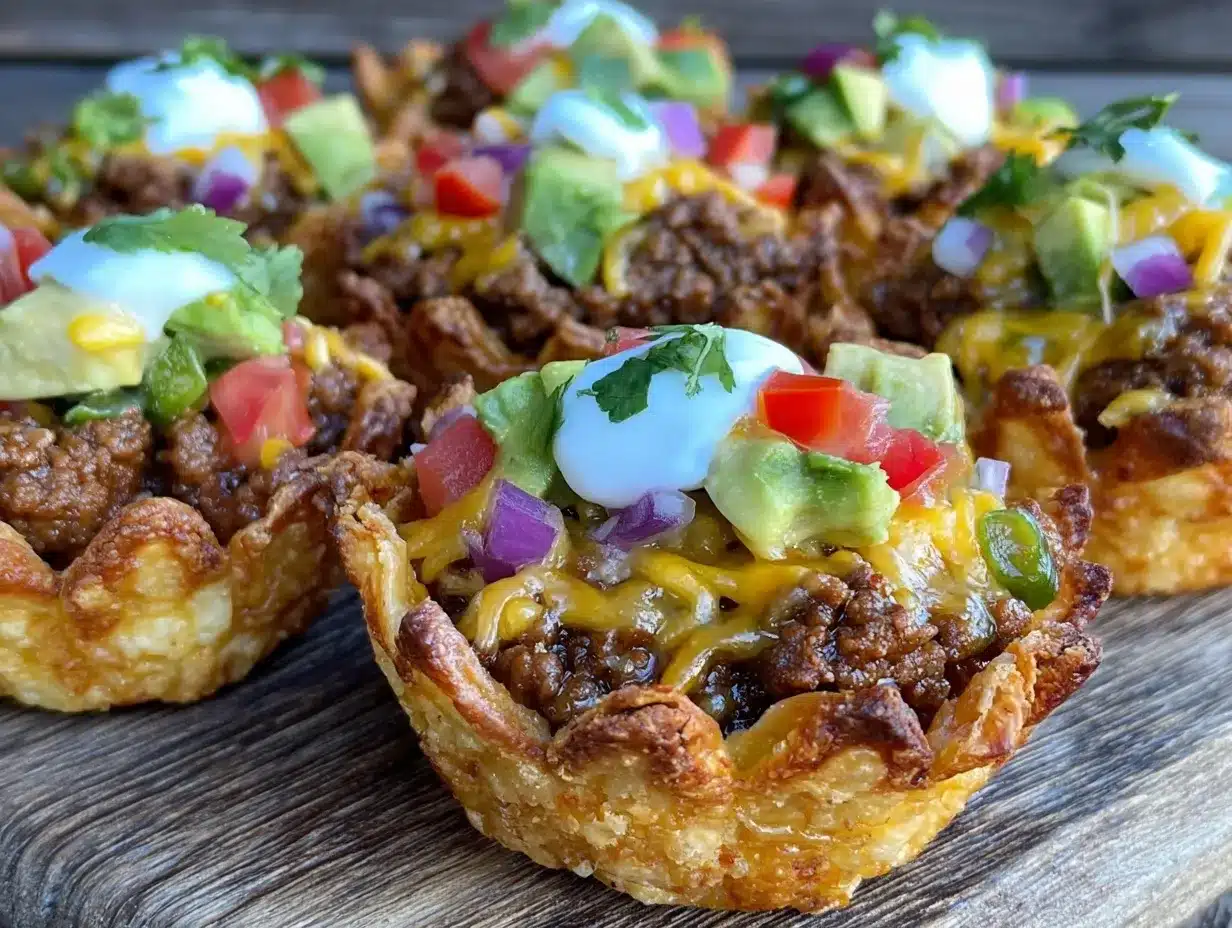
There was this one evening when I had exactly ten minutes to whip up something for a surprise visit from a couple of friends. The fridge was looking pretty bare, and honestly, I wasn’t in the mood for anything complicated or messy. I grabbed some taco shells, a bit of cheese, and an avocado that was just barely ripe. I wasn’t sure if this would turn out, but hey—sometimes you’ve got to trust the basics. What happened next was a little magic: these crispy mini taco cups with fresh avocado and cheese came together faster than I could have imagined, and they were a total hit.
It’s funny how the crunch of the taco cups paired with the creamy avocado and melty cheese can feel like such a treat, especially when you’re short on time. That first batch disappeared in minutes, and now I find myself making these mini taco cups almost every week—whether for a quick snack, a casual get-together, or even a light dinner. They’re one of those recipes that feels fancy but really isn’t, you know? The fresh avocado adds just the right touch of coolness against that crispy shell and gooey cheese. Honestly, it’s the kind of recipe that sticks with you because it’s simple, satisfying, and a little bit unexpected.
Looking back, I realize this recipe stayed around because it’s the kind of comfort food that doesn’t weigh you down. It’s quick, colorful, and hits that spot when you want something tasty without a fuss. So, if you’ve got a busy night, a few random ingredients, and a craving for something crunchy and fresh, these crispy mini taco cups with fresh avocado and cheese might just become your go-to too.
Why You’ll Love This Recipe
- Quick & Easy: Ready in under 30 minutes, perfect for last-minute gatherings or busy weeknights.
- Simple Ingredients: Uses pantry staples and fresh produce you likely already have on hand.
- Perfect for Parties: These mini taco cups are crowd-pleasers at potlucks, game nights, or casual dinners.
- Kid-Friendly: The crispy texture and cheesy goodness win over even picky eaters.
- Unbelievably Delicious: The combo of crunchy taco shells, creamy avocado, and melted cheese hits all the right flavor notes.
- Unique Twist: Unlike typical tacos, these are bite-sized and crispy, making them easy to serve and eat without the mess.
- Customizable: You can easily swap fillings or add your favorite toppings to make it your own.
This recipe isn’t just another taco version—it’s a fresh take that brings a satisfying texture contrast and bright avocado flavor that sets it apart. Trust me, once you try making these crispy mini taco cups with fresh avocado and cheese, you’ll find yourself reaching for the ingredients again and again.
What Ingredients You Will Need
This recipe uses simple, wholesome ingredients to deliver bold flavor and satisfying texture without the fuss. Most of these are pantry staples, with fresh avocado adding a lovely creamy element that ties everything together.
- Mini taco shells: Usually found in the snack aisle, or use small corn tortillas cut into rounds.
- Ground beef or turkey: For the filling (optional if you want vegetarian).
- Shredded cheese: Cheddar or Monterey Jack works great for that melty, gooey texture.
- Ripe avocados: Peeled and diced or mashed, the fresher the better for creaminess.
- Onion: Finely chopped to add a bit of bite and depth.
- Garlic: Minced, for that subtle kick.
- Jalapeño: Optional, finely diced if you like a little heat.
- Fresh cilantro: Chopped, for brightness and color.
- Spices: Chili powder, cumin, smoked paprika, salt, and black pepper—these make the filling flavorful without overpowering.
- Olive oil: For sautéing.
- Lime juice: Freshly squeezed, to brighten the avocado and topping flavors.
If you need to swap things around, feel free! Use black beans or lentils instead of meat for a vegetarian version, or swap cheddar for a dairy-free cheese if needed. For the best texture, I like using small-cup taco shells, but regular mini tortillas cut into rounds work just fine too. And if you want to make this gluten-free, just double-check your taco shells or use corn tortillas labeled gluten-free.
Equipment Needed
- Muffin tin: Essential for shaping the mini taco cups and baking them evenly. A standard 12-cup tin works perfectly.
- Mixing bowls: For combining ingredients and prepping fillings.
- Skillet or frying pan: To cook the meat and sauté veggies.
- Sharp knife and cutting board: For chopping avocado, onions, and herbs.
- Spoon or small spatula: Helpful for scooping fillings into the taco cups.
- Measuring spoons and cups: To keep seasoning balanced and consistent.
If you don’t have a muffin tin, you can try using a silicone muffin mold or even small ramekins lined with foil to shape the cups. For cleaning up, I recommend non-stick muffin tins or lining with parchment rounds to save time. I’ve found that investing in a sturdy, non-stick muffin tin makes this recipe easier to pull off without taco shells sticking or breaking apart.
Preparation Method
- Preheat your oven to 375°F (190°C). This gets the mini taco cups crisp and golden without overcooking the filling.
- Prepare the taco cups: If using mini taco shells, gently press each one into the muffin tin cups to form little bowls. If using tortillas, cut into 3-inch rounds and place them in the muffin cups, pressing to shape.
- Bake the shells: Place the muffin tin in the oven for about 8-10 minutes until the shells are crisp but not browned too much. Keep an eye on them—overbaking can make them brittle.
- Cook the filling: While the shells bake, heat 1 tablespoon olive oil in a skillet over medium heat. Add chopped onion and garlic, sautéing until translucent and fragrant, about 3-4 minutes.
- Add the ground meat: Stir in 1 pound (450g) ground beef or turkey. Break it up with a spoon and cook until browned, about 6-8 minutes. Drain excess fat if needed.
- Season the meat: Sprinkle in 1 teaspoon chili powder, 1/2 teaspoon cumin, 1/2 teaspoon smoked paprika, salt, and pepper to taste. Mix well and cook for another 2 minutes to let the flavors meld.
- Assemble the cups: Remove the taco shells from the oven. Spoon a small amount of the meat mixture into each cup—about 2 tablespoons (30g) per shell. Top with a generous pinch of shredded cheese.
- Bake again: Return the muffin tin to the oven and bake for another 5-7 minutes until the cheese melts and bubbles.
- Prepare the topping: While the cups bake, dice or mash your ripe avocado. Toss it gently with a squeeze of lime juice and a pinch of salt to keep it fresh and bright.
- Finish and serve: Remove the taco cups from the oven carefully. Let them cool for a couple of minutes, then top each with a spoonful of fresh avocado, chopped cilantro, and optional jalapeño if you want some extra kick.
Pro tip: Don’t overfill the taco cups at assembly or they’ll spill over. It’s better to have a neat, crispy cup with just the right amount of filling and cheese. Also, if your taco shells seem too thick or not crisping well, a quick pre-bake without filling helps them hold their shape and crunch better.
Cooking Tips & Techniques
Getting these crispy mini taco cups just right is easier when you keep a few things in mind. First, the pre-baking of the shells is key. It dries them out enough to hold up once filled, but you don’t want to turn them into brittle crumbs. I learned the hard way that skipping this step leads to soggy bottoms and sad taco cups.
When cooking the meat, breaking it up finely ensures every bite has seasoning and texture. If you’re using ground turkey or chicken, adding a bit of olive oil prevents dryness. Don’t rush the sautéing of onions and garlic—it builds the flavor foundation.
Melting the cheese on top in the oven creates a lovely binding effect, but watch closely so it doesn’t burn. Using a mix of cheeses can add complexity; I sometimes blend cheddar with a little mozzarella for gooey stretchiness.
Multitasking is your friend here—while the shells bake, get the filling going. It keeps everything moving smoothly and your kitchen from getting too crowded. Oh, and a quick lime squeeze on the avocado right before serving prevents browning and adds that fresh zing that keeps the flavors lively.
Lastly, if you want extra crunch, try sprinkling a tiny bit of crushed tortilla chips on top before baking the second time. It adds a fun texture contrast that’s surprisingly addictive.
Variations & Adaptations
- Vegetarian: Skip the meat and use black beans or cooked lentils for a hearty filling. Add corn kernels and diced bell peppers for sweetness and color.
- Spicy: Mix diced jalapeños or a dash of hot sauce into the filling. Finish with a chipotle crema drizzle for smoky heat.
- Seasonal Twist: Swap fresh avocado for guacamole with added tomatoes and onions in summer. Or in winter, add roasted sweet potatoes for warmth.
- Gluten-Free: Use corn tortillas labeled gluten-free or certified mini taco shells. Double-check seasoning blends for hidden gluten.
- Cheese Options: Try pepper jack for a bit of spice, or cotija for a crumbly, salty kick. Vegan cheese alternatives work well too if you want dairy-free.
Personally, I once made a batch with shredded rotisserie chicken instead of ground meat and tossed in some fresh pineapple chunks—surprisingly refreshing and a hit at a summer gathering. Feel free to experiment with what you have and like best.
Serving & Storage Suggestions
These crispy mini taco cups are best served warm, right out of the oven, when the cheese is melty and the shells are perfectly crunchy. I like to plate them with a few lime wedges and a sprinkle of fresh cilantro for color and zing.
They pair wonderfully with a light side salad, some black beans, or even a chilled margarita if you’re in that kind of mood. For a casual party, set them out on a platter with extra avocado, salsa, and sour cream for guests to customize.
If you have leftovers (though it’s rare!), store them in an airtight container in the fridge for up to two days. Reheat gently in a toaster oven or conventional oven at 350°F (175°C) for 5-7 minutes to bring back some crispness. Avoid microwaving if you want to keep that crunch.
Flavors develop nicely after a day, especially if you let the avocado topping sit separately and add it fresh before serving. This keeps everything tasting bright and fresh, not soggy or dull.
Nutritional Information & Benefits
Each serving of these crispy mini taco cups with fresh avocado and cheese offers a balanced mix of protein, healthy fats, and carbs. The avocado provides heart-healthy monounsaturated fats and fiber, which are great for digestion and sustained energy.
The ground meat adds a good source of protein and iron, while the cheese contributes calcium and adds to the satisfying texture. Using lean ground turkey or plant-based fillings can lower saturated fat content for a lighter option.
These mini taco cups can fit into gluten-free and low-carb diets depending on your choice of shells. Just be mindful of any dairy allergies and swap cheese accordingly. Overall, they’re a flavorful, wholesome snack or meal that feels indulgent without tipping the scales.
Conclusion
Honestly, these crispy mini taco cups with fresh avocado and cheese have earned a permanent spot in my recipe rotation. They’re quick, tasty, and just fun to eat—a combo that’s hard to beat when life gets busy. I love how easy it is to make a batch and customize it a bit depending on what’s in the fridge or who’s coming over.
Whether you’re cooking for yourself or feeding a crowd, these little bites bring comfort and crunch in a way that feels special but isn’t a hassle. Give them a try, tweak the toppings to your liking, and see how quickly they disappear at your table.
And hey, if you’ve made these crispy mini taco cups before or come up with your own spin, drop a comment—I’d love to hear what you think or how you made them your own. Happy cooking!
Frequently Asked Questions
Can I make these mini taco cups ahead of time?
You can prep the shells and filling a few hours before serving, but it’s best to assemble and bake the cheese topping just before eating to keep them crispy.
What can I use instead of ground beef?
Ground turkey, shredded chicken, black beans, or lentils all make great alternatives depending on your dietary preferences.
How do I keep the avocado from browning?
Toss diced avocado with fresh lime juice right before serving. Avoid prepping too far in advance to keep it fresh and green.
Are these taco cups gluten-free?
They can be if you use certified gluten-free corn tortillas or taco shells. Always check labels to be sure.
Can I freeze the mini taco cups?
It’s not recommended as the shells may lose their crispness after freezing and reheating. Best to enjoy fresh or refrigerate for a day or two.
Pin This Recipe!
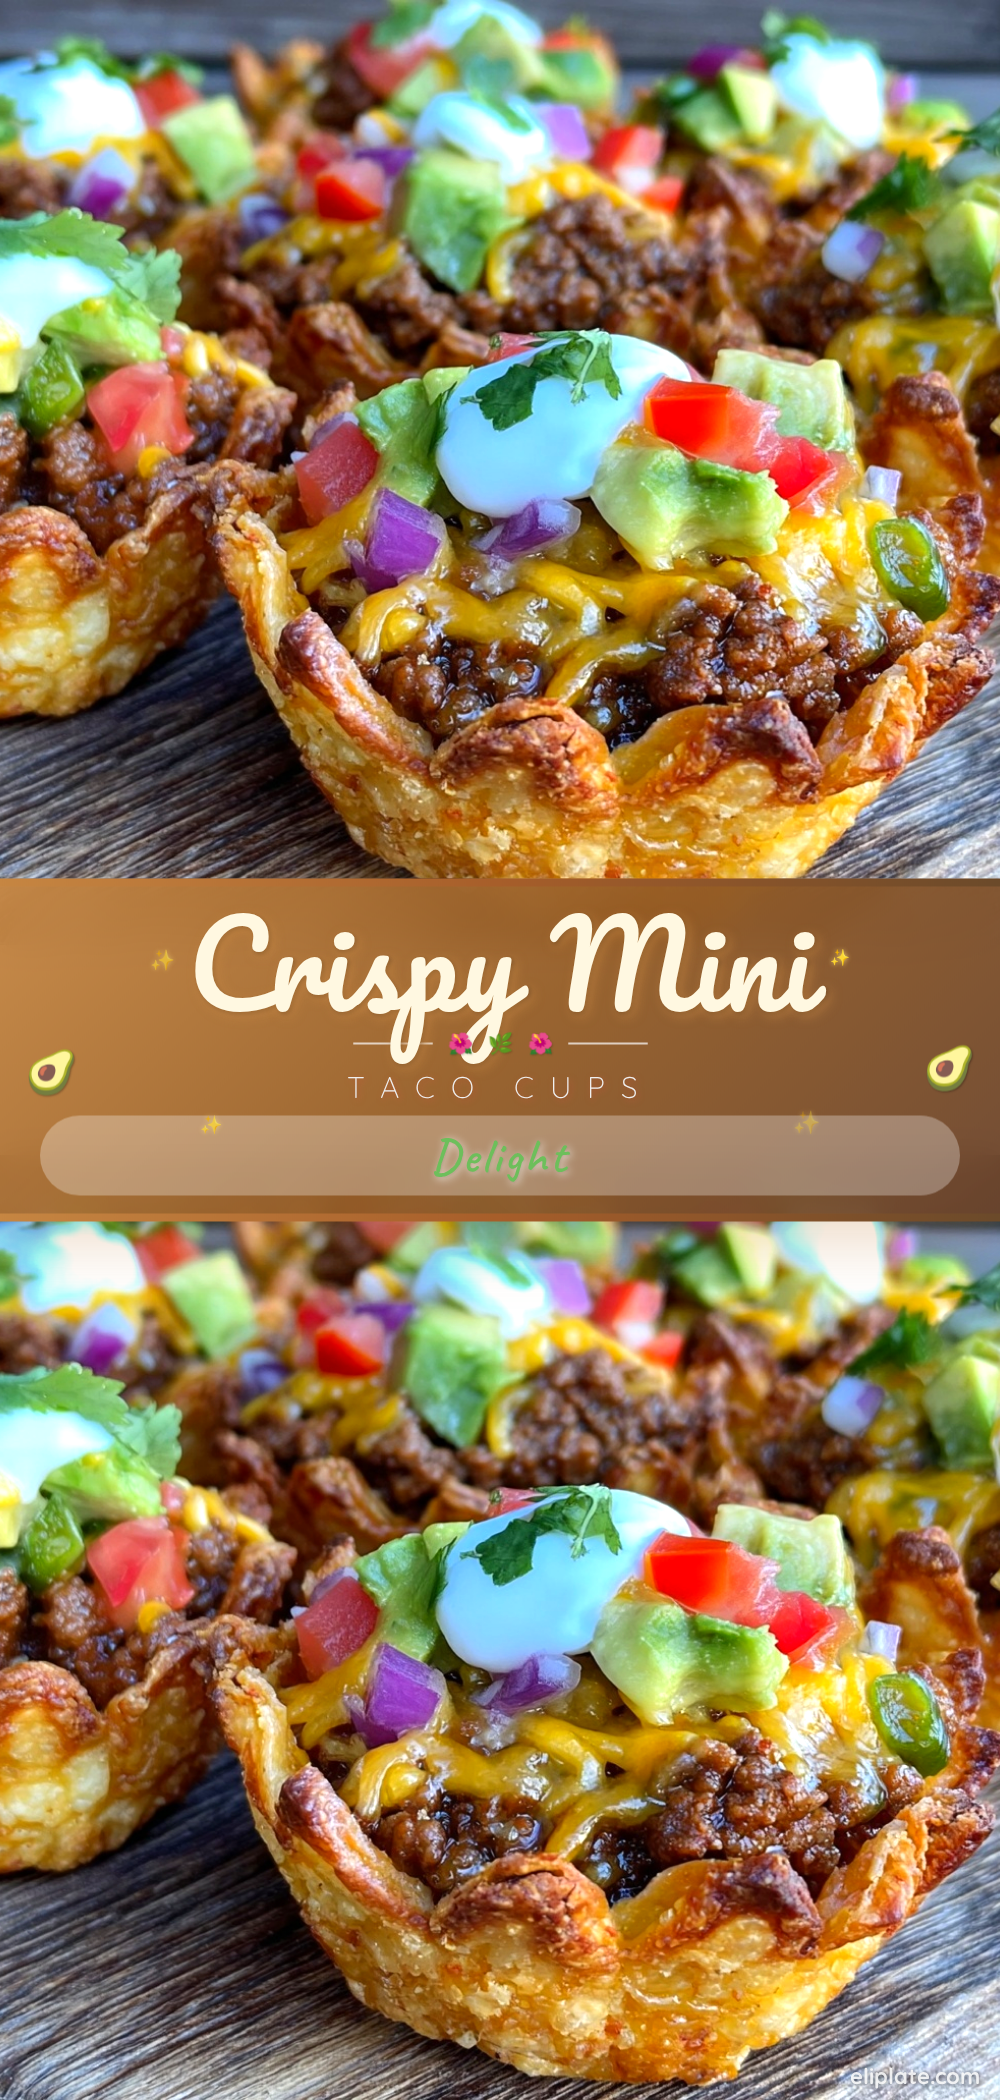
Crispy Mini Taco Cups Recipe Easy Homemade with Avocado and Cheese

Quick and easy crispy mini taco cups with fresh avocado and melted cheese, perfect for snacks, parties, or light dinners. These bite-sized treats combine crunchy shells with creamy avocado and gooey cheese for a satisfying flavor and texture.
- Prep Time: 10 minutes
- Cook Time: 20 minutes
- Total Time: 30 minutes
- Yield: 12 mini taco cups 1x
- Category: Snack
- Cuisine: Mexican
Ingredients
- Mini taco shells or small corn tortillas cut into 3-inch rounds
- 1 pound ground beef or turkey (optional for vegetarian)
- 1 cup shredded cheddar or Monterey Jack cheese
- 2 ripe avocados, peeled and diced or mashed
- 1 small onion, finely chopped
- 2 cloves garlic, minced
- 1 jalapeño, finely diced (optional)
- 1/4 cup fresh cilantro, chopped
- 1 teaspoon chili powder
- 1/2 teaspoon cumin
- 1/2 teaspoon smoked paprika
- Salt and black pepper to taste
- 1 tablespoon olive oil
- 1 tablespoon fresh lime juice
Instructions
- Preheat your oven to 375°F (190°C).
- If using mini taco shells, gently press each one into the muffin tin cups to form little bowls. If using tortillas, cut into 3-inch rounds and place them in the muffin cups, pressing to shape.
- Bake the shells in the oven for about 8-10 minutes until crisp but not overly browned.
- While the shells bake, heat olive oil in a skillet over medium heat. Add chopped onion and garlic and sauté until translucent and fragrant, about 3-4 minutes.
- Add ground beef or turkey to the skillet. Break it up and cook until browned, about 6-8 minutes. Drain excess fat if needed.
- Season the meat with chili powder, cumin, smoked paprika, salt, and pepper. Cook for another 2 minutes to blend flavors.
- Remove taco shells from the oven. Spoon about 2 tablespoons of the meat mixture into each shell. Top with a generous pinch of shredded cheese.
- Return the muffin tin to the oven and bake for another 5-7 minutes until the cheese melts and bubbles.
- While baking, dice or mash the ripe avocado and toss with lime juice and a pinch of salt.
- Remove taco cups from the oven and let cool for a couple of minutes. Top each with fresh avocado, chopped cilantro, and optional jalapeño.
- Serve warm.
Notes
Pre-baking the shells is key to keep them crisp and prevent soggy bottoms. Avoid overfilling the cups to prevent spilling. Use lime juice on avocado just before serving to prevent browning. For extra crunch, sprinkle crushed tortilla chips on top before the second bake. Leftovers can be stored in an airtight container in the fridge for up to two days and reheated in an oven or toaster oven to maintain crispness. Avoid microwaving to keep shells crunchy.
Nutrition
- Serving Size: 1 mini taco cup
- Calories: 150
- Sugar: 1
- Sodium: 250
- Fat: 9
- Saturated Fat: 4
- Carbohydrates: 10
- Fiber: 3
- Protein: 8
Keywords: mini taco cups, crispy taco cups, avocado taco cups, easy taco recipe, party snacks, quick appetizers, cheesy tacos, gluten-free tacos