“You really think you can pull off a Milk Bar-style birthday layer cake with rainbow funfetti?” my friend teased over text, doubtful but curious. Honestly, I wasn’t sure either when I first attempted this cake. What started as a last-minute plan for a birthday celebration ended up becoming a bit of a kitchen adventure — flour everywhere, colorful sprinkles scattering like confetti in a breeze, and a frosting mishap or two. But somehow, that messy chaos gave birth to the best Milk Bar-style birthday layer cake with rainbow funfetti I’ve ever made.
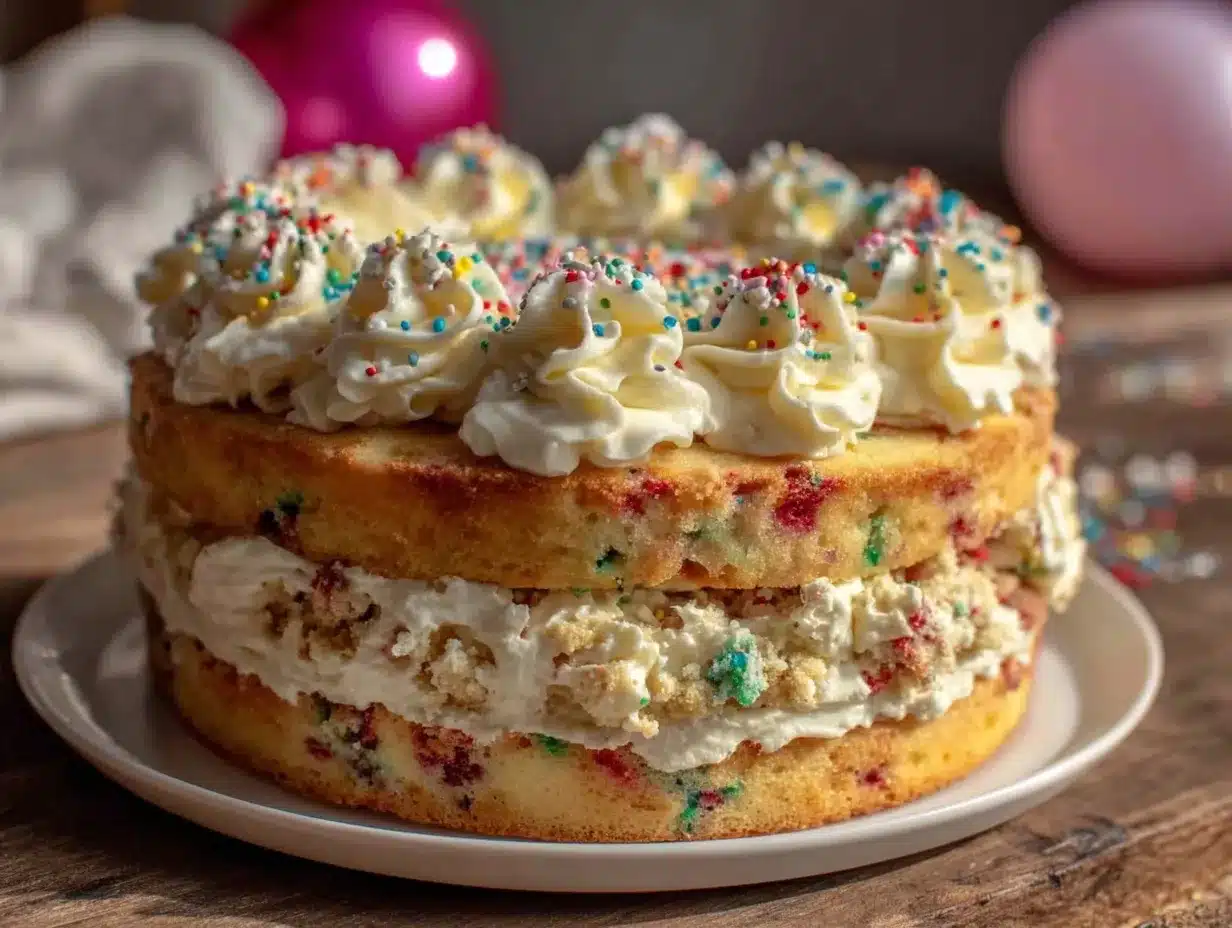
It’s funny how this recipe snuck into my regular baking rotation. I was aiming for something bright and joyful, a cake that doesn’t just taste good but feels like a celebration in every bite. This cake brings that fun, whimsical vibe with the classic tang of buttermilk and the soft, moist crumb that Milk Bar cakes are known for. The rainbow funfetti adds a surprise pop of color and a playful crunch that you don’t get with just plain batter. By the time I wrapped up frosting and stacked those layers, I realized this wasn’t just a cake for birthdays — it’s the kind of treat that sparks a smile anytime.
What stuck with me most is how approachable this recipe is, despite looking fancy. It’s not some overly complicated bakery trick; it’s a recipe that invites you to get your hands a little messy and enjoy the process. Plus, it’s perfect for when you want to impress without stress — whether you’re hosting a party or just craving something special after a long day. If you’ve been hunting for a cake that’s both nostalgic and fresh, this one’s a quiet winner that might just become your go-to.
Why You’ll Love This Recipe
After making this Best Milk Bar-Style Birthday Layer Cake with Rainbow Funfetti more times than I can count, I’m confident it has a spot in your baking arsenal. Here’s why it stands out:
- Quick & Easy: You can have it ready in under 2 hours, including baking and frosting — perfect for last-minute celebrations or sweet cravings.
- Simple Ingredients: No specialty pantry runs here. Basic baking staples and sprinkles you might already have on hand.
- Perfect for Celebrations: Whether it’s a birthday, anniversary, or just because, the rainbow funfetti brings that festive feel effortlessly.
- Crowd-Pleaser: Kids love the colorful surprise inside, and adults appreciate the moist texture and balanced sweetness.
- Unbelievably Delicious: The tender crumb with buttermilk tang and silky vanilla frosting is exactly what you’d expect from a bakery-worthy cake.
What sets this recipe apart is the layering technique and the homemade sprinkle mix that mimics Milk Bar’s iconic crunch. I’ve tested variations — trust me, the balance of butter, sugar, and vanilla here is spot-on. The frosting isn’t just sweet; it’s got that creamy tang that cuts through the richness in just the right way. Honestly, this is the kind of cake where you close your eyes after the first bite because it just hits the spot, every time.
For those moments when you want to turn an ordinary day into something memorable without fuss or fancy equipment, this cake delivers. And if you happen to love easy weeknight dinners as much as decadent desserts, you might appreciate the creamy one-pot chicken pasta I often make alongside this treat for full-on cozy vibes.
What Ingredients You Will Need
This recipe uses simple, wholesome ingredients that come together to create a moist, flavorful cake with bursts of color and texture from the rainbow funfetti. Most are pantry staples, and I’ve included a few tips to help you pick the best options for that perfect Milk Bar-style cake.
- All-purpose flour: 2 ¾ cups (345g) — I prefer King Arthur for consistent results.
- Baking powder: 2 teaspoons — helps the cake rise nicely without a dense crumb.
- Baking soda: ½ teaspoon — balances the acidity in buttermilk.
- Salt: ½ teaspoon — enhances all the flavors.
- Unsalted butter: ¾ cup (170g), softened — room temperature butter is key for a smooth batter.
- Sugar: 1 ¾ cups (350g) granulated — I use organic cane sugar for a cleaner taste.
- Large eggs: 3, room temperature — helps with structure and richness.
- Buttermilk: 1 cup (240ml), room temperature — adds moisture and that trademark tang.
- Vanilla extract: 2 teaspoons — I recommend pure vanilla extract for best aroma.
- Rainbow funfetti sprinkles: ¾ cup (about 120g) — use sturdy jimmies or confetti sprinkles to avoid bleeding colors.
- For the frosting:
- Unsalted butter: 1 cup (225g), softened
- Powdered sugar: 4 cups (480g), sifted — ensures a smooth frosting without lumps.
- Heavy cream: 2-3 tablespoons (30-45ml) — adjust for preferred consistency.
- Vanilla extract: 1 ½ teaspoons
- Pinch of salt
Pro tip: If you want a gluten-free twist, swapping the flour for a gluten-free blend works well here. For dairy-free adaptations, use coconut milk yogurt instead of buttermilk and a plant-based butter alternative in the frosting. I’ve found that using jimmies rather than nonpareils keeps the colors bright and the texture intact, especially when baking — a little lesson I learned the hard way the first time I tried with cheaper sprinkles.
Equipment Needed
- Two 8-inch (20cm) round cake pans — non-stick or lined with parchment paper for an easy release.
- Electric mixer (stand or hand mixer) — critical for whipping the butter and sugar to a fluffy texture.
- Mixing bowls — at least two; one for dry ingredients, one for wet.
- Measuring cups and spoons — precise measurements make a big difference here.
- Rubber spatula — for folding in the funfetti gently without deflating the batter.
- Cake leveler or serrated knife — helps achieve even layers for stacking.
- Offset spatula — perfect for smooth frosting application.
If you don’t have cake pans, you can use an 8×8-inch square pan, but you’ll need to adjust baking times slightly. I’ve also made this with a handheld mixer when the stand mixer was busy with other recipes like my creamy no-bake mini cheesecakes. It takes longer but is totally doable. Keeping your butter at room temperature (not too soft) is a small maintenance trick that helps the frosting come together without becoming greasy or runny.
Preparation Method
- Preheat your oven to 350°F (175°C). Grease and flour your two 8-inch cake pans, or line the bottoms with parchment paper. This prevents sticking and makes the layers come out clean.
- Mix dry ingredients: In a medium bowl, whisk together 2 ¾ cups (345g) all-purpose flour, 2 teaspoons baking powder, ½ teaspoon baking soda, and ½ teaspoon salt. Set aside.
- Cream butter and sugar: In a large bowl, beat ¾ cup (170g) softened unsalted butter with 1 ¾ cups (350g) granulated sugar on medium speed until light and fluffy, about 3-4 minutes. This step is crucial – don’t rush it! You want the mixture pale and airy.
- Add eggs and vanilla: Beat in 3 large eggs, one at a time, making sure each is fully incorporated before adding the next. Mix in 2 teaspoons vanilla extract.
- Combine wet and dry ingredients: Alternate adding the dry mixture and 1 cup (240ml) room temperature buttermilk to the butter mixture, starting and ending with dry ingredients. Mix on low speed just until combined. Overmixing can make the cake dense.
- Fold in funfetti: Gently fold ¾ cup (120g) rainbow funfetti sprinkles with a rubber spatula. This preserves their shape and keeps the batter colorful.
- Divide batter: Evenly pour batter into the prepared pans, smoothing the tops. Tap the pans on the counter a few times to release air bubbles.
- Bake: Place pans in the oven and bake for 30-35 minutes or until a toothpick inserted in the center comes out clean. The cake should be golden and springy to the touch.
- Cool layers: Let the cakes cool in pans for 10 minutes before transferring to wire racks to cool completely. Cooling fully is key for clean frosting and stacking.
- Prepare frosting: Beat 1 cup (225g) softened unsalted butter until creamy. Gradually add 4 cups (480g) sifted powdered sugar, mixing on low until combined. Add 2-3 tablespoons (30-45ml) heavy cream, 1 ½ teaspoons vanilla extract, and a pinch of salt. Beat on medium-high for about 3 minutes until fluffy and spreadable. Adjust consistency with a bit more cream or powdered sugar as needed.
- Assemble the cake: Level the cake layers with a serrated knife or cake leveler. Place one layer on your serving plate and spread about 1/3 of the frosting evenly on top. Add the second layer and frost the top and sides. For a smooth finish, dip your offset spatula in hot water and wipe dry before smoothing the frosting.
- Final touches: Sprinkle extra funfetti on top or along the sides for added celebration vibes. Chill the cake for 30 minutes before slicing for cleaner cuts.
Remember, patience here pays off — letting the layers cool fully and using room temperature ingredients makes a big difference. I learned the hard way that rushing the cooling step leads to frosting disasters, so trust me on this one.
Cooking Tips & Techniques
Getting this cake just right requires a few insider tips I picked up through trial and error:
- Don’t skip sifting the powdered sugar for the frosting. It prevents lumps and gives you that silky texture that’s signature to Milk Bar-style cakes.
- Use room temperature eggs and butter. Cold ingredients won’t blend properly, resulting in a dense batter or curdled frosting.
- Fold in sprinkles gently. Aggressive mixing will cause the colors to bleed and the batter to lose volume, making the cake less fluffy.
- Measure flour carefully. Spoon and level for accuracy. Too much flour dries out the cake.
- Grease pans well and use parchment. The layers are delicate, and sticking can ruin your presentation.
- Chill your cake layers before frosting. If your layers are warm, frosting melts and slides off.
- For even layers, weigh your batter. I usually divide the batter by weight to make sure each pan has exactly the same amount.
- Keep the frosting light and fluffy. Beat it long enough to incorporate air, but don’t overdo it or it might become too soft.
I once tried skipping the buttermilk and swapped in regular milk — the crumb was noticeably less tender, so I don’t recommend cutting that corner. Also, multitasking by prepping the frosting while the cakes bake saves a good 15 minutes, so plan your time wisely.
Variations & Adaptations
You can tweak this recipe to fit different tastes and dietary needs. Here are some ideas I’ve tried and loved:
- Chocolate Funfetti: Add ½ cup (45g) cocoa powder to the dry ingredients and swap rainbow sprinkles for chocolate ones. The rich cocoa pairs beautifully with vanilla frosting.
- Vegan Version: Use flax eggs (3 tablespoons ground flaxseed + 9 tablespoons water), dairy-free butter, and coconut yogurt as a buttermilk substitute. The texture is a bit different but still moist and delicious.
- Seasonal Twist: Replace rainbow sprinkles with chopped freeze-dried berries or edible flowers for a more grown-up look and flavor.
- Layer Cake Cupcakes: Bake the batter in cupcake tins and top each with a swirl of frosting and sprinkles for an easier serving option.
One personal favorite variation is adding a thin layer of homemade raspberry jam between the layers for a tangy surprise that cuts through the sweetness. If you want more savory meal ideas to pair with your celebrations, the easy crockpot chicken taco bowls are a great, flavorful option.
Serving & Storage Suggestions
This cake is best served at room temperature to showcase that tender crumb and creamy frosting. If you’ve refrigerated it, take it out for about 30 minutes before slicing. Use a sharp serrated knife and wipe it clean between cuts for neat slices.
The colorful funfetti and smooth frosting make it a perfect centerpiece for birthday parties, baby showers, or casual celebrations. Pair it with a simple cup of coffee or a refreshing sparkling lemonade to balance the sweetness.
Store leftovers covered tightly in the refrigerator for up to 4 days. You can also freeze individual slices wrapped well in plastic wrap and foil for up to 2 months. Thaw in the fridge overnight and let come to room temperature before enjoying again.
Interestingly, the flavors meld beautifully after a day, making it even more flavorful the next day. Just don’t forget to add a fresh sprinkle on top before serving to keep that festive look alive.
Nutritional Information & Benefits
Per serving (based on 12 slices): approximately 380 calories, 18g fat, 50g carbohydrates, 3g protein.
This cake is a treat, so I recommend enjoying it mindfully. The buttermilk provides a subtle boost of calcium and probiotics, and using real butter contributes to a richer flavor and texture compared to margarine. If you’re watching carbs, substituting the flour with almond flour or trying a low-carb frosting alternative can help tailor it to your needs.
Keep in mind, this recipe contains gluten, dairy, and eggs — important for allergy considerations. It’s worth balancing indulgence with your overall diet, and sometimes that slice of rainbow funfetti cake is exactly the joy you need.
Conclusion
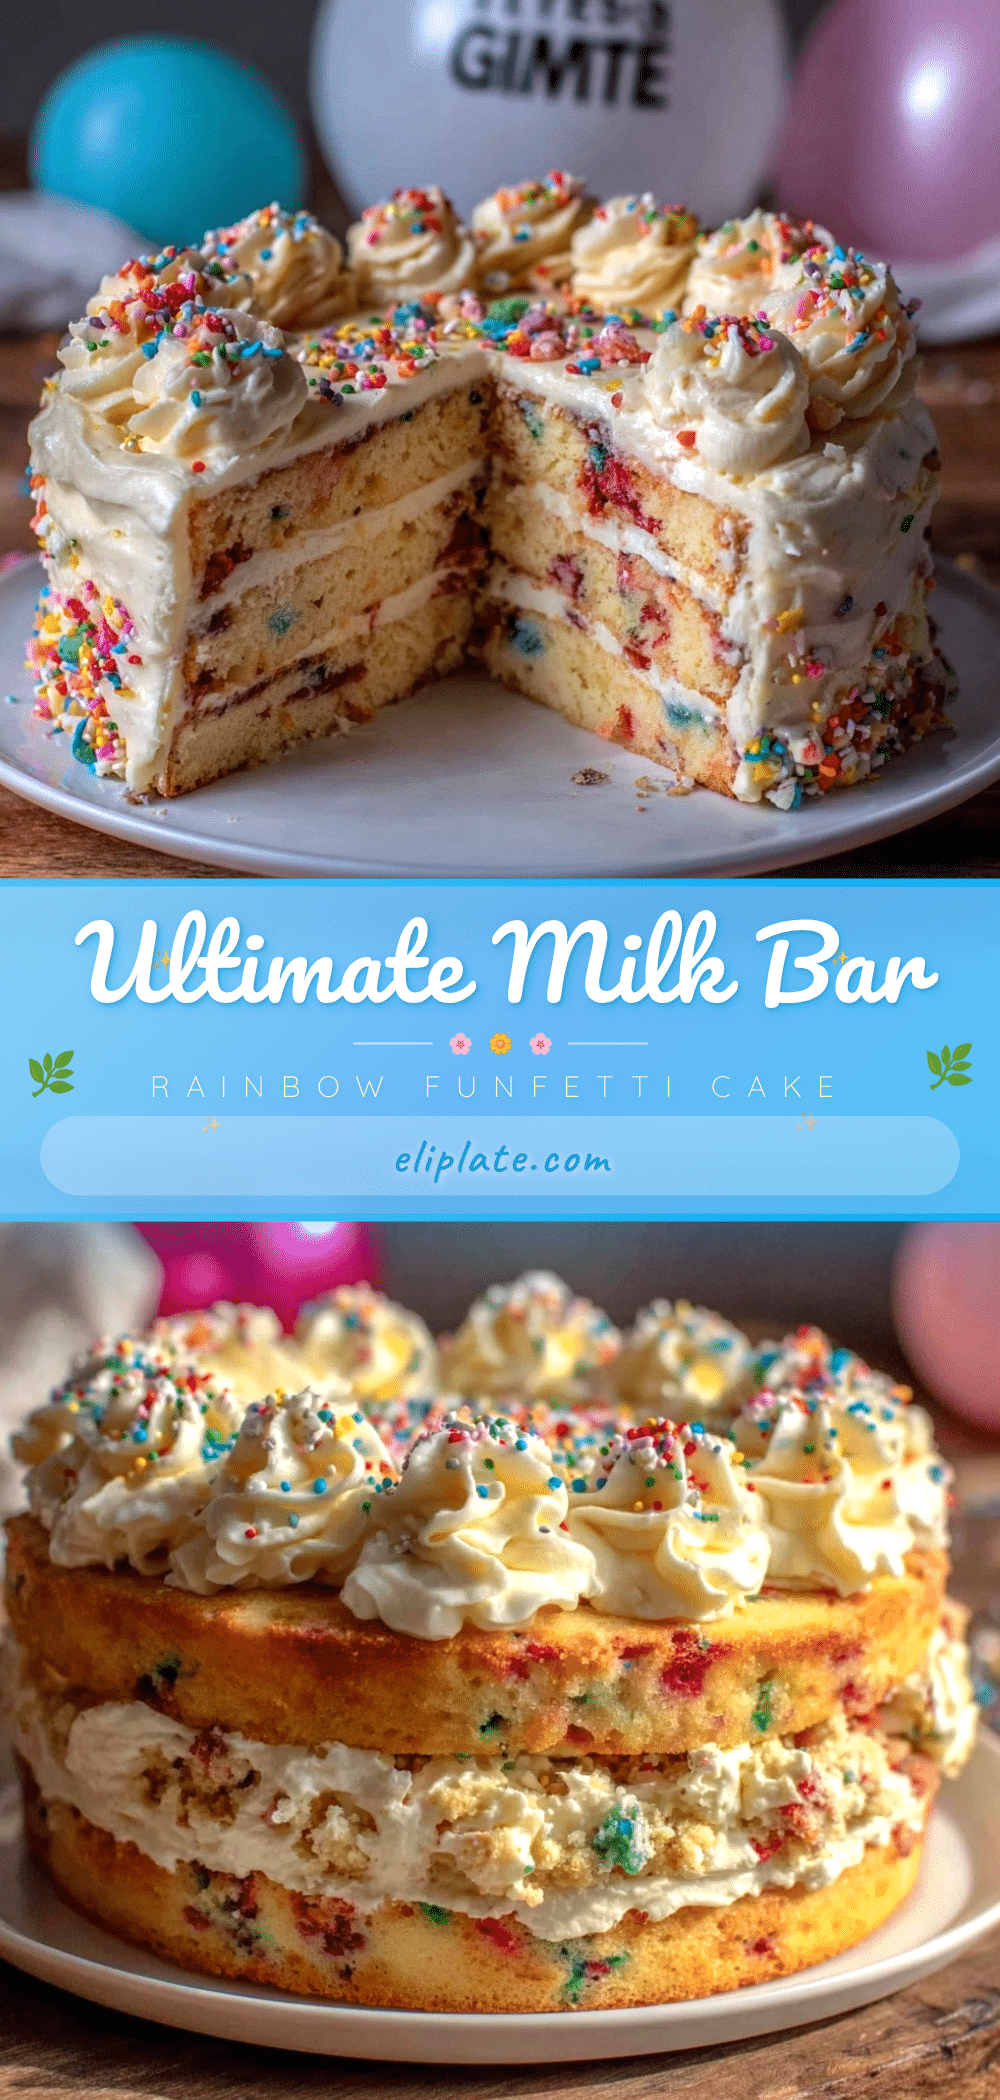
This Best Milk Bar-Style Birthday Layer Cake with Rainbow Funfetti is more than just a dessert — it’s a little celebration you can bake at home with confidence and ease. Its approachable ingredients and straightforward steps make it accessible for bakers who want that wow factor without fuss. I love how it brings bright colors and rich flavors together in a way that feels both special and comforting.
Feel free to make it your own by adjusting the sprinkles, frosting, or even adding a fruit layer. Baking is as much about creativity as it is about tradition, and this recipe invites you to enjoy both. When I serve this cake, it’s not just about the taste — it’s about the smiles and the moments shared.
If you try this recipe, I’d love to hear how it turns out or any fun twists you add! Sharing those little baking stories makes the kitchen feel even warmer.
FAQs
- Can I make this cake ahead of time? Yes! Bake the layers a day ahead and store wrapped tightly in the fridge. Assemble and frost the day of serving for best texture.
- What if I don’t have buttermilk? Mix 1 tablespoon lemon juice or vinegar with 1 cup milk and let sit for 5 minutes to make a buttermilk substitute.
- Can I use different sprinkles? Absolutely. Use sturdy jimmies or confetti sprinkles to avoid color bleeding during baking.
- How do I keep the frosting from melting? Make sure your cake layers are completely cool before frosting, and keep the cake refrigerated if your kitchen is warm.
- Is this recipe suitable for beginners? Yes! The steps are straightforward, and I’ve included tips to help avoid common mistakes.
Pin This Recipe!
Best Milk Bar-Style Birthday Layer Cake Recipe
A moist and flavorful Milk Bar-style birthday layer cake with rainbow funfetti, featuring a tender crumb, buttermilk tang, and silky vanilla frosting. Perfect for celebrations and easy enough for bakers of all levels.
- Prep Time: 20 minutes
- Cook Time: 35 minutes
- Total Time: 1 hour 30 minutes
- Yield: 12 servings 1x
- Category: Dessert
- Cuisine: American
Ingredients
- 2 ¾ cups (345g) all-purpose flour
- 2 teaspoons baking powder
- ½ teaspoon baking soda
- ½ teaspoon salt
- ¾ cup (170g) unsalted butter, softened
- 1 ¾ cups (350g) granulated sugar
- 3 large eggs, room temperature
- 1 cup (240ml) buttermilk, room temperature
- 2 teaspoons vanilla extract
- ¾ cup (about 120g) rainbow funfetti sprinkles (sturdy jimmies or confetti sprinkles)
- For the frosting:
- 1 cup (225g) unsalted butter, softened
- 4 cups (480g) powdered sugar, sifted
- 2–3 tablespoons (30-45ml) heavy cream
- 1 ½ teaspoons vanilla extract
- Pinch of salt
Instructions
- Preheat oven to 350°F (175°C). Grease and flour two 8-inch cake pans or line with parchment paper.
- In a medium bowl, whisk together flour, baking powder, baking soda, and salt. Set aside.
- In a large bowl, beat softened butter and granulated sugar on medium speed until light and fluffy, about 3-4 minutes.
- Add eggs one at a time, beating well after each addition. Mix in vanilla extract.
- Alternate adding dry ingredients and buttermilk to the butter mixture, starting and ending with dry ingredients. Mix on low speed just until combined.
- Gently fold in rainbow funfetti sprinkles with a rubber spatula.
- Divide batter evenly between prepared pans and smooth tops. Tap pans on counter to release air bubbles.
- Bake for 30-35 minutes or until a toothpick inserted in the center comes out clean.
- Cool cakes in pans for 10 minutes, then transfer to wire racks to cool completely.
- For frosting, beat softened butter until creamy. Gradually add sifted powdered sugar, mixing on low until combined.
- Add heavy cream, vanilla extract, and salt. Beat on medium-high for about 3 minutes until fluffy and spreadable. Adjust consistency as needed.
- Level cake layers with a serrated knife or cake leveler. Place one layer on serving plate and spread 1/3 of frosting evenly on top.
- Add second layer and frost top and sides. For smooth finish, dip offset spatula in hot water, wipe dry, and smooth frosting.
- Sprinkle extra funfetti on top or sides for decoration. Chill cake for 30 minutes before slicing.
Notes
Use room temperature ingredients for best results. Fold sprinkles gently to avoid color bleeding. Chill cake layers before frosting to prevent melting. Sift powdered sugar for smooth frosting. For gluten-free, substitute flour with gluten-free blend. For dairy-free, use coconut milk yogurt and plant-based butter. Use sturdy jimmies sprinkles to maintain color and texture.
Nutrition
- Serving Size: 1 slice (1/12 of cak
- Calories: 380
- Fat: 18
- Carbohydrates: 50
- Protein: 3
Keywords: Milk Bar cake, birthday cake, funfetti cake, layer cake, vanilla cake, rainbow sprinkles, easy cake recipe, celebration cake