“You sure you’ve got enough red, white, and blue?” my niece asked, peering over my shoulder as I squeezed the last bit of royal icing into a piping bag. Honestly, I was skeptical. Royal icing and I have had a rocky past—too runny or too stiff, and those cookies never looked quite right. But that Fourth of July afternoon changed everything. The kitchen smelled like a sugar cloud, the radio played some nostalgic tunes, and the kids’ laughter echoed outside. That day, these perfect decorated sugar cookies with patriotic royal icing went from a last-minute idea to the hit of the picnic, with neighbors asking for the recipe the very next day.
I remember how the colors came alive, bright and bold, on the soft, buttery cookies. The whole process felt like a quiet kind of magic—fiddling with piping tips, steadying hands, and a little bit of patience. These cookies remind me a bit of the simple joy in summer celebrations, the kind you savor while sipping on a cold glass of sweet tea (which pairs beautifully, by the way, with a classic southern sweet tea). Looking back, I realize these cookies stuck with me because they’re not just about the look—they’re about the moments you share while making and eating them. And that’s something worth holding onto.
Why You’ll Love This Recipe
After a handful of trial runs and a few frosting disasters, I landed on this recipe for perfect decorated sugar cookies with patriotic royal icing that’s truly a keeper. Here’s why this recipe has earned a permanent spot in my holiday baking rotation:
- Quick & Easy: The dough comes together in about 15 minutes, and the cookies bake in just 10–12 minutes—perfect for last-minute party prep.
- Simple Ingredients: No specialty stores needed. You probably have everything in your pantry already, from powdered sugar to vanilla extract.
- Perfect for Patriotic Celebrations: Whether it’s Independence Day, Memorial Day, or Veterans Day, these cookies scream festive and fun.
- Crowd-Pleaser: Kids and adults alike love the balance of sweet, buttery cookie with the smooth, colorful icing.
- Unbelievably Delicious: The cookie base is tender and buttery, while the royal icing dries to a smooth, slightly crisp finish that’s just the right texture.
What makes this recipe stand out is the royal icing technique—getting that perfect pipe consistency so you can craft detailed stars, stripes, and dots without the icing bleeding or cracking. I use a tried-and-true method that keeps the colors vibrant and the designs sharp. Honestly, it’s like cookie decorating with a little bit of patience and a whole lot of fun.
And if you’re thinking, “I’m not really a baker,” this recipe is surprisingly forgiving. My first batch looked like a kindergarten art project, but by the third—well, let’s just say the neighbors noticed. Plus, if you want to add a little twist, these cookies pair wonderfully with a glass of classic southern sweet tea or even a scoop of homemade ice cream for a cool summer treat.
What Ingredients You Will Need
This recipe uses simple, wholesome ingredients to deliver bold flavor and satisfying texture without the fuss. Most are pantry staples, but I’ve also included some tips for picking the best options.
- For the Sugar Cookies:
- All-purpose flour – 3 cups (360 g), sifted for a light texture
- Baking powder – 1 teaspoon (4 g), helps the cookies rise just right
- Salt – ½ teaspoon (3 g), balances the sweetness
- Unsalted butter – 1 cup (227 g), softened to room temperature (I prefer Land O’Lakes for consistent creaminess)
- Granulated sugar – 1 cup (200 g), for that classic sweet crunch
- Large eggs – 2, room temperature (adds moisture and richness)
- Pure vanilla extract – 2 teaspoons (10 ml), I like Nielsen-Massey—it has a clean, deep flavor
- For the Patriotic Royal Icing:
- Powdered sugar – 4 cups (480 g), sifted to avoid lumps
- Meringue powder – 3 tablespoons (30 g), for a stable, glossy finish (Wilton brand works great)
- Warm water – ⅔ cup (160 ml), adjust to get the right consistency
- Vanilla or almond extract – 1 teaspoon (5 ml), optional but adds subtle flavor
- Gel food coloring – red, white (no color needed), and blue (I recommend AmeriColor gels for vibrant, true colors)
Substitution tips: Use coconut oil or dairy-free margarine for a dairy-free cookie, and swap meringue powder with egg whites if you’re comfortable with that. Almond flour can replace some all-purpose flour for a slightly nutty twist, but it changes the texture a bit. For the icing, if you want a vegan version, aquafaba can sometimes replace meringue powder but expect a longer drying time.
Equipment Needed
- Mixing bowls – at least two (one for dough, one for icing)
- Electric mixer – stand or hand mixer (trust me, it makes whipping butter and egg whites a breeze)
- Measuring cups and spoons – for precise baking measurements
- Rolling pin – smooth, with adjustable rings if you have them for even thickness
- Cookie cutters – star, circle, and flag shapes really bring out the patriotic theme
- Baking sheets – heavy-duty with non-stick surfaces
- Parchment paper or silicone baking mats – to prevent sticking and burn
- Piping bags and tips – small round tips (sizes #1 or #2) for detail and larger ones for flooding
- Toothpicks or scribe tools – perfect for fixing small icing mistakes or creating marbled effects
If you don’t have piping bags, disposable plastic sandwich bags with a tiny corner snipped work just fine. I’ve also used a basic wooden rolling pin on parchment paper to keep the dough from sticking. Investing in good-quality baking sheets really helps with even baking, but if you’re on a budget, lining your trays with parchment paper can compensate for thinner pans.
Preparation Method
- Mix dry ingredients: In a large bowl, whisk together 3 cups (360 g) sifted all-purpose flour, 1 teaspoon (4 g) baking powder, and ½ teaspoon (3 g) salt. Set aside. This keeps your cookies tender but sturdy enough for decorating.
- Cream butter and sugar: Using an electric mixer, beat 1 cup (227 g) softened unsalted butter with 1 cup (200 g) granulated sugar on medium speed for 3-4 minutes until light and fluffy. The texture is key here—if your butter is too cold, the dough won’t come together well.
- Add eggs and vanilla: Beat in 2 large room-temperature eggs, one at a time, then 2 teaspoons (10 ml) pure vanilla extract. Scrape down the bowl as needed to keep everything well mixed.
- Combine wet and dry: Gradually add the flour mixture to the butter mixture, mixing on low speed. Stop when it just comes together—overmixing can make cookies tough. The dough should feel soft but not sticky.
- Chill the dough: Wrap the dough in plastic wrap and refrigerate for at least 1 hour. This step is crucial for rolling and shaping. If you’re short on time, 30 minutes works, but the cookies will hold shape better when chilled.
- Preheat oven and prepare baking sheets: Preheat your oven to 350°F (175°C). Line baking sheets with parchment paper or silicone mats.
- Roll and cut cookies: Lightly flour your surface and rolling pin. Roll the dough to about ¼ inch (6 mm) thickness. Use patriotic cookie cutters—stars, flags, circles—to cut shapes and place them about 1 inch (2.5 cm) apart on the baking sheets.
- Bake cookies: Bake for 10–12 minutes, until edges are just starting to turn golden. Watch closely—overbaking dries them out. Let cookies cool on the sheets for 5 minutes, then transfer to wire racks to cool completely before decorating.
- Prepare royal icing: In a clean bowl, combine 4 cups (480 g) sifted powdered sugar, 3 tablespoons (30 g) meringue powder, and ⅔ cup (160 ml) warm water. Beat on high speed for 5–7 minutes until the icing forms stiff peaks. Add 1 teaspoon (5 ml) vanilla or almond extract if desired for flavor.
- Color and adjust icing: Divide icing into three bowls for red, white, and blue. Add gel food coloring a little at a time until you reach the perfect shade. Thin the icing with a few drops of water for flooding consistency (smooth and flows easily) or keep thicker for piping details.
- Decorate cookies: Use piping bags fitted with small round tips to outline shapes first, then flood with thinned icing. Work quickly but carefully. Use toothpicks to spread icing evenly or create star and stripe patterns. Allow each color to set slightly before adding adjacent colors to prevent bleeding.
- Let icing dry: Place decorated cookies on a flat surface and let the icing dry at room temperature for at least 4 hours, preferably overnight. This ensures a firm, crisp finish perfect for stacking or gifting.
Pro tip: If you find your royal icing too stiff, add water by the drop, not by the spoonful. And if it’s too runny, a little more powdered sugar will save the day. I learned this the hard way during my first few batches!
Cooking Tips & Techniques
Getting royal icing just right can be intimidating, but once you understand a few basics, it’s surprisingly satisfying. Here’s what I’ve picked up after many batches of these decorated sugar cookies:
- Keep your workspace clean and dry: Moisture can ruin royal icing consistency. Wipe down surfaces and avoid humid days if you can.
- Consistency is king: Use the “10-second rule” to test flooding icing: when you drag a knife through it, the icing should smooth out within 10 seconds. Thicker icing works for outlines and details.
- Use gel colors: Liquid food coloring can thin your icing, but gels give you bold colors without mess.
- Practice piping: If you’re nervous, try piping on parchment paper first. Steady your hand by resting your elbow on the table, and don’t rush.
- Patience pays off: Let colors dry before layering to prevent bleeding. This is especially important for patriotic stripes and stars.
- Store your tools: I keep my piping bags in airtight containers overnight so the icing doesn’t dry out—great for multi-day projects.
I once tried to rush the drying process with a fan; let’s just say cracked icing is not a good look. Since then, I’ve learned to embrace the wait—it’s part of the charm and gives a professional finish.
Variations & Adaptations
These perfect decorated sugar cookies with patriotic royal icing are versatile and easy to customize based on occasion or preference:
- Flavor swaps: Add lemon zest or almond extract to the cookie dough for a citrusy or nutty twist. For the icing, try peppermint extract for a refreshing holiday variation.
- Dietary adaptations: Use gluten-free flour blends to make the cookies safe for gluten-sensitive eaters. For dairy-free versions, substitute butter with vegan margarine or coconut oil.
- Seasonal themes: Instead of red, white, and blue, switch to fall colors like orange, brown, and yellow for Thanksgiving or green and red for Christmas.
- Alternative decorating techniques: Try using edible glitter or sanding sugar to add sparkle. You can also stencil designs with powdered sugar and food-safe stencils for a quick but fancy look.
- Personal favorite variation: I once swapped out royal icing for a simple cream cheese glaze tinted with natural beet and spirulina powders. It gave the cookies a softer finish and a subtle tang, which my family loved.
For a casual twist, these cookies pair surprisingly well with the crispy southern fried okra from my crispy southern fried okra recipe—a fun mix of savory and sweet for your summer gatherings.
Serving & Storage Suggestions
Serve these colorful sugar cookies at room temperature for the best texture and flavor. They’re perfect alongside a tall glass of ice-cold southern sweet tea or a festive lemonade. Presentation tip: arrange them on a white platter with some fresh berries for a pop of natural color.
To store, keep cookies in an airtight container at room temperature for up to 5 days. If you want to make them ahead, they freeze beautifully. Just place parchment paper between layers to avoid sticking, and thaw at room temperature before serving.
Reheating isn’t necessary, but if you prefer your cookies a little softer, microwave them individually for about 5 seconds. The royal icing will soften slightly but won’t melt.
Over time, the flavors meld nicely, and the royal icing develops a delicate crispness that’s delightful. Just avoid storing in humid places, or the icing can become tacky.
Nutritional Information & Benefits
Each cookie (based on a 3-inch diameter) contains approximately:
| Calories | 150 kcal |
|---|---|
| Fat | 7 g (mostly from butter) |
| Carbohydrates | 22 g (mostly sugars and flour) |
| Protein | 1.5 g |
The butter provides some beneficial fats, and the eggs add a bit of protein. Of course, these are treats best enjoyed in moderation during your festive occasions. If you’re watching carbs or sugar, consider making smaller cookies or thinning the icing layer.
For those with allergies, the recipe contains gluten, dairy, and eggs, but substitutions like gluten-free flour and dairy-free butter can help. Always double-check your meringue powder ingredients if sensitive to egg products.
Conclusion
These perfect decorated sugar cookies with patriotic royal icing are more than just eye candy—they’re a sweet way to bring people together, celebrate special moments, and add a handmade touch to your holiday table. Whether you’re a first-timer or a cookie pro, the recipe’s forgiving nature and clear steps make it worth trying.
Feel free to tweak the colors, shapes, and flavors to suit your style. I love how these cookies brighten up any gathering and spark conversations, especially when paired with classic southern favorites like homemade sweet tea or even some crispy nuggets from my crispy homemade chicken nuggets recipe.
Give this recipe a try, share your decorating wins (and funny fails), and make those patriotic celebrations a little sweeter. Happy baking!
Frequently Asked Questions
How long can I store decorated sugar cookies?
Store them in an airtight container at room temperature for up to 5 days. For longer storage, freeze them with parchment paper between layers for up to 3 months.
Can I make the dough and icing ahead of time?
Yes! Dough can be refrigerated for 24 hours or frozen for up to 3 months. Royal icing is best used within a day but can be stored in an airtight container in the fridge—just re-whip before use.
Why is my royal icing too runny or too stiff?
Adjust consistency by adding tiny amounts of water to thin or powdered sugar to thicken. Use the 10-second rule test to check flooding icing.
Can I use liquid food coloring instead of gel?
Gel food coloring is preferred because it won’t thin your icing. Liquid colors can make the icing too runny and affect drying time.
What’s the best way to pipe intricate designs on cookies?
Use small round piping tips and steady your hand by resting your elbow on the table. Practice on parchment paper first and work slowly, allowing layers to dry between colors.
Pin This Recipe!

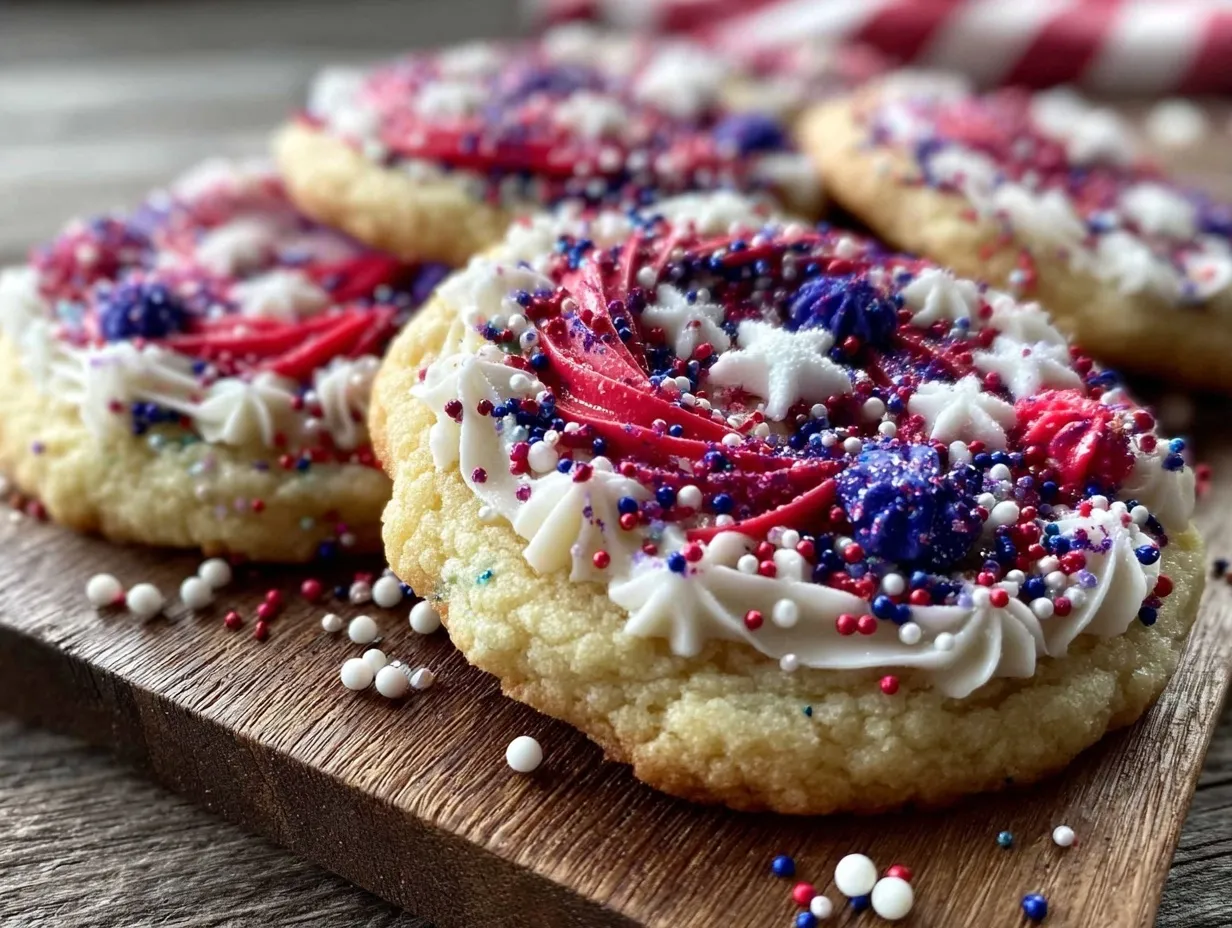
Perfect Decorated Sugar Cookies with Patriotic Royal Icing

These soft, buttery sugar cookies decorated with vibrant patriotic royal icing are perfect for Fourth of July and other patriotic celebrations. The recipe is quick, easy, and forgiving, making it ideal for bakers of all skill levels.
- Prep Time: 15 minutes
- Cook Time: 12 minutes
- Total Time: 1 hour 31 minutes
- Yield: 24 cookies 1x
- Category: Dessert
- Cuisine: American
Ingredients
- 3 cups (360 g) all-purpose flour, sifted
- 1 teaspoon (4 g) baking powder
- ½ teaspoon (3 g) salt
- 1 cup (227 g) unsalted butter, softened to room temperature
- 1 cup (200 g) granulated sugar
- 2 large eggs, room temperature
- 2 teaspoons (10 ml) pure vanilla extract
- 4 cups (480 g) powdered sugar, sifted
- 3 tablespoons (30 g) meringue powder
- ⅔ cup (160 ml) warm water
- 1 teaspoon (5 ml) vanilla or almond extract (optional)
- Gel food coloring – red, white (no color needed), and blue
Instructions
- In a large bowl, whisk together sifted all-purpose flour, baking powder, and salt. Set aside.
- Using an electric mixer, beat softened unsalted butter with granulated sugar on medium speed for 3-4 minutes until light and fluffy.
- Beat in eggs one at a time, then add vanilla extract, scraping down the bowl as needed.
- Gradually add the flour mixture to the butter mixture, mixing on low speed until just combined. Dough should be soft but not sticky.
- Wrap dough in plastic wrap and refrigerate for at least 1 hour (30 minutes if short on time).
- Preheat oven to 350°F (175°C). Line baking sheets with parchment paper or silicone mats.
- Lightly flour surface and rolling pin. Roll dough to about ¼ inch (6 mm) thickness.
- Use patriotic cookie cutters (stars, flags, circles) to cut shapes and place about 1 inch (2.5 cm) apart on baking sheets.
- Bake for 10–12 minutes until edges just start to turn golden. Cool on sheets for 5 minutes, then transfer to wire racks to cool completely.
- Prepare royal icing by combining powdered sugar, meringue powder, and warm water in a clean bowl. Beat on high speed for 5–7 minutes until stiff peaks form. Add vanilla or almond extract if desired.
- Divide icing into three bowls for red, white, and blue. Add gel food coloring gradually to achieve desired shades. Thin icing with drops of water for flooding consistency or keep thicker for piping details.
- Use piping bags with small round tips to outline cookie shapes, then flood with thinned icing. Use toothpicks to spread icing evenly or create patterns. Allow each color to set slightly before adding adjacent colors to prevent bleeding.
- Let decorated cookies dry at room temperature for at least 4 hours, preferably overnight, for a firm, crisp finish.
Notes
If royal icing is too stiff, add water drop by drop; if too runny, add powdered sugar. Use gel food coloring for vibrant colors without thinning icing. Let each color dry before layering to prevent bleeding. Store piping bags airtight overnight to keep icing from drying out. Dough can be refrigerated for 24 hours or frozen for up to 3 months. Royal icing is best used within a day but can be refrigerated and re-whipped before use.
Nutrition
- Serving Size: 1 cookie (3-inch dia
- Calories: 150
- Fat: 7
- Carbohydrates: 22
- Protein: 1.5
Keywords: sugar cookies, royal icing, patriotic cookies, Fourth of July, decorated cookies, holiday baking, easy sugar cookies