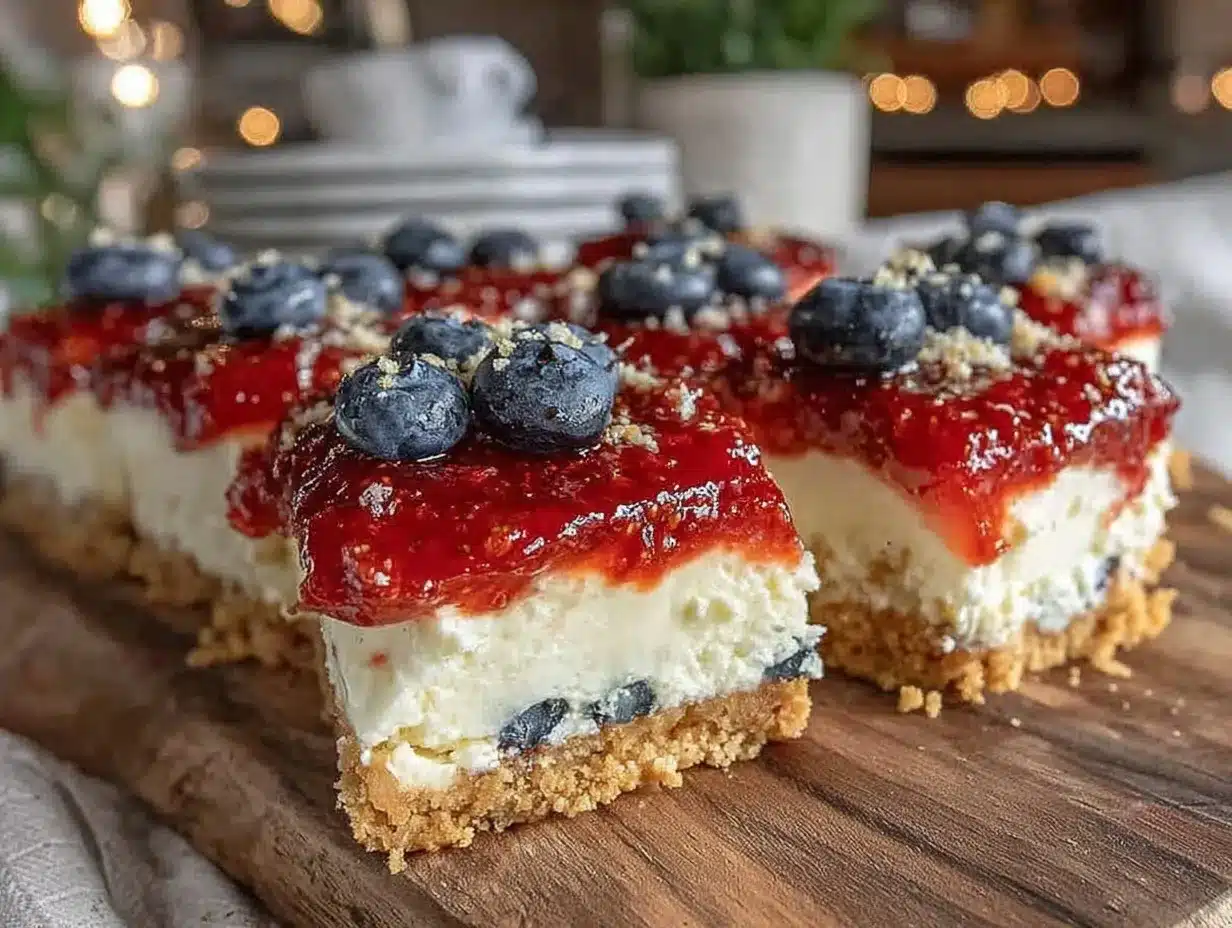
The kitchen was buzzing with last-minute party prep chaos—paper plates stacked, red cups scattered, and the unmistakable hum of a playlist set for backyard fun. I was supposed to whip up something quick and festive, but honestly, I wasn’t feeling very inspired. Then, while pulling ingredients from the fridge, those blocks of cream cheese caught my eye. “Why not cheesecake?” I thought, but with a twist. It wasn’t about fancy layers or elaborate decorating—just simple, fun, and something that would bring a smile when folks spotted that bold, red, white, and blue flag pattern on the bars. The idea grew from there. I grabbed fresh strawberries, blueberries, and a graham cracker crust, and before I knew it, these Easy Patriotic Flag Cheesecake Bars were born—perfect for festive celebrations, especially around the 4th of July.
This recipe stuck with me, not because it’s complex or showy, but because it’s the kind of sweet that feels like a little celebration on your tongue. Plus, it’s one of those desserts you can make without breaking a sweat, even when the party’s about to start and your to-do list is a mile long. I’ll admit, I made this three times in one week last summer. Each time, friends asked if I’d bring it again, which says a lot. It’s simple, joyful, and a little nostalgic—like fireworks on a plate. Honestly, every time I slice into those cheesecake bars and see that flag pattern, I’m reminded why I keep this recipe close for every patriotic get-together.
Why You’ll Love This Recipe
This Easy Patriotic Flag Cheesecake Bars recipe has become my go-to when I want something that’s both festive and fuss-free. Here’s why it might just become your favorite too:
- Quick & Easy: From start to finish, it takes about 45 minutes, including baking and cooling time. Perfect when you’re juggling party prep and want a dessert ready in no time.
- Simple Ingredients: You don’t need a specialty store run. Pantry staples like cream cheese and graham crackers combine with fresh berries that are usually in season or easy to find frozen.
- Perfect for Festive Occasions: Whether it’s the 4th of July, Memorial Day, or any summer BBQ, these bars bring that red, white, and blue spirit right to your dessert table.
- Crowd-Pleaser: Kids love the sweet creaminess and berries, while adults appreciate the classic cheesecake flavor without the heaviness of a full cake.
- Unbelievably Delicious: The creamy texture meets the crisp, buttery crust, and those fresh berry bursts make every bite feel fun and balanced.
What sets this recipe apart is the way the flag design is built right into the cheesecake layer—no fancy piping or complicated decorating. The secret is layering the berries thoughtfully and gently swirling the filling so every square looks like a miniature flag. I’ve made other cheesecake bars before, but this recipe’s combination of visual appeal and straightforward prep makes it a winner every time. It’s the kind of dessert that makes you pause and smile before digging in—a little patriotic pride baked into each bite.
What Ingredients You Will Need
This recipe uses simple, wholesome ingredients to deliver bold flavor and satisfying texture without the fuss. Most are pantry staples, easy to swap or adjust depending on what you have on hand or dietary needs.
- For the crust:
- 1 ½ cups graham cracker crumbs (I like using Honey Maid for a balanced sweetness)
- 5 tablespoons unsalted butter, melted (adds richness and helps bind the crust)
- 2 tablespoons granulated sugar (optional, for a touch of extra sweetness)
- For the cheesecake filling:
- 16 oz (450g) cream cheese, softened (room temperature helps avoid lumps)
- ⅔ cup granulated sugar
- 2 large eggs, room temperature
- 1 teaspoon vanilla extract (pure vanilla is best for depth of flavor)
- ½ cup sour cream or Greek yogurt (for a tangy, creamy finish; use dairy-free yogurt if needed)
- For the patriotic flag decoration:
- 1 cup fresh strawberries, sliced (or frozen, thawed, and drained; summer berries work wonderfully)
- 1 cup fresh blueberries (can substitute frozen if fresh aren’t available, just pat dry)
Substitution tips: For a gluten-free crust, swap graham crackers with almond flour mixed with a bit more melted butter. If you want to make it vegan, try plant-based cream cheese and yogurt alternatives. The key is keeping the creamy texture intact. I’ve found that using full-fat cream cheese makes a noticeable difference in richness.
Equipment Needed
- 9×9-inch (23×23 cm) baking pan – glass or metal works fine; glass gives you a nice even bake.
- Mixing bowls – one large for the crust, one medium for the filling.
- Electric mixer or stand mixer – to beat the cream cheese smooth, though a sturdy whisk and some elbow grease can work if you’re in a pinch.
- Measuring cups and spoons – accuracy helps the cheesecake set just right.
- Spatula – essential for scraping down the bowl and spreading the filling evenly.
- Knife and cutting board – to slice strawberries and cut the bars after baking.
If you don’t have a 9×9 pan, a similar-sized square or rectangular pan will do, just adjust the baking time slightly. For cleanup, lining your pan with parchment paper is a lifesaver and helps you lift the bars out easily. I’ve tried foil, but parchment gives a neater edge.
Preparation Method
- Prepare the crust: Preheat oven to 325°F (163°C). In a medium bowl, mix graham cracker crumbs, melted butter, and sugar until the mixture resembles wet sand. Press firmly into the bottom of your 9×9-inch pan, making an even layer. Bake for 10 minutes. This firm base keeps your bars crisp and buttery. Let it cool slightly while you prepare the filling.
- Make the cheesecake filling: Beat softened cream cheese and sugar together on medium speed until smooth and creamy—about 2-3 minutes. Scrape down the sides to avoid lumps. Add eggs one at a time, beating well after each addition. Stir in vanilla extract and sour cream (or Greek yogurt). The mixture should be silky and pourable but thick enough to hold some shape.
- Assemble the flag: Pour half the cheesecake filling over the cooled crust, spreading evenly. Arrange sliced strawberries in a rectangle in the top left corner of the pan—this will be the “red stripes” and “blue field” area. Spoon the remaining cheesecake filling over the rest of the pan carefully to keep the berries in place.
- Add blueberries: Place blueberries in neat rows over the strawberry rectangle to represent the stars section. You want the look of a flag, so take your time to make it visually balanced. Gently spoon any leftover filling around the berries to seal them in without smudging the pattern.
- Bake the bars: Bake for 35-40 minutes at 325°F (163°C), or until the edges are set but the center still jiggles slightly when you gently shake the pan. Overbaking makes the cheesecake dry and crumbly, so keep a close eye.
- Cool and chill: Remove from oven and allow to cool at room temperature for about 30 minutes. Then transfer to the fridge for at least 3 hours, ideally overnight. This resting time lets the flavors meld and the texture firm up perfectly.
- Slice and serve: Use a sharp knife dipped in hot water for clean cuts. Wipe the blade between slices to maintain those crisp, patriotic bars. Serve chilled or slightly cooled—either way, these bars hold their shape and charm beautifully.
Cooking Tips & Techniques
One trick I learned the hard way is to never rush the cream cheese to room temperature. Cold cream cheese lumps up and ruins the texture, so let it sit out for about an hour before mixing. Also, mixing on medium speed and scraping down the bowl ensures no stubborn clumps sneak in.
When arranging the berries, patience pays off. It’s tempting to throw them on quickly, but a neat pattern not only looks impressive but also helps the bars bake evenly. If the berries are wet (especially frozen), pat them dry first to avoid watery cheesecake.
Baking cheesecake bars at a lower temperature prevents cracking and keeps the texture creamy. I usually set my oven a bit cooler than standard recipes suggest and add an extra 5 minutes to the bake time, watching for that gentle jiggle in the center.
If you’re multitasking during a party prep, make the crust first and bake it while you get other things ready—like prepping the fresh fruit or setting up the grill. Then, mix and assemble the filling while the crust cools. It’s all about flow.
Variations & Adaptations
- Berry Swap: Use raspberries or blackberries for a different twist on the red and blue colors. In summer, fresh berries shine, but frozen works in a pinch.
- Crust Alternatives: Try a chocolate cookie crust for a richer base or use gluten-free almond flour crumbs for a dietary-friendly option.
- Flavor Boost: Add a teaspoon of lemon zest or a splash of almond extract to the cheesecake filling for a subtle flavor lift that cuts through the richness.
- Mini Cheesecake Bars: Bake in a muffin tin lined with paper cups for individual servings—perfect for potlucks or picnics.
- Dairy-Free Version: Swap cream cheese and sour cream for vegan cream cheese and coconut yogurt. Texture will be slightly different but still tasty.
One variation I tried recently was swirling in a blueberry jam ribbon before adding the berries on top. It added a lovely fruity depth and made the bars look even more festive.
Serving & Storage Suggestions
Serve these cheesecake bars chilled for the best texture and flavor. They make a beautiful centerpiece for any patriotic table—especially paired with fresh fruit salads or a light sparkling lemonade. For a fun summer spread, consider pairing with other festive treats like fresh watermelon pizza with yogurt and berries or a cool watermelon mint sorbet.
Store leftover bars in an airtight container in the refrigerator for up to 4 days. They keep their creamy texture well and flavors deepen over time. For longer storage, freeze the bars tightly wrapped for up to 2 months. Thaw overnight in the fridge before serving.
Reheat is generally not recommended, but if you want a softer texture, let bars sit at room temperature for 15 minutes before serving.
Nutritional Information & Benefits
Each serving of these cheesecake bars (assuming 12 servings) contains approximately:
| Calories | 280 |
|---|---|
| Fat | 18g |
| Carbohydrates | 22g |
| Protein | 5g |
The cream cheese provides a good source of protein and calcium, while the fresh berries add antioxidants and vitamins. Using Greek yogurt or sour cream adds a bit of probiotic benefit and tang without extra sugar. For those watching carbs, swapping the crust for almond flour can lower the carb count significantly.
Keep in mind, this recipe contains dairy and gluten (unless adapted). It’s a treat best enjoyed mindfully, but with fresh fruit and simple ingredients, it’s a satisfying dessert that complements a balanced summer menu.
Conclusion
These Easy Patriotic Flag Cheesecake Bars bring a little festive joy without fuss or fancy tricks. They’ve been a quiet star at many celebrations, offering creamy, tangy cheesecake with fresh fruity pops that remind me why simplicity often wins in the kitchen. I love how this recipe lets me show a bit of spirit while keeping things manageable—even when the grill is fired up and the kids are running wild.
Feel free to play around with the berries or crust to suit your taste or dietary needs. And if you’re hunting for more crowd-pleasers to round out your summer spread, you might enjoy the creamy one-pot garlic Tuscan chicken pasta or these crispy air fryer garlic parmesan chicken wings I’ve shared before.
Give these cheesecake bars a try at your next gathering—whether it’s a casual hangout or a full-on patriotic bash. I’d love to hear how you make them your own!
FAQs About Easy Patriotic Flag Cheesecake Bars
Can I make these cheesecake bars ahead of time?
Absolutely! They actually taste better after chilling overnight, which helps the flavors meld and the texture firm up perfectly.
What if I don’t have fresh berries?
Frozen berries work fine—just thaw and drain them well to avoid excess moisture in the cheesecake.
How do I prevent cracks in the cheesecake bars?
Mix the filling gently and bake at a lower temperature (325°F/163°C). Also, avoid overbaking; the center should still jiggle slightly when done.
Can I use a different crust for these bars?
Yes! Chocolate cookie crumbs or almond flour crusts work well. Just adjust butter amounts to keep the crust firm and buttery.
How long do these cheesecake bars keep?
Store them in the fridge for up to 4 days or freeze for up to 2 months. Always thaw in the fridge before serving if frozen.
Pin This Recipe!
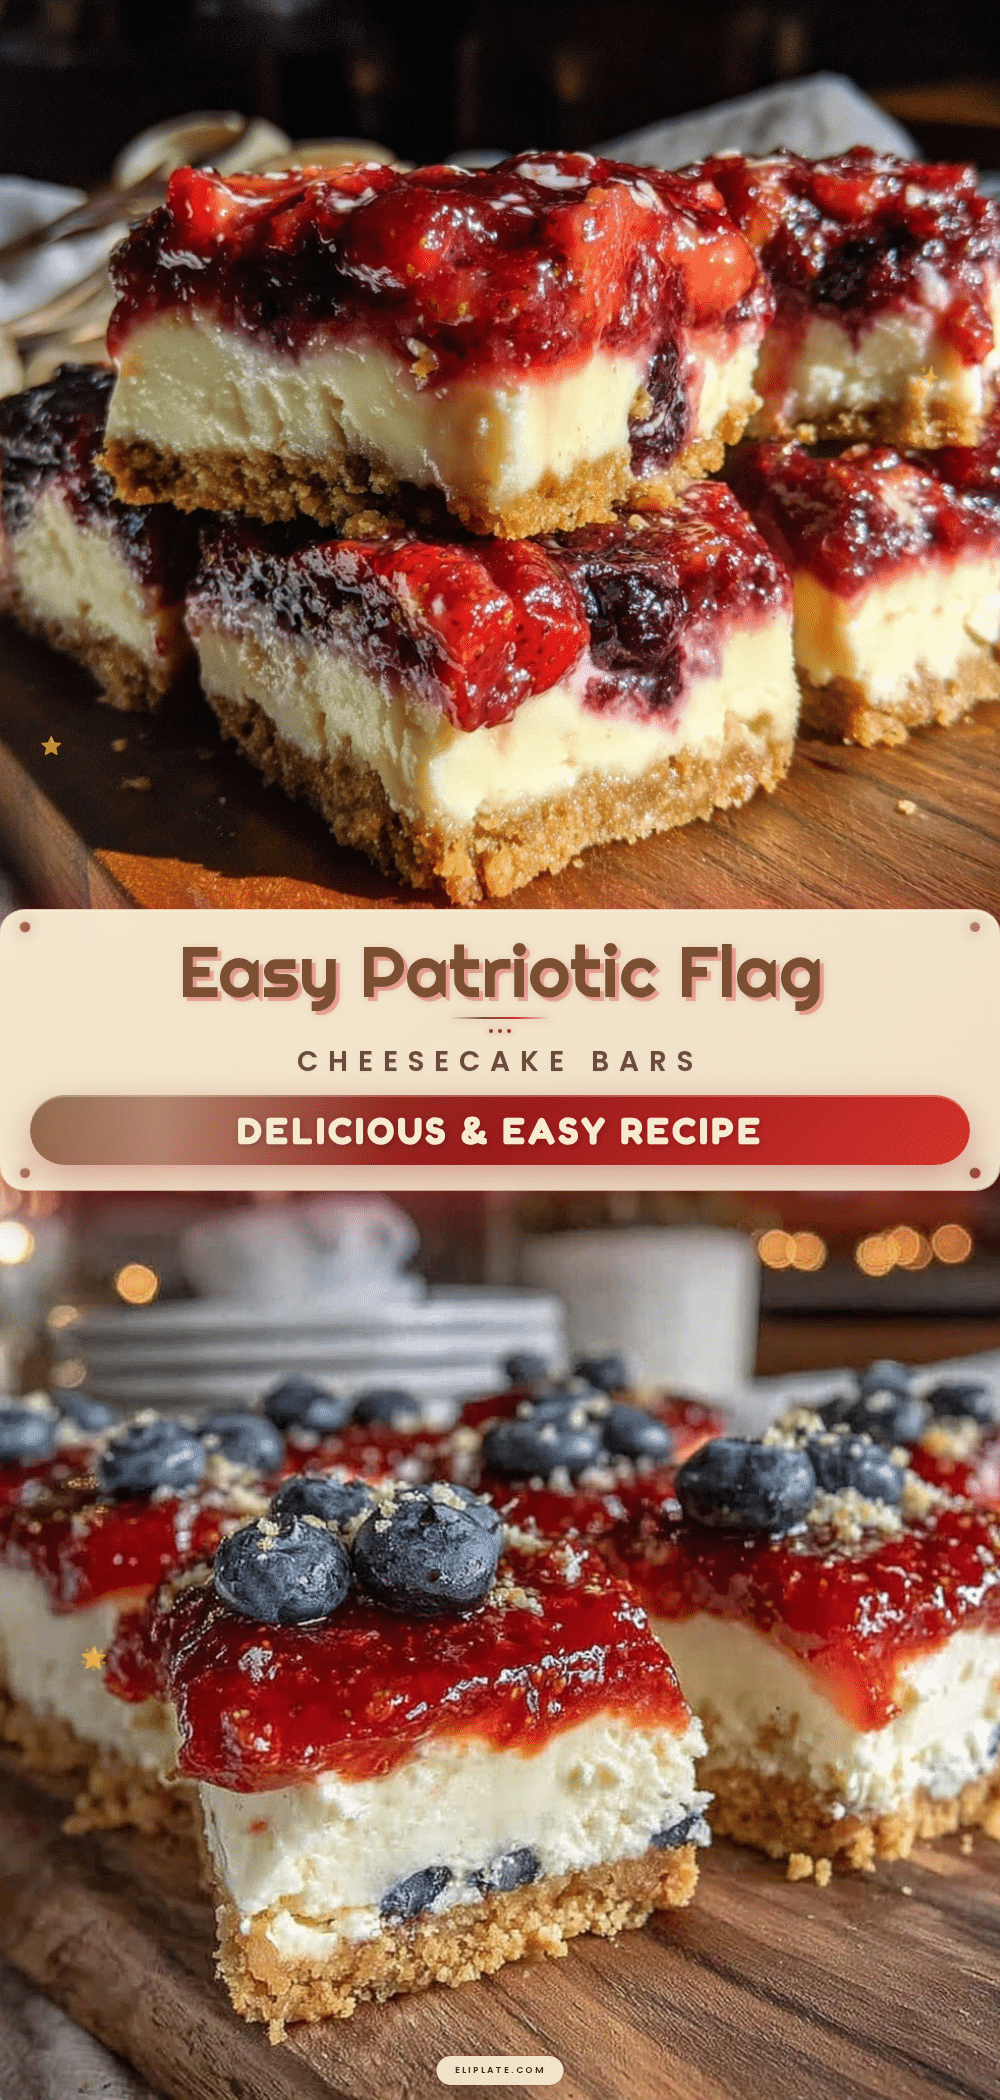
Easy Patriotic Flag Cheesecake Bars
These festive cheesecake bars feature a bold red, white, and blue flag pattern with a creamy cheesecake filling and a buttery graham cracker crust, perfect for 4th of July celebrations and summer parties.
- Prep Time: 15 minutes
- Cook Time: 45 minutes
- Total Time: 1 hour
- Yield: 12 servings 1x
- Category: Dessert
- Cuisine: American
Ingredients
- 1 ½ cups graham cracker crumbs
- 5 tablespoons unsalted butter, melted
- 2 tablespoons granulated sugar (optional)
- 16 oz (450g) cream cheese, softened
- ⅔ cup granulated sugar
- 2 large eggs, room temperature
- 1 teaspoon vanilla extract
- ½ cup sour cream or Greek yogurt
- 1 cup fresh strawberries, sliced
- 1 cup fresh blueberries
Instructions
- Preheat oven to 325°F (163°C). In a medium bowl, mix graham cracker crumbs, melted butter, and sugar until the mixture resembles wet sand. Press firmly into the bottom of a 9×9-inch pan, making an even layer. Bake for 10 minutes. Let cool slightly.
- Beat softened cream cheese and sugar together on medium speed until smooth and creamy, about 2-3 minutes. Scrape down the sides. Add eggs one at a time, beating well after each. Stir in vanilla extract and sour cream or Greek yogurt until silky and pourable but thick.
- Pour half the cheesecake filling over the cooled crust, spreading evenly. Arrange sliced strawberries in a rectangle in the top left corner of the pan.
- Place blueberries in neat rows over the strawberry rectangle to represent the stars section. Spoon remaining cheesecake filling over the rest of the pan carefully to keep berries in place.
- Bake for 35-40 minutes at 325°F (163°C), until edges are set but center jiggles slightly. Avoid overbaking.
- Remove from oven and cool at room temperature for 30 minutes. Transfer to fridge for at least 3 hours or overnight.
- Slice bars using a sharp knife dipped in hot water for clean cuts. Serve chilled or slightly cooled.
Notes
Let cream cheese come to room temperature before mixing to avoid lumps. Pat frozen berries dry before use to prevent watery cheesecake. Bake at a lower temperature to prevent cracking and maintain creamy texture. Use parchment paper to line pan for easy removal. Bars taste better after chilling overnight.
Nutrition
- Serving Size: 1 bar (1/12th of rec
- Calories: 280
- Fat: 18
- Carbohydrates: 22
- Protein: 5
Keywords: cheesecake bars, patriotic dessert, 4th of July, easy cheesecake, berry cheesecake, summer dessert, graham cracker crust