Juggling dinner prep while the kids are in full meltdown mode, and then realizing the store-bought pickles are all gone—yeah, that’s when this crunchy dill pickle spears recipe came to life. The kitchen smelled like vinegar and dill, and I was chopping cucumbers in between referee-ing sibling spats. Honestly, it was less about making something fancy and more about saving sanity with a quick, crunchy snack that could pull double-duty as a condiment and a crunchy treat.
There’s something oddly satisfying about the clink of glass jars, the fresh snap of cucumbers, and the tangy scent of dill that fills the air. I remember sneaking a spear before the jars even chilled in the fridge—guilty as charged! This homemade refrigerator canning method means no pressure canner drama, just easy prep and waiting a few days for that perfect crunch and tang to develop.
What stuck with me most is how this simple recipe turned into a staple—whenever I need a quick flavor boost or a snack that’s actually good for me, these pickle spears are the go-to. It’s the kind of recipe that doesn’t ask for much but gives back in crisp, briny, herby goodness. If you’re the type who loves a good crunch and tang without fuss, this homemade dill pickle spears recipe is your new kitchen sidekick.
Why You’ll Love This Recipe
Honestly, making your own crunchy dill pickle spears is kind of a game changer, especially when you’re juggling a busy schedule and want something homemade without the hassle. I’ve tested this recipe multiple times (and yes, eaten way too many jars), and here’s why it’s a keeper:
- Quick & Easy: Ready to eat in as little as 48 hours, perfect for last-minute crunchy cravings or adding zest to your meals.
- Simple Ingredients: Uses pantry staples and fresh cucumbers—no fancy, hard-to-find stuff, which means you can whip these up anytime.
- Perfect for Snacking & Entertaining: Whether it’s a family snack, a side for your honey-glazed ribs, or a tangy addition to sandwiches, these pickle spears shine.
- Crowd-Pleaser: Kids love the crunch, adults appreciate the balance of dill and garlic—always gets compliments at potlucks.
- Unbelievably Delicious: The secret’s in the vinegar-brine ratio and fresh dill sprigs—each bite bursts with classic pickle goodness without being too sour or salty.
- Home-Canned Without Fuss: Refrigerator canning means no pressure cooker, no boiling water bath, just simple layering in jars and chilling.
What makes this recipe stand apart? It’s a fresh take on the classic dill pickle spear with just the right crunch—thanks to a pinch of pickling salt and a touch of sugar to balance the acidity. Plus, you get to customize the garlic and dill levels to your liking. It’s comfort food that’s fast, fresh, and fuss-free.
What Ingredients You Will Need
This recipe uses simple, wholesome ingredients to deliver bold flavor and satisfying crunch without any fuss. You probably have most of these in your pantry already, and the fresh cucumbers are the star here. I prefer firm, pickling cucumbers for that classic snap.
- Cucumbers: 6-8 medium pickling cucumbers, washed and cut into spears (about 3-4 inches long)
- Fresh Dill: 4-5 sprigs (or about 2 tablespoons chopped dill weed) – fresh dill is a must for authentic flavor
- Garlic Cloves: 4 cloves, peeled and smashed (adjust based on how garlicky you want it)
- White Vinegar: 2 cups (500 ml) – I use distilled white vinegar for a clean, sharp tang
- Water: 2 cups (500 ml) – equal parts vinegar and water keeps the acidity balanced
- Pickling Salt: 2 tablespoons – use pickling or kosher salt, avoid iodized for best results
- Sugar: 1 tablespoon – just a touch to soften the acidity and round out the flavor
- Black Peppercorns: 1 teaspoon – whole peppercorns add a subtle spice pop
- Red Pepper Flakes (Optional): 1/2 teaspoon – for a mild heat kick
Substitution Notes: If you want to skip the sugar, you can, but it does help mellow the vinegar bite. For a gluten-free option, all these ingredients are naturally gluten-free, so no worries there. If fresh dill is out of season, dried dill can work, but fresh really makes the flavor pop.
Equipment Needed
- Quart-sized Mason Jars: 2-3 jars with lids and bands, sterilized – I like wide-mouth jars for easier packing of the spears.
- Large Mixing Bowl: To toss cucumbers and combine brine ingredients.
- Medium Saucepan: For heating the vinegar brine.
- Measuring Cups & Spoons: For precise brine measurements.
- Knife and Cutting Board: Sharp knife to cut cucumbers into spears.
- Tongs or Jar Funnel (Optional): To make filling jars less messy.
If you don’t have Mason jars on hand, any clean glass jar with a tight-fitting lid will do for refrigerator pickles, but I recommend using jars designed for canning to avoid leaks and maintain freshness. I’ve tried simpler containers before and ended up with brine spills all over the fridge—lesson learned!
Preparation Method
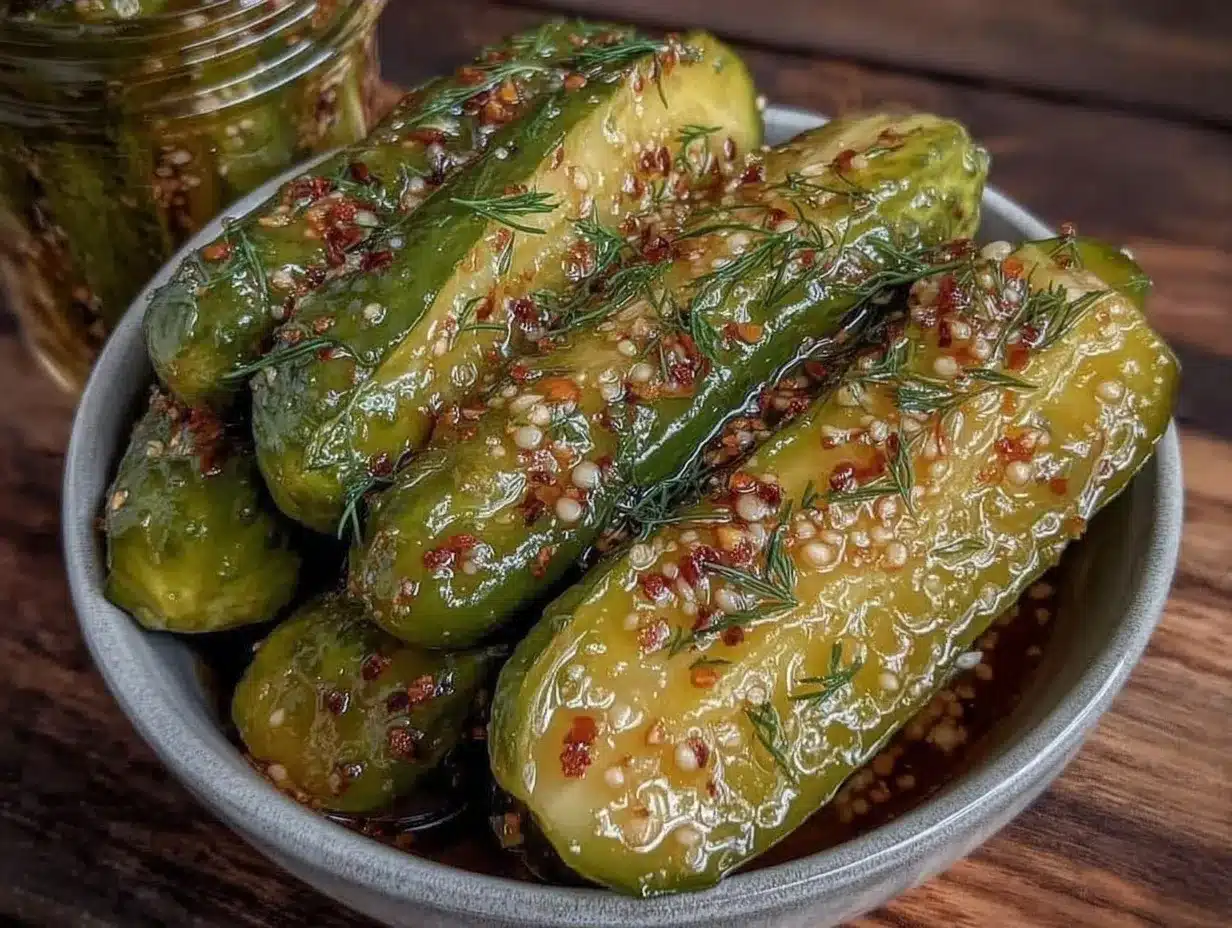
- Prepare the Cucumbers: Rinse cucumbers under cold water and trim off the blossom ends (this helps keep the pickles crunchy). Slice each cucumber into spears about 3-4 inches long and roughly 1/2 inch thick. This size holds up well in the brine and is easy to snack on.
(Prep time: 10 minutes) - Pack the Jars: Place 1-2 sprigs of fresh dill and 2 garlic cloves at the bottom of each sterilized jar. Then, tightly pack cucumber spears upright inside the jars, leaving about 1/2 inch headspace at the top.
Tip: Don’t force the spears so much that they crack or bend; a snug fit is perfect.
(Prep time: 10 minutes) - Make the Brine: In a medium saucepan, combine 2 cups white vinegar, 2 cups water, 2 tablespoons pickling salt, 1 tablespoon sugar, black peppercorns, and red pepper flakes if using. Bring the mixture to a boil, stirring until salt and sugar dissolve.
Warning: Keep an eye on the brine to avoid boiling over.
(Prep time: 5 minutes) - Pour the Brine: Carefully pour the hot brine over the cucumbers in each jar, covering the spears completely. Leave about 1/2 inch headspace. Use a clean utensil to release any trapped air bubbles by gently pressing around the cucumbers.
Tip: Filling jars while brine is hot helps soften cucumbers just enough for perfect texture.
(Prep time: 5 minutes) - Seal and Chill: Wipe the rims with a clean cloth and screw on the lids tightly. Let the jars cool to room temperature, then refrigerate. The pickles will be ready to enjoy in 48 hours but taste best after 4-5 days.
Note: Keep refrigerated and consume within 3-4 weeks for best crunch and flavor.
(Prep time: 2 days to 1 week for optimal flavor)
Personal tip: I always label my jars with the date so I know when to pop them open. Also, if you find your pickles are too soft after a few days, next time try adding a couple of grape leaves or a pinch of tannin powder—they help maintain that satisfying snap.
Cooking Tips & Techniques
Getting those crunchy dill pickle spears just right is part science, part art. Here’s what I’ve learned after a few batches (and some soggy disappointments):
- Pickling Salt Is Key: Regular table salt can cloud the brine and add unwanted iodine flavors. Pickling or kosher salt keeps the brine clear and the flavor clean.
- Trim the Blossom Ends: The blossom end of cucumbers contains enzymes that can make pickles mushy. Snip it off before slicing for the best crunch.
- Hot Brine Pour: Pouring hot brine over the cucumbers helps them absorb flavor quickly and prevents bacterial growth.
- Don’t Overcrowd Jars: Give cucumbers a little breathing room; overpacking can lead to uneven pickling and soggy spears.
- Patience Pays Off: While you can sneak a taste after 48 hours, the full flavor and crunch develop over several days in the fridge.
- Use Fresh Dill: Fresh dill adds that signature bright herbal note. Avoid dried dill as a substitute unless you’re in a pinch—it just doesn’t compare.
- Temperature Matters: Keep your refrigerator at a steady 37-40°F (3-4°C) to keep pickles crisp and safe.
One kitchen mishap I recall was rushing to seal jars while the brine was still boiling vigorously. The jars cracked slightly, and the pickles ended up with a weird off-smell. Lesson learned: let the brine just reach a boil, then remove from heat before pouring.
Variations & Adaptations
Once you get the hang of this crunchy dill pickle spears recipe, it’s fun to tweak it to suit your taste or dietary needs. Here are a few ideas I’ve tried or recommend:
- Spicy Pickle Spears: Add extra red pepper flakes or a sliced jalapeño to the jar for a fiery kick that pairs perfectly with grilled meats.
- Garlic Lover’s Version: Double the garlic cloves and add a pinch of ground coriander for a savory depth.
- Low-Sodium Option: Reduce salt by half, but keep in mind this may affect texture and preservation time. Make sure to refrigerate and consume quickly.
- Herbal Twist: Swap fresh dill with fresh tarragon or add a few mustard seeds and bay leaves for a different flavor profile.
- Quick Refrigerator Pickles: Use sliced cucumbers instead of spears for faster marinating and great salad toppings, similar to my quick cucumber salad dressing in this recipe.
Personally, I once tried adding a splash of apple cider vinegar instead of white vinegar for a slightly sweeter twist, and it turned out surprisingly well—although it takes a bit longer to develop that classic pickle tang.
Serving & Storage Suggestions
These crunchy dill pickle spears are insanely versatile. Serve them chilled straight from the jar as a snack or alongside your favorite sandwich or burger to add that crisp, tangy bite. They’re especially good next to something rich and smoky, like the BBQ pulled pork sliders or my creamy southern coleslaw recipe, which balances the acidity perfectly.
Store your pickles in the refrigerator in their brine, sealed tightly. They keep well for up to 4 weeks, but honestly, they rarely last that long in my house. Reheat? Nope, better cold and crunchy! However, letting them sit a bit at room temperature before serving can soften the bite just a touch.
Over time, the flavors meld and intensify—if you like your pickles super tangy, wait a full week before opening. Just watch the texture, as longer storage can soften them slightly.
Nutritional Information & Benefits
Crunchy dill pickle spears are low in calories—roughly 5-7 calories per spear depending on size—and fat-free, making them a guilt-free snack. They’re also a good source of vitamin K from the cucumbers and antioxidants from fresh dill.
The vinegar in the brine has been linked to digestive benefits, and the fermented-like environment (even though this is a refrigerator pickle) can support gut health when eaten regularly. Just watch the sodium intake if you’re monitoring salt, since pickling salt can add up.
For those on gluten-free or keto diets, this recipe fits perfectly—no hidden carbs or gluten. Just pure crunchy, tangy goodness that complements many healthy eating plans.
Conclusion
This crunchy dill pickle spears recipe isn’t just a quick fix—it’s a reliable, flavor-packed staple that’s easy to make and always impresses. It’s perfect for anyone who loves that satisfying snap and classic dill tang, but hates the fuss of traditional canning methods.
Feel free to tweak the garlic, dill, or heat levels to suit your mood or menu. I keep a jar or two in my fridge constantly, ready to add crunch to sandwiches, salads, or just to munch on while managing the chaos of everyday life.
Give it a try, and you might find yourself reaching for your homemade pickles more often than store-bought—trust me, the difference is worth it. And hey, if you want a fresh, crunchy side to go with those pickles, my creamy southern coleslaw recipe pairs beautifully and is just as easy to make.
Frequently Asked Questions
How long do refrigerator pickles last?
Stored properly in the fridge, these crunchy dill pickle spears last about 3-4 weeks. For best crunch and flavor, consume within this timeframe.
Can I use regular cucumbers instead of pickling cucumbers?
Yes, but pickling cucumbers are firmer and have fewer seeds, which helps keep the pickles crunchy. Regular slicing cucumbers can work but may yield softer pickles.
Do I need special pickling salt for this recipe?
Pickling salt is recommended because it dissolves easily and doesn’t contain additives that cloud the brine or affect flavor. Kosher salt is a good substitute if pickling salt isn’t available.
Can I make these pickles spicy?
Absolutely! Adding red pepper flakes or fresh jalapeño slices to the jars adds a pleasant heat that complements the dill and garlic nicely.
Is this recipe safe without boiling water canning?
Yes. This is a refrigerator pickle recipe, meaning the jars are stored in the fridge and not shelf-stable. The vinegar and salt preserve the cucumbers safely when refrigerated.
Pin This Recipe!

Crunchy Dill Pickle Spears Recipe Easy Homemade Refrigerator Canning Guide

A quick and easy homemade recipe for crunchy dill pickle spears using a simple refrigerator canning method. Perfect for snacking, condiments, and adding tangy crunch to meals.
- Prep Time: 25 minutes
- Cook Time: 5 minutes
- Total Time: 2 days to 1 week (for optimal flavor)
- Yield: 2-3 quart jars 1x
- Category: Condiment, Snack
- Cuisine: American
Ingredients
- 6–8 medium pickling cucumbers, washed and cut into spears (about 3–4 inches long)
- 4–5 sprigs fresh dill (or about 2 tablespoons chopped dill weed)
- 4 garlic cloves, peeled and smashed
- 2 cups white vinegar (distilled)
- 2 cups water
- 2 tablespoons pickling salt (or kosher salt)
- 1 tablespoon sugar
- 1 teaspoon black peppercorns
- 1/2 teaspoon red pepper flakes (optional)
Instructions
- Rinse cucumbers under cold water and trim off the blossom ends. Slice each cucumber into spears about 3-4 inches long and roughly 1/2 inch thick.
- Place 1-2 sprigs of fresh dill and 2 garlic cloves at the bottom of each sterilized quart-sized mason jar. Tightly pack cucumber spears upright inside the jars, leaving about 1/2 inch headspace.
- In a medium saucepan, combine 2 cups white vinegar, 2 cups water, 2 tablespoons pickling salt, 1 tablespoon sugar, black peppercorns, and red pepper flakes if using. Bring to a boil, stirring until salt and sugar dissolve.
- Carefully pour the hot brine over the cucumbers in each jar, covering the spears completely and leaving about 1/2 inch headspace. Use a clean utensil to release any trapped air bubbles.
- Wipe the rims with a clean cloth and screw on the lids tightly. Let jars cool to room temperature, then refrigerate. Pickles are ready to eat in 48 hours but taste best after 4-5 days. Consume within 3-4 weeks.
Notes
Use pickling or kosher salt to keep brine clear and flavor clean. Trim blossom ends of cucumbers to maintain crunch. Pour hot brine over cucumbers to help absorb flavor and prevent bacterial growth. Do not overcrowd jars. Label jars with date. Keep refrigerator temperature steady at 37-40°F (3-4°C). For extra crunch, add grape leaves or tannin powder. Consume within 3-4 weeks for best quality.
Nutrition
- Serving Size: 1 pickle spear
- Calories: 57
- Sugar: 0.5
- Sodium: 400
- Carbohydrates: 1
- Fiber: 0.3
Keywords: dill pickles, refrigerator pickles, crunchy pickles, homemade pickles, easy pickles, quick pickles, dill pickle spears, pickling recipe