My youngest came home from school last Tuesday with a note pinned to his backpack. “Reminder: Field trip next Friday. Please pack a disposable lunch.” I stared at that note, then at my fridge, then back at the note. The fridge had deli turkey, provolone slices, a half-used pack of Hawaiian rolls, and some butter. That’s it. No time for grocery shopping—I had thirty minutes before I needed to pick up my daughter from dance. So I did what any slightly frazzled parent does. I threw those ingredients together, brushed some butter on top, and baked them until the cheese got all melty and the tops turned golden. The kids devoured them that night, and I realized—these little sliders were perfect for the field trip lunch too.
Honestly, I wasn’t trying to create anything special. I was just trying to survive a Tuesday. But these Easy Deli Turkey and Provolone Lunchbox Sliders became a weekly staple in our house. They’re the kind of thing you make when you need lunch sorted for a few days and you’re too tired to think. The turkey stays juicy, the provolone gets that perfect stretchy pull, and the buttery tops crisp up just enough. My oldest called them “the best lunchbox surprise ever,” and I didn’t correct her. Sometimes the best recipes come from a fridge that’s almost empty and a schedule that’s way too full.
These sliders aren’t fancy. They’re honest, they’re fast, and they’re exactly what you need when you’re packing lunches at 10 PM and your brain is done for the day. Trust me on this one.
Why You’ll Love This Recipe
I’ve tested a lot of slider recipes over the years. Some get soggy. Some fall apart. Some just taste like sad deli meat on bread. These are none of those things. Here’s why this version actually works.
- Comes together in 20 minutes – From fridge to oven in under 10 minutes, then 10 minutes to bake. That’s faster than deciding what to order for takeout.
- Simple ingredients you already have – Deli turkey, provolone, Hawaiian rolls, butter, and a few pantry staples. No fancy grocery run needed. You probably have everything right now.
- Perfect for lunchbox prep – Make a batch on Sunday, and you’ve got lunch sorted for the week. They pack beautifully and taste great cold or reheated.
- Crowd-pleaser for all ages – My kids, their friends, my husband, even my picky mother-in-law—everyone loves these. They’re the definition of a safe bet.
- Unbelievably satisfying – The combination of soft sweet rolls, savory turkey, creamy provolone, and that buttery, slightly salty top is just… perfect. You’ll eat two before you realize it.
What makes these different from every other slider recipe out there? It’s the little details I figured out through trial and error. The way you layer the meat so every bite has filling. The exact butter-to-seasoning ratio so the tops get crispy without burning. The trick to keeping them from getting soggy overnight. I’ve made every mistake so you don’t have to.
This is the recipe you turn to when you need a win. When you’re tired, when you’re busy, when you just need lunch to be done. It’s comfort food that actually works for real life.
What Ingredients You Will Need
This recipe uses simple, everyday ingredients to create something that feels way more special than it should. Most of these are pantry staples or regular fridge items you probably already have on hand.
- Hawaiian sweet rolls (12-count package) – These are non-negotiable in my opinion. The slight sweetness balances the savory turkey and cheese perfectly. King’s Hawaiian is my go-to brand, but any sweet roll works. If you can’t find them, brioche slider buns are a decent substitute—just know the flavor will be a bit less sweet.
- Deli turkey (1 pound, thinly sliced) – Go for oven-roasted or honey-roasted turkey for the best flavor. I like Boar’s Head or Applegate for clean ingredients. Ask the deli counter to slice it thin but not shaved—thick enough to hold up during baking, thin enough to layer easily. About 8-10 slices should do it.
- Provolone cheese (8-10 slices) – Use regular provolone, not smoked, for that classic mild flavor. Sliced from the deli counter melts better than pre-packaged slices. If you want a sharper flavor, swap in cheddar or Swiss. Provolone keeps it mellow and creamy though.
- Unsalted butter (1/4 cup, melted) – Salted butter works too, just reduce the added salt in the seasoning mix. I use unsalted so I control the salt level. Kerrygold is my preference for flavor, but any good butter works.
- Dijon mustard (2 tablespoons) – This adds a subtle tang that cuts through the richness. Yellow mustard works in a pinch, but Dijon gives a more sophisticated flavor. Don’t skip it—it really makes a difference.
- Worcestershire sauce (1 tablespoon) – Adds deep umami flavor. Sounds weird for turkey sliders, but trust me. If you don’t have it, soy sauce works as a substitute (use half the amount).
- Garlic powder (1 teaspoon) – Not garlic salt. Garlic powder distributes evenly and doesn’t add extra salt. Fresh garlic would burn under the broiler, so stick with powder here.
- Onion powder (1/2 teaspoon) – Complements the garlic without being overpowering. If you only have onion salt, skip the extra salt in the recipe.
- Poppy seeds (1 tablespoon) – Optional but highly recommended. They add a lovely crunch and nutty flavor. Sesame seeds work as a substitute if you don’t have poppy seeds on hand.
- Salt and black pepper (to taste) – Go easy on the salt since the deli meat and cheese already have plenty. A good pinch of black pepper is all you need.
That’s it. Ten ingredients, most of which you probably already have. The beauty of this recipe is its simplicity—no complicated sauces, no exotic spices, just solid ingredients that work together.
Equipment Needed
You don’t need a fancy kitchen to make these sliders. Here’s what you’ll need:
- 9×13-inch baking dish – This fits a 12-count package of Hawaiian rolls perfectly. An 8×8 dish works if you only want to make 6 sliders. I’ve also used a cast iron skillet in a pinch—works great, just watch the baking time.
- Sharp knife or serrated bread knife – For cutting the rolls in half without squishing them. A serrated knife works best for soft bread. I ruined a batch once with a dull knife—the rolls got all smushed and uneven.
- Pastry brush – For brushing the butter mixture evenly over the tops. A silicone brush works better than a bristle one for melted butter. If you don’t have one, use a spoon and spread it carefully.
- Small mixing bowl – For whisking together the butter, mustard, Worcestershire, and seasonings. Any small bowl works.
- Aluminum foil – For covering the sliders during the first part of baking. This keeps the tops from browning too quickly while the inside heats through.
- Cooling rack – Optional but helpful for letting the sliders cool evenly after baking. Prevents soggy bottoms.
That’s genuinely all you need. No stand mixer, no food processor, no special gadgets. This is a one-dish, one-bowl recipe that keeps cleanup minimal—exactly what you want when you’re making lunch prep.
Preparation Method
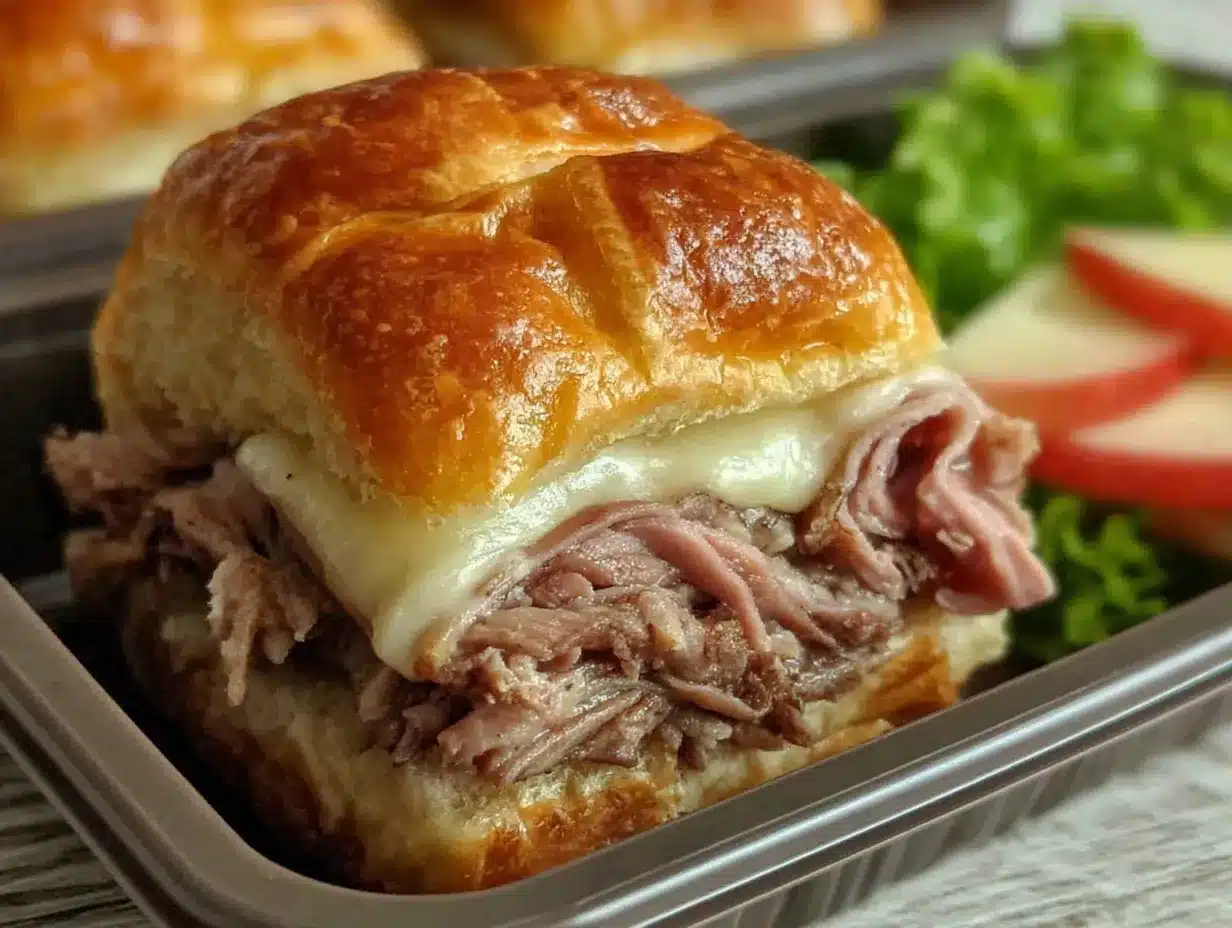
Let me walk you through this step by step. I’ve made these sliders probably forty times now, and I’ve learned a few things along the way. Follow these steps and you’ll get perfect results every time.
- Preheat your oven to 350°F (175°C). Getting the oven hot before you start assembling is key. While it heats, you can prep everything else. Line your baking dish with parchment paper if you want easier cleanup—I usually skip it and just wash the dish.
- Prepare the Hawaiian rolls. Keep the rolls connected in a single slab. Using a serrated knife, carefully slice the entire slab horizontally through the middle. You want the whole top half and bottom half intact. Take your time here—rushing leads to uneven halves and sad sliders. Set the top half aside.
- Place the bottom half in the baking dish. Carefully transfer the bottom half of the rolls to your prepared dish. Make sure it sits flat and even. If the rolls shift around, they’ll be harder to fill evenly.
- Layer the turkey. Start layering your deli turkey slices over the bottom half. Fold each slice slightly to create little pockets of meat—this ensures every bite has turkey in it. Don’t just lay flat slices on top; you want some texture and volume. Use about two-thirds of the turkey for the first layer, then add the remaining slices to fill any gaps. You want complete coverage.
- Add the provolone. Layer the provolone slices evenly over the turkey. Overlap them slightly so the cheese covers the meat completely. The cheese acts as a barrier that helps keep the top bun from getting soggy. If you’re using larger slices, you might only need 6-8. Tear them to fit if needed.
- Place the top half back on. Carefully put the top half of the rolls over the cheese and turkey. Line it up with the bottom half as best you can. Don’t press down—you want the layers to stay fluffy.
- Make the butter mixture. In your small bowl, whisk together the melted butter, Dijon mustard, Worcestershire sauce, garlic powder, onion powder, and a pinch of black pepper. Taste it—it should be savory with a little tang from the mustard. Adjust seasoning if needed, but remember the meat and cheese add salt too.
- Brush the tops. Using your pastry brush, generously brush the butter mixture over the tops of the rolls. Don’t be shy—use all of it. Make sure you get the edges and the sides too. Sprinkle the poppy seeds evenly over the top. If you’re skipping poppy seeds, a pinch of flaky sea salt is lovely here.
- Cover and bake. Cover the dish loosely with aluminum foil. Bake for 10 minutes covered. This steams the sliders gently, melting the cheese and warming the turkey through without burning the tops.
- Uncover and finish baking. Remove the foil and bake for another 5-8 minutes, until the tops are golden brown and the edges are slightly crispy. The cheese should be visibly melted and bubbly around the edges. Watch closely during these last few minutes—ovens vary, and you don’t want burnt rolls.
- Rest before cutting. Let the sliders rest in the dish for 5 minutes. This is important—it lets the cheese set slightly so the sliders hold their shape when you cut them. If you cut too soon, everything slides apart. I learned this the hard way.
- Cut and serve. Using a sharp knife, cut along the seams of the rolls to separate them into individual sliders. A bench scraper works great for this too. Serve warm or let them cool completely before packing for lunches.
The whole process takes about 25 minutes from start to finish. Most of that is hands-off baking time. You can easily prep these while doing other things—I often make them while my kids do homework at the kitchen table.
Cooking Tips & Techniques
After making these sliders dozens of times, I’ve collected some tips that make the difference between good sliders and great ones. Here’s what I’ve learned.
Don’t over-bake them. This is the most common mistake. The sliders are done when the cheese is melted and the tops are golden. If you bake too long, the rolls dry out and the cheese gets tough. Set a timer and check at the 5-minute mark after removing the foil.
Let the butter mixture sit. After you whisk the butter, mustard, and seasonings together, let it sit for a minute. This lets the flavors meld. I once rushed and brushed it on immediately, and the flavor wasn’t as developed. Patience pays off here.
Use room temperature rolls. If your Hawaiian rolls are cold from the fridge, let them sit out for 10 minutes before slicing. Cold rolls are harder to cut cleanly and don’t absorb the butter mixture as well. Room temperature rolls give you better texture.
Layer strategically. I mentioned folding the turkey slices, but here’s why—flat layers slide around when you cut the sliders. Folded or ruffled layers lock together and stay put. Same with the cheese—slightly overlapping slices create a cohesive layer that holds everything together.
Make extra butter mixture. I always make a little extra butter mixture and brush it on the cut sides of the rolls before assembling. This adds flavor and prevents the bread from getting dry during baking. Just a light brush—don’t soak them.
Watch the poppy seeds. Poppy seeds can burn quickly under high heat. If your oven runs hot, check the sliders a couple minutes early. Burnt poppy seeds taste bitter and ruin the whole batch. I’ve definitely done this before.
Let them rest properly. The 5-minute rest isn’t optional. It lets the cheese firm up just enough that the sliders hold their shape when cut. If you skip this step, you’ll end up with a messy pile of meat and cheese instead of neat little sandwiches.
These tips come from trial and error—mostly error, honestly. But that’s how you learn, right? Now I can make these sliders in my sleep, and they turn out perfect every time.
Variations & Adaptations
One of the best things about this recipe is how adaptable it is. Here are some variations I’ve tried and loved.
Turkey and Swiss. Swap the provolone for Swiss cheese for a completely different flavor profile. The nutty, slightly sweet Swiss pairs beautifully with turkey. Add a thin layer of honey mustard for extra depth. My husband prefers this version.
Ham and cheddar. Replace the turkey with deli ham and use sharp cheddar instead of provolone. This gives you a classic ham and cheese slider that’s perfect for game day or potlucks. Add a smear of Dijon mustard to the bottom rolls for a tangy kick.
Italian-style. Use salami, pepperoni, and provolone for an Italian-inspired version. Add a sprinkle of dried oregano and red pepper flakes to the butter mixture. This one disappears fast at parties—I made it for a party snack spread and they were gone in minutes.
Vegetarian option. Skip the meat entirely and layer roasted red peppers, sautéed mushrooms, and fresh spinach with the provolone. The butter mixture works beautifully with vegetables. My vegetarian friend requests this version every time she visits.
Spicy version. Add a teaspoon of sriracha or chipotle powder to the butter mixture. Use pepper jack cheese instead of provolone for extra heat. This is my go-to when I want something with a kick. It pairs great with a cool cucumber salad on the side.
Breakfast sliders. Use the same technique but fill with scrambled eggs, cooked breakfast sausage, and cheddar cheese. Brush the tops with the same butter mixture. Perfect for busy mornings or brunch gatherings.
The beauty of this recipe is the technique—once you master the basic method, you can adapt it to whatever you have in your fridge. It’s a template, not a rigid formula.
Serving & Storage Suggestions
These sliders are versatile when it comes to serving. Here’s how I handle both immediate serving and storage.
Serve warm. These are best served warm, right after the 5-minute rest. The cheese is perfectly melty, the tops are crisp, and the bread is soft. I usually serve them with a side of creamy tomato soup for dipping—the combination is unbeatable.
Room temperature works too. These sliders are honestly delicious at room temperature. If you’re packing them for lunch, they don’t need reheating. The flavors actually meld together more after they’ve sat for a bit. Just let them cool completely before packing.
Storage instructions. Store leftover sliders in an airtight container in the refrigerator for up to 4 days. Layer parchment paper between layers if stacking to prevent sticking. They actually taste better on day two—the flavors have time to meld.
Freezer-friendly. These freeze beautifully. Wrap each slider individually in plastic wrap, then place in a freezer bag. They’ll keep for up to 3 months. To reheat, unwrap and microwave for 30-45 seconds, or pop them in a 350°F oven for 10 minutes straight from frozen.
Reheating tips. For best results, reheat in a toaster oven or air fryer at 350°F for 5-7 minutes. This restores the crispy top while keeping the inside soft. Microwave works in a pinch but the tops will be soft, not crispy.
Packing for lunchboxes. Let the sliders cool completely before packing. Wrap each one in parchment paper or foil to prevent sogginess. Pair with some peanut butter energy bites for a complete lunch that kids actually eat.
The flavors continue developing over time, so don’t be surprised if day-old sliders taste even better than fresh ones. The bread absorbs some of the butter mixture, and everything becomes more cohesive.
Nutritional Information & Benefits
Here’s a rough estimate of what you’re getting per slider (based on 12 sliders total):
| Nutrient | Amount per Slider |
|---|---|
| Calories | 220-250 |
| Protein | 14-16g |
| Carbohydrates | 18-20g |
| Fat | 10-12g |
| Saturated Fat | 5-6g |
| Sodium | 450-500mg |
| Fiber | 1-2g |
| Sugar | 5-6g |
These numbers will vary based on the specific brands and quantities you use. The deli turkey provides lean protein, which helps keep you full through the afternoon. Provolone cheese offers calcium and protein, though it does add saturated fat. The Hawaiian rolls contribute carbohydrates for quick energy—perfect for active kids.
If you’re watching sodium, look for low-sodium deli turkey and reduced-sodium provolone. You can also cut back on the butter mixture slightly. For a lower-carb option, use lettuce wraps instead of Hawaiian rolls—though honestly, the rolls are what make these special.
These sliders aren’t health food, but they’re a balanced lunch option when paired with vegetables or fruit. They’re certainly better than most fast food or processed lunch options. I feel good about packing these for my kids because I know exactly what’s in them.
Conclusion
These Easy Deli Turkey and Provolone Lunchbox Sliders have saved my sanity more times than I can count. They’re the recipe I turn to when I need lunch sorted without a trip to the store, when I’m running late, when I just need one thing to go right. And they always deliver.
What I love most about this recipe is how forgiving it is. You can swap the meat, change the cheese, add different seasonings—it still works. It’s not a precise science. It’s a template for making something good with what you have. That’s real cooking, you know?
Try these sliders this week. Make them for lunch, for a party, for a lazy Sunday dinner. Customize them with whatever you have in your fridge. And when you do, come back and tell me how they turned out. I love hearing about your variations and successes. Drop a comment below or tag me in your photos—I genuinely want to see your creations.
Happy cooking, friends. May your lunchboxes be full and your mornings be easy.
Frequently Asked Questions
Can I make these sliders ahead of time?
Absolutely. Assemble the sliders completely (without brushing the butter mixture), cover tightly, and refrigerate for up to 24 hours. When ready to bake, brush with the butter mixture and bake as directed. You may need to add 5 extra minutes to the covered baking time since they’re starting cold.
Can I use a different type of bread?
Yes, though the results will vary. Brioche slider buns work well. Regular dinner rolls are fine but won’t have the same sweetness. Avoid crusty bread like ciabatta—it doesn’t absorb the butter mixture the same way and can be too chewy for sliders.
How do I prevent the sliders from getting soggy in lunchboxes?
Let them cool completely before packing. Wrap each slider individually in parchment paper or foil. If using a container, add a paper towel to absorb excess moisture. Avoid adding wet ingredients like tomato slices until just before eating.
Can I freeze these sliders?
Yes, they freeze beautifully. Wrap each cooled slider individually in plastic wrap, then place in a freezer bag. They keep for up to 3 months. Thaw overnight in the refrigerator or reheat directly from frozen in a 350°F oven for 10-12 minutes.
What if I don’t have poppy seeds?
No problem. You can skip them entirely, use sesame seeds, everything bagel seasoning, or a sprinkle of flaky sea salt instead. The poppy seeds add texture and visual appeal, but the sliders are still delicious without them.
Pin This Recipe!
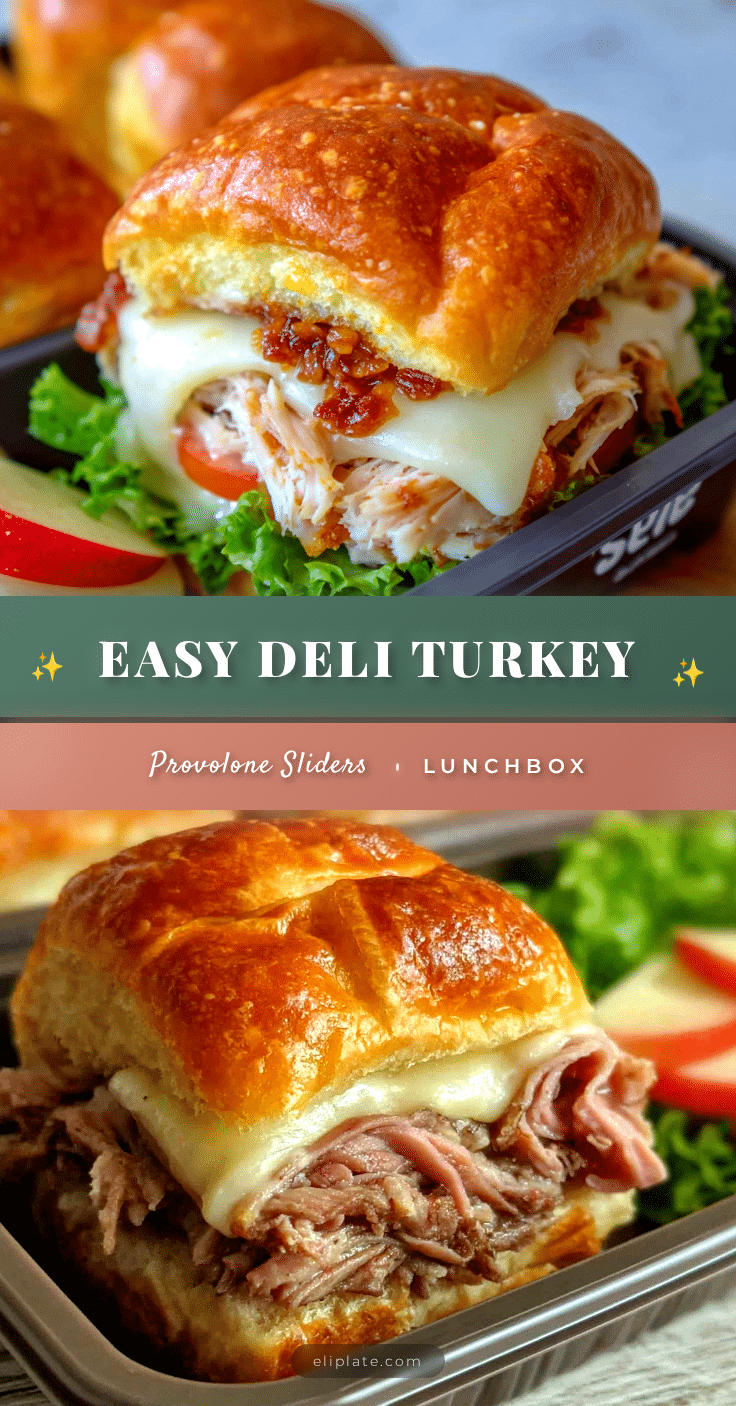
Best Easy Turkey & Provolone Sliders with Lunchbox Prep

These easy deli turkey and provolone sliders are made with Hawaiian rolls, melted provolone, and a buttery topping. Perfect for lunchbox prep, they come together in 20 minutes and are a crowd-pleaser for all ages.
- Prep Time: 10 minutes
- Cook Time: 15 minutes
- Total Time: 25 minutes
- Yield: 12 sliders 1x
- Category: Main Course
- Cuisine: American
Ingredients
- 1 (12-count) package Hawaiian sweet rolls
- 1 pound deli turkey, thinly sliced
- 8–10 slices provolone cheese
- 1/4 cup unsalted butter, melted
- 2 tablespoons Dijon mustard
- 1 tablespoon Worcestershire sauce
- 1 teaspoon garlic powder
- 1/2 teaspoon onion powder
- 1 tablespoon poppy seeds (optional)
- Salt and black pepper to taste
Instructions
- Preheat oven to 350°F (175°C).
- Keep the rolls connected in a single slab. Using a serrated knife, carefully slice the entire slab horizontally through the middle. Set the top half aside.
- Place the bottom half of the rolls in a 9×13-inch baking dish.
- Layer the deli turkey slices over the bottom half, folding each slice slightly to create pockets of meat. Use about two-thirds of the turkey for the first layer, then add remaining slices to fill gaps.
- Layer the provolone slices evenly over the turkey, overlapping slightly.
- Place the top half of the rolls back on over the cheese and turkey.
- In a small bowl, whisk together melted butter, Dijon mustard, Worcestershire sauce, garlic powder, onion powder, and a pinch of black pepper.
- Brush the butter mixture generously over the tops of the rolls, including the edges and sides. Sprinkle poppy seeds evenly over the top.
- Cover the dish loosely with aluminum foil and bake for 10 minutes.
- Remove the foil and bake for another 5-8 minutes, until the tops are golden brown and the edges are slightly crispy.
- Let the sliders rest in the dish for 5 minutes.
- Cut along the seams of the rolls to separate into individual sliders. Serve warm or let cool completely before packing for lunches.
Notes
Let the sliders rest for 5 minutes before cutting to allow the cheese to set. For best results, use room temperature rolls. The sliders can be assembled ahead of time (without the butter mixture) and refrigerated for up to 24 hours before baking. They freeze well for up to 3 months.
Nutrition
- Serving Size: 1 slider
- Calories: 235
- Sugar: 5.5
- Sodium: 475
- Fat: 11
- Saturated Fat: 5.5
- Carbohydrates: 19
- Fiber: 1.5
- Protein: 15
Keywords: turkey sliders, provolone sliders, lunchbox sliders, easy sliders, Hawaiian roll sliders, deli turkey sliders, kid-friendly lunch, make-ahead lunch