Standing at the counter at 6:47 AM, staring at a half-empty package of flour tortillas and a block of cheddar that needed using up. The lunchboxes sat open on the counter like three little hungry mouths, and I had absolutely nothing planned. You know that feeling when the morning is already slipping away and you haven’t even poured your coffee yet? That was me. I grabbed the turkey from the deli drawer, shredded some cheese, and figured I’d just roll something up and hope for the best. Honestly, I wasn’t expecting much — just a functional lunch that wouldn’t come back home uneaten.
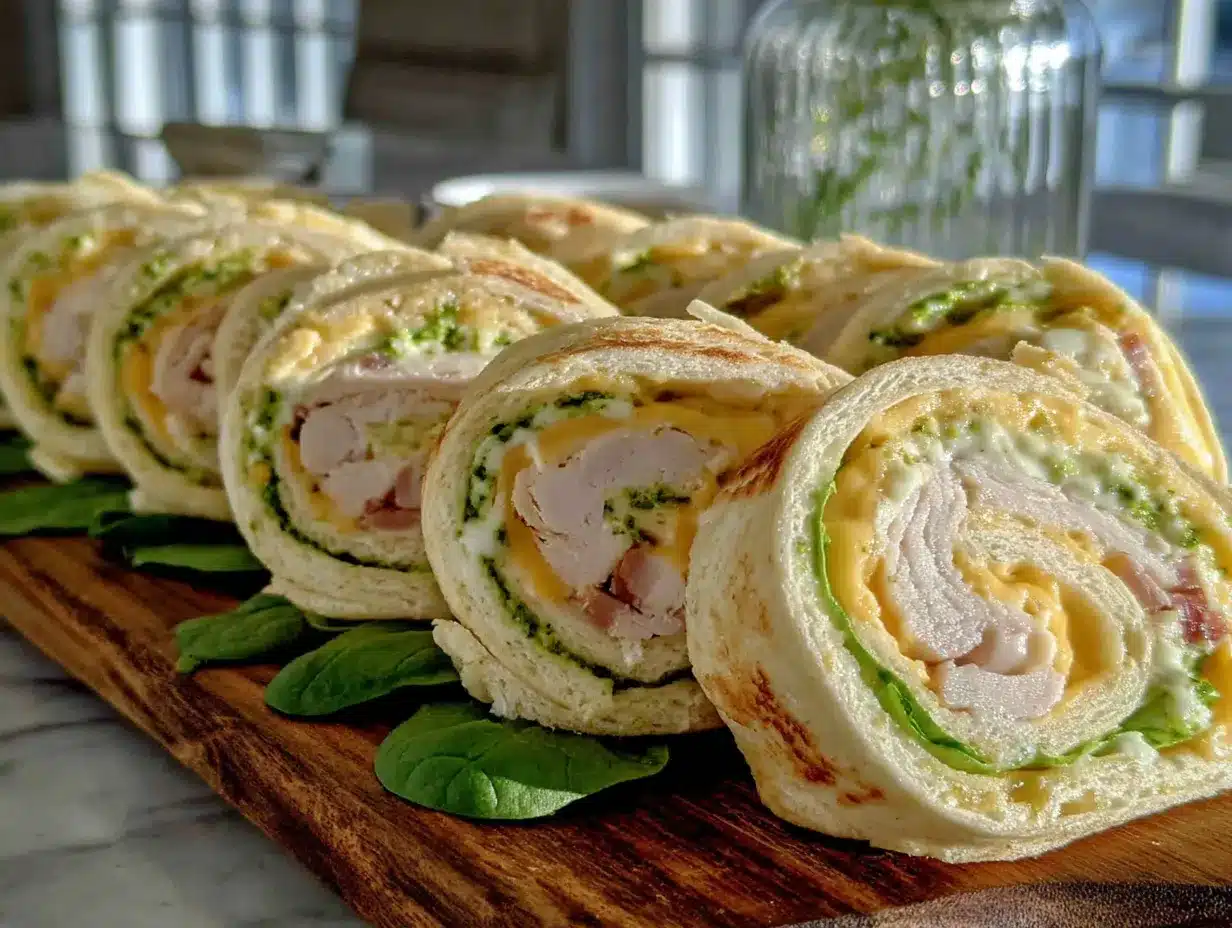
But here’s the thing about these easy turkey cheddar pinwheel sandwiches — they turned out to be the kind of lunch that actually gets eaten. Not just picked at, not traded away, but completely gone by the time the lunchboxes come home. My youngest, who usually eats like a bird, actually asked for them again the next day. That never happens. The cream cheese spread keeps everything soft and holds the roll together, the turkey adds that savory protein punch, and the cheddar gives it that familiar, comforting flavor kids actually want. No sad, soggy sandwiches here.
These pinwheels have become my secret weapon for mornings when I need something fast that doesn’t look like an afterthought. They take maybe ten minutes to throw together, and they actually look kind of impressive sitting there in the lunchbox — like I tried, even when I absolutely did not have time to try. That’s the kind of win I’ll take any day of the week.
Why You’ll Love This Recipe
Let me tell you why these pinwheel sandwiches have earned a permanent spot in my weekly rotation. I’ve tested them through three different lunchbox styles, two picky eaters, and one very skeptical husband who claimed he “doesn’t do rolled sandwiches.” He does now.
- Ready in Under 10 Minutes : No cooking, no heating, no fuss. By the time you’ve poured your coffee, these are done. Perfect for those mornings when you’re running on autopilot.
- Simple Ingredients You Already Have : Tortillas, deli turkey, cheddar cheese, cream cheese — that’s it. No fancy grocery runs required. I’ve made these with whatever cheese was in the drawer and they still worked beautifully.
- Perfect for Lunchboxes : They hold up remarkably well. No squished bread, no separated layers. Just neat little spirals that stay intact until lunchtime.
- Crowd-Pleaser for All Ages : Kids love the fun shape, adults appreciate the portability. I’ve packed these for school lunches, work lunches, and even road trip snacks.
- Endlessly Customizable : Swap the turkey for ham, use pepper jack for a kick, add veggies — this recipe is a template, not a rulebook.
What makes these different from every other pinwheel recipe out there? It’s the cream cheese technique. Instead of just layering ingredients and hoping they stay put, the cream cheese acts like edible glue that keeps everything rolled tight. No toothpicks needed, no unrolling disasters. I learned this after one too many sad, flattened pinwheels that looked more like a crime scene than lunch. This version actually works.
These sandwiches aren’t just convenient — they’re the kind of lunch that makes you feel like you’ve got your act together. Even when you absolutely don’t. And honestly? That feeling is worth more than any fancy recipe.
What Ingredients You Will Need
This recipe uses simple, everyday ingredients to create something that feels surprisingly special. Here’s what you’ll need and why each one matters:
For the Pinwheel Base
- Large flour tortillas (10-inch) — Burrito-sized works best for getting enough filling in each roll. I prefer Mission or Old El Paso for their flexibility, but any brand works. If your tortillas seem stiff, microwave them for 10 seconds to make them pliable and prevent cracking.
- Deli turkey breast (8-10 slices per wrap) — Go for quality here. I like Boar’s Head or Applegate for clean ingredients, but any deli turkey works. Ask for thicker slices at the counter — they hold up better than the paper-thin pre-packaged stuff.
- Cheddar cheese (4-6 slices per wrap) — Sharp cheddar gives more flavor, but mild works great for kids. Block cheese sliced at home melts better and doesn’t get that waxy texture. Pro tip: let the cheese come to room temperature so it doesn’t crack when you roll.
- Cream cheese (3-4 tablespoons per wrap) — This is the secret weapon. Full-fat cream cheese spreads best and holds everything together. Let it soften on the counter for 15 minutes before using — cold cream cheese will tear your tortilla every time.
Optional Add-Ins
- Lettuce leaves — Romaine or butter lettuce adds crunch. Pat them completely dry with paper towels first, or they’ll make your pinwheels soggy by lunchtime.
- Thinly sliced cucumber — Adds freshness and a nice cool crunch. Remove the seeds if your kids are picky about texture.
- Mustard or mayo — Spread a thin layer over the cream cheese for extra flavor. Dijon mustard is my personal favorite — it cuts through the richness beautifully.
- Spinach leaves — A handful of fresh spinach adds color and nutrients without changing the flavor much. My kids don’t even notice it’s there.
Ingredient Selection Tips
Look for tortillas that are soft and flexible, not dry or cracked at the edges. If your tortillas are on the smaller side, use less filling and expect smaller pinwheels — they’ll still taste great. For the cream cheese, avoid the low-fat versions if you can; they have a different texture and don’t spread as smoothly. I learned this the hard way after a particularly frustrating morning of torn tortillas and lumpy spreads. Trust me on this one.
Substitution Guidance
Use gluten-free tortillas for a celiac-friendly version — just warm them slightly to prevent cracking. Swap turkey for ham, roast beef, or even rotisserie chicken for variety. No cheddar? Try provolone, mozzarella, or pepper jack. The cream cheese is non-negotiable for structure, but you can use dairy-free cream cheese if needed (just let it soften extra).
Equipment Needed
You don’t need much to make these pinwheels, which is exactly why I love this recipe. Here’s what you’ll want on hand:
- Cutting board — A large, flat surface for assembly. Nothing fancy needed.
- Butter knife or offset spatula — For spreading the cream cheese evenly. An offset spatula gives you better control, but a regular butter knife works fine.
- Sharp chef’s knife — A clean, sharp knife makes all the difference. Dull blades will squish your pinwheels instead of cutting through them cleanly. I use a Wusthof 8-inch chef’s knife, but any sharp knife will do.
- Plastic wrap — For wrapping the rolls before chilling. This keeps them tight and prevents them from drying out.
- Baking sheet or large plate — To hold the wrapped rolls in the fridge. A baking sheet is nice because it gives you a flat surface.
- Toothpicks (optional) — If you’re packing these for older kids or adults, a toothpick through the center helps keep everything together. Skip them for younger children.
I’ve made these with just a butter knife and a cutting board in a pinch, and they turned out fine. The plastic wrap is the one thing I wouldn’t skip — it really does help the rolls hold their shape. If you don’t have plastic wrap, you can use beeswax wraps or even press the rolls gently with your hands before cutting.
Preparation Method
Ready to make the best lunchbox pinwheels of your life? Here’s exactly how to do it, step by step. I’ve included all the little tricks I learned from trial and error so you don’t have to make the same mistakes I did.
Step 1: Prep Your Ingredients
Take the cream cheese out of the fridge about 15 minutes before you start. You want it soft and spreadable — cold cream cheese will tear your tortillas and leave you with lumpy, uneven coverage. While that’s softening, lay your tortillas flat on a clean cutting board. If they seem stiff or dry around the edges, microwave them for 10 seconds between damp paper towels. This makes them flexible and less likely to crack when you roll.
Step 2: Spread the Cream Cheese
Using your butter knife or offset spatula, spread a thin, even layer of cream cheese over the entire surface of each tortilla. Go all the way to the edges — this is what seals the roll and keeps everything from sliding around. You want just enough to coat the surface without it being gloppy. Think of it like buttering toast: even coverage, not too thick. I use about 3 tablespoons per large tortilla.
Step 3: Layer the Turkey
Place your turkey slices flat over the cream cheese, overlapping them slightly. You want complete coverage with no gaps — bare spots mean some bites will be all tortilla and no filling. I use about 8-10 slices per wrap, depending on the size of the slices. If your turkey is pre-packaged and very thin, you might need more. Press the turkey down gently so it sticks to the cream cheese.
Step 4: Add the Cheese
Lay your cheddar slices over the turkey, again overlapping slightly. If you’re using shredded cheese, sprinkle it evenly across the surface. Leave about an inch of space at the far end of the tortilla — this bare strip will help seal the roll when you finish. Trust me, I learned this after making rolls that wouldn’t stay closed.
Step 5: Add Any Extras
If you’re adding lettuce, cucumber, or spinach, lay them in a single layer over the cheese. Don’t pile them too thick, or your pinwheels will be bulky and hard to cut. A thin, even layer is all you need.
Step 6: Roll It Tight
Starting from the edge closest to you, begin rolling the tortilla away from you, keeping it as tight as you can without tearing. Use your fingers to hold the filling in place as you go. When you reach the bare inch at the end, press it down firmly to seal. The cream cheese should act like glue here, holding everything in place. If it doesn’t stick, dab a little extra cream cheese on the edge.
Step 7: Wrap and Chill
Wrap each roll tightly in plastic wrap, twisting the ends like a candy wrapper. This keeps the roll compressed and helps the cream cheese set. Place the wrapped rolls on a baking sheet or plate and refrigerate for at least 30 minutes. An hour is better if you have the time. This step is crucial — without it, your pinwheels will fall apart when you cut them. I know it’s tempting to skip, but don’t.
Step 8: Slice and Pack
After chilling, unwrap the rolls and place them on a clean cutting board. Using a sharp chef’s knife, slice each roll into 1-inch pieces. Use a gentle sawing motion rather than pressing straight down — this keeps the pinwheels round instead of squished. You should get about 6-8 pinwheels per large tortilla. Pack them snugly in the lunchbox so they don’t unroll during transport.
Sensory cues to watch for: The cream cheese should feel firm but not hard when you slice. The roll should feel solid and compact, not loose or squishy. If your pinwheels are falling apart, you either didn’t chill them long enough or didn’t use enough cream cheese. Adjust next time and you’ll be golden.
Cooking Tips & Techniques
After making these pinwheels more times than I can count, I’ve collected a few tricks that make the process smoother and the results better. Here’s what I wish someone had told me from the start.
The cream cheese temperature rule is non-negotiable. I once tried to rush things and used cold cream cheese straight from the fridge. The tortilla tore in three places, the spread was lumpy, and the whole roll looked like a disaster. Let it sit out for 15-20 minutes. Your future self will thank you.
Don’t overfill your tortillas. It’s tempting to pile on the good stuff, but too much filling makes the roll bulky and hard to cut. The ingredients will start squeezing out the ends, and you’ll end up with messy, uneven pinwheels. Less is genuinely more here.
Use a serrated knife for cutting if your chef’s knife isn’t razor-sharp. A dull blade will squish your beautiful roll flat before it even gets through the first layer. I learned this after ruining an entire batch for a school party. A serrated bread knife actually works beautifully — it saws through without crushing.
Chill time matters more than you think. Thirty minutes is the absolute minimum, but an hour gives you much cleaner cuts. If you’re making these for the next day’s lunch, assemble them the night before and let them chill overnight. The flavors actually meld together better, and the texture improves.
For meal prep, keep the rolls whole until you’re ready to pack them. Whole rolls stay fresh longer than sliced pinwheels. Just wrap them tightly and slice in the morning before packing. This is a game-changer for busy weeks.
If your pinwheels keep unrolling, you’re not using enough cream cheese on the edge. That final inch needs a generous smear to act as glue. I double-check this every time now, and I haven’t had an unrolling incident since.
Variations & Adaptations
One of the best things about this recipe is how adaptable it is. Here are some of my favorite variations that keep lunchboxes interesting all week long.
The Italian Job
Swap turkey for salami and provolone, add a smear of pesto under the cream cheese, and throw in some roasted red peppers. It’s like an Italian sub in pinwheel form. My husband requests these for his work lunches constantly.
The Garden Veggie
Skip the meat entirely and load up on thinly sliced cucumber, bell pepper strips, shredded carrots, and fresh spinach. Use herb and garlic cream cheese for extra flavor. Even my meat-loving kids eat these without complaint.
The Spicy Southwest
Use pepper jack cheese instead of cheddar, add a thin layer of refried beans under the cream cheese, and sprinkle in some diced jalapeños (or leave them out for milder palates). Turkey or chicken both work great here.
The Breakfast Twist
Spread cream cheese mixed with a little maple syrup, layer on thin slices of ham or bacon, and add a sprinkle of shredded cheddar. These make excellent morning snacks or brunch appetizers.
Dietary Adaptations
For gluten-free needs, use corn tortillas or gluten-free wraps — just warm them first so they don’t crack. For dairy-free, use vegan cream cheese and your favorite dairy-free cheese slices. For lower-carb, use large lettuce leaves instead of tortillas and roll them like wraps. Each version works beautifully with a little adjustment.
I personally love the Italian variation for grown-up lunchboxes. It feels indulgent without being complicated, and the pesto adds such a lovely depth of flavor. Pair these with some easy DIY snack board lunchbox ideas for a complete meal that feels special.
Serving & Storage Suggestions
These pinwheels are incredibly versatile when it comes to serving and storing. Here’s everything you need to know to keep them at their best.
Serving temperature: I prefer these cold or at room temperature. If you’re packing them for lunch, they’ll naturally come to room temp by the time lunch rolls around. For parties or snacks, serve them straight from the fridge — they hold up beautifully.
Presentation ideas: Arrange the pinwheels cut-side up on a platter for parties. They look gorgeous with the spiral pattern showing. For lunchboxes, pack them snugly in a container so they don’t roll around and uncurl. A bento box works perfectly.
What to serve with them: These pair wonderfully with fresh fruit, carrot sticks, or a small salad. For a heartier lunch, add a side of creamy cucumber tomato salad for a refreshing contrast. They also go great with a cup of soup on cold days.
Storage instructions: Keep assembled but unsliced rolls wrapped tightly in plastic wrap in the refrigerator for up to 3 days. Sliced pinwheels will last 2 days in an airtight container. I don’t recommend freezing these — the cream cheese gets grainy and the tortillas become soggy when thawed.
Reheating notes: These are meant to be served cold or at room temperature, so no reheating needed. If you want a warm version, you can toast the assembled rolls in a dry skillet for 1-2 minutes per side before slicing. It gives them a lovely crispy exterior and melty interior.
Flavor development: Interestingly, these pinwheels taste even better the next day. The flavors meld together overnight, and the cream cheese firms up perfectly. I actually prefer day-old pinwheels to fresh ones. The texture is just right.
For busy mornings, I like to make a batch of these alongside some easy make-ahead egg muffins for a complete grab-and-go breakfast or lunch solution. They both keep well and make mornings so much smoother.
Nutritional Information & Benefits
Here’s a rough nutritional breakdown for one pinwheel (based on 8 pinwheels per wrap, using full-fat cream cheese and sharp cheddar):
| Nutrient | Amount Per Pinwheel |
|---|---|
| Calories | 110-130 |
| Protein | 8-10g |
| Carbohydrates | 8-10g |
| Fat | 6-8g |
| Fiber | 1-2g |
| Sodium | 250-350mg |
Health benefits: Turkey is an excellent lean protein source that helps keep kids full and focused through the school day. Cheddar provides calcium for strong bones and teeth, plus a good dose of vitamin A. The cream cheese adds a small amount of protein and healthy fats that make these pinwheels satisfying without being heavy.
Dietary considerations: This recipe can easily be made gluten-free with appropriate tortillas. For lower-sodium diets, look for low-sodium deli turkey and reduced-sodium cheese. The recipe is naturally nut-free, which makes it school-safe for many classrooms.
Potential allergens: Contains dairy (cream cheese, cheddar) and gluten (tortillas). Always check your specific ingredient labels if allergies are a concern.
I love that these pinwheels pack a decent protein punch without feeling heavy. They keep my kids full until afternoon snack time, which is more than I can say for some of the other lunch options I’ve tried. For a balanced lunchbox, I pair these with some fruit and a peanut butter energy bite for a complete meal that covers all the bases.
Conclusion
These easy turkey cheddar pinwheel sandwiches have genuinely changed my lunch-packing game. They’re fast enough for chaotic mornings, sturdy enough to survive a lunchbox, and tasty enough that nobody complains. Honestly, that’s a rare combination in the world of packed lunches.
What I love most about this recipe is how forgiving it is. You can swap ingredients, adjust portions, add whatever’s in your fridge — and they still turn out great. It’s not a fussy recipe that demands precision. It’s a reliable, no-stress solution that makes you look like you’ve got your life together, even when you absolutely don’t.
I’d love to hear how these turn out for you. Did you try a fun variation? Did your kids actually eat them? Drop a comment below and let me know — I read every single one and I’m always looking for new ideas to try. And if you loved this recipe, share it with a friend who’s tired of the same old lunchbox routine. We could all use a little less morning stress and a little more easy wins.
Happy lunch packing, friends. You’ve got this.
Frequently Asked Questions
Can I make these pinwheels the night before?
Absolutely! In fact, I recommend it. Assemble the rolls, wrap them tightly in plastic wrap, and refrigerate overnight. The flavors meld together beautifully, and the cream cheese sets perfectly for clean slicing in the morning. Just slice them before packing into lunchboxes.
How do I keep pinwheels from getting soggy in the lunchbox?
The key is moisture control. Pat any veggies completely dry before adding them, and don’t overdo the cream cheese. Also, letting the rolls chill for at least 30 minutes before slicing helps them hold their structure. If you’re worried about sogginess, pack any wet ingredients like cucumber or tomato separately and add them just before eating.
What’s the best way to cut pinwheels without squishing them?
Use a very sharp knife and a gentle sawing motion. A serrated knife actually works better than a straight blade for this — it cuts through without compressing the roll. Chill the rolls thoroughly before cutting, and clean your knife between cuts for the cleanest slices.
Can I use different types of cheese?
Yes, and I encourage it! Provolone, mozzarella, pepper jack, Swiss, or even smoked gouda all work wonderfully. Just make sure whatever cheese you use slices thinly and evenly. Hard cheeses like Parmesan don’t work as well since they don’t bend with the roll.
How long do these pinwheels last in the refrigerator?
Whole, unsliced rolls will keep for up to 3 days in the refrigerator when wrapped tightly. Sliced pinwheels are best within 2 days. After that, the tortillas start to dry out and the edges can get a little tough. I don’t recommend freezing them — the texture changes too much upon thawing.
Pin This Recipe!

Easy Turkey Cheddar Pinwheel Sandwiches: Best Lunchbox Idea

These easy turkey cheddar pinwheel sandwiches are the perfect lunchbox solution—ready in under 10 minutes with simple ingredients. The cream cheese spread keeps everything soft and holds the roll together, making them a crowd-pleaser for all ages.
- Prep Time: 10 minutes
- Cook Time: 0 minutes
- Total Time: 40 minutes (including chilling)
- Yield: 4 servings 1x
- Category: Lunch
- Cuisine: American
Ingredients
- 4 large flour tortillas (10-inch)
- 8–10 slices deli turkey breast per wrap
- 4–6 slices cheddar cheese per wrap
- 3–4 tablespoons cream cheese per wrap
- Optional: lettuce leaves
- Optional: thinly sliced cucumber
- Optional: mustard or mayo
- Optional: spinach leaves
Instructions
- Take the cream cheese out of the fridge about 15 minutes before starting to let it soften. Lay tortillas flat on a cutting board; if stiff, microwave for 10 seconds between damp paper towels.
- Spread a thin, even layer of cream cheese over the entire surface of each tortilla, going all the way to the edges.
- Place turkey slices flat over the cream cheese, overlapping slightly to cover completely. Press down gently.
- Lay cheddar slices over the turkey, overlapping slightly. Leave about 1 inch of space at the far end of the tortilla.
- If using, add lettuce, cucumber, or spinach in a single layer over the cheese.
- Starting from the edge closest to you, roll the tortilla away from you as tightly as possible without tearing. Press the bare inch at the end firmly to seal.
- Wrap each roll tightly in plastic wrap, twisting the ends. Refrigerate for at least 30 minutes (1 hour is better).
- After chilling, unwrap rolls and slice into 1-inch pieces using a sharp chef’s knife with a gentle sawing motion. Pack snugly in lunchboxes.
Notes
Cream cheese must be at room temperature to avoid tearing tortillas. Chill rolls thoroughly before slicing for clean cuts. For meal prep, keep rolls whole and slice just before packing. Use a serrated knife if chef’s knife isn’t sharp.
Nutrition
- Serving Size: 1 pinwheel (based on
- Calories: 120
- Sugar: 1
- Sodium: 300
- Fat: 7
- Saturated Fat: 3.5
- Carbohydrates: 9
- Fiber: 1
- Protein: 9
Keywords: turkey cheddar pinwheel sandwiches, lunchbox ideas, easy lunch, no-cook lunch, pinwheel sandwiches, kid-friendly lunch