Third time this week I found myself staring into the fridge at 8:47 AM, and that’s when it hit me—I was overcomplicating snack time by about fifteen steps. My three-year-old had started rejecting the neatly arranged plates I’d been preparing, and honestly, I was losing my mind over something that should have been simple. The bento-style snack box wasn’t just a trend I’d seen on social media; it was becoming a survival strategy in our house.
The first attempt was a disaster, let me tell you. I tried to cram too many things in there, and my kid just pushed the whole thing away. But by the fourth try, something clicked. I stopped trying to make it Instagram-worthy and started making it practical. These easy 5-minute preschool snack boxes became our morning ritual, and I haven’t looked back since.
The beauty of this approach is that it takes the pressure off. You’re not preparing a meal—you’re assembling a little adventure in a container. And when you find the right combination of textures and flavors, something magical happens. They actually eat it. The whole thing. Without a single negotiation.
So here’s what I learned through trial and error, spilled yogurt, and more rejected cheese cubes than I care to admit. These no-cook bento boxes are about to change your mornings too.
Why You’ll Love This Recipe
Let me tell you why these snack boxes have become the unsung hero of our preschool routine. First off, they take exactly five minutes to assemble—I’ve timed myself. No cooking, no heating, no standing over a stove while your child is asking you for the forty-seventh time if snack is ready.
- Quick & Easy: Five minutes from start to finish. That includes washing fruit and cutting cheese. I’m not joking.
- Simple Ingredients: Everything comes from your regular grocery run. No specialty stores, no obscure ingredients that cost a fortune.
- Perfect for Busy Mornings: Whether you’re heading to preschool, daycare, or just need a park-friendly snack, these boxes travel beautifully.
- Crowd-Pleaser: I’ve made these for playdates, and every single kid cleaned their box. Even the picky ones.
- Unbelievably Versatile: You can switch up the components daily without getting bored, and your child never knows what fun combination they’ll get.
What makes this different from just throwing snacks in a bag? The presentation matters, honestly. There’s something about having compartments that makes kids feel like they’re getting a treat. Plus, portion control happens naturally when you’re working with a divided container. I’ve tested this with my own child and with friends’ kids, and the bento format consistently wins over a regular plate or bowl.
This isn’t just about feeding your kid—it’s about giving yourself a break. No more arguing over what’s for snack, no more last-minute scrambles, and definitely no more feeling guilty about feeding them processed junk because you ran out of time.
What Ingredients You Will Need
Here’s the thing about these snack boxes—you don’t need a complicated shopping list. The whole point is using what you have and making it work. But let me walk you through the components that make these boxes actually successful, based on what I’ve learned from many, many attempts.
Fresh Fruits
- Apple slices (tossed in a little lemon juice to prevent browning)
- Banana coins or half slices
- Grapes (halved lengthwise for safety)
- Blueberries or raspberries
- Strawberry slices
- Melon balls or cubes
- Peach or nectarine slices (in season)
Vegetable Options
- Mini cucumber rounds
- Cherry tomatoes (halved)
- Bell pepper strips (any color works)
- Carrot sticks or coins (steamed if your child prefers them softer)
- Snap peas (whole or halved)
- Avocado slices (squeeze with lime to keep green)
Protein Sources
- Cheese cubes or sticks (I prefer cheddar or mozzarella)
- Hard-boiled eggs (make a batch at the start of the week)
- Turkey or chicken roll-ups (just roll a slice and slice into pinwheels)
- Hummus (individual cups or a small container)
- Greek yogurt (plain or vanilla, in a small container)
- Peanut butter or almond butter (for dipping apple slices)
- Edamame (shelled and lightly salted)
Crunchy Elements
- Whole-grain crackers (I like the mini ones for little hands)
- Rice cakes (plain or lightly salted)
- Pretzel sticks or twists
- Pita chips or tortilla chips
- Cheese crackers or fish crackers
- Popcorn (plain or lightly buttered)
Fun Extras
- Dried fruit (raisins, apricots, mango strips)
- Granola or muesli (check for added sugar)
- Nut-free seed butter (for schools with restrictions)
- Mini muffins (make a batch and freeze them)
- Yogurt-covered raisins or pretzels
- Dark chocolate chips (a small handful goes a long way)
I always keep a stash of these staples in my pantry and fridge. The key is having at least three categories represented in each box—a fruit, a protein, and a crunch. That combination keeps them full and happy until lunchtime.
Equipment Needed
You don’t need much for this, which is the whole point. Here’s what actually makes the process easier:
- A bento-style lunchbox with compartments. I’ve tried about six different brands, and the ones with silicone dividers are easiest to clean. The PlanetBox and Bentgo brands have held up well in our house.
- A sharp paring knife for cutting fruits and vegetables. A dull knife makes everything take twice as long.
- A cutting board with a juice groove—trust me, it keeps your counter from getting sticky.
- Small silicone cups or mini containers for dips, yogurt, or wet ingredients. These prevent everything from getting soggy.
- Cookie cutters in fun shapes (optional, but my kid goes crazy for star-shaped cheese slices).
- A vegetable peeler for carrots and cucumber strips.
- An apple slicer if you’re doing apples regularly—it saves about thirty seconds per apple, and those seconds add up.
If you don’t have a bento box, don’t worry. A regular lunchbox with silicone muffin cups works just as well. I’ve also used small glass containers with dividers, and they work great. The key is keeping wet and dry ingredients separate so nothing gets mushy.
Preparation Method
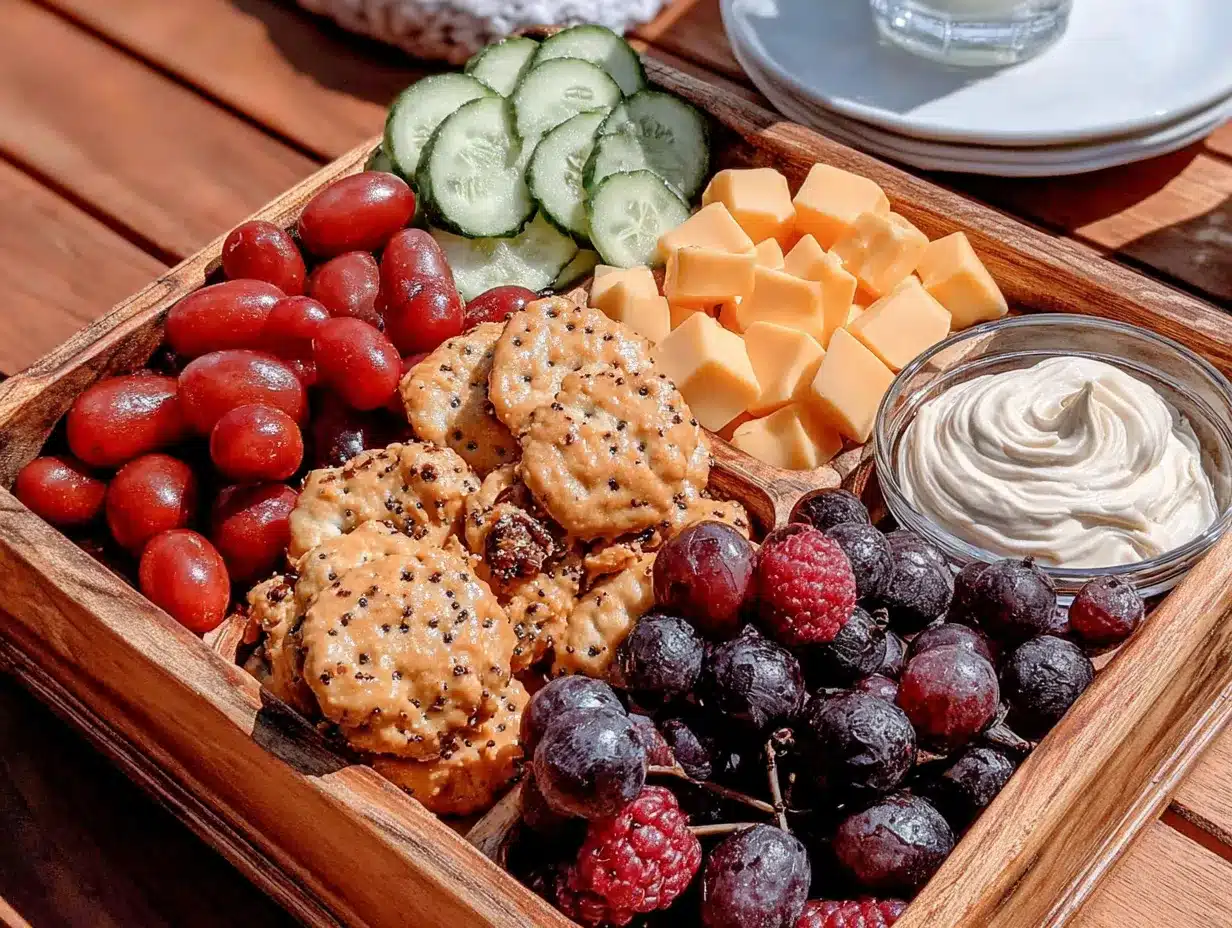
Alright, let me walk you through exactly how I put these together in five minutes flat. I’ve streamlined this process through trial and error, and I promise it works.
Step 1: Wash and Prep Your Produce (1 minute)
Start by washing whatever fruit and vegetables you’re using. I keep a colander in the sink and rinse everything at once. Then, cut your fruit into kid-friendly pieces. For apples, I cut them into thin wedges or use the apple slicer. For grapes, I always cut them lengthwise—it’s safer for little ones. For berries, I just rinse them and leave them whole. Toss apple slices in a little lemon juice or pineapple juice to keep them from browning.
Step 2: Arrange the Protein (1 minute)
This is where the bento box shines. Put your protein in the largest compartment. If you’re using cheese cubes, arrange them in a single layer. For roll-ups, slice them into pinwheels about half an inch thick. If you’re using hummus or yogurt, spoon it into a small silicone cup first, then place that cup in the compartment. This prevents leaks and keeps everything tidy.
Step 3: Add the Crunch (1 minute)
Fill one of the smaller compartments with crackers, pretzels, or whatever crunchy element you chose. I like to stand crackers up on their edges—it looks more appealing and they stay crisp longer. If you’re using popcorn, pack it loosely so it doesn’t get crushed.
Step 4: Fill with Fruits and Vegetables (1 minute)
This is the fun part. Arrange your fruit pieces in one compartment and vegetables in another. I try to create a little color contrast—red strawberries next to green cucumber slices, orange melon next to purple grapes. Kids eat with their eyes first, and a pretty box is more likely to get eaten.
Step 5: Add the Fun Touch (30 seconds)
This is optional but highly effective. Add a small treat or fun element—a few dark chocolate chips, a yogurt-covered raisin, or a star-shaped cheese piece. It makes the box feel special without adding much sugar or effort. I also like to add a little note or sticker on the lid sometimes.
Step 6: Close and Store (30 seconds)
Snap the lid on securely. If you’re making these the night before, store them in the refrigerator. If you’re making them in the morning, they’re good at room temperature for a few hours. I usually make three at a time on Sunday night and grab one each morning.
And that’s it. Six minutes max, including cleanup. The first few times might take you eight or nine minutes, but once you get into a rhythm, you’ll be done before your coffee finishes brewing.
Cooking Tips & Techniques
I’ve made plenty of mistakes with these boxes, and I want you to learn from them so you don’t have to.
The Soggy Crackers Problem
This was my biggest failure early on. I’d put crackers next to grapes, and by snack time, everything was a sad, mushy mess. The solution is simple: keep wet and dry ingredients in separate compartments. If your box doesn’t have enough dividers, use those silicone cups I mentioned. They’re a game-changer.
The Browning Apple Issue
Apple slices turning brown is a cosmetic issue, but kids notice. A quick toss in lemon juice works, but if you don’t have lemons, try pineapple juice or even a splash of orange juice. Salt water works too, but rinse them after. I’ve also found that Honeycrisp and Fuji apples brown slower than Granny Smiths.
Portion Sizing for Little Appetites
Here’s what I learned the hard way: less is more. A preschooler’s stomach is about the size of their fist. If you pack too much, they get overwhelmed and might not eat anything. Stick to two to three options from each category, and keep portions small. You can always add more if they’re still hungry.
The Temperature Trick
If you’re making these the night before, keep the whole box in the fridge. But if your child doesn’t like cold food, let it sit on the counter for ten minutes before serving. For yogurt or cheese, this makes a huge difference in how appealing it looks.
Batch Prep Strategy
I spend twenty minutes on Sunday evening washing and cutting all my fruit and vegetables for the week. Then each morning, I just grab pre-cut ingredients and assemble. This cuts my morning time down to about two minutes. If you have a food processor with a slicing disc, use it for vegetables—it’s a total time-saver.
Variations & Adaptations
The beauty of these snack boxes is how customizable they are. Here are some variations I’ve tried and loved:
Seasonal Fruit Swap
In summer, I use fresh peaches, nectarines, and watermelon. In fall, it’s apples and pears. Winter brings clementines and pomegranate seeds. Spring means strawberries and rhubarb (cooked lightly). Following the seasons keeps things interesting and usually saves money too.
Protein Alternatives
If your child is allergic to nuts, skip the peanut butter and try sun butter or wow butter instead. For dairy-free kids, use coconut yogurt and nut-based cheese alternatives. Hard-boiled eggs are always a safe bet, and they’re packed with protein. For a vegetarian option, try edamame or chickpeas.
Dipping Sauces Make Everything Better
Kids love to dip. Include a small container of ranch dressing for vegetables, hummus for crackers, or yogurt for fruit. I’ve seen kids eat vegetables they normally refuse just because they got to dip them. It’s like magic.
Themed Snack Boxes
This is where it gets fun. For a “rainbow box,” include red strawberries, orange cheese, yellow bell peppers, green cucumber, and blueberries. For a “taco Tuesday” box, use tortilla chips, salsa, cheese cubes, and avocado. For a “breakfast for snack” box, include mini pancakes (make ahead and freeze), yogurt, and berries. My personal favorite is the “picnic box” with mini sandwiches, grapes, and cheese cubes—it’s like a turkey and cheese pinwheel situation but even simpler.
Texture Variations
Some kids love crunch, others prefer soft foods. If your child is texture-sensitive, stick to softer options like yogurt, bananas, avocado, and cheese. For crunch lovers, add more crackers, pretzels, and raw vegetables. You can also mix textures within the same box—that’s actually the most successful approach.
Serving & Storage Suggestions
These snack boxes are designed to be portable, but how you serve them makes a difference.
Serving Temperature
I prefer serving these at room temperature. Cold cheese and fruit can be less appealing to little ones. If you’ve stored them in the fridge, let them sit out for about ten minutes before serving. For yogurt, I sometimes microwave it for five seconds to take the chill off—just make sure it’s not hot.
Presentation Matters
Arrange the food in a visually appealing way. I group similar colors together and leave a little space between different items. If you have a bento box with a lid, the presentation stays intact. For regular containers, use those silicone cups to keep things separated and pretty.
Storage Instructions
These boxes will keep in the refrigerator for up to three days if you’re using fresh ingredients. I don’t recommend freezing them—the texture of fruits and vegetables suffers. If you’re making a batch for the week, prep the ingredients separately and assemble each morning. That way, everything stays fresh.
Reheating Tips
Most of these components don’t need reheating, but if you’ve included hard-boiled eggs or cooked vegetables, you can warm them slightly. Just remove them from the box and microwave for ten seconds. Let them cool before putting them back in the container.
Flavor Development
Here’s something interesting—some flavors actually improve after sitting for a few hours. Hummus develops a deeper flavor, and the salt from crackers can season the cheese slightly. I’ve found that boxes made the night before often taste better than freshly assembled ones. The flavors meld together in a really pleasant way.
Nutritional Information & Benefits
These snack boxes are designed to be balanced and nutritious. Here’s what you’re getting from a typical box:
Estimated Nutritional Values (per box)
- Calories: 250-350 (varies based on ingredients)
- Protein: 8-12 grams
- Carbohydrates: 30-40 grams
- Fiber: 4-6 grams
- Fat: 10-15 grams
- Sugar: 15-20 grams (mostly from fruit)
Health Benefits of Key Ingredients
Fruits provide essential vitamins and antioxidants. Vegetables add fiber and minerals. Protein sources like cheese and eggs support growth and development. Whole-grain crackers offer complex carbohydrates for sustained energy. This combination keeps blood sugar stable and prevents the mid-morning crash that sugary snacks cause.
Dietary Considerations
These boxes can easily be made gluten-free by using gluten-free crackers. They’re naturally low in added sugar if you skip the treats. For nut-free options, use seed butters or cheese. For dairy-free, skip the cheese and yogurt and add more fruits and vegetables. This is a flexible system that works for almost any dietary need.
Potential Allergens
Common allergens include dairy (cheese, yogurt), nuts (peanut butter), eggs, and gluten (crackers). Always check labels and be aware of what you’re including. If you’re sending these to school, check their allergy policy first—many schools are nut-free zones.
Conclusion
These easy 5-minute preschool snack boxes have genuinely changed our mornings. No more scrambling, no more arguing, and no more feeling guilty about what my child is eating. The best part? My kid actually looks forward to opening their lunchbox and seeing what’s inside.
I encourage you to experiment with different combinations and find what works for your family. Maybe your child loves bell peppers but hates cucumbers. Maybe they prefer crackers over pretzels. That’s the beauty of this system—it’s completely customizable. And if you’re looking for more quick and easy snack ideas, try these peanut butter energy bites or these yogurt parfait cups for even more variety.
I’d love to hear what combinations your kids love. Drop a comment below and share your favorite snack box creations. And if you’ve found a trick that makes mornings easier, please share it—we’re all in this together. Happy snacking!
Frequently Asked Questions
How long do these snack boxes stay fresh?
If stored in the refrigerator, they’ll stay fresh for up to three days. I recommend making them the night before or up to two days ahead. After that, the fruits and vegetables start to lose their texture. For best results, prep ingredients separately and assemble fresh each morning.
Can I use these for school lunches?
Absolutely! These are perfect for school lunches. Just make sure to check your school’s allergy policy before including nuts or nut butters. Most schools are nut-free, so use seed butters or cheese instead. Also, use an insulated lunch bag with an ice pack if you’re packing them in the morning for lunch later in the day.
What if my child is a picky eater?
Start with foods you know they already like, then gradually introduce new items alongside familiar favorites. The bento format is actually great for picky eaters because foods don’t touch each other. You can also use cookie cutters to make fun shapes—a star-shaped cheese slice is way more appealing than a plain square.
How do I keep crackers from getting soggy?
The key is keeping wet and dry ingredients separate. Use bento boxes with dividers or silicone cups to create barriers. Never put crackers or pretzels in the same compartment as grapes, yogurt, or hummus. If you’re packing the night before, add crunchy elements in the morning for maximum crispness.
Can I make these for adults too?
Definitely! Just increase the portion sizes and add more protein. I often make a larger version for myself with extra vegetables, a hard-boiled egg, and some nuts. It makes a great work lunch or hiking snack. The same principles apply—balance, variety, and easy assembly.
Pin This Recipe!
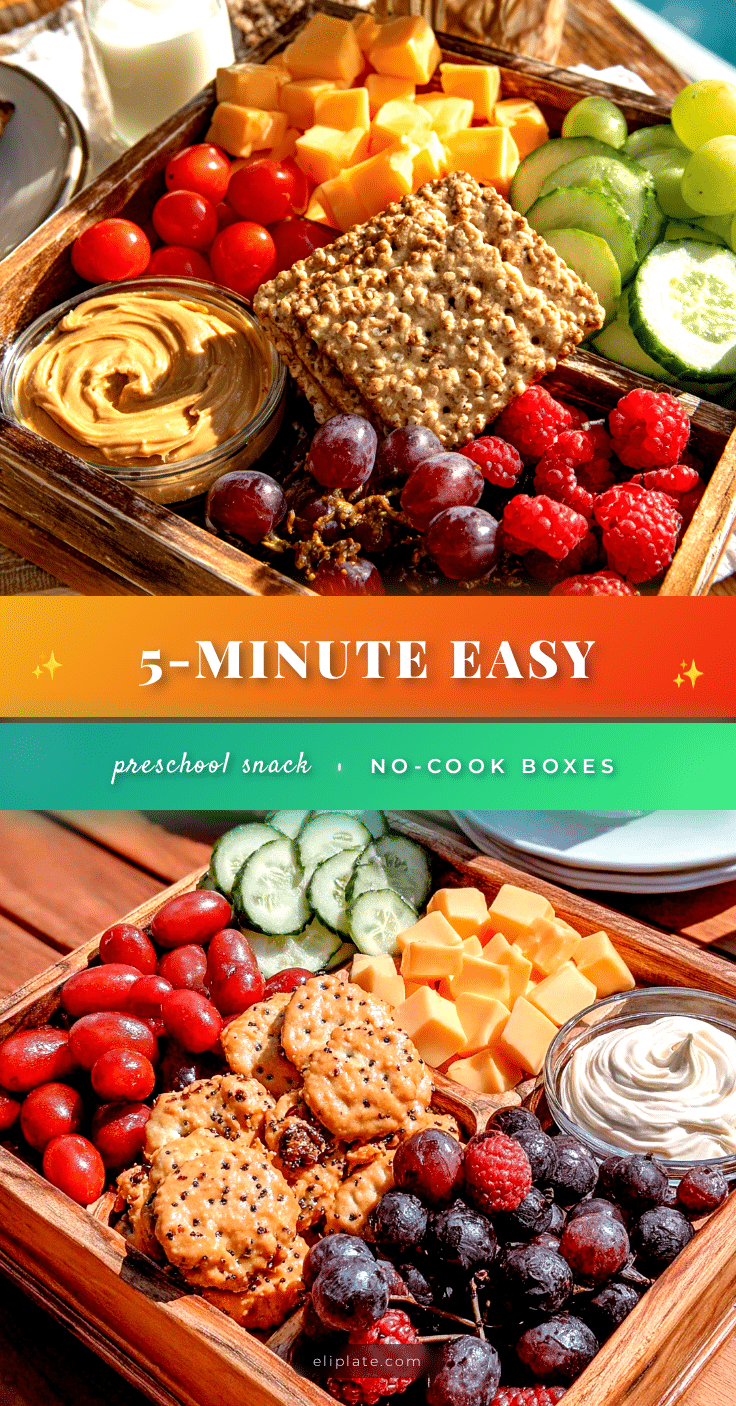
Easy 5-Minute Preschool Snack Boxes: Best No-Cook Bento
These easy 5-minute preschool snack boxes are a no-cook bento-style solution for busy mornings. Packed with fresh fruits, vegetables, protein, and crunchy elements, they’re quick to assemble, customizable, and perfect for picky eaters.
- Prep Time: 5 minutes
- Cook Time: 0 minutes
- Total Time: 5 minutes
- Yield: 1 serving
- Category: Snack
- Cuisine: American
Ingredients
- Fresh Fruits: apple slices (tossed in lemon juice), banana coins, grapes (halved lengthwise), blueberries, raspberries, strawberry slices, melon balls, peach or nectarine slices
- Vegetable Options: mini cucumber rounds, cherry tomatoes (halved), bell pepper strips, carrot sticks or coins, snap peas, avocado slices (with lime juice)
- Protein Sources: cheese cubes or sticks, hard-boiled eggs, turkey or chicken roll-ups, hummus, Greek yogurt, peanut butter or almond butter, edamame
- Crunchy Elements: whole-grain crackers, rice cakes, pretzel sticks, pita chips, cheese crackers, popcorn
- Fun Extras: dried fruit, granola, nut-free seed butter, mini muffins, yogurt-covered raisins, dark chocolate chips
Instructions
- Wash and prep produce: rinse fruits and vegetables, cut into kid-friendly pieces (e.g., apple wedges, halved grapes). Toss apple slices in lemon juice to prevent browning.
- Arrange protein in the largest compartment: place cheese cubes, roll-ups, or hummus in a silicone cup to prevent leaks.
- Add crunchy elements to a small compartment: stand crackers on edge to stay crisp.
- Fill compartments with fruits and vegetables: arrange for color contrast (e.g., red strawberries next to green cucumber).
- Add a fun touch: include a small treat like dark chocolate chips or a star-shaped cheese piece.
- Close lid securely. Store in refrigerator if making ahead, or serve at room temperature. For batch prep, assemble in the morning from pre-cut ingredients.
Notes
Keep wet and dry ingredients in separate compartments to prevent sogginess. For batch prep, wash and cut fruits/vegetables on Sunday and assemble each morning. Let refrigerated boxes sit at room temperature for 10 minutes before serving. Portion sizes should be small—a preschooler’s stomach is about the size of their fist.
Nutrition
- Serving Size: 1 snack box
- Calories: 250350
- Sugar: 1520
- Sodium: 200400
- Fat: 1015
- Saturated Fat: 35
- Carbohydrates: 3040
- Fiber: 46
- Protein: 812
Keywords: preschool snack, bento box, no-cook, easy snack, kid-friendly, healthy snack, quick snack, lunchbox ideas