My husband took one bite of these no-bake Reeses peanut butter cake bars, put the fork down, and just stared at me. Not in a dramatic way, just a quiet, confused look, like I had somehow tricked him into eating something that couldn’t possibly be this simple. He asked for another piece the next morning with his coffee. Then again after lunch. By day three, I knew this recipe was going to be a problem, the kind of problem where you find yourself making excuses to whip up another batch just to watch someone’s face light up.
Honestly, these bars started as a total accident. I had a half-empty jar of peanut butter staring at me from the pantry, a block of cream cheese that needed using, and absolutely zero patience for turning on the oven. It was one of those sticky summer afternoons where the thought of preheating anything felt like a personal insult. So I grabbed a bowl, started mixing, and crossed my fingers. What came together was this ridiculously creamy, crunchy, chocolate-peanut butter situation that tastes like a candy bar but somehow feels like a real dessert.
These no-bake Reeses peanut butter cake bars are the kind of recipe you keep tucked away for when you need something impressive without the stress. No oven required, no complicated techniques, just a few simple ingredients that turn into something genuinely special. I think that’s why this one stuck with us, it proves you don’t need fancy equipment or hours in the kitchen to make something that tastes like pure indulgence.
Why You’ll Love This Recipe
Let me tell you why these no-bake Reeses peanut butter cake bars have earned a permanent spot in my dessert rotation. I’ve tested this recipe about six times now, tweaking the ratios, trying different peanut butters, and even convincing my neighbor (a former pastry chef) to give them her honest opinion. She asked for the recipe, which felt like a win.
- No oven required: Summer heat, busy schedules, or just plain laziness, these bars don’t care. You mix, you chill, you eat.
- Simple ingredients: You probably have most of these in your kitchen right now. No weird specialty items or expensive extracts.
- Perfect for crowds: I brought these to a potluck and watched them disappear faster than the store-bought cookies. Kids and adults both go crazy for them.
- Incredible texture: The creamy peanut butter filling against that crunchy chocolate top layer? It’s the kind of contrast that keeps you reaching for just one more bite.
- Make-ahead friendly: These bars actually taste better after a day in the fridge. The flavors meld together and the texture sets perfectly.
What makes this version different from other no-bake desserts I’ve tried is the balance. Some recipes end up too dense or overly sweet, but this one hits that sweet-salty-crunchy spot just right. The cream cheese keeps the filling light and tangy, while the peanut butter brings that rich, nutty depth. It’s comfort food without the fuss, honestly.
What Ingredients You Will Need
This recipe uses simple, everyday ingredients to build layers of flavor and texture. Nothing fancy here, just smart combinations that work beautifully together.
- Graham cracker crumbs – 2 cups (about 16 full sheets, crushed finely). This forms the buttery base. I prefer Honey Maid brand for consistent texture.
- Unsalted butter – ½ cup (1 stick), melted. Use the good stuff here, it makes a difference in the crust.
- Cream cheese – 8 ounces, softened to room temperature. Full-fat works best for that creamy, stable filling.
- Creamy peanut butter – 1 cup, divided. I use Skippy natural creamy, but any standard creamy peanut butter works. Avoid the natural kind that separates too much, it can make the filling grainy.
- Powdered sugar – 1 cup, sifted if you’re feeling fancy (I rarely bother).
- Vanilla extract – 1 teaspoon. Pure vanilla adds warmth, but imitation works in a pinch.
- Semi-sweet chocolate chips – 1½ cups. Ghirardelli is my go-to for that smooth melt.
- Coconut oil – 1 tablespoon. This helps the chocolate layer set with a nice snap. You can skip it, but the texture won’t be as clean.
- Mini Reese’s cups – ½ cup, roughly chopped. Optional but highly recommended for that extra peanut butter punch.
Substitution notes: For a gluten-free version, use gluten-free graham crackers or crushed gluten-free cookies. Dairy-free cream cheese and butter alternatives work, but the texture will be slightly softer. If you’re avoiding refined sugar, try a powdered monk fruit sweetener in the filling, though the taste will shift a bit.
Equipment Needed
You don’t need a fancy kitchen to pull these off, which is part of their charm.
- 8×8-inch baking pan – Glass or metal both work. Line it with parchment paper for easy lifting.
- Mixing bowls – One medium for the crust, one large for the filling.
- Electric hand mixer – You can mix the filling by hand if you’re patient, but a mixer makes it silky smooth in seconds.
- Rubber spatula – For scraping every last bit of that peanut butter goodness.
- Microwave-safe bowl – For melting the chocolate. A double boiler works too, but I’m all about convenience.
- Parchment paper – Makes lifting the bars out clean and frustration-free.
I’ve made these bars with just a fork and a lot of elbow grease when my mixer was in the dishwasher. It’s doable, just expect a bit more arm workout. The parchment paper is non-negotiable though, trust me on that one.
Preparation Method
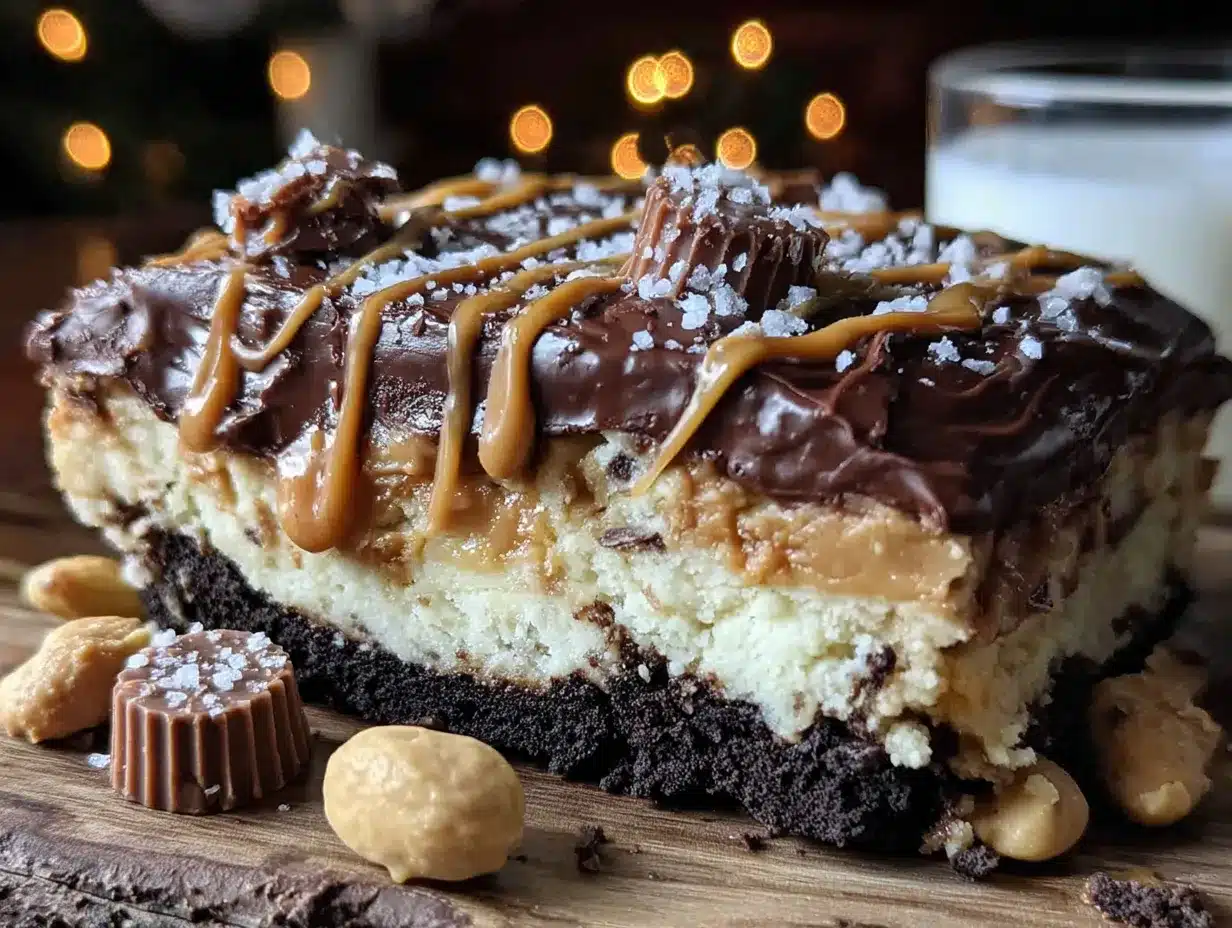
- Prepare the crust: In a medium bowl, combine 2 cups graham cracker crumbs with ½ cup melted unsalted butter. Stir until every crumb is moistened and the mixture looks like wet sand. Press this firmly into the bottom of your parchment-lined 8×8 pan. Use the bottom of a flat measuring cup to really compact it down. Pop it in the fridge while you make the filling.
- Make the peanut butter filling: In a large bowl, beat 8 ounces softened cream cheese with a hand mixer until smooth and fluffy, about 2 minutes. Add ½ cup creamy peanut butter and beat again until fully combined. Scrape down the sides of the bowl. Add 1 cup powdered sugar and 1 teaspoon vanilla extract, then beat on low speed until the sugar is incorporated, then crank it up to medium for another minute. The mixture should be thick, creamy, and slightly airy.
- Assemble the first layer: Spread the peanut butter filling evenly over the chilled crust. Use an offset spatula or the back of a spoon to smooth it out. The filling is thick, so take your time. Place the pan back in the fridge while you prepare the topping.
- Melt the chocolate: In a microwave-safe bowl, combine 1½ cups semi-sweet chocolate chips and 1 tablespoon coconut oil. Microwave in 30-second intervals, stirring after each, until completely smooth. This usually takes about 90 seconds total. Don’t rush this step, burnt chocolate is a tragedy.
- Add the chocolate layer: Pour the melted chocolate over the peanut butter filling. Tilt the pan gently to spread it evenly, or use a spatula. Sprinkle the chopped mini Reese’s cups over the top while the chocolate is still wet. They’ll sink in just a little and look gorgeous.
- Chill until firm: Refrigerate the bars for at least 4 hours, but overnight is better. The filling needs time to set properly, and the chocolate needs to firm up completely. I’ve learned this the hard way after cutting into too-soft bars and ending up with a delicious mess.
- Slice and serve: Lift the bars out using the parchment paper overhang. Use a sharp knife to cut into squares, wiping the blade clean between cuts for neat edges. Let the bars sit at room temperature for about 5 minutes before serving for the best texture.
Sensory cues: The crust should feel compact and slightly sandy when pressed. The filling should be thick enough to hold its shape but still spreadable. The chocolate layer should look glossy and smooth before chilling, and should snap cleanly when you cut through it after setting.
Cooking Tips & Techniques
I’ve made these no-bake Reeses peanut butter cake bars enough times to have a few hard-won lessons. The first time, I used natural peanut butter that had separated, and the filling turned out greasy and crumbly. Not cute. Stick with standard creamy peanut butter for the most reliable results.
Another mistake I made was rushing the chilling time. These bars need a solid 4 hours minimum, and honestly, overnight is where the magic happens. If you try to cut them too soon, the layers will smear together and you’ll lose that beautiful definition. Patience is boring but necessary.
For the cleanest cuts, run your knife under hot water, dry it off, then slice. Wipe the blade between each cut. This works like a charm for getting those Instagram-worthy squares. Also, if your chocolate layer cracks when cutting, your bars might be too cold. Let them sit out for a few minutes to soften slightly.
One pro tip I picked up from making fudgy double chocolate zucchini brownies is that layering desserts in the fridge between each step helps everything set up clean. It takes a bit more time, but the results are worth it.
Variations & Adaptations
These bars are incredibly flexible, so feel free to make them your own.
- Peanut butter cookie crust: Swap the graham cracker crumbs for crushed vanilla wafers or shortbread cookies for a different flavor base. I tried this with crushed Nilla wafers once and it was dangerously good.
- Chocolate peanut butter swirl: Reserve about ¼ cup of the melted chocolate and drizzle it over the peanut butter filling before adding the main chocolate layer. Use a toothpick to create swirls. It looks fancy with zero extra effort.
- Add a crunch layer: Sprinkle a handful of crushed peanuts or chopped pretzels over the crust before adding the filling. The salty crunch is amazing against the creamy layers.
- White chocolate version: Use white chocolate chips instead of semi-sweet for a sweeter, more candy-bar feel. Add a few drops of peanut butter extract to the white chocolate for extra punch.
- Vegan adaptation: Use dairy-free cream cheese, vegan butter, and dairy-free chocolate chips. The texture will be slightly softer, but the taste is still incredible. I’ve made this for a vegan friend and she didn’t believe it was dairy-free.
If you love this kind of easy, no-fuss dessert, you might also enjoy these easy 5-ingredient peanut butter energy bites for a healthier grab-and-go option. They have that same peanut butter-chocolate magic but in a snack-sized form.
Serving & Storage Suggestions
These bars are best served cold or at cool room temperature. I like to pull them out of the fridge about 10 minutes before serving, just enough to take the chill off without letting the chocolate get soft. They pair beautifully with a cold glass of milk or a hot cup of coffee.
For a fun presentation, cut them into small squares and arrange on a platter with fresh berries. The tartness of raspberries or strawberries cuts through the richness perfectly. I’ve also served these alongside a scoop of vanilla ice cream for an over-the-top dessert that always gets compliments.
Storage: Keep the bars in an airtight container in the refrigerator for up to 1 week. They actually get better after a day or two as the flavors meld together. I’ve never had them last longer than that in my house, but they should hold up fine.
Freezing: These freeze beautifully. Wrap individual bars in plastic wrap, then place them in a freezer-safe bag. They’ll keep for up to 3 months. Thaw in the refrigerator overnight or let them sit at room temperature for about 20 minutes before serving. I always keep a stash in my freezer for unexpected cravings or last-minute guests.
If you’re planning a party and want another easy dessert option, these creamy no-bake pumpkin pie cheesecake bars are a fantastic seasonal alternative that uses the same no-bake technique.
Nutritional Information & Benefits
Let’s be real, these are a treat, not a health food. But here’s the estimated breakdown per bar (based on 16 servings):
- Calories: Approximately 320
- Fat: 22g
- Carbohydrates: 28g
- Protein: 7g
- Sugar: 18g
On the plus side, peanut butter provides protein and healthy monounsaturated fats. Dark chocolate offers antioxidants and a little magnesium. The cream cheese adds calcium, though it’s not exactly a superfood. These bars are vegetarian and can be made gluten-free with simple substitutions. They contain peanuts, dairy, and gluten (unless modified), so keep that in mind for allergies.
I personally love that these bars satisfy a serious sweet tooth without requiring a whole production. They feel indulgent but don’t leave you with that overly processed, fake-sugar aftertaste. Moderation is key, but honestly, one bar is rarely enough for me.
Conclusion
These no-bake Reeses peanut butter cake bars are the kind of recipe that earns a permanent spot in your rotation. They’re ridiculously easy, use ingredients you already have, and deliver that perfect combination of creamy peanut butter and rich chocolate that everyone craves. No oven, no stress, just pure dessert happiness.
I love that this recipe lets me feel like a kitchen genius without actually doing much work. It’s the perfect dessert for busy weeks, hot days, or anytime you need something impressive in a hurry. Whether you’re making them for a party, a potluck, or just because it’s Tuesday and you deserve a treat, these bars never disappoint.
I’d love to hear how yours turn out! Drop a comment below and let me know if you tried any fun variations, or tag me in your photos if you share them online. Happy no-baking, friends!
Frequently Asked Questions
Can I use crunchy peanut butter instead of creamy?
Absolutely! Crunchy peanut butter adds a nice texture contrast. Just keep in mind that the filling won’t be as smooth, and the chunks might make spreading a little trickier. I’ve used it before and loved the extra crunch.
How long do these bars need to set in the fridge?
At least 4 hours, but overnight is ideal. The filling needs time to firm up completely, and the chocolate layer needs to set fully. Rushing this step leads to messy slices, so plan ahead.
Can I make these bars vegan or dairy-free?
Yes, with a few swaps. Use dairy-free cream cheese, vegan butter, and dairy-free chocolate chips. The texture will be slightly softer, but the taste is still fantastic. I’ve tested this with Kite Hill cream cheese and it worked well.
Why did my chocolate layer crack when I cut it?
This usually happens when the bars are too cold. Let them sit at room temperature for 5-10 minutes before slicing. Also, using a sharp knife and wiping it clean between cuts helps prevent cracking.
Can I double this recipe for a 9×13 pan?
Yes, just double all the ingredients and use a 9×13 pan. You’ll need to increase the chilling time slightly, probably 5-6 hours minimum. The bars will be a bit thinner, but they’ll still taste amazing.
Pin This Recipe!
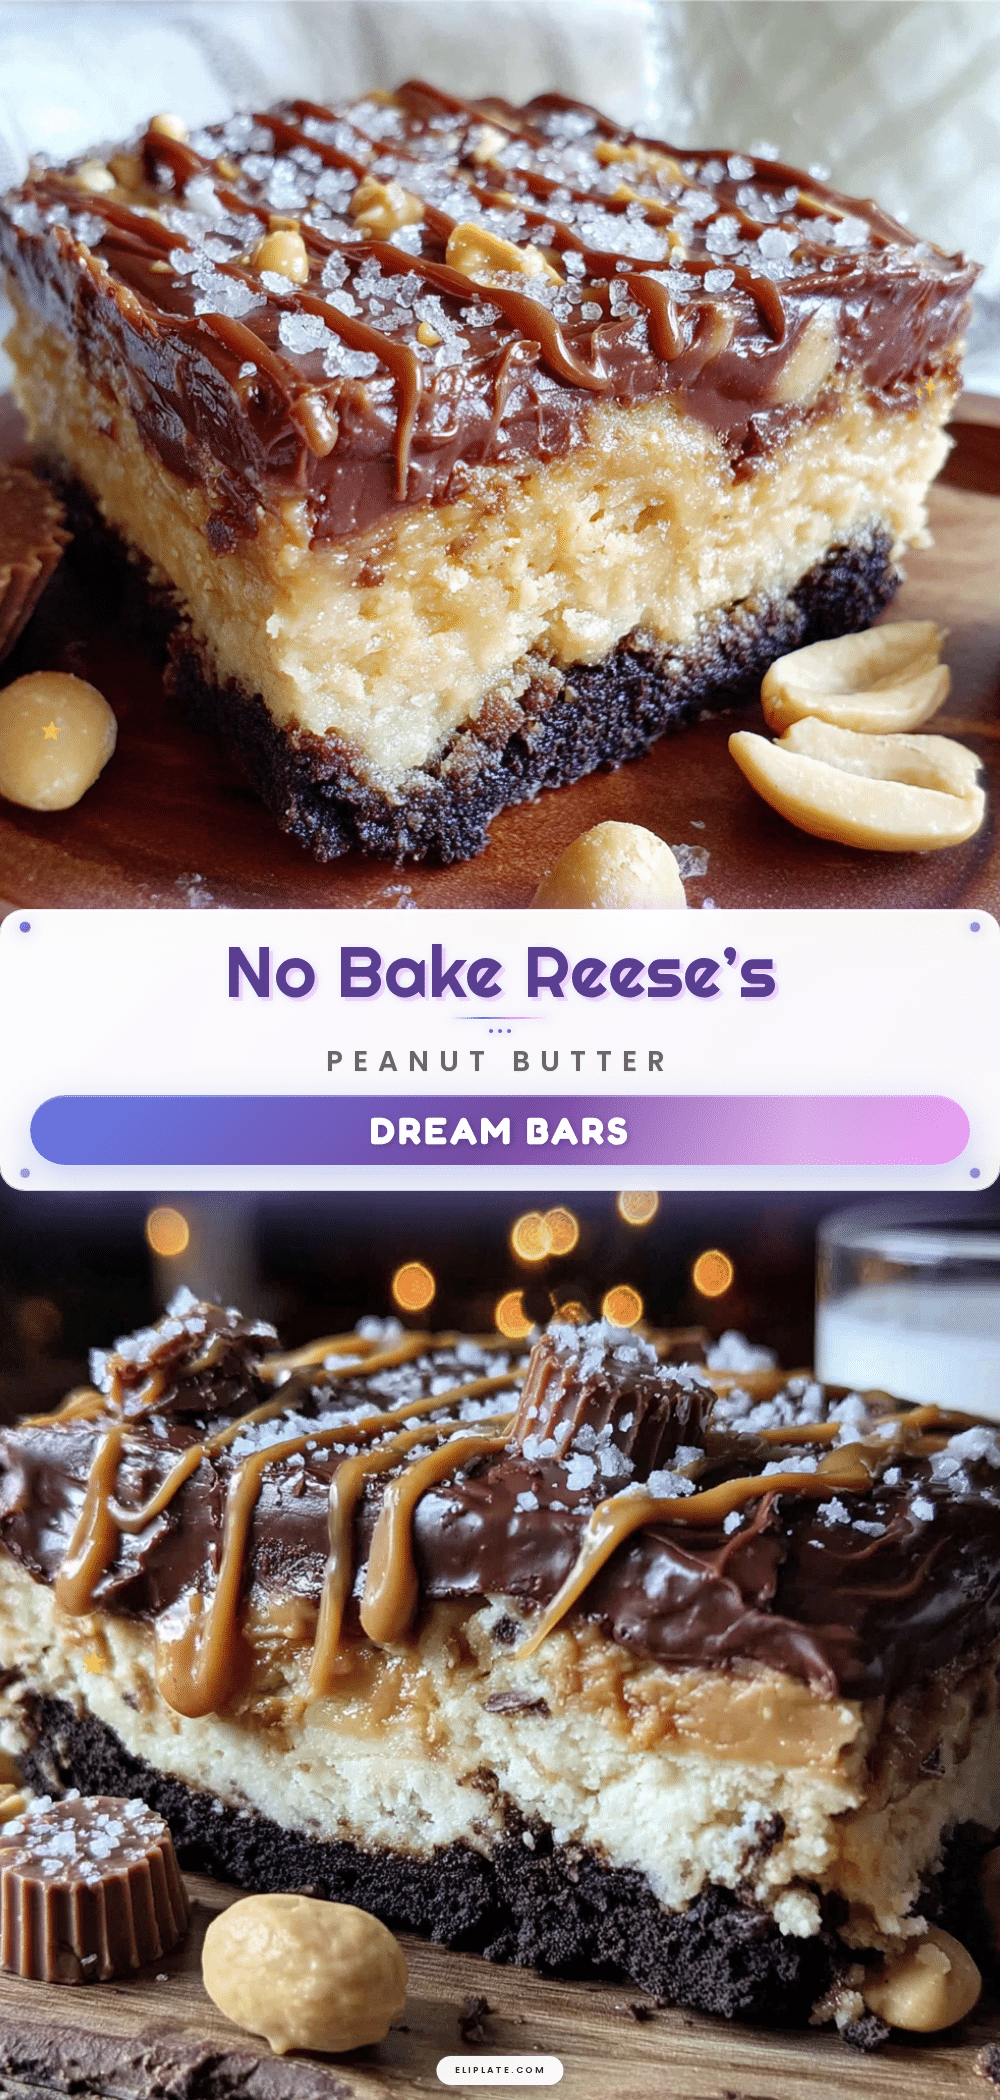
Best No-Bake Reeses Peanut Butter Cake Bars Recipe
These no-bake Reeses peanut butter cake bars are ridiculously creamy, crunchy, and chocolatey, with a simple graham cracker crust, a light peanut butter cream cheese filling, and a smooth chocolate top. No oven required, just a few ingredients and a bit of patience for a dessert that tastes like pure indulgence.
- Prep Time: 20 minutes
- Cook Time: 0 minutes
- Total Time: 4 hours 20 minutes (includes chilling)
- Yield: 16 servings 1x
- Category: Dessert
- Cuisine: American
Ingredients
- 2 cups graham cracker crumbs (about 16 full sheets, crushed finely)
- ½ cup unsalted butter, melted
- 8 ounces cream cheese, softened to room temperature
- 1 cup creamy peanut butter, divided
- 1 cup powdered sugar, sifted if desired
- 1 teaspoon vanilla extract
- 1½ cups semi-sweet chocolate chips
- 1 tablespoon coconut oil
- ½ cup mini Reese’s cups, roughly chopped (optional)
Instructions
- Prepare the crust: In a medium bowl, combine 2 cups graham cracker crumbs with ½ cup melted unsalted butter. Stir until every crumb is moistened and the mixture looks like wet sand. Press this firmly into the bottom of your parchment-lined 8×8 pan. Use the bottom of a flat measuring cup to really compact it down. Pop it in the fridge while you make the filling.
- Make the peanut butter filling: In a large bowl, beat 8 ounces softened cream cheese with a hand mixer until smooth and fluffy, about 2 minutes. Add ½ cup creamy peanut butter and beat again until fully combined. Scrape down the sides of the bowl. Add 1 cup powdered sugar and 1 teaspoon vanilla extract, then beat on low speed until the sugar is incorporated, then crank it up to medium for another minute. The mixture should be thick, creamy, and slightly airy.
- Assemble the first layer: Spread the peanut butter filling evenly over the chilled crust. Use an offset spatula or the back of a spoon to smooth it out. The filling is thick, so take your time. Place the pan back in the fridge while you prepare the topping.
- Melt the chocolate: In a microwave-safe bowl, combine 1½ cups semi-sweet chocolate chips and 1 tablespoon coconut oil. Microwave in 30-second intervals, stirring after each, until completely smooth. This usually takes about 90 seconds total. Don’t rush this step, burnt chocolate is a tragedy.
- Add the chocolate layer: Pour the melted chocolate over the peanut butter filling. Tilt the pan gently to spread it evenly, or use a spatula. Sprinkle the chopped mini Reese’s cups over the top while the chocolate is still wet. They’ll sink in just a little and look gorgeous.
- Chill until firm: Refrigerate the bars for at least 4 hours, but overnight is better. The filling needs time to set properly, and the chocolate needs to firm up completely. I’ve learned this the hard way after cutting into too-soft bars and ending up with a delicious mess.
- Slice and serve: Lift the bars out using the parchment paper overhang. Use a sharp knife to cut into squares, wiping the blade clean between cuts for neat edges. Let the bars sit at room temperature for about 5 minutes before serving for the best texture.
Notes
For cleanest cuts, run your knife under hot water, dry it off, then slice. Wipe the blade between each cut. If chocolate layer cracks, bars may be too cold; let sit at room temperature for a few minutes. For gluten-free, use gluten-free graham crackers. For dairy-free, use dairy-free cream cheese, vegan butter, and dairy-free chocolate chips.
Nutrition
- Serving Size: 1 bar
- Calories: 320
- Sugar: 18
- Sodium: 180
- Fat: 22
- Saturated Fat: 10
- Carbohydrates: 28
- Fiber: 2
- Protein: 7
Keywords: no-bake, Reeses, peanut butter, chocolate, cake bars, easy dessert, no oven, summer dessert, potluck