My mother-in-law showed up with a bushel of pears. Not a polite little bag from the grocery store, but a full-on, two-handed, “I-didn’t-know-what-else-to-do-with-these” bushel. They were beautiful—firm, golden, and fragrant in that way that makes your kitchen smell like autumn instantly. But there were thirty-seven of them. I counted. And they were all ripening at once, like some kind of pear-based countdown clock.
I had about forty-five minutes before carpool. The kids were asking for snacks. The dog needed to go out. And there I was, staring at a mountain of fruit that would be mush by tomorrow if I didn’t do something. So I did the only logical thing—I grabbed my biggest pot, raided the spice cabinet, and started making these cozy spiced cinnamon vanilla canned pears. Honestly? It felt a little reckless at first. But that’s how the best kitchen accidents happen, isn’t it? When you stop overthinking and just start peeling.
I’ll be real with you—I’d never canned anything before that afternoon. My grandmother did, sure, but I always figured that was a skill from a different era, one I didn’t inherit. Turns out, you don’t need a pressure canner or a special certification. You just need some fruit, a bit of sugar, and a willingness to trust the process. These cozy spiced cinnamon vanilla canned pears were born out of pure necessity, but they’ve become a staple in my pantry every fall since.
There’s something about opening a jar in the middle of winter—when the world is gray and cold—and being hit with that scent of warm cinnamon and vanilla. It’s like you bottled up a sunny October afternoon and saved it for later. And that, right there, is why this recipe stuck with me. Not because it’s fancy, but because it feels like a small act of care for your future self.
Why You’ll Love This Recipe
Let’s be honest—homemade canned pears sound like a project. And they are, in the best possible way. But here’s the thing: once you taste these, you’ll never go back to the store-bought version. They’re softer, more fragrant, and somehow taste more like… pears. Real pears.
- Simple Ingredients : You probably already have cinnamon sticks, vanilla extract, and sugar in your pantry. The pears are the only thing you might need to buy.
- Beginner-Friendly : If I can do this with zero canning experience, so can you. I promise. No fancy equipment required.
- Perfect for Gifting : A jar of these tied with a ribbon? Instant homemade Christmas gift that people actually want to receive.
- Incredibly Versatile : Eat them straight from the jar, spoon them over ice cream, or use them in baked goods. They’re a pantry MVP.
- Comfort in a Jar : The smell alone will make your whole house feel like a cozy fall day. It’s basically aromatherapy you can eat.
What makes this recipe different from every other canned pear recipe out there? It’s the balance. Most recipes go heavy on the sugar or skimp on the spice, but this one nails that cozy, warm sweetness without being cloying. The vanilla rounds out the cinnamon, and a tiny hint of lemon keeps things bright. It’s not just another version of canned pears—it’s the one you’ll actually look forward to opening.
And honestly? It’s the kind of recipe that makes you feel like you’ve got your life together, even if the rest of your kitchen is a disaster. You know what I mean.
What Ingredients You Will Need
This recipe uses simple, wholesome ingredients to create something that tastes far more complex than it really is. Most of these are pantry staples, which makes this a great last-minute project when you find yourself with too many pears and not enough time.
- 6 pounds firm but ripe pears (Bartlett or Bosc work beautifully—Bartletts get softer, Boscs hold their shape better). Look for pears that yield slightly when you press near the stem but aren’t mushy. Overripe pears will turn to mush during processing.
- 4 cups water (filtered if you can, but tap is fine)
- 2 cups granulated sugar (this is the base of your syrup—don’t reduce it too much or the pears won’t preserve properly)
- 3 cinnamon sticks (I prefer Ceylon cinnamon for its milder, more floral flavor, but Cassia works in a pinch)
- 2 tablespoons vanilla extract (use real vanilla, not imitation—it makes a real difference in the final flavor)
- 1 lemon, juiced (this prevents the pears from browning and adds a subtle brightness)
- 1 vanilla bean, split lengthwise (optional, but gorgeous if you have one—it adds those beautiful little vanilla specks)
- Pinch of salt (don’t skip this—it balances the sweetness)
A quick note on the pears: you want them ripe but still firm. If they’re too hard, they won’t soften enough in the syrup. If they’re too soft, they’ll fall apart. I usually buy my pears a day or two ahead and let them sit on the counter until they hit that sweet spot. For the best texture, I recommend using Bosc pears if you can find them—they hold their shape beautifully during the water bath process.
For the vanilla, I’ve tested this with both extract and vanilla bean paste, and both work great. The paste gives you those lovely specks without the cost of a whole bean. If you’re using extract, just make sure it’s pure vanilla and not the artificially flavored stuff. Trust me on this one.
Equipment Needed
You don’t need a fancy canning setup for this. Here’s what you’ll actually use:
- Large stockpot (at least 8 quarts) for the water bath
- 4-5 pint-sized canning jars with new lids and bands (Mason or Ball are my go-to brands)
- Canning rack or a folded kitchen towel placed at the bottom of the pot (prevents jars from rattling)
- Jar lifter (worth the $8 investment—trust me, you don’t want to fish hot jars out with tongs)
- Wide-mouth funnel (makes filling jars so much less messy)
- Small saucepan for making the syrup
- Vegetable peeler and paring knife
- Clean kitchen towel for wiping jar rims
If you don’t have a jar lifter, you can use silicone-tipped tongs, but be careful—they can slip. I speak from experience, and a broken jar of hot syrup is not a fun cleanup. Also, don’t forget to check your jars for cracks or chips before you start. A damaged jar can shatter in the water bath, and nobody wants that.
Preparation Method
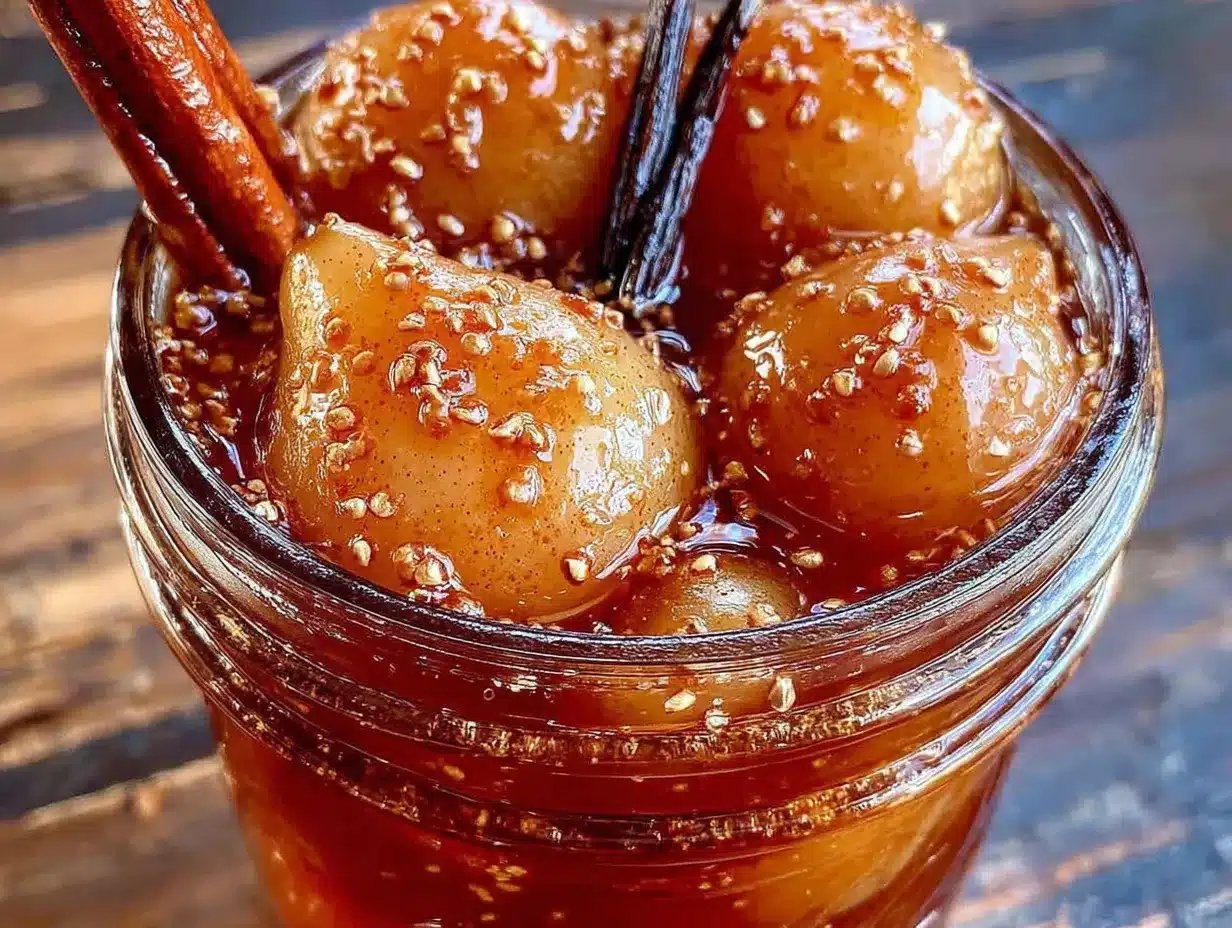
- Sterilize your jars: Wash your jars, lids, and bands in hot, soapy water. Rinse well. Place the jars in your stockpot, cover with water, and bring to a boil. Let them boil for 10 minutes. Keep them in the hot water until you’re ready to use them. The lids can go in a small bowl of hot water (not boiling) to soften the seals.
- Prepare the pears: While your jars are sterilizing, peel the pears. Yes, all of them. It takes a minute, but it’s worth it. Cut each pear in half and use a melon baller or small spoon to scoop out the core and seeds. If you’re feeling fancy, you can leave the stems on for a prettier presentation, but I usually cut them off for easier packing.
- Make the syrup: In your small saucepan, combine the water, sugar, cinnamon sticks, and a pinch of salt. Bring to a boil over medium-high heat, stirring occasionally until the sugar dissolves completely. Reduce the heat to low and let it simmer for 5 minutes. Remove from heat and stir in the vanilla extract and lemon juice. If you’re using a vanilla bean, add the split bean to the syrup while it simmers.
- Treat the pears: As you work, place the peeled and cored pear halves in a bowl of water with a squeeze of lemon juice. This keeps them from turning brown while you’re prepping. Don’t leave them in there too long, though—10-15 minutes max, or they’ll start to absorb too much water.
- Pack the jars: Using your jar lifter, remove a hot jar from the water bath (careful—it’s hot!). Place it on your clean towel. Using your wide-mouth funnel, pack the pear halves into the jar, cut side down. Pack them snugly but don’t force them—you want the syrup to be able to flow around each piece. Leave about ½ inch of headspace at the top.
- Add the syrup: Ladle the hot syrup over the pears, leaving that ½ inch of headspace. Use a chopstick or a thin spatula to gently run around the inside of the jar to release any air bubbles. Trust me, this step matters—air bubbles can cause your seals to fail later.
- Wipe and seal: Wipe the rim of the jar with a clean, damp towel. Any syrup on the rim can prevent the lid from sealing properly. Center a lid on the jar and screw on the band until it’s fingertip-tight—not too tight, just snug. The band needs to allow air to escape during processing.
- Process the jars: Place the filled jars back into the stockpot of boiling water, making sure they’re covered by at least 1-2 inches of water. Bring back to a full rolling boil and process for 20 minutes. Start your timer only after the water returns to a boil.
- Cool and check seals: After 20 minutes, turn off the heat and let the jars sit in the water for 5 minutes. Then use your jar lifter to remove them to a towel-lined counter. Let them cool completely, undisturbed, for 12-24 hours. You’ll hear the satisfying “pop” of the lids sealing as they cool. After they’re cool, press the center of each lid—if it doesn’t flex up and down, it’s sealed. If it does, refrigerate that jar and use it within a few weeks.
A few things I learned the hard way: don’t rush the cooling process. I once moved a batch of jars too early and broke a seal. Also, if a jar doesn’t seal, don’t panic—just store it in the fridge and eat those pears first. They’ll still be delicious.
Cooking Tips & Techniques
Here’s the thing about canning—it feels intimidating until you’ve done it once. After that, you’ll wonder why you waited so long. But there are a few tricks I’ve picked up along the way that make a real difference.
Don’t skip the lemon juice. I know it seems like a small detail, but the acid in the lemon juice not only prevents browning—it also helps preserve the pears safely. Canned goods need a certain acidity level to prevent bacterial growth, and pears are naturally low in acid. The lemon juice balances that out.
Temperature matters. Your pears should be warm when you pack them, and your syrup should be hot. Cold ingredients going into hot jars can cause thermal shock, which leads to cracked jars. I’ve lost a few jars this way, and it’s heartbreaking. Keep everything warm and you’ll be fine.
Use the right pears. I mentioned this earlier, but it’s worth repeating: firm but ripe is the goal. Underripe pears won’t soften enough in the syrup, and overripe ones will turn into pear sauce. If you’re not sure, err on the side of slightly underripe—they’ll continue to soften a bit during processing.
Label your jars. I know you think you’ll remember what’s in there and when you made it, but you won’t. Six months from now, you’ll be staring at a jar of amber-colored pears wondering if they’re from this year or last. Trust me, just write the date on the lid with a permanent marker.
Batch size matters. This recipe makes about 4-5 pints, which is a manageable amount for a first-timer. Don’t try to double it unless you have a second stockpot—overcrowding the water bath can lead to uneven processing.
Variations & Adaptations
One of the best things about this recipe is how easy it is to customize. Here are a few ways I’ve played around with it:
Spiced Chai Pears: Add 2 star anise, 4 cardamom pods, and a piece of fresh ginger (about an inch, sliced) to the syrup along with the cinnamon. It gives the pears a warm, slightly exotic flavor that’s incredible over vanilla ice cream.
Vanilla Honey Pears: Swap half the sugar for honey. Use a mild honey like clover or orange blossom so it doesn’t overpower the vanilla. The honey gives the syrup a slightly thicker consistency and a more complex sweetness.
Bourbon Vanilla Pears: Add 2 tablespoons of bourbon to the syrup after it’s cooled slightly. The bourbon adds a subtle warmth that pairs beautifully with the vanilla and cinnamon. These are amazing spooned over pound cake or served alongside a cheese board.
Low-Sugar Version: If you’re watching your sugar intake, you can reduce the sugar to 1 cup and add a pinch of stevia or monk fruit sweetener. The texture will be slightly softer, and the pears won’t keep as long (use within 3 months instead of a year), but they’re still delicious.
Spiced Apple-Pear Mix: Use half pears and half firm apples (like Granny Smith or Honeycrisp). The apples hold their shape even better than pears, and the combination is lovely in a fall fruit salad or served with pork chops.
I’ve personally tried the bourbon vanilla variation, and it’s become my go-to for holiday gifts. People lose their minds over it. Just saying.
Serving & Storage Suggestions
These pears are incredibly versatile, which is why I always make extra. Here’s how I like to use them:
Straight from the jar: Honestly, this is my favorite way to eat them. Cold from the fridge on a warm day, or gently warmed on a cold evening. The syrup is almost as good as the pears themselves.
Over ice cream: Spoon a few pear halves and some syrup over vanilla bean ice cream, and you’ve got a dessert that tastes fancy but took about 30 seconds. Add a sprinkle of cinnamon on top for extra flair.
With yogurt or oatmeal: Chop up a pear half and stir it into plain Greek yogurt or morning oatmeal. The spiced syrup adds just the right amount of sweetness without needing extra sugar.
In baked goods: Drain the pears (save the syrup for cocktails or glazes!) and chop them up to use in muffins, quick breads, or even pancake batter. They add moisture and flavor without being too heavy.
On a cheese board: These pears are gorgeous alongside sharp cheddar, creamy brie, or tangy goat cheese. Add some crackers and a drizzle of honey, and you’ve got an impressive appetizer in minutes.
Storage: Sealed jars will keep in a cool, dark pantry for up to 12 months. Once opened, refrigerate and use within 2-3 weeks. The syrup will thicken slightly over time, and the flavor will continue to develop—they’re actually better after a month or two.
Reheating: If you want to serve them warm, just spoon the pears and syrup into a small saucepan and heat gently over low heat. Don’t boil them, or the pears will fall apart. You can also microwave them in a bowl for 30-45 seconds.
Nutritional Information & Benefits
Per serving (about 2 pear halves with ¼ cup syrup):
- Calories: 180
- Carbohydrates: 46g
- Fiber: 4g
- Sugar: 38g (naturally occurring plus added)
- Vitamin C: 8% of daily value
- Potassium: 190mg
Pears are a good source of dietary fiber, which supports digestive health and helps keep you feeling full. They also contain vitamin C, vitamin K, and copper, which supports immune function and bone health. The cinnamon in this recipe adds antioxidants and may help regulate blood sugar levels—though obviously, the sugar content balances that out a bit.
If you’re watching your sugar intake, remember that these are a treat. They’re not an everyday snack, but they’re certainly better for you than most store-bought desserts. And honestly? The comfort factor matters too. Sometimes you need a little sweetness and nostalgia, and that’s okay.
For those with dietary restrictions: this recipe is naturally gluten-free, dairy-free, and vegan. Just make sure your vanilla extract doesn’t contain any hidden additives if you’re strictly vegan.
Conclusion
These cozy spiced cinnamon vanilla canned pears are more than just a recipe—they’re a way to capture a moment and save it for later. Whether you’re dealing with an overflowing bushel of pears from a well-meaning relative, or you just want to stock your pantry with something beautiful and delicious, this recipe delivers.
I love that I can open a jar in the middle of February and taste October again. I love that I can give a jar to a friend and watch their face light up. And I really love that this recipe is forgiving enough for beginners but impressive enough to feel like an accomplishment. If you’ve never canned anything before, start here. You’ve got this.
Have you tried making these pears? Did you add your own twist? I’d love to hear about it—drop a comment below and tell me how yours turned out. And if you share a photo on Pinterest, tag me so I can see your beautiful jars!
Frequently Asked Questions
Can I use this same syrup recipe for other fruits?
Absolutely! This cinnamon-vanilla syrup works beautifully with apples, peaches, and even plums. Just adjust the processing time based on the fruit—apples need about 20 minutes, peaches need 25, and plums need 15. Always check a trusted canning guide for specific times.
Do I really need to process the jars in a water bath?
Yes, if you want them to be shelf-stable. The water bath processing creates a vacuum seal that prevents bacteria from growing. If you skip this step, you’ll need to store the jars in the refrigerator and use them within a few weeks. The pears will still taste great—they just won’t last as long.
What if my jars don’t seal?
Don’t panic! It happens to everyone at some point. If a lid doesn’t pop down and stay down after 24 hours, just move that jar to the fridge and use it first. You can also reprocess it with a new lid within 24 hours if you catch it quickly enough.
Can I reduce the sugar in this recipe?
You can, but it will affect both the texture and the shelf life. Sugar acts as a preservative in canned goods, so reducing it means the pears won’t keep as long. If you want to cut back, try using 1½ cups instead of 2, and plan to use the jars within 3-4 months. For a deeper dive into preserving seasonal produce, you might enjoy this easy homemade fig jam recipe with rosemary and lemon—it follows a similar method.
How do I know when the pears are ripe enough for canning?
Gently press near the stem of the pear. If it yields slightly—like the softness of a ripe avocado—it’s ready. If it’s rock hard, give it another day or two on the counter. If it’s mushy, it’s too ripe for canning but perfect for pear butter or sauce. And if you’re in the mood for another cozy fall treat, try these cozy brown butter pumpkin chocolate chip bread—they pair beautifully with a warm pear dessert.
Pin This Recipe!
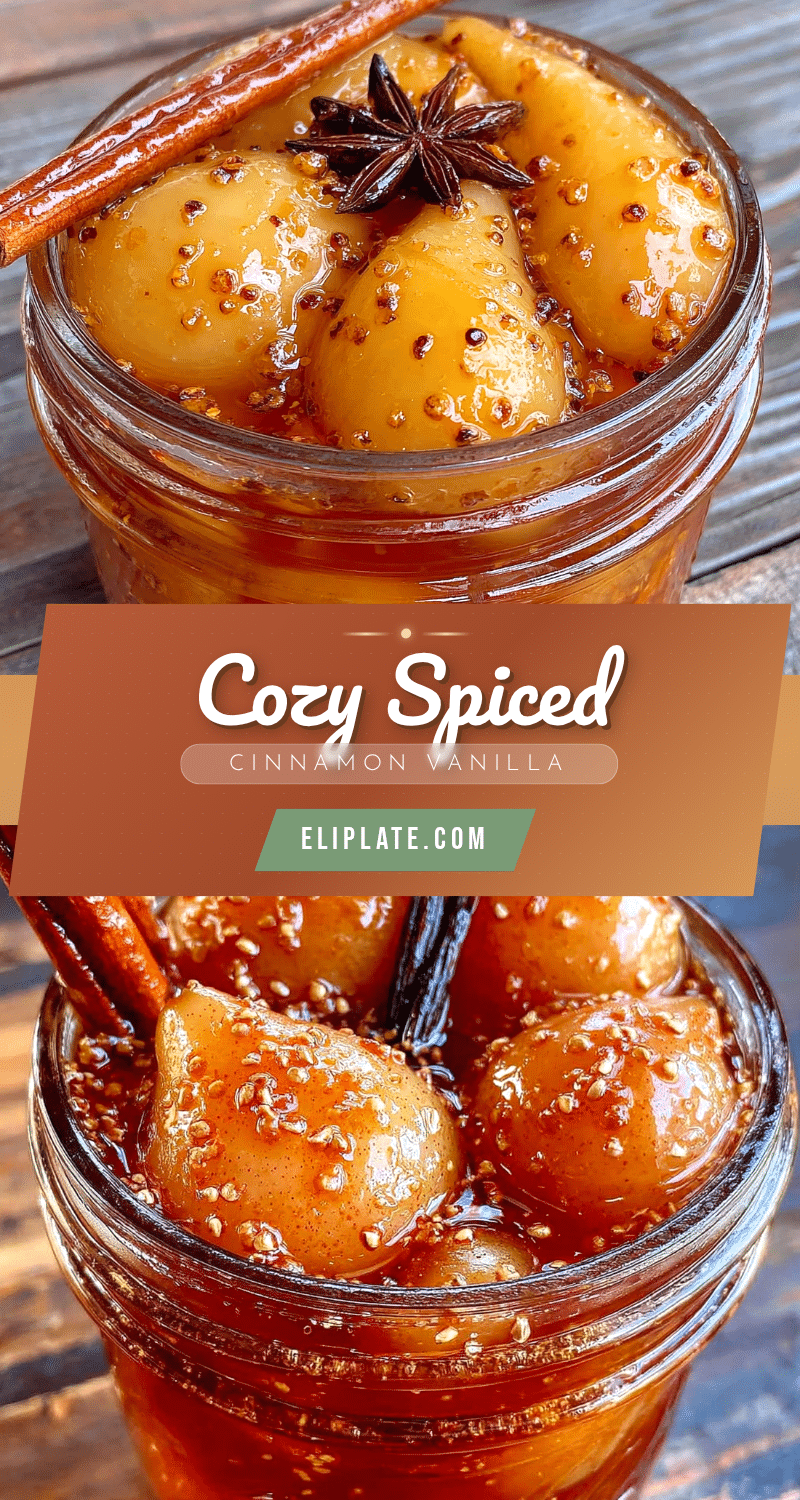
Cozy Spiced Cinnamon Vanilla Canned Pears: Easy Homemade Recipe
A beginner-friendly recipe for homemade canned pears infused with cinnamon and vanilla, perfect for preserving autumn’s bounty. These spiced pears are versatile, delicious straight from the jar, over ice cream, or in baked goods.
- Prep Time: 30 minutes
- Cook Time: 20 minutes
- Total Time: 50 minutes (plus 12-24 hours cooling)
- Yield: 4-5 pint jars 1x
- Category: Preserves
- Cuisine: American
Ingredients
- 6 pounds firm but ripe pears (Bartlett or Bosc)
- 4 cups water
- 2 cups granulated sugar
- 3 cinnamon sticks
- 2 tablespoons vanilla extract
- 1 lemon, juiced
- 1 vanilla bean, split lengthwise (optional)
- Pinch of salt
Instructions
- Sterilize your jars: Wash jars, lids, and bands in hot, soapy water. Rinse well. Place jars in a stockpot, cover with water, and bring to a boil. Boil for 10 minutes. Keep jars in hot water until ready to use. Place lids in a small bowl of hot water (not boiling) to soften seals.
- Prepare the pears: While jars sterilize, peel the pears. Cut each pear in half and use a melon baller or small spoon to scoop out the core and seeds. Optionally leave stems on for presentation.
- Make the syrup: In a small saucepan, combine water, sugar, cinnamon sticks, and a pinch of salt. Bring to a boil over medium-high heat, stirring until sugar dissolves. Reduce heat to low and simmer for 5 minutes. Remove from heat and stir in vanilla extract and lemon juice. If using vanilla bean, add split bean to syrup while it simmers.
- Treat the pears: Place peeled and cored pear halves in a bowl of water with a squeeze of lemon juice to prevent browning. Do not leave for more than 10-15 minutes.
- Pack the jars: Using a jar lifter, remove a hot jar from the water bath. Place on a clean towel. Using a wide-mouth funnel, pack pear halves into the jar, cut side down. Pack snugly but leave ½ inch headspace.
- Add the syrup: Ladle hot syrup over pears, leaving ½ inch headspace. Use a chopstick or thin spatula to release air bubbles.
- Wipe and seal: Wipe jar rim with a clean, damp towel. Center a lid on the jar and screw on the band until fingertip-tight.
- Process the jars: Place filled jars back into the stockpot of boiling water, ensuring they are covered by 1-2 inches of water. Bring to a full rolling boil and process for 20 minutes. Start timer after water returns to a boil.
- Cool and check seals: After 20 minutes, turn off heat and let jars sit in water for 5 minutes. Remove jars to a towel-lined counter and let cool completely, undisturbed, for 12-24 hours. Check seals by pressing center of each lid—if it doesn’t flex, it’s sealed. If it does, refrigerate and use within a few weeks.
Notes
Don’t skip the lemon juice—it prevents browning and helps preserve safely. Keep pears and syrup warm when packing to avoid thermal shock. Use firm but ripe pears; underripe won’t soften enough, overripe will turn to mush. Label jars with date. If a jar doesn’t seal, refrigerate and use within a few weeks.
Nutrition
- Serving Size: 2 pear halves with 1
- Calories: 180
- Sugar: 38
- Carbohydrates: 46
- Fiber: 4
Keywords: canned pears, spiced pears, cinnamon vanilla pears, homemade canned pears, easy canning recipe, fall preserving, pear canning