My kid came home from school one Tuesday and dropped the bomb. “Mom, everyone except me has the rectangle lunch.” You know the one. That plastic tray with the processed meat discs, the cheese that tastes like wax, and those cardboard-tasting crackers. I stood there in the kitchen holding a block of sharp cheddar and thought, “I am not buying that.” Not because I’m some lunchbox purist, but because I’d actually tasted one recently and honestly, it was sad. Soggy crackers, sweaty meat, and that weird aftertaste that lingers for hours. No thank you.
So I did what any slightly stubborn parent would do. I grabbed a few small containers from the cabinet, sliced up some real deli turkey, cut actual cheddar into neat little squares, and tossed in some whole wheat crackers. I handed it to her the next morning and watched her face light up at lunchtime. She came home and said, “Mom, this is way better. Can we make these every week?” And just like that, the homemade turkey and cheddar lunchables box became a permanent fixture in our rotation. It’s faster than you think, cheaper than store-bought, and honestly, you’ll feel like a kitchen genius.
There’s something satisfying about opening the fridge and knowing exactly what’s going into that lunchbox. No preservatives, no mystery ingredients, just real food that tastes like, well, food. And the best part? It takes fifteen minutes to prep five days’ worth. Fifteen minutes. That’s less time than it takes to argue about homework.
Why You’ll Love This Recipe
Let me be real with you. I’ve tested this method about a dozen times before I got it just right. The first few attempts were fine, but the crackers got soft, the cheese dried out, and the turkey looked sad by noon. After some trial and error, I figured out the tricks that actually work. Here’s why this version is different.
- Quick & Easy : You can assemble a whole week of lunches in under 15 minutes. No joke. I time myself every Sunday evening while catching up on a podcast.
- Simple Ingredients : You need exactly four main components — turkey, cheddar, crackers, and a little something extra for crunch. Everything comes from your regular grocery store.
- Perfect for School Lunches : No heating required, no mess, and everything stays separate until your kid decides to assemble it themselves. It’s basically a DIY snack board in a box.
- Crowd-Pleaser : I’ve packed these for school, road trips, park days, and even my own desk lunches. Kids and adults both go for them. My husband steals them from the fridge.
- Unbelievably Delicious : Real cheddar, good quality turkey, and crunchy crackers make a combo that store-bought versions can’t touch. The texture difference is night and day.
What makes this recipe different from the dozens of lunchable copycats out there? It’s the little details. I wrap the cheese in parchment paper so it doesn’t dry out. I store the crackers separately until the last minute. And I always add a small treat — a few berries, a handful of grapes, or a couple of those peanut butter energy bites I make on Sundays. It turns a simple lunch into something they actually look forward to opening.
This isn’t just a lunch hack. It’s the kind of thing that makes you feel good about what you’re sending out the door. No guilt, no processed junk, just real food that your kid will actually eat. And honestly, that’s a win in my book.
What Ingredients You Will Need
This recipe uses simple, everyday ingredients to create a lunch that feels special without being complicated. You probably already have most of these in your kitchen right now. Here’s what you’ll need for one homemade turkey and cheddar lunchables box.
For the Main Components
- Oven-roasted turkey breast — 4 to 6 slices (about 4 ounces). Look for thick-cut deli turkey from the counter, not the pre-packaged stuff. It tastes better and holds up better in the fridge. I like Boar’s Head or the store-brand oven-roasted version if it looks fresh.
- Sharp cheddar cheese — 2 ounces, cut into ½-inch cubes or small rectangles. Block cheese works way better than pre-shredded or sliced. It stays fresh longer and doesn’t get that weird plastic texture.
- Whole wheat crackers — about 12 to 15 crackers. I use Annie’s bunny crackers or simple square whole wheat ones. You can also use pretzel thins or rice crackers if that’s your thing.
- Fresh fruit — a handful of red grapes, apple slices, or berries. This adds sweetness and balances the savory flavors. I rotate based on what’s in season.
- Crunchy vegetable — baby carrots, cucumber rounds, or bell pepper strips. Adds color and texture. My kid prefers cucumber, so that’s what we use most weeks.
For the Extras (Optional but Recommended)

- Small treat — a few dark chocolate chips, a mini cookie, or a couple of chocolate-dipped pretzel rods broken into pieces. Keeps it fun without going overboard.
- Condiment — a small container of honey mustard, ranch dressing, or hummus for dipping. My kid likes honey mustard with the turkey. I use those tiny reusable silicone cups.
- Nut or seed butter — a tablespoon of almond butter or sunflower seed butter for extra protein. Great if your kid isn’t a huge meat eater.
Ingredient Selection Tips
When picking turkey, look for slices that are thick enough to hold their shape but thin enough to roll or fold easily. If the turkey is too thin, it tears when you try to separate the slices. Too thick, and it’s hard for little hands to manage. Aim for that happy medium — about an eighth of an inch thick.
For the cheddar, I always go with sharp or extra sharp. It has more flavor, which means you can use less and still get that satisfying cheese taste. Plus, it doesn’t get that greasy texture at room temperature like mild cheddar does. If you want to switch it up, try colby jack, gouda, or even a smoky cheddar for a different vibe.
As for crackers, texture is everything. You want something sturdy enough to hold up to the cheese and turkey without crumbling into a million pieces. I’ve tested this with butter crackers, wheat thins, and even bagel chips. The best results come from crackers that are crisp but not too hard. Think snack cracker consistency, not artisan bread cracker.
Equipment Needed
You don’t need fancy gadgets for this one. Here’s what you’ll actually use.
- Lunchbox containers — Bento-style boxes with compartments work best. I use a set of three-section containers from the dollar store, and they’ve lasted two years so far. You can also use small glass meal prep containers if you prefer.
- Small silicone cups or mini containers — for condiments, fruit, or small treats. Reusable ones are better for the planet and your wallet. I got a pack of twelve for under ten bucks.
- Cheese knife or sharp chef’s knife — for cutting the cheddar into even cubes. A sharp knife makes clean cuts, which means less crumbling.
- Cutting board — preferably one that’s used only for cheese and fruit to avoid cross-contamination. I have a small bamboo board just for lunch prep.
- Parchment paper or wax paper — for wrapping the cheese so it doesn’t dry out. This one trick changed my lunch game completely.
- Kitchen scale (optional) — if you want to be precise about portions. I use mine for the first batch, then eyeball it after that.
If you don’t have a bento box, no worries. Use a regular container with a silicone muffin liner to separate components. Or just use three small containers inside a lunch bag. The key is keeping things separate so nothing gets soggy.
Preparation Method
I’m going to walk you through exactly how I prep five days of lunches in under fifteen minutes. Once you get the rhythm down, it becomes second nature. Trust me, you’ll have this memorized after one or two tries.
Step 1: Prep the Turkey (2 minutes)
Open your package of oven-roasted turkey and lay the slices flat on a cutting board. If the slices are stuck together, gently separate them with your fingers. Stack them in piles of two or three slices, then roll them up loosely. Cut each roll into bite-sized pieces, about one inch wide. You want pieces that are easy for little fingers to pick up. Place the turkey pieces into one section of your lunchbox container.
Pro tip: If you’re prepping for the whole week, layer the turkey pieces between sheets of parchment paper in a container. This keeps them from sticking together and makes morning assembly faster.
Step 2: Cube the Cheddar (3 minutes)
Take your block of sharp cheddar and cut it into ½-inch thick slices. Stack two or three slices on top of each other, then cut them into strips about ½-inch wide. Rotate the strips and cut across to create small cubes. You should get about 12 to 15 cubes from a 2-ounce piece. Place the cubes into another section of your container.
Pro tip: Cut the cheese while it’s still cold from the fridge. Warm cheese gets soft and sticky, which makes clean cuts nearly impossible. Cold cheese gives you those perfect, clean-edged cubes every time.
Step 3: Portion the Crackers (1 minute)
Count out 12 to 15 crackers per lunch and place them in a separate compartment. If your container doesn’t have a separate section, put the crackers in a small snack bag or a silicone cup. The goal is to keep them away from any moisture until lunchtime.
Pro tip: Don’t put the crackers in the container until the morning of. If you’re meal prepping on Sunday, store the crackers in a ziplock bag inside the lunchbox. Add them right before you pack the lunch.
Step 4: Wash and Prep the Fruits and Vegetables (4 minutes)
Rinse your grapes, berries, or apple slices under cold water and pat them dry with a clean kitchen towel. If you’re using apple slices, toss them with a little lemon juice to prevent browning. For carrots or cucumber, cut them into sticks or rounds that are easy to grab. Place them in the remaining compartment of your container.
Pro tip: Dry your fruit thoroughly. Any extra moisture will make the crackers and turkey soggy by lunchtime. I use a salad spinner for berries and pat grapes dry with paper towels.
Step 5: Add the Extras (2 minutes)
If you’re including a small treat or condiment, portion those out now. A few dark chocolate chips go in a tiny silicone cup. A tablespoon of honey mustard goes in another. Place these in any empty spaces in the container or on top of the fruit.
Step 6: Assemble and Store (3 minutes)
Arrange everything neatly in your container. Close the lid tightly and place it in the refrigerator. If you’re making multiple lunches, repeat the process for each one. I stack mine in the fridge so I can grab one each morning without thinking.
Pro tip: For the best texture, add the crackers in the morning right before you pack the lunch. If you’re sending it to school, include a small ice pack to keep everything cool until lunchtime.
Cooking Tips & Techniques
I’ve made this recipe probably fifty times by now, and I’ve learned a few things the hard way. Here are the tips that actually make a difference.
Keep the cheese wrapped. I learned this after a week of dry, cracked cheese cubes. Wrap your cheddar cubes in a small piece of parchment paper or wax paper before putting them in the container. It keeps the moisture in and the air out. Your cheese stays soft and creamy instead of turning into little rubber bricks.
Layer your turkey like a pro. Don’t just throw the turkey pieces in a pile. Lay them flat in a single layer if possible. If you stack them, they stick together and become one giant turkey clump. Nobody wants to peel apart turkey slices at lunchtime. I arrange mine in a single layer, then add a piece of parchment paper on top if I’m stacking another layer.
Watch the moisture. This is the number one mistake people make with homemade lunchables. Wet fruit, sweaty cheese, and humid containers create a soggy disaster. Pat everything dry before you pack it. Use a paper towel to blot the turkey if it looks wet. Dry your grapes and berries thoroughly. A little extra effort here saves you from a sad, mushy lunch.
Temperature matters. Cold cheese cuts better, but room temperature cheese tastes better. If your kid is eating lunch at noon, the cheese will have had a few hours to come to room temperature by then. That’s perfect. Just make sure you include an ice pack to keep everything safe until lunchtime, especially if you’re packing turkey.
Prep in batches. I spend fifteen minutes on Sunday evening cutting cheese, portioning turkey, and washing fruit. Then each morning I just grab a container, add the crackers, and go. This system has saved me so much morning chaos. I can pack a lunch in under two minutes while my coffee is brewing.
One mistake I made early on: I used pre-sliced cheese from those individually wrapped packets. Don’t do this. It’s more expensive, creates more waste, and the texture is weird. A block of good cheddar costs less and tastes infinitely better. Plus, cutting it yourself gives you control over the size and shape.
Variations & Adaptations
One of the best things about this recipe is how easy it is to customize. Here are some variations I’ve tried and loved.
Gluten-Free Version
Swap the whole wheat crackers for gluten-free crackers or rice cakes. I like the simple round rice crackers from the Asian section of the grocery store. They’re crunchy, neutral in flavor, and hold up well. You can also use gluten-free pretzel sticks for that salty crunch.
Low-Carb or Keto Version
Skip the crackers entirely and add extra vegetables. Cucumber rounds, bell pepper strips, and celery sticks make great dippers. Use full-fat cheese and add some almonds or walnuts for healthy fats. This version works great for adults watching their carb intake.
Vegetarian Version
Replace the turkey with hard-boiled eggs, cubed tofu, or a plant-based deli slice. I’ve tried the smoked tofu slices from the refrigerated section, and they work surprisingly well. You can also use chickpea salad or egg salad in a small container for a protein boost.
Seasonal Variations
In summer, I add fresh berries, watermelon cubes, or peach slices. In fall, apple slices with a squeeze of lemon and a sprinkle of cinnamon. Winter calls for clementine segments and pomegranate seeds. Spring brings fresh strawberries and snap peas. The fruit and veggie component changes with what’s available and affordable.
Flavor Twists
Switch up the cheese for a completely different experience. Smoked gouda adds a rich, smoky flavor. Pepper jack gives it a little kick. Mozzarella pearls are fun and mild. For the turkey, try peppered turkey, honey smoked turkey, or even roast beef for a change. I once used leftover rotisserie chicken, and it was a hit.
One of my favorite variations is turning this into a mini snack board for road trips. I add a few mini caprese skewers on the side and some olives for a grown-up version. It feels fancy but takes the same fifteen minutes to assemble.
Serving & Storage Suggestions
This homemade turkey and cheddar lunchables box is designed to be eaten cold or at room temperature. Here’s how to serve and store it for the best results.
Serving temperature: Cold or room temperature works perfectly. If you’re packing it for school, include a small ice pack to keep the turkey and cheese safe until lunchtime. By the time your kid opens it, the cheese will have softened slightly, which actually makes it taste better.
Presentation ideas: Arrange the components in separate compartments so everything stays distinct. I like to put the turkey in one section, cheese in another, crackers in a third, and fruit in any remaining space. If you’re using a container without dividers, use silicone cupcake liners to separate things. It looks neat and keeps flavors from mingling.
Storage instructions: Assemble the containers without the crackers and store them in the refrigerator for up to five days. Keep the crackers in a separate airtight container or ziplock bag at room temperature. Add them to the lunchbox on the morning of. This prevents sogginess and keeps everything fresh.
Freezer instructions: I don’t recommend freezing the assembled lunchables. The turkey gets watery when thawed, and the cheese texture changes. However, you can freeze the cheese cubes in a freezer bag for up to three months. Thaw them in the fridge overnight before using.
Reheating tips: This recipe is meant to be eaten cold, so no reheating needed. If you want to serve it warm, you can briefly microwave the turkey and cheese for about 15 seconds, but honestly, it’s better cold. The crackers should never be microwaved.
How flavors develop: The turkey and cheese taste best when they’ve had a few hours to chill together in the fridge. The flavors meld slightly, and the cheese firms up to the perfect texture. I’ve noticed that day two and three taste even better than day one. Something about the cheese and turkey getting acquainted in the fridge just works.
Nutritional Information & Benefits
Here’s an approximate nutritional breakdown for one homemade turkey and cheddar lunchables box (without the optional treat or condiment).
| Nutrient | Amount per Serving |
|---|---|
| Calories | 320-380 |
| Protein | 22-26g |
| Carbohydrates | 28-32g |
| Fiber | 3-5g |
| Fat | 14-18g |
| Saturated Fat | 7-9g |
| Sodium | 600-800mg |
| Calcium | 200-250mg |
This lunch provides a good balance of protein, healthy fats, and complex carbohydrates. The turkey offers lean protein that keeps energy levels steady throughout the afternoon. The cheddar adds calcium for strong bones and teeth, along with a satisfying richness. The whole wheat crackers contribute fiber, which aids digestion and keeps your kid feeling full until after-school snacks.
The fresh fruit and vegetables add vitamins, antioxidants, and natural sweetness without processed sugar. Grapes provide vitamin C and K, while carrots offer beta-carotene for eye health. If you include apple slices, you’re also getting pectin, a type of fiber that supports gut health.
This recipe is naturally nut-free if you skip the almond butter, making it a safe option for nut-free classrooms. It’s also relatively low in added sugars compared to store-bought lunch kits, which often contain hidden sugars in the crackers, meat, and even the cheese. By making it yourself, you control exactly what goes in.
One thing I love about this lunch is that it doesn’t spike blood sugar the way a carb-heavy lunch might. The protein and fat from the turkey and cheese slow down digestion, providing steady energy instead of a crash. My kid comes home from school actually alert and ready for homework, not dragging and cranky.
Conclusion
This homemade turkey and cheddar lunchables box is one of those recipes that makes you wonder why you didn’t start making it sooner. It’s faster than a trip to the store, cheaper than the boxed version, and honestly, it tastes so much better. Real cheese, real turkey, real fruit — it’s lunch made simple and good.
What I love most about this recipe is how adaptable it is. You can switch up the cheese, change the fruit, add a different vegetable, or throw in a small treat. It works for school lunches, road trips, park picnics, and even desk lunches for grown-ups. It’s the kind of recipe that grows with your family and changes with the seasons.
I encourage you to try it this week. Start with the basic version, then experiment with your own variations. Maybe your kid loves pepper jack cheese and apple slices. Maybe they prefer turkey rolled around a cheese stick. The beauty of homemade is that you get to decide.
If you make this recipe, I’d love to hear how it goes. Drop a comment below and tell me what variations you tried. Did your kid love it? Did you discover a new favorite combination? Share your wins, your fails, and everything in between. And if you’re looking for more lunch ideas, check out our DIY snack board lunchbox ideas for even more inspiration.
Happy lunch packing, friends. You’ve got this.
Frequently Asked Questions
How long does the turkey stay fresh in the lunchbox?
The turkey stays fresh for up to four hours when kept cold with an ice pack. If you’re packing it for school, use an insulated lunch bag with a frozen ice pack. The turkey should be consumed within two hours if left at room temperature, so include that ice pack for safety.
Can I use pre-sliced cheese instead of cutting it myself?
You can, but I don’t recommend it. Pre-sliced cheese has additives that prevent it from sticking together, which also affects the texture and flavor. Block cheese tastes better, costs less, and cuts into perfect cubes in just a few minutes. The difference is noticeable.
How do I keep the crackers from getting soggy?
Store the crackers separately from the moist ingredients until the morning of. I keep a bag of crackers in the pantry and add them to the lunchbox right before packing. If you’re using a bento box with compartments, make sure the cracker section is completely dry and doesn’t touch the fruit or vegetables.
Can I make these lunchables for a whole week at once?
Absolutely. I prep five containers every Sunday evening. I cut the cheese, portion the turkey, wash and cut the fruit, and arrange everything except the crackers. Then I store the containers in the fridge and add the crackers each morning. It takes less than two minutes per day.
What if my kid doesn’t like cheddar?
No problem! Swap the cheddar for colby jack, mozzarella, gouda, or provolone. You can also use cheese sticks cut into rounds. The key is using a cheese that your kid actually enjoys. The recipe is flexible, so feel free to experiment until you find the perfect combination.
Pin This Recipe!
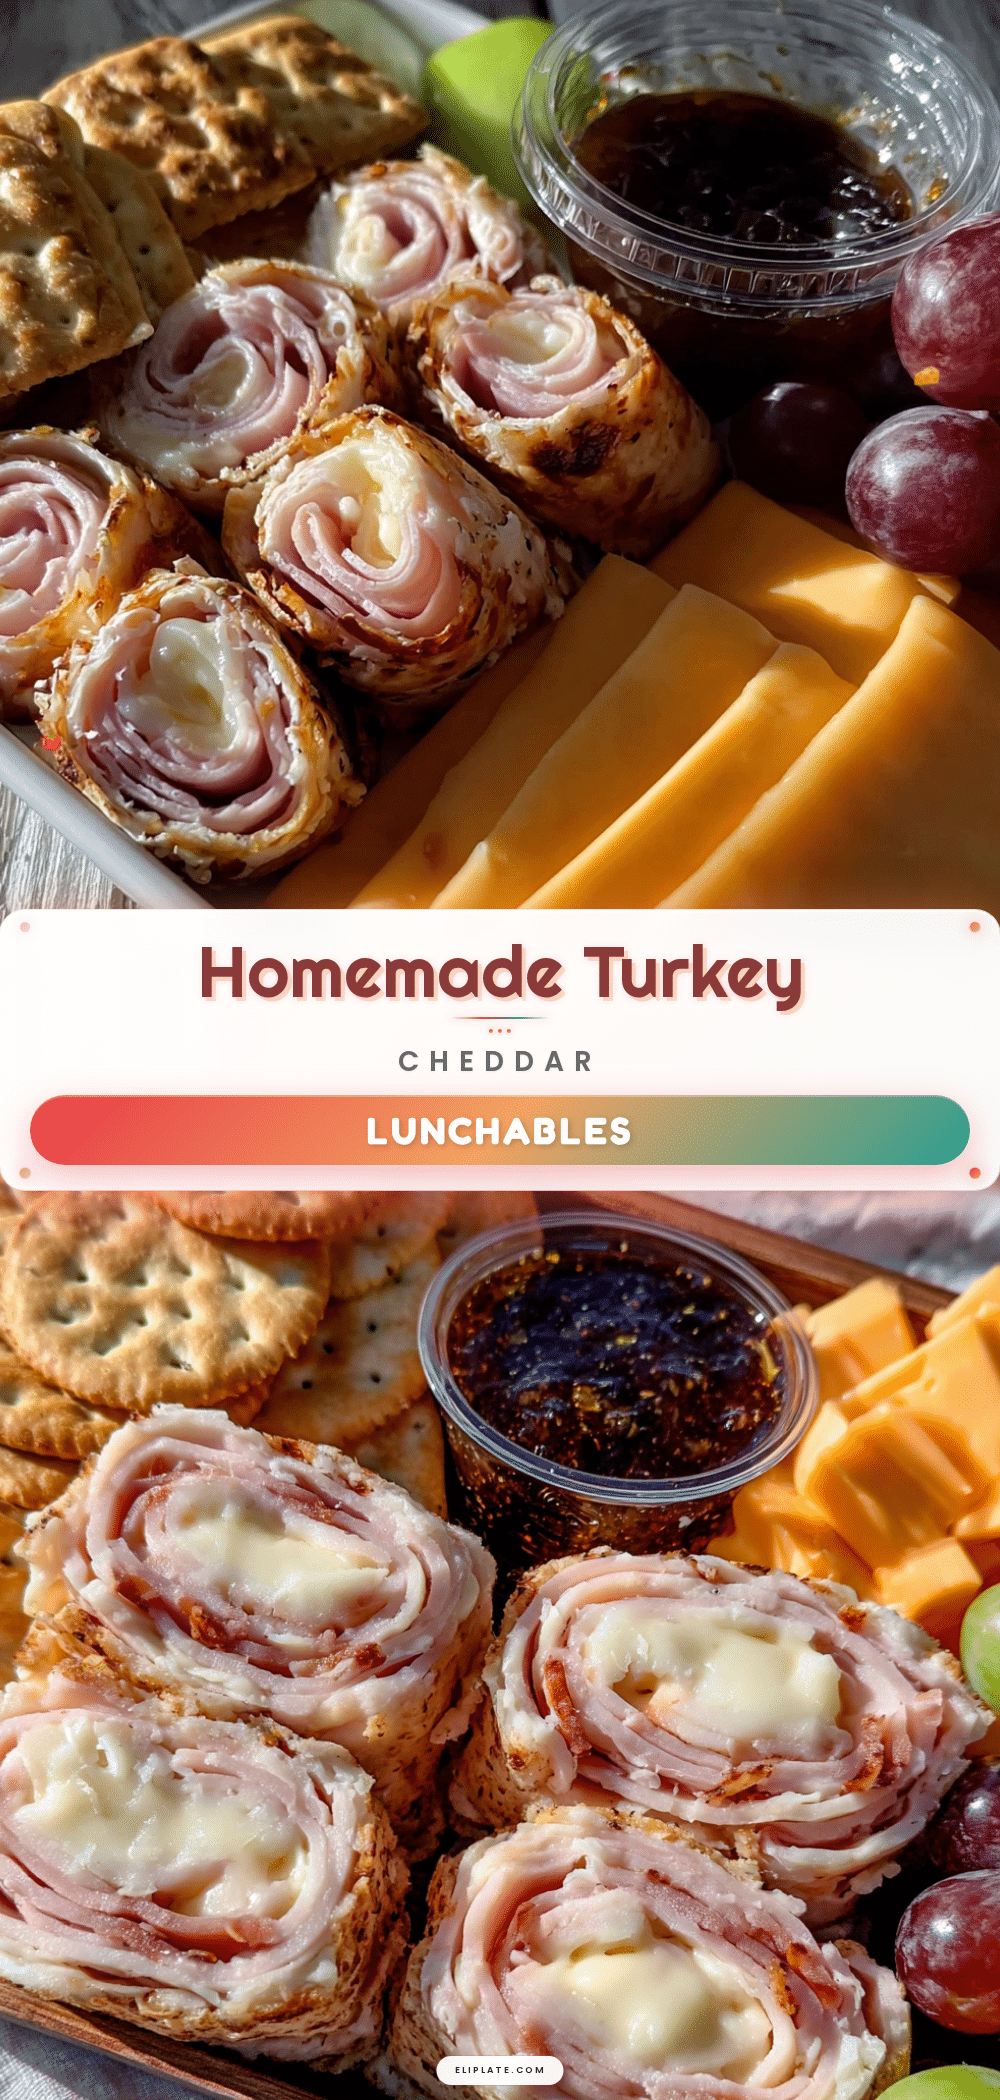
15-Minute Homemade Turkey and Cheddar Lunchables

A quick and easy homemade version of the classic lunchable, made with real turkey, sharp cheddar, and whole wheat crackers. Perfect for school lunches, road trips, or desk lunches, and can be prepped in just 15 minutes for the whole week.
- Prep Time: 15 minutes
- Cook Time: 0 minutes
- Total Time: 15 minutes
- Yield: 1 serving 1x
- Category: Lunch
- Cuisine: American
Ingredients
- 4 to 6 slices oven-roasted turkey breast (about 4 ounces)
- 2 ounces sharp cheddar cheese, cut into ½-inch cubes
- 12 to 15 whole wheat crackers
- 1 handful fresh fruit (red grapes, apple slices, or berries)
- 1 handful crunchy vegetable (baby carrots, cucumber rounds, or bell pepper strips)
- Optional: small treat (dark chocolate chips, mini cookie, or chocolate-dipped pretzel rods)
- Optional: condiment (honey mustard, ranch dressing, or hummus)
- Optional: 1 tablespoon nut or seed butter (almond butter or sunflower seed butter)
Instructions
- Prep the turkey: Open the package of oven-roasted turkey and lay slices flat on a cutting board. Stack in piles of 2-3 slices, roll loosely, and cut into bite-sized pieces about 1 inch wide. Place in one section of the lunchbox container.
- Cube the cheddar: Cut the block of sharp cheddar into ½-inch thick slices, stack 2-3 slices, cut into ½-inch wide strips, then cut across to create small cubes. Place in another section of the container.
- Portion the crackers: Count out 12-15 crackers per lunch and place in a separate compartment or small snack bag. Keep away from moisture until lunchtime.
- Wash and prep fruits and vegetables: Rinse fruit under cold water and pat dry. Cut apple slices and toss with lemon juice to prevent browning. Cut carrots or cucumber into sticks or rounds. Place in remaining compartment.
- Add extras: Portion out small treat or condiment into tiny silicone cups and place in empty spaces.
- Assemble and store: Arrange everything neatly in the container, close lid tightly, and refrigerate. For best texture, add crackers in the morning before packing. Include a small ice pack to keep cool until lunchtime.
Notes
Keep cheese wrapped in parchment paper to prevent drying. Store crackers separately until morning to avoid sogginess. Pat all fruit and vegetables dry thoroughly. For best texture, add crackers right before packing. Prep containers without crackers up to 5 days in advance.
Nutrition
- Serving Size: 1 lunchable box
- Calories: 320380
- Sugar: 812
- Sodium: 600800
- Fat: 1418
- Saturated Fat: 79
- Carbohydrates: 2832
- Fiber: 35
- Protein: 2226
Keywords: homemade lunchables, turkey and cheddar lunchables, school lunch, easy lunch, meal prep, bento box lunch, kid-friendly lunch