“Mom, my throat feels scratchy again.” That was my five-year-old, climbing into bed with me at 6:47 on a Tuesday morning. I kissed her forehead—already a little warm—and felt that familiar knot in my stomach. You know the one. It’s the pre-cold dread that hits every parent when you realize the school germ cycle has officially started its rounds again.
I’d been meaning to make homemade elderberry gummies for kids’ immune support for months. I had the dried berries in my pantry, the silicone molds in a drawer, and about a dozen tabs open on my phone with different recipes. But life gets busy, you know? Between school drop-offs, work deadlines, and the general chaos of keeping tiny humans alive, it kept getting pushed to the bottom of my to-do list.
That morning, I finally cracked. I pulled out a pot, measured the water, and decided I was done relying on store-bought versions with questionable ingredients. Honestly, the first batch was a little messy—some gummies stuck together, and I definitely spilled gelatin powder across my counter. But watching my daughter happily chew her way through a “berry candy” that was actually packed with immune-supporting goodness? That made every sticky second worth it.
These homemade elderberry gummies have become our secret weapon through cold season. They’re not just effective—they’re something my kids actually ask for, which feels like a parenting win in itself. Let me show you how to make them.
Why You’ll Love This Recipe
I’ve tested this recipe through three different cold seasons, two kids with picky palates, and one memorable batch where I accidentally doubled the honey. Here’s why it works:
- Immune-Boosting Power: Elderberries are packed with antioxidants and vitamins that support the immune system naturally. This isn’t just a fun snack—it’s a proactive step for keeping your family healthier during cold and flu season.
- No Artificial Anything: Store-bought gummies often contain corn syrup, artificial flavors, and preservatives. These use real elderberry syrup, honey, and fruit juice. You control exactly what goes in.
- Kid-Approved Taste: The tartness of elderberries balances beautifully with honey and a splash of apple juice. My kids genuinely think these are candy—they have no idea they’re eating something good for them.
- Simple Ingredients: You need about five ingredients, most of which you probably already have. No fancy health food store trips required.
- Cost-Effective: Homemade versions cost a fraction of what you’d pay for organic gummies at the store. Plus, you get way more per batch.
- Customizable: Adjust the sweetness, try different juice combinations, or add extra immune boosters like vitamin C powder or zinc. This recipe bends to your family’s needs.
What makes these different from other recipes I’ve tried? The texture. I spent weeks perfecting the gelatin-to-liquid ratio so these gummies are firm enough to hold their shape but soft enough for little teeth. No rock-hard gummies or slimy messes—just perfect, bouncy little immune boosters.
What Ingredients You Will Need
This recipe uses simple, wholesome ingredients to deliver immune support without any weird additives. Most of these are pantry staples or easy to find at your local grocery store.
- Dried Elderberries (½ cup): Look for organic dried elderberries from a trusted brand like Starwest Botanicals or Frontier Co-op. They’re usually found in the bulk spice section or online. Avoid fresh elderberries—they need to be cooked thoroughly before consumption.
- Water (3 cups): Filtered water works best. Tap water with high chlorine content can affect the flavor slightly.
- Raw Honey (3-4 tablespoons): Raw, local honey adds natural sweetness and its own immune-supporting properties. For kids under one year, substitute with maple syrup or agave nectar.
- Apple Juice (½ cup): Unsweetened apple juice adds natural sweetness and helps balance the tartness of elderberries. You can also use white grape juice or diluted apple cider.
- Grass-Fed Gelatin (4 tablespoons): This is the key to getting that perfect gummy texture. I recommend Vital Proteins or Great Lakes gelatin—they dissolve smoothly and produce consistent results. Don’t substitute with collagen peptides; they won’t set properly.
- Optional Add-Ins:
- Vitamin C powder (¼ teaspoon) for extra immune support
- Zinc picolinate (liquid form, 2-3 drops)
- Echinacea tincture (a few drops, if desired)
- Lemon juice (1 tablespoon) for brightness and extra vitamin C
A quick note on ingredient selection: I’ve tried this with both dried and fresh elderberries, and dried are honestly easier to work with. They’re available year-round and concentrate the flavor beautifully. If you’re foraging your own elderberries—which I’ve done exactly once, and let’s just say I learned my lesson about checking for stems—make sure you cook them thoroughly.
For the gelatin, steer clear of flavored or sweetened versions. Unflavored grass-fed gelatin gives you the cleanest taste and best texture. I learned this the hard way when I grabbed a box of strawberry gelatin by mistake—the resulting gummies were… weirdly artificial tasting.
Equipment Needed
You don’t need a fancy kitchen setup for these gummies. Here’s what you’ll need:
- Silicone Gummy Molds: I use bear-shaped molds because my kids lose their minds over them. You can find these on Amazon or at craft stores for under $10. Fun shapes like stars, dinosaurs, or hearts work great too.
- Small Saucepan: For simmering the elderberries. A 2-quart pot works perfectly.
- Fine-Mesh Strainer or Cheesecloth: To strain out the berry solids. A nut milk bag also works in a pinch.
- Glass Measuring Cup or Small Bowl: For blooming the gelatin. A Pyrex measuring cup with a spout makes pouring into molds much easier.
- Whisk: A small whisk helps incorporate the gelatin without lumps. A fork works in a pinch.
- Dropper or Small Spoon: For filling the molds. A medicine dropper or a steady hand with a spoon works fine.
- Baking Sheet or Plate: To hold the filled molds while they set in the fridge.
If you don’t have silicone molds, you can pour the gummy mixture into a small glass dish (like an 8×8 pan) and cut it into squares once set. They won’t look as cute, but they’ll taste the same. I’ve done this when my kids lost half the molds under the couch—true story.
Preparation Method
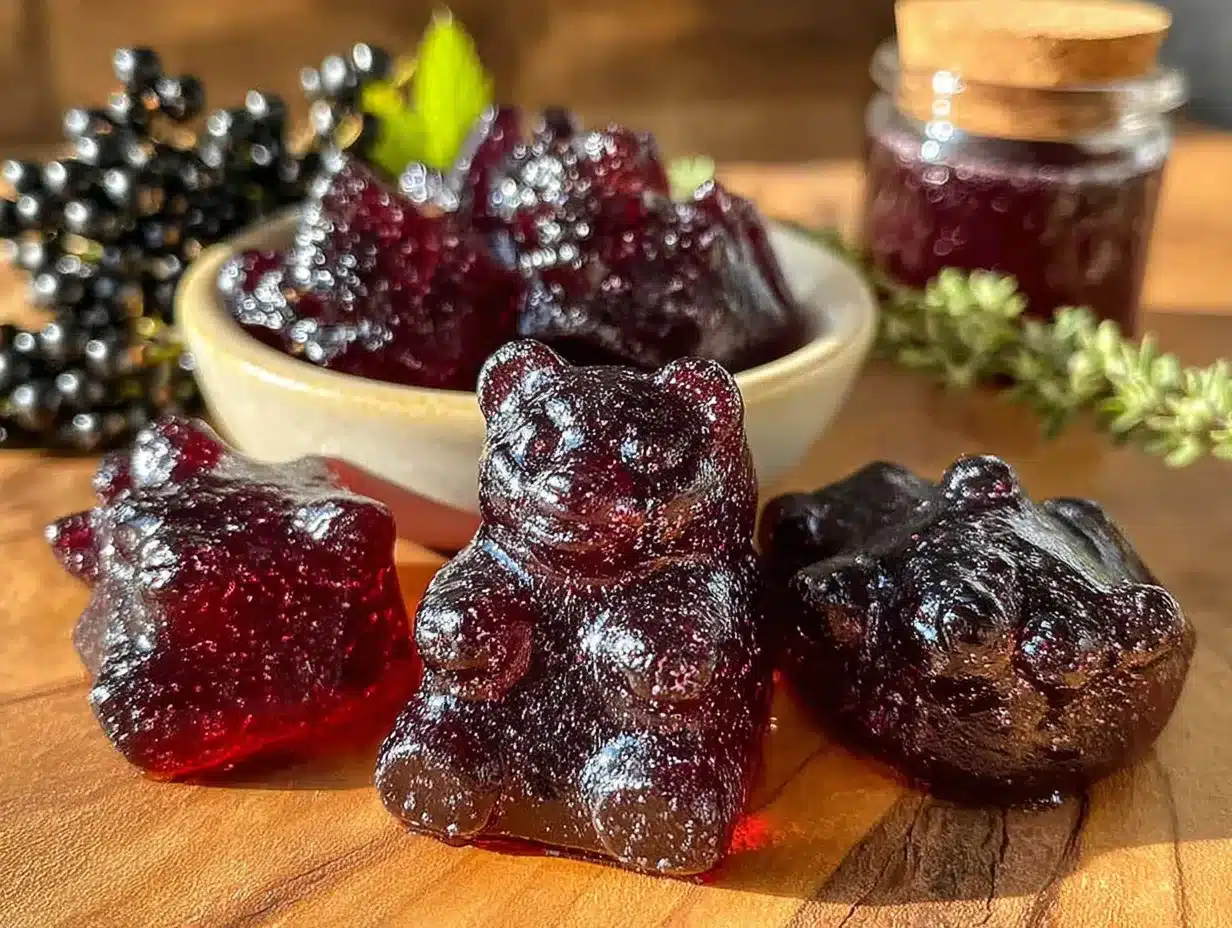
- Make the Elderberry Concentrate: In a small saucepan, combine ½ cup dried elderberries with 3 cups filtered water. Bring to a boil, then reduce heat and let it simmer uncovered for 25-30 minutes. The liquid will reduce by about half and turn a deep, dark purple. Your kitchen will smell amazing—like tart berries and earthiness.
- Strain the Berries: Place a fine-mesh strainer over a large bowl or glass measuring cup. Pour the elderberry mixture through the strainer, pressing gently on the berries with the back of a spoon to extract all the liquid. Discard the solids. You should have about 1½ cups of concentrated elderberry syrup. Let it cool for 5-10 minutes—it needs to be warm but not boiling hot for the next step.
- Bloom the Gelatin: While the syrup cools slightly, pour ½ cup cold apple juice into a small bowl. Sprinkle 4 tablespoons of gelatin evenly over the surface. Don’t dump it all in at once—sprinkle slowly to prevent clumps. Let it sit for 3-5 minutes until the gelatin absorbs the liquid and becomes thick and spongy. This is called blooming, and it’s crucial for smooth, lump-free gummies.
- Combine Everything: Whisk the bloomed gelatin into the warm elderberry syrup. Add 3-4 tablespoons of raw honey (start with 3 and taste—you can always add more). Whisk gently but thoroughly until the gelatin is fully dissolved and the honey is incorporated. If you’re adding vitamin C powder or other supplements, whisk them in now.
- Fill the Molds: Place your silicone molds on a baking sheet for stability. Using a dropper or small spoon, carefully fill each cavity with the gummy mixture. Don’t overfill—leave a tiny bit of space at the top. If you get bubbles on the surface, pop them with a toothpick.
- Set the Gummies: Transfer the baking sheet to the refrigerator and let the gummies set for at least 2-3 hours. I usually leave them overnight for best results. They should be firm to the touch and pop easily out of the molds when ready.
- Remove and Store: Gently push the gummies out of the molds from the bottom. If they stick, let them sit at room temperature for 5 minutes—the slight warmth helps release them. Transfer to an airtight container.
A few sensory cues: when you’re simmering the elderberries, the liquid should be bubbling gently, not furiously. The finished syrup should coat the back of a spoon. When you whisk in the gelatin, you’re looking for a smooth, glossy liquid with no lumps. If you see streaks of undissolved gelatin, keep whisking—or pop the mixture back on low heat for 30 seconds.
One thing I wish I’d known earlier: work quickly once the gelatin is in. The mixture starts to thicken as it cools, and if it gets too thick, you’ll end up with lumpy gummies. If that happens, gently reheat the mixture over low heat while whisking constantly until it’s pourable again.
Cooking Tips & Techniques
After making these gummies more times than I can count, here are the lessons I’ve learned—some of them the hard way.
Don’t Boil the Gelatin: This is the biggest mistake I made early on. If you add gelatin to boiling liquid, it loses its thickening power. Your gummies will never set properly. Always let your elderberry syrup cool to warm (around 120°F) before adding the bloomed gelatin.
Use a Whisk, Not a Spoon: I tried using a fork once to mix in the gelatin. Big mistake. A whisk incorporates everything smoothly and prevents those annoying little gelatin clumps that feel weird in your mouth.
Temperature Matters: The ideal temperature for pouring the mixture into molds is when it’s warm but not hot—think bathwater temperature. Too hot, and you risk damaging the beneficial compounds in the elderberries and honey. Too cold, and the mixture thickens before you can fill all the molds.
Grease Your Molds (Sometimes): High-quality silicone molds usually don’t need greasing, but cheaper ones might. If your gummies are sticking, try spraying the molds very lightly with coconut oil before filling. I learned this after losing an entire batch of dinosaur-shaped gummies to a stubborn mold.
Storage Is Key: These gummies need to stay refrigerated. They’ll last about 2-3 weeks in an airtight container. I’ve pushed it to a month, and they were still fine, but the texture starts to get a little rubbery after week three.
Batch Size Strategy: I always double this recipe and make a big batch. The extra time investment is minimal, and having gummies ready in the fridge means I’m never caught off guard when someone starts sniffling.
Variations & Adaptations
This recipe is incredibly flexible. Here are some variations I’ve tried and loved:
Berry Blend: Swap half the elderberries for dried blueberries or dried tart cherries. The flavor profile changes beautifully, and you get additional antioxidant benefits. My kids love the blueberry version—it’s sweeter and milder.
Citrus Boost: Add 2 tablespoons of fresh lemon juice and 1 teaspoon of orange zest to the elderberry syrup before adding the gelatin. The citrus brightens everything and adds extra vitamin C. This version has become my go-to during January when everyone seems to be fighting something.
Ginger Kick: Simmer a 1-inch piece of fresh ginger (sliced) with the elderberries. Ginger adds anti-inflammatory properties and a gentle warmth that’s perfect for winter. Strain it out with the berries. My husband swears by this version when he feels a cold coming on.
Vegan Version: Substitute the gelatin with agar agar powder (use about 2 tablespoons). The texture will be different—firmer and less bouncy—but it works. You’ll need to boil the mixture for 1-2 minutes to activate the agar agar, and the gummies will set at room temperature. I’ve made this for vegan friends, and while they’re not identical, they’re still delicious.
Lower Sugar Option: Reduce the honey to 1-2 tablespoons or substitute with stevia drops to taste. The gummies won’t be as sweet, but they’ll still be effective. My kids protested the first time I tried this, so I stick with the full honey version for them.
Serving & Storage Suggestions
These gummies are best served cold, straight from the fridge. The texture is firmer and more satisfying that way. If you leave them out at room temperature for too long (more than an hour), they’ll start to soften and get sticky.
Dosage for Kids: For children ages 2-4, I recommend 1-2 gummies per day. For ages 5-12, 2-3 gummies. For adults (yes, you can eat them too!), 3-4 gummies. During cold and flu season, you can increase to twice daily if needed. Always consult your pediatrician before starting any new supplement routine.
Storage: Keep gummies in an airtight container in the refrigerator. Glass jars work beautifully, but any container with a tight seal will do. Layer them between pieces of parchment paper if you’re stacking—they can stick together otherwise.
Freezing: These gummies freeze surprisingly well. Lay them in a single layer on a baking sheet, freeze for 1-2 hours, then transfer to a freezer bag. They’ll keep for 3-4 months. Thaw in the refrigerator overnight before serving. The texture might be slightly softer after freezing, but the immune benefits remain intact.
On-the-Go Tip: I pack a small container of gummies in my kids’ lunchboxes during cold season. They stay cold enough with an ice pack, and it gives me peace of mind knowing they’re getting immune support even at school.
Nutritional Information & Benefits
While I’m not a nutritionist, I’ve done my research on these ingredients. Here’s the approximate breakdown per 2-gummy serving (based on my recipe):
- Calories: 45-55
- Carbohydrates: 10-12g
- Sugar: 8-10g (from honey and apple juice)
- Protein: 3-4g (from gelatin)
- Vitamin C: Varies based on added supplements
Key Health Benefits:
- Elderberries: Rich in antioxidants called anthocyanins, which support immune function and may reduce the duration of cold symptoms.
- Honey: Contains natural antimicrobial properties and soothes sore throats.
- Gelatin: Supports gut health, joint health, and provides protein. Grass-fed gelatin also contains glycine, which supports sleep and immune function.
- Apple Juice: Provides natural sweetness and a small amount of vitamin C.
Dietary Considerations: These gummies are gluten-free, dairy-free, and nut-free. They are not vegan due to the gelatin. If you’re avoiding sugar, you can reduce the honey, but note that the gummies won’t be as palatable to kids.
I personally feel better knowing my kids are getting immune support from real food ingredients rather than synthetic supplements. There’s something reassuring about watching them happily eat something I made with my own hands, knowing exactly what’s in it.
Conclusion
Making these homemade elderberry gummies has genuinely changed how our family navigates cold season. Instead of scrambling for immune support when someone already feels sick, I’ve got a batch ready in the fridge, waiting to be chewed. It’s a small act of preparation that makes me feel like I’m doing something proactive for my kids’ health.
I love that this recipe lets you customize based on what your family needs—more sweetness, different flavors, extra immune boosters. It’s forgiving, simple, and produces something that actually works. Plus, watching my kids’ faces light up when they see “gummy bear day” on the snack rotation? That never gets old.
If you try this recipe, I’d love to hear how it goes. Did your kids love them? Did you try a fun variation? Drop a comment below and let me know. And if you’re looking for more easy, healthy snack ideas, check out these easy 5-ingredient peanut butter energy bites or these easy yogurt parfait cups for more kid-friendly options your family will love.
Here’s to healthier winters and happy, immune-strong kids!
Frequently Asked Questions
Can I use fresh elderberries instead of dried?
Yes, but you’ll need to adjust the amount. Use about 1 cup of fresh elderberries in place of ½ cup dried. Fresh berries contain more water, so you may need to simmer them a bit longer to concentrate the syrup. Always cook fresh elderberries thoroughly—they contain compounds that can cause stomach upset if eaten raw.
How long do these gummies last?
Stored in an airtight container in the refrigerator, these gummies stay fresh for 2-3 weeks. You can also freeze them for 3-4 months. I always label my containers with the date so I know when I made them.
Can I make these without a gummy mold?
Absolutely! Pour the mixture into a small glass dish (like an 8×8 pan) lined with parchment paper. Let it set in the fridge, then cut into small squares. They won’t look as cute, but they’ll taste just as good. I’ve done this when traveling and didn’t want to bring my molds.
Are these safe for toddlers?
For children over 12 months (due to the honey), yes, but always supervise young children when eating gummies to prevent choking. For toddlers, I recommend cutting the gummies into smaller pieces. As always, check with your pediatrician before introducing any new supplement into your child’s routine.
Why did my gummies turn out too soft or too hard?
Soft gummies usually mean you didn’t use enough gelatin or the liquid was too hot when you added it. Hard gummies mean too much gelatin or you boiled the mixture after adding it. Stick to the ratio of 4 tablespoons gelatin per 1½ cups liquid, and don’t let the mixture boil after adding gelatin. If you’re at high altitude, you might need slightly more gelatin—experiment with adding an extra teaspoon.
Pin This Recipe!
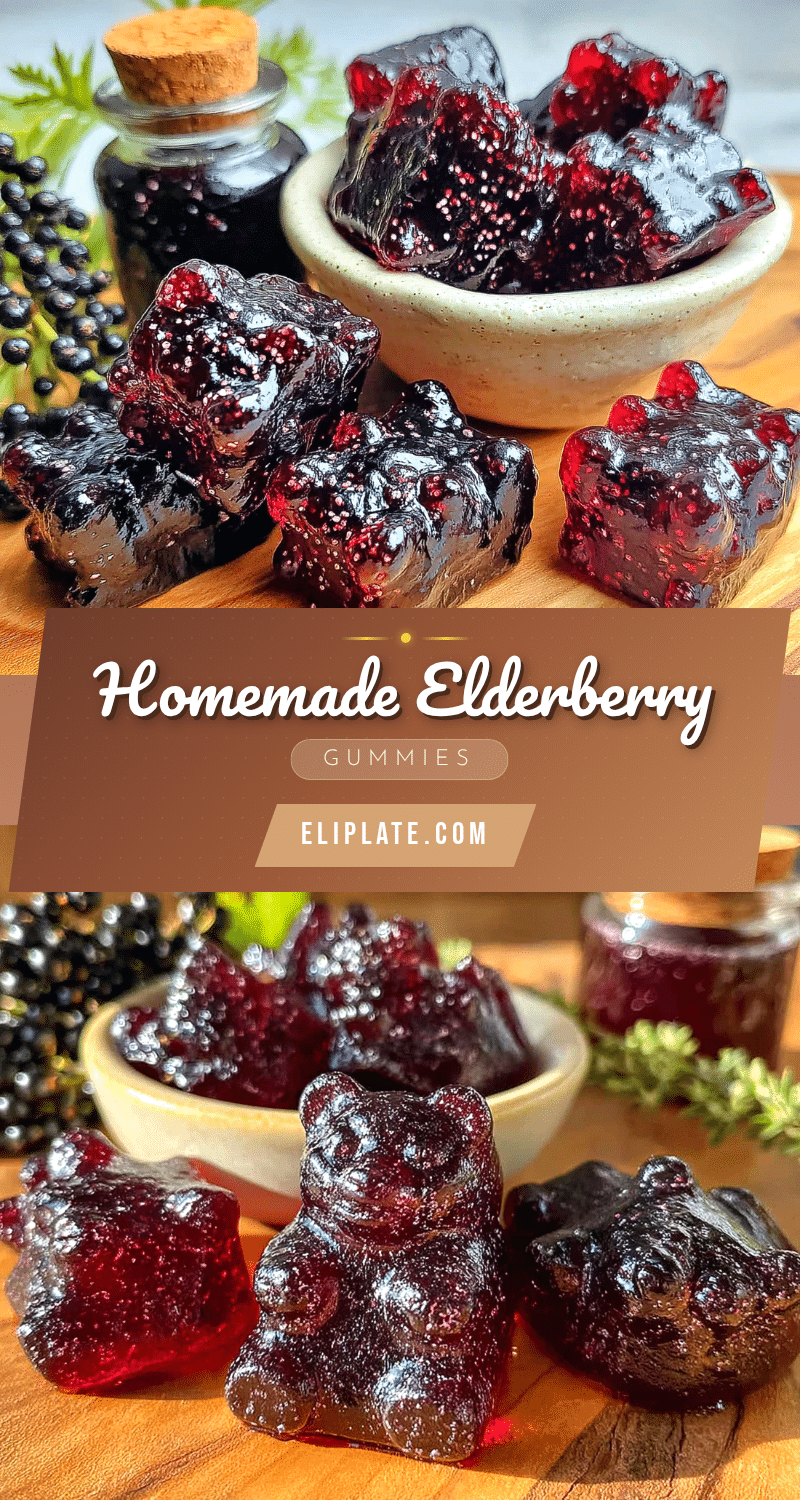
Homemade Elderberry Gummies for Kids | Easy Immune Boost
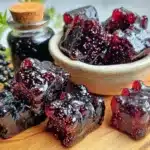
These homemade elderberry gummies are a kid-approved immune-boosting snack made with real elderberries, honey, and apple juice. They’re free from artificial ingredients and perfect for cold season.
- Prep Time: 15 minutes
- Cook Time: 30 minutes
- Total Time: 45 minutes
- Yield: 4 servings 1x
- Category: Snack
- Cuisine: American
Ingredients
- ½ cup dried elderberries
- 3 cups filtered water
- 3–4 tablespoons raw honey (or maple syrup for under 1 year)
- ½ cup unsweetened apple juice
- 4 tablespoons grass-fed gelatin (e.g., Vital Proteins or Great Lakes)
- Optional: ¼ teaspoon vitamin C powder, 2-3 drops liquid zinc picolinate, a few drops echinacea tincture, 1 tablespoon lemon juice
Instructions
- Make the Elderberry Concentrate: In a small saucepan, combine ½ cup dried elderberries with 3 cups filtered water. Bring to a boil, then reduce heat and simmer uncovered for 25-30 minutes until liquid reduces by half and turns deep purple.
- Strain the Berries: Place a fine-mesh strainer over a large bowl or glass measuring cup. Pour the elderberry mixture through the strainer, pressing gently on the berries with the back of a spoon to extract all liquid. Discard solids. You should have about 1½ cups of concentrated syrup. Let cool for 5-10 minutes until warm but not boiling.
- Bloom the Gelatin: While syrup cools, pour ½ cup cold apple juice into a small bowl. Sprinkle 4 tablespoons gelatin evenly over the surface. Let sit for 3-5 minutes until thick and spongy.
- Combine Everything: Whisk the bloomed gelatin into the warm elderberry syrup. Add 3-4 tablespoons raw honey (start with 3, taste, and adjust). Whisk gently until gelatin is fully dissolved and honey is incorporated. If using optional add-ins, whisk them in now.
- Fill the Molds: Place silicone molds on a baking sheet. Using a dropper or small spoon, carefully fill each cavity with the mixture, leaving a tiny space at the top. Pop any bubbles with a toothpick.
- Set the Gummies: Transfer baking sheet to the refrigerator and let set for at least 2-3 hours, preferably overnight, until firm.
- Remove and Store: Gently push gummies out of molds from the bottom. If they stick, let sit at room temperature for 5 minutes. Transfer to an airtight container and refrigerate.
Notes
Do not boil the gelatin; it will lose thickening power. Work quickly once gelatin is added as mixture thickens as it cools. If mixture gets too thick, gently reheat over low heat while whisking. Store gummies in an airtight container in the refrigerator for 2-3 weeks, or freeze for 3-4 months. For children under 1 year, substitute honey with maple syrup or agave nectar. Dosage: ages 2-4: 1-2 gummies/day; ages 5-12: 2-3 gummies/day; adults: 3-4 gummies/day. Always consult pediatrician before starting new supplements.
Nutrition
- Serving Size: 2 gummies
- Calories: 50
- Sugar: 9
- Sodium: 5
- Carbohydrates: 11
- Protein: 3.5
Keywords: elderberry gummies, homemade gummies, immune boost, kids snacks, elderberry recipe, healthy gummies, cold season remedy