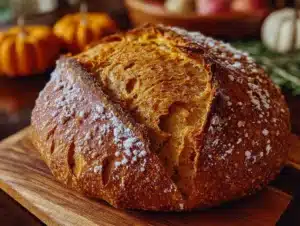
Third time in two weeks, and this time I actually let the autolyse go a full forty minutes while I stood there staring at it like it might disappear. That sticky, shaggy mass of flour, water, and my bubbly starter—it had become a sort of obsession. I couldn’t stop tweaking. Too much pumpkin puree and the dough turned into a wet, uncooperative puddle. Not enough brown butter and the nutty aroma just didn’t sing. But on that third try, something clicked. The dough felt alive under my hands, supple and strong, and when I slid it into the Dutch oven, I already knew. That first slice, still warm, with a smear of salted butter—it was the quiet, golden moment I had been chasing. This was the one.
There’s something about the combo of nutty brown butter and earthy pumpkin that feels like fall in a single bite. Pair that with the tangy chew of sourdough, and you’ve got a bread that doesn’t just sit on the counter—it demands to be eaten. I’ve baked a lot of loaves over the years, but this one? It’s the one I keep coming back to make again. It’s not complicated, but it asks for a little patience. And honestly, that patience pays off in the most delicious way.
Why You’ll Love This Recipe
This isn’t just another pumpkin bread recipe. It’s a loaf that brings together the best of two worlds: the deep, savory-sweet flavor of brown butter and the gentle tang of a well-fed sourdough starter. I’ve tested this recipe more times than I can count, tweaking hydration levels and fermentation times until it was just right. Here’s why it works:
- Deep, Complex Flavor: The brown butter adds a nutty, almost caramel-like richness that plain butter just can’t match. It’s a game-changer for sourdough.
- Perfectly Moist Crumb: Pumpkin puree keeps the inside tender and soft without making it gummy. It’s the kind of texture that practically melts.
- That Signature Sourdough Tang: The natural fermentation gives the bread a subtle, pleasant sourness that balances the sweetness of the pumpkin beautifully.
- No Fancy Equipment Needed: You just need a Dutch oven, a bowl, and some patience. No stand mixer required—this is a hands-on, feel-it-out kind of bake.
- Incredible Aroma: Your kitchen will smell like a cozy bakery. Seriously, the scent of brown butter and baking bread is pure comfort.
- Family-Approved: I’ve brought this to brunch and watched it disappear in minutes. Even people who aren’t sourdough fans ask for the recipe.
This bread is the kind that makes you close your eyes after the first bite. It’s comfort food, reimagined—a little healthier, a lot more flavorful, and absolutely worth every minute of the wait.
What Ingredients You Will Need
This recipe uses simple, wholesome ingredients to deliver big flavor. Most of these are pantry staples, especially if you already keep a sourdough starter. Here’s what you’ll need:
For the Brown Butter
- Unsalted butter, ½ cup (1 stick / 113g) – I prefer using a good quality European-style butter like Kerrygold for the richest flavor. The browning process concentrates the milk solids, so starting with a high-quality butter makes a real difference.
For the Dough
- Active sourdough starter, 100g (about ½ cup) – Make sure your starter is bubbly and has been fed within the last 4-6 hours. A hungry starter won’t give you the rise you need.
- Pumpkin puree, 150g (about ⅔ cup) – Use 100% pure pumpkin puree, not pumpkin pie filling. I like Libby’s for its consistent texture. If you’re feeling ambitious, you can roast and puree your own sugar pumpkin—it’s worth it.
- Bread flour, 400g (about 3 cups) – King Arthur Bread Flour is my go-to for its high protein content, which creates a strong, chewy crumb. You can use all-purpose flour, but the structure won’t be quite as sturdy.
- Whole wheat flour, 50g (about ⅓ cup) – This adds a little nuttiness and depth that pairs perfectly with the brown butter. You can substitute with more bread flour if needed.
- Water, 100g (about ½ cup) – Use lukewarm water (around 80°F) to help activate the starter. Tap water is fine, but if yours is heavily chlorinated, let it sit out for an hour first.
- Salt, 10g (about 1½ teaspoons) – Fine sea salt works best. It dissolves more evenly than kosher salt in the dough.
- Brown sugar, 50g (about ¼ cup, packed) – Light or dark brown sugar both work. Dark brown sugar will give a deeper molasses flavor that complements the brown butter nicely.
- Pumpkin pie spice, 1½ teaspoons – You can use store-bought or make your own with a mix of cinnamon, nutmeg, ginger, and cloves. I always make my own—it’s fresher and you can tweak the ratios.
- Cinnamon, 1 teaspoon – Adds warmth and that classic fall aroma.
Optional Add-Ins
- Toasted pepitas, ¼ cup – For a little crunch on top or folded into the dough.
- Dried cranberries or chopped pecans, ½ cup – These add texture and bursts of sweetness. I’ve tried both, and honestly, I can’t pick a favorite.
Equipment Needed
You don’t need a bakery-grade setup for this. Here’s what I use:
- Dutch oven (5-6 quart) – This is key for creating steam and that beautiful crust. If you don’t have one, you can use a heavy baking sheet with a pan of water on the lower rack.
- Digital kitchen scale – I cannot stress this enough. Baking by weight is way more accurate than cups. A simple $15 scale will change your baking life.
- Large mixing bowl – Glass or stainless steel works best. Plastic can hold onto odors.
- Bench scraper – Handy for folding the dough and cleaning up sticky messes. A flexible plastic one is my favorite.
- Banneton or proofing basket – Lined with a linen cloth, it gives the dough support and that classic spiral pattern. You can use a colander lined with a floured kitchen towel in a pinch.
- Parchment paper – For easy transfer into the Dutch oven.
- Thermometer – An instant-read one is helpful to check the internal temp of the bread (should be around 200-210°F when done).
- Small saucepan – For browning the butter. A light-colored pan helps you see the color change.
Preparation Method
This process takes time, but most of it is hands-off. The actual hands-on work is maybe 20-30 minutes spread across the day. Here’s how it goes:
Step 1: Brown the Butter
In a small saucepan over medium heat, melt the butter. Stir frequently with a silicone spatula. The butter will foam, then start to crackle, and finally settle down. Watch closely—once you see golden-brown specks forming at the bottom and it smells nutty (like toasted hazelnuts), remove it from the heat immediately. Pour it into a heat-safe bowl to stop the cooking. Let it cool to room temperature. You should have about 85g of brown butter after evaporation. Don’t skip this step—it’s the soul of the bread.
Step 2: Mix the Dough (Autolyse)
In a large bowl, combine the bread flour, whole wheat flour, and water. Mix until no dry bits remain. It will look shaggy and rough. Cover with a damp towel and let it rest for 30-45 minutes. This autolyse step hydrates the flour and starts developing gluten, making the dough easier to work with later.
Step 3: Add the Starter and Brown Butter
After the autolyse, add the active sourdough starter, cooled brown butter, pumpkin puree, brown sugar, salt, pumpkin pie spice, and cinnamon to the bowl. Wet your hands (trust me, this helps) and squish everything together until well combined. It will be sticky and a bit messy—that’s normal. Cover and rest for 30 minutes.
Step 4: Perform Stretch and Folds
Over the next 2-3 hours, you’ll do a series of stretch and folds. Every 30 minutes, wet your hand, grab one side of the dough, stretch it up, and fold it over the top. Rotate the bowl and repeat on all four sides. This strengthens the dough without deflating it. You’ll feel it tighten up with each fold. After 4-6 folds (depending on how the dough feels), let it rest and bulk ferment.
Step 5: Bulk Fermentation
Let the dough rise at room temperature (around 70-75°F) for 4-6 hours, or until it has increased in volume by about 50% and looks bubbly and jiggly. The time varies based on your starter’s strength and room temperature. A warmer kitchen means faster fermentation. Don’t rush this—it’s where the flavor develops.
Step 6: Shape the Dough
Turn the dough out onto a lightly floured surface. Gently shape it into a round by folding the edges into the center, then flipping it over and dragging it toward you to create tension. Place it seam-side up in a floured banneton. Cover with a towel.
Step 7: Cold Proof (Overnight)
Place the banneton in the fridge for 12-18 hours. This slow cold proof deepens the flavor and makes the dough easier to score. It also gives you a more open crumb. I usually do this overnight and bake the next morning—it’s so nice to wake up to a dough that’s ready to go.
Step 8: Bake
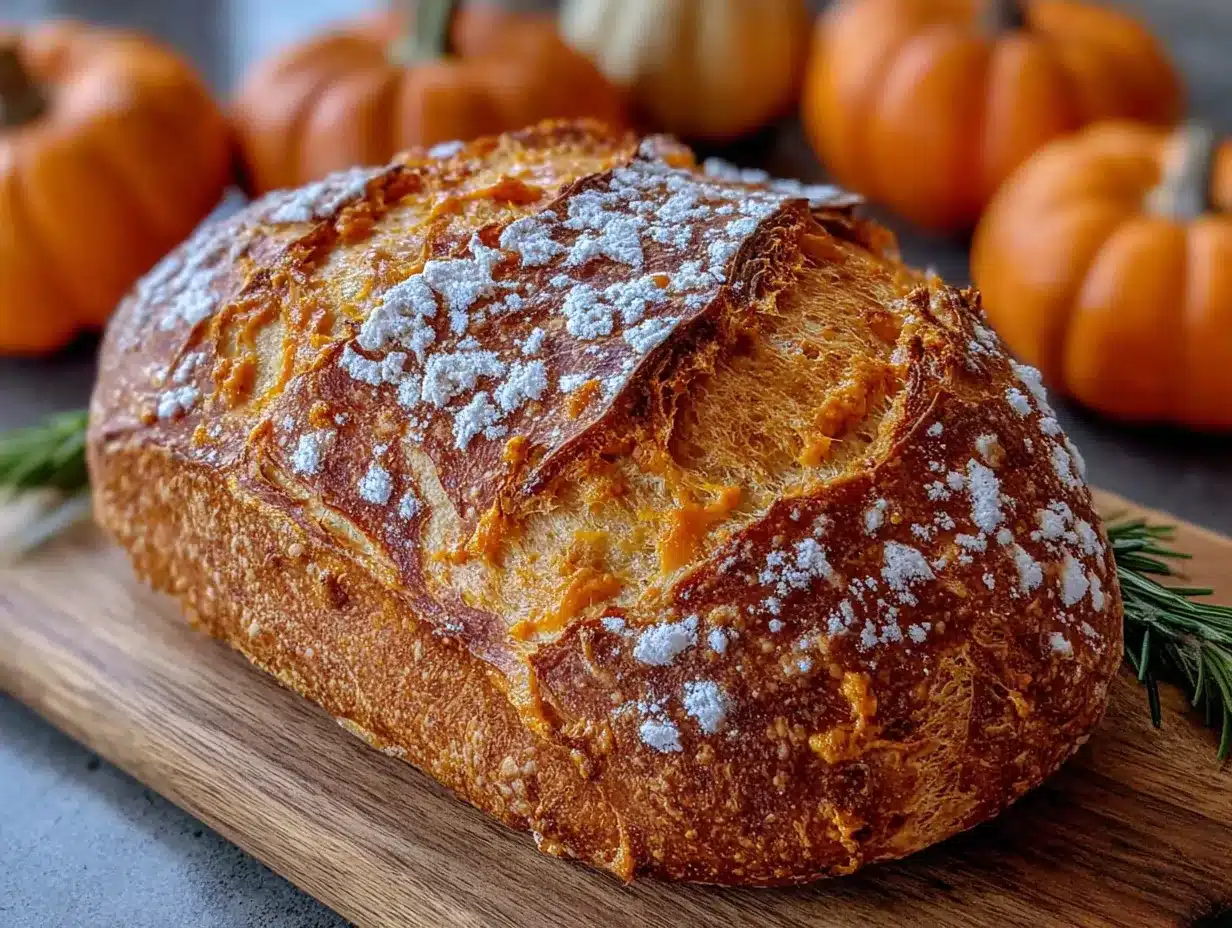
Preheat your oven to 450°F with the Dutch oven inside for at least 30 minutes. When ready, carefully remove the hot Dutch oven. Turn the dough out onto a piece of parchment paper, score the top with a sharp knife or razor blade (a simple “X” or a leaf pattern works great), and lower it into the pot. Cover and bake for 30 minutes. Remove the lid and bake for another 15-20 minutes, until deep golden brown. The internal temperature should read 200-210°F. Let it cool on a wire rack for at least 2 hours before slicing—I know it’s hard, but the structure needs to set.
Cooking Tips & Techniques
I’ve made every mistake in the book with this bread, so let me save you some trouble:
- Don’t skip the autolyse: This is not a step you can rush. That rest period gives the flour time to absorb the water, which makes the dough more extensible and easier to handle. I once skipped it and ended up with a dense, flat loaf.
- Watch the brown butter like a hawk: It goes from perfectly nutty to burnt in seconds. As soon as the foam subsides and you see brown specks, pull it off the heat. If it smells like burnt popcorn, you’ve gone too far.
- Use lukewarm water: If your water is too cold, the fermentation will slow down dramatically. Too hot, and you’ll kill the yeast. Aim for about 80°F, which feels like a warm bath.
- Wet your hands for stretch and folds: This is the single best tip I can give you. Wet hands don’t stick to the dough, and you’ll be able to work without adding extra flour, which can dry out the dough.
- Trust the dough, not the clock: Fermentation times are guidelines. Your dough is ready when it looks and feels right—bubbly, jiggly, and slightly puffed. A cold kitchen means a longer rise. A warm one means shorter.
- Score with confidence: A sharp, decisive cut gives the bread room to expand. Hesitant, shallow scores will close up during baking. Use a lame or a clean razor blade for the best results.
Variations & Adaptations
This recipe is a great base for experimentation. Here are some twists I’ve tried and loved:
- Whole Wheat Swap: Replace the bread flour entirely with whole wheat flour for a heartier, more rustic loaf. You’ll need to add an extra 25g of water to compensate for the extra absorption.
- Gluten-Free Version: Use a good gluten-free bread flour blend (I like Cup4Cup) and add 1 teaspoon of xanthan gum if your blend doesn’t include it. The texture will be a bit denser, but it’s still delicious.
- Savory Pumpkin Seed Crust: Before the final proof, roll the shaped dough in toasted pepitas and a sprinkle of flaky sea salt. The crust gets wonderfully crunchy and nutty.
- Spiced Cranberry Pecan: Fold in ½ cup of dried cranberries and ½ cup of chopped toasted pecans during the last stretch and fold. The tartness of the cranberries cuts through the richness.
- Maple Glaze Finish: Whisk together ½ cup of powdered sugar with 2 tablespoons of maple syrup and a splash of milk. Drizzle over the cooled loaf for a sweet, indulgent treat.
Serving & Storage Suggestions
This bread is best served warm, but it’s also fantastic at room temperature. Here’s how I like to enjoy it:
- Serving: Slice thick and toast lightly, then spread with salted butter or a dollop of honey. It’s also incredible with a schmear of cream cheese and a pinch of cinnamon. For a savory twist, serve it alongside a bowl of creamy roasted butternut squash soup—the tangy bread is perfect for dipping.
- Storage: Wrap the cooled loaf tightly in beeswax wrap or plastic wrap and store at room temperature for up to 3 days. Do not refrigerate—it will dry out the bread.
- Freezing: Slice the bread and freeze the slices in a single layer on a baking sheet, then transfer to a freezer bag. Toast directly from frozen for a quick breakfast. It’ll keep for up to 3 months.
- Reheating: Pop slices in a toaster or a 350°F oven for 5-7 minutes. The crust gets crispy again, and the inside stays soft.
- Flavor Development: Honestly, this bread is even better on day two. The sourdough tang mellows and melds with the pumpkin and brown butter flavors. If you can wait, it’s worth it.
Nutritional Information & Benefits
This bread is a treat, but it also has some redeeming qualities. Here’s a rough estimate per slice (based on 12 slices):
- Calories: ~220
- Protein: 6g
- Fat: 8g (mostly from the brown butter)
- Carbohydrates: 32g
- Fiber: 3g
- Sugar: 6g
The pumpkin puree is packed with Vitamin A and antioxidants, while the sourdough fermentation makes the nutrients more bioavailable and easier to digest. The whole wheat flour adds a nice dose of fiber and B vitamins. It’s not health food, but it’s a far cry from a sugary store-bought muffin. If you’re looking for a more indulgent pumpkin treat, you might also enjoy these fluffy sourdough pumpkin cinnamon rolls—they’re a different beast, but equally delicious.
Conclusion
This brown butter pumpkin sourdough bread is the kind of recipe that makes you feel like a real baker. It asks for a little patience, but the reward is a loaf that’s deeply flavorful, beautifully textured, and genuinely satisfying to make. I love how it fills the house with that warm, nutty aroma, and I love even more how it brings people together around the table.
Don’t be afraid to make it your own. Tweak the spices, add some nuts, or skip the sweetener for a more savory loaf. The beauty of sourdough is that it’s forgiving and personal. If you try it, I’d love to hear how it goes. Drop a comment below or tag me in your photos—I’m always excited to see your bakes. Happy baking, friend!
Frequently Asked Questions
Can I use canned pumpkin pie filling instead of pure pumpkin puree?
No, I wouldn’t recommend it. Pumpkin pie filling has added sugar and spices, which will throw off the balance of the dough and make it too sweet. Stick with 100% pure pumpkin puree for the best texture and flavor.
My dough is really sticky. What am I doing wrong?
That’s totally normal for sourdough, especially with pumpkin puree added. The pumpkin adds extra moisture. Resist the urge to add more flour—it will make the bread dense. Use wet hands for the stretch and folds, and trust the process. As the gluten develops, the dough will become more manageable.
Can I bake this bread without a Dutch oven?
Yes, you can. Place a shallow metal pan on the bottom rack of your oven and preheat it. When you put the bread in, pour a cup of hot water into the pan to create steam. Bake on a preheated baking sheet or pizza stone for the same amount of time.
How do I know when my sourdough starter is active enough?
Your starter should be bubbly, doubled in volume, and pass the “float test”—a small spoonful of starter should float in a cup of water. It should also smell pleasantly sour, not like acetone or nail polish remover. If it’s sluggish, give it a few more feedings before using it.
Can I make this recipe vegan?
Absolutely. Substitute the brown butter with vegan butter or coconut oil (brown it the same way). For the optional glaze, use a plant-based milk and maple syrup instead of honey. The sourdough starter is naturally vegan, so you’re good there. The texture will be slightly different, but it’s still delicious.
Pin This Recipe!
Brown Butter Pumpkin Sourdough Bread: Easy Homemade Recipe

This brown butter pumpkin sourdough bread combines nutty brown butter and earthy pumpkin with the tangy chew of sourdough for a deeply flavorful, moist loaf that’s perfect for fall. It’s a patient, rewarding bake that fills your kitchen with a cozy aroma.
- Prep Time: 30 minutes
- Cook Time: 45 minutes
- Total Time: 14 hours (including bulk fermentation and cold proof)
- Yield: 12 servings 1x
- Category: Bread
- Cuisine: American
Ingredients
- ½ cup (1 stick / 113g) unsalted butter (preferably European-style like Kerrygold)
- 100g (about ½ cup) active sourdough starter (fed within 4–6 hours)
- 150g (about ⅔ cup) 100% pure pumpkin puree (e.g., Libby’s)
- 400g (about 3 cups) bread flour (e.g., King Arthur Bread Flour)
- 50g (about ⅓ cup) whole wheat flour
- 100g (about ½ cup) lukewarm water (around 80°F)
- 10g (about 1½ teaspoons) fine sea salt
- 50g (about ¼ cup, packed) brown sugar (light or dark)
- 1½ teaspoons pumpkin pie spice
- 1 teaspoon cinnamon
- ¼ cup toasted pepitas (optional, for topping or folding)
- ½ cup dried cranberries or chopped pecans (optional)
Instructions
- Brown the butter: In a small saucepan over medium heat, melt the butter. Stir frequently with a silicone spatula. The butter will foam, crackle, then settle. Once golden-brown specks form at the bottom and it smells nutty, remove from heat immediately. Pour into a heat-safe bowl to cool to room temperature (yield about 85g).
- Mix the dough (autolyse): In a large bowl, combine bread flour, whole wheat flour, and water. Mix until no dry bits remain. Cover with a damp towel and rest for 30-45 minutes.
- Add the starter and brown butter: After autolyse, add active sourdough starter, cooled brown butter, pumpkin puree, brown sugar, salt, pumpkin pie spice, and cinnamon. Wet your hands and squish everything together until well combined. Cover and rest for 30 minutes.
- Perform stretch and folds: Over 2-3 hours, every 30 minutes, wet your hand, grab one side of the dough, stretch it up, and fold it over the top. Rotate the bowl and repeat on all four sides. Do 4-6 folds total.
- Bulk fermentation: Let the dough rise at room temperature (70-75°F) for 4-6 hours, until increased by about 50% and bubbly/jiggly.
- Shape the dough: Turn dough onto a lightly floured surface. Gently shape into a round by folding edges into the center, then flip over and drag toward you to create tension. Place seam-side up in a floured banneton. Cover with a towel.
- Cold proof (overnight): Place banneton in the fridge for 12-18 hours.
- Bake: Preheat oven to 450°F with Dutch oven inside for 30 minutes. Carefully remove hot Dutch oven. Turn dough onto parchment paper, score the top, and lower into pot. Cover and bake for 30 minutes. Remove lid and bake 15-20 minutes more until deep golden brown (internal temp 200-210°F). Cool on wire rack for at least 2 hours before slicing.
Notes
Don’t skip the autolyse; watch brown butter closely to avoid burning; use lukewarm water (80°F); wet hands for stretch and folds; trust dough readiness over clock; score with confidence. Bread is even better on day two. Store at room temperature for up to 3 days; freeze slices for up to 3 months.
Nutrition
- Serving Size: 1 slice
- Calories: 220
- Sugar: 6
- Sodium: 200
- Fat: 8
- Saturated Fat: 4
- Carbohydrates: 32
- Fiber: 3
- Protein: 6
Keywords: brown butter, pumpkin, sourdough bread, fall recipe, homemade bread, artisan bread, pumpkin bread