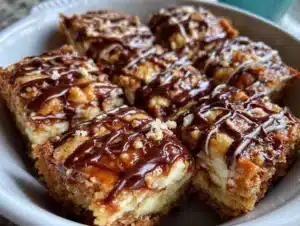
My nephew stood at the counter, three sugar cookies stacked on his plate, and asked if the spiderwebs were made of real spider silk. I laughed, but honestly? That was the moment I knew these bars were a keeper. The dish was gone before I even sat down. Fourth time that month.
It started with a Pinterest fail, if I’m being honest. I had this grand vision of perfectly piped spiderweb cookies, individual rounds, each one a tiny masterpiece. Two hours in, my hands were cramping, the icing was running, and I had a kitchen that looked like a flour bomb went off. I sat down, frustrated, staring at a batch of sugar cookie dough that was supposed to be something else entirely. That’s when it hit me—why not make it a bar? Press it into a pan, bake it, and then do the spiderweb on top. Less fuss, more fun, and honestly, a better texture. The soft, chewy center of a bar is just so much more satisfying than a crisp cookie, you know?
These Easy Spiderweb Sugar Cookie Bars are the result of that happy accident. They’re the Halloween dessert you bring when you want to impress without the stress. The spiderweb design looks complicated, but it’s done in about two minutes with a toothpick. The base is a soft, buttery sugar cookie bar that’s basically a hug in dessert form. And the topping? A simple powdered sugar glaze that sets up just enough to hold those beautiful web lines. I’ve made these for three Halloweens now, and they never last long. There’s something about pulling that toothpick through the glaze—it feels a little bit like magic, even the tenth time you do it.
Why You’ll Love This Recipe
Let’s be real for a second. Halloween desserts can be a huge pain. You’re either dealing with finicky royal icing that takes forever to dry, or you’re spending hours cutting out individual cookie shapes. These spiderweb sugar cookie bars skip all that nonsense. They deliver the same spooky, festive look with about a quarter of the effort. That’s a win in my book.
- So Easy, Anyone Can Do It: No cookie cutters, no rolling pin, no chilling the dough. You mix everything in one bowl, press it into a pan, and bake. The spiderweb design is just a toothpick and a steady hand.
- Simple Pantry Ingredients: Butter, sugar, flour, eggs—you probably have everything already. No weird specialty ingredients that you’ll only use once.
- Perfect for Halloween Parties: These bars are the life of the party. They look like you spent hours on them, but they come together in under an hour. Bring them to a school party, a potluck, or just keep them at home for a spooky movie night.
- A Total Crowd-Pleaser: Kids love the spiderweb design, and adults love the soft, buttery, not-too-sweet flavor. I’ve seen people grab two before they even finish their first one.
- Unbelievably Delicious: The texture is the real star here. The bars are thick, soft, and chewy in the center with slightly crisp edges. The glaze adds a sweet, creamy layer that perfectly complements the buttery cookie base.
What makes these different from every other spiderweb cookie recipe out there? It’s the method. By baking it as a bar, you get a perfectly even, soft texture that individual cookies just can’t match. Plus, the glaze-to-cookie ratio is spot on. You get a generous layer of sweet, glossy icing on top of every single bite. It’s not just a decoration—it’s part of the experience. This is the kind of dessert that makes you close your eyes after the first bite. It’s comfort food with a Halloween twist, and it’s guaranteed to make you feel like a kitchen rockstar.
What Ingredients You Will Need
This recipe uses simple, wholesome ingredients to deliver that classic sugar cookie flavor and a perfectly soft, chewy texture. You don’t need anything fancy here—just good, reliable staples that work together beautifully. I’ve tested this with a few different brands, and I always come back to the basics.
- Unsalted Butter (1 cup, 2 sticks, softened): This is the backbone of the flavor. I prefer unsalted so I can control the salt level. Make sure it’s truly softened to room temperature—you want it to be pliable but not melted. If it’s too cold, your dough will be lumpy. If it’s too warm, the bars will spread too much.
- Granulated Sugar (1 ½ cups): Standard white sugar gives the bars that classic sweet flavor and helps create those slightly crisp edges. I’ve tried using a blend of white and brown sugar, but for this recipe, all white sugar gives the best, cleanest sugar cookie taste.
- Large Eggs (2, room temperature): Eggs add structure and richness. Let them sit on the counter for about 20 minutes to come to room temperature. Cold eggs can seize the butter and make the dough harder to mix.
- Vanilla Extract (2 teaspoons): Use pure vanilla extract if you can. It makes a real difference in the flavor. The imitation stuff works in a pinch, but the pure stuff gives a warmer, more complex taste.
- All-Purpose Flour (2 ½ cups): Standard all-purpose flour is perfect here. Don’t pack it into your measuring cup—spoon it in and level it off. Too much flour will make the bars dry and dense.
- Baking Powder (1 teaspoon): This is our leavening agent. It helps the bars rise just a little and gives them a soft, tender crumb. Make sure your baking powder isn’t expired—it loses its potency over time.
- Salt (½ teaspoon): Salt is crucial in sweet baking. It balances the sugar and enhances all the other flavors. I use fine sea salt for baking.
For the Spiderweb Glaze:
- Powdered Sugar (2 cups): Also called confectioners’ sugar. This is the base of our glaze. Sift it if it’s lumpy for a super smooth finish.
- Milk (3-4 tablespoons): Whole milk gives the richest glaze, but 2% works fine too. You’re looking for a consistency that’s thick but pourable—like a slightly runny pancake batter.
- Vanilla Extract (½ teaspoon): A little extra vanilla in the glaze ties everything together.
- Black Gel Food Coloring: This is for the spiderweb design. Gel coloring is much better than liquid drops because it gives you a deep, dark color without thinning out the glaze. I use the Wilton brand.
Ingredient Selection Tips: For the best texture, make sure your butter is at genuine room temperature. If you’re in a hurry, you can cut it into small cubes and let it sit for 15 minutes. For the milk in the glaze, start with 3 tablespoons and add more if needed. You want it thick enough to hold the spiderweb lines, but thin enough to spread easily.
Equipment Needed
You don’t need a fancy kitchen to pull these off. Here’s what you’ll need:
- 9×13-inch Baking Pan: This is the perfect size for these bars. A metal pan will give you slightly crispier edges, while a glass or ceramic pan will yield softer bars all around. I prefer metal for that contrast between the soft center and the crisp edge.
- Electric Mixer (Handheld or Stand): You can cream the butter and sugar by hand with a wooden spoon, but an electric mixer makes it so much easier. It helps you get that light, fluffy texture that’s key for soft bars.
- Large Mixing Bowls: One for the dough, one for the glaze.
- Rubber Spatula: For scraping down the bowl and spreading the dough into the pan.
- Toothpick or Wooden Skewer: This is your spiderweb drawing tool. A toothpick is perfect for the fine lines.
- Piping Bag or Small Ziploc Bag: For piping the black glaze circles. A Ziploc bag with a tiny corner snipped off works just as well as a piping bag. No need to buy anything special.
- Parchment Paper: Line your pan with parchment paper, leaving some overhang on the sides. This creates “handles” that let you lift the whole block of bars out of the pan for easy cutting. It’s a game-changer.
Preparation Method
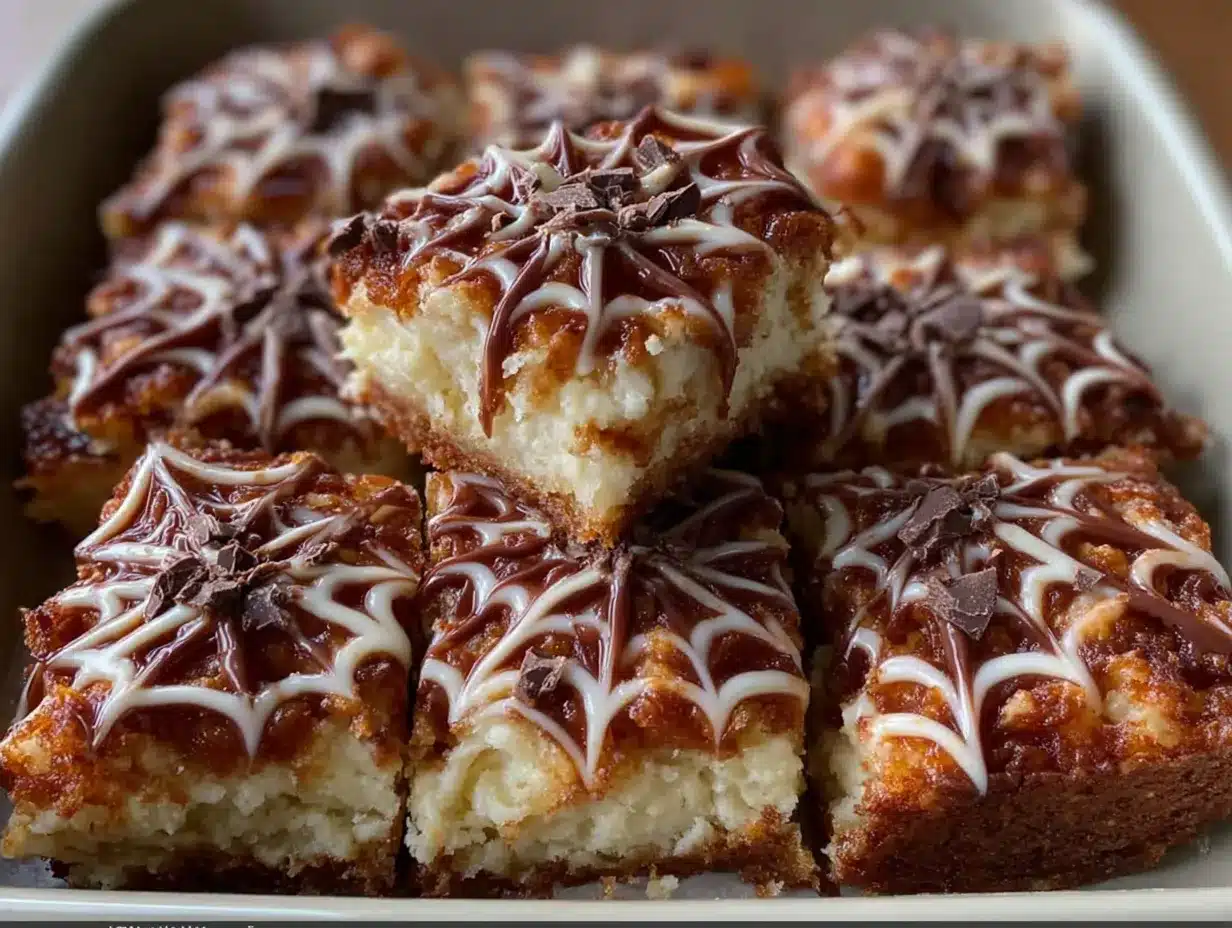
Alright, let’s get to the fun part. Follow these steps, and you’ll have a pan of gorgeous spiderweb bars in no time.
- Preheat and Prep: Preheat your oven to 375°F (190°C). Line your 9×13-inch baking pan with parchment paper, leaving a couple inches of overhang on the long sides. This is your lifeline for getting the bars out cleanly.
- Cream the Butter and Sugar: In a large mixing bowl, beat the softened butter and granulated sugar together with an electric mixer on medium speed until light, fluffy, and pale in color. This should take about 2-3 minutes. You want it to look like a thick, creamy paste. Scrape down the sides and bottom of the bowl with a rubber spatula.
- Add the Eggs and Vanilla: Add the eggs one at a time, beating well after each addition. Then, beat in the vanilla extract. The mixture might look a little curdled at this point—that’s totally normal. Don’t worry, it will come together when you add the flour.
- Mix the Dry Ingredients: In a separate bowl, whisk together the all-purpose flour, baking powder, and salt. This ensures the baking powder is evenly distributed.
- Combine Wet and Dry: Gradually add the dry ingredients to the wet mixture, mixing on low speed just until combined. Be careful not to overmix. Overmixing develops the gluten in the flour and will make your bars tough. You want to mix until you can’t see any more streaks of flour. The dough will be thick and slightly sticky.
- Press into the Pan: Transfer the dough to your prepared pan. It’s going to be thick, so use a rubber spatula or your lightly floured hands to press it evenly into the corners. The dough should be about ½-inch thick. Take your time here—an even layer ensures even baking.
- Bake: Bake for 18-22 minutes, or until the edges are lightly golden brown and the center is set. A toothpick inserted into the center should come out clean or with just a few moist crumbs. The bars will look puffed and slightly cracked on top. Let them cool completely in the pan on a wire rack. This is crucial. If you add the glaze while the bars are still warm, it will melt and soak in, ruining your spiderweb design. Patience, my friend.
- Make the Glaze: Once the bars are completely cool, make the glaze. In a medium bowl, whisk together the powdered sugar, 3 tablespoons of milk, and ½ teaspoon of vanilla extract. Start with 3 tablespoons of milk. Whisk until smooth. You’re looking for a thick, pourable consistency. If it’s too thick, add another teaspoon of milk. If it’s too thin, add a bit more powdered sugar.
- Spread the Base Glaze: Pour the white glaze over the cooled bars. Use a spatula to spread it evenly to the edges. Work quickly—the glaze will start to set.
- Create the Spiderweb: This is where the magic happens. Take about 2 tablespoons of the remaining white glaze and put it in a small bowl. Add a few drops of black gel food coloring and stir until you get a deep, dark black. Transfer this black glaze to a small piping bag or a Ziploc bag with a tiny corner snipped off. Starting from the center of the pan, pipe a small black circle. Then, pipe a larger circle around it. Keep going until you have 4-5 concentric circles. Immediately, take a toothpick and drag it from the center of the smallest circle straight out to the edge of the pan. Then, drag another line from the center out, spacing them evenly around the pan. I usually do 8 lines, like spokes on a wheel. The toothpick will pull the black glaze into the white, creating those beautiful web lines. Wipe the toothpick clean between each line for the cleanest effect.
- Let the Glaze Set: Let the bars sit at room temperature for about 30 minutes to allow the glaze to set. Then, use the parchment paper handles to lift the entire block of bars out of the pan. Place it on a cutting board.
- Cut and Serve: Use a sharp knife to cut the bars into squares. A 9×13 pan will give you about 24 bars if you cut them into 2-inch squares. For the cleanest cuts, wipe the knife clean between each slice.
Cooking Tips & Techniques
I’ve made these bars more times than I can count, and I’ve learned a few things along the way. Here are my best tips for spiderweb success.
Don’t Overbake the Bars. This is the number one mistake people make. Sugar cookie bars should be soft and tender, not dry and crumbly. Pull them out of the oven when the edges are just barely golden and the center looks set but still soft. They will continue to cook a little bit in the hot pan as they cool.
The Glaze Consistency is Key. If your glaze is too thin, it will run off the edges of the bars and won’t hold the spiderweb lines. If it’s too thick, it won’t spread smoothly. You want it to be thick but pourable—think of it like a thick cream. When you lift the spatula, the glaze should fall in a thick ribbon and then slowly smooth out.
Work Fast with the Spiderweb. Once you spread the white glaze, you have a limited window to pipe the black circles and drag the lines. The glaze starts to set almost immediately. If it sets too much, the toothpick won’t pull the black through the white cleanly. So, have your black glaze ready in the piping bag before you even start spreading the white glaze.
My Biggest Failure: The first time I made these, I used liquid food coloring for the black glaze. It turned the glaze into a gray, watery mess that ran everywhere. Don’t do that! Gel food coloring is non-negotiable here. It gives you that deep, dramatic black without messing with the texture.
Timing Strategy: These bars are perfect for make-ahead prep. You can bake the cookie base a day in advance and keep it covered at room temperature. Then, on the day you need them, you just make the glaze and create the spiderweb. It takes about 10 minutes of active work. This is a lifesaver for Halloween parties.
Variations & Adaptations
One of the best things about this recipe is how easy it is to customize. Here are a few ways to make it your own.
- Spooky Orange Spiderweb: Instead of black, use orange gel food coloring for the spiderweb. It gives a warmer, more autumnal look that’s perfect for a fall party. You could even do a mix of orange and purple webs for a super festive vibe.
- Chocolate Sugar Cookie Bars: For the chocolate lovers in your life, replace ⅓ cup of the all-purpose flour with ⅓ cup of unsweetened cocoa powder. The base becomes a rich, fudgy chocolate cookie bar. Then, do the spiderweb with white glaze and black glaze. The contrast is stunning.
- Gluten-Free Version: I’ve tested this with a 1:1 gluten-free baking flour blend (like Bob’s Red Mill or King Arthur), and it works beautifully. No other adjustments needed. Just make sure your blend contains xanthan gum for structure.
- Add Some Sprinkles: Before the glaze sets, sprinkle some orange and black Halloween sprinkles over the top. It adds a fun, crunchy texture and makes the bars look even more festive. My kids love this version.
- Pumpkin Spice Twist: Add 1 teaspoon of pumpkin pie spice to the dry ingredients for a fall-flavored sugar cookie bar. It pairs beautifully with the vanilla glaze. This version is a huge hit at Thanksgiving, too.
Serving & Storage Suggestions
These bars are best served at room temperature. The glaze is set but still soft, and the cookie base is perfectly tender. I like to arrange them on a festive Halloween platter or a cake stand for a dramatic presentation.
What to Serve with Them: A glass of cold milk is the classic pairing, but they’re also fantastic with a warm cup of apple cider or a pumpkin spice latte. For a full Halloween dessert spread, serve them alongside our cozy pumpkin graveyard brownie bites for a spooky, delicious duo. If you’re hosting a party, they pair perfectly with a batch of our creamy pumpkin spice cold foam for a complete Halloween coffee experience.
Storage: Store any leftover bars in an airtight container at room temperature for up to 4 days. The glaze will stay glossy and beautiful. Do not refrigerate them, as the cold air can make the cookie base dry out and the glaze can become sticky. If you need to store them longer, you can freeze the un-glazed bars for up to 3 months. Wrap the entire block of baked, cooled bars tightly in plastic wrap, then in foil. When you’re ready to serve, thaw them at room temperature, then make the glaze and create the spiderweb. The flavors actually get better after a day or two—the vanilla really deepens.
Nutritional Information & Benefits
Let’s be honest—these are a treat, not a health food. But that doesn’t mean they can’t be part of a balanced life. Here’s a quick look at the numbers.
Estimated Nutritional Information (per bar, based on 24 servings):
| Nutrient | Amount |
|---|---|
| Calories | 185 |
| Total Fat | 8g |
| Saturated Fat | 5g |
| Cholesterol | 35mg |
| Sodium | 85mg |
| Total Carbohydrates | 27g |
| Sugars | 18g |
| Protein | 2g |
Health Benefits: While these bars are a dessert, the butter provides a small amount of vitamin A, and the eggs contribute protein and choline. The real benefit is the joy they bring. Sharing a homemade treat with friends and family is good for the soul. Life is all about balance—enjoy the spiderweb bars, and maybe have a side of apple slices too.
Dietary Considerations: This recipe contains gluten, dairy, and eggs. It can be made gluten-free using a 1:1 gluten-free flour blend. It is nut-free, making it a safe option for school parties.
Conclusion
These Easy Spiderweb Sugar Cookie Bars are everything I want in a Halloween dessert: impressive-looking, completely delicious, and shockingly simple to make. They’ve become a non-negotiable part of my October baking rotation, and I have a feeling they’ll become one for you too. The best part? You get to feel like a total pro when you pull that toothpick through the glaze and watch the spiderweb appear. It never gets old.
I’d love to see your spiderweb creations! Tag me in your photos or leave a comment below telling me how they turned out. Did you try a fun variation? Did the kids help with the toothpick part? I read every single comment, and your stories are my favorite part of running this blog. Go ahead, give these a try—your Halloween party just got a whole lot sweeter. And if you’re looking for more spooky inspiration, don’t miss our flavorful witch hat chocolate cupcakes for another show-stopping Halloween treat.
Frequently Asked Questions
Can I use a different size pan?
Yes, but you’ll need to adjust the baking time. A 9×9-inch pan will give you thicker bars that need about 5-7 more minutes of baking time. A larger pan will give you thinner, crispier bars that need less time. Just keep an eye on them and use the toothpick test.
My glaze is too thick. What do I do?
Just add a tiny splash of milk—like a teaspoon at a time—and whisk until it reaches the right consistency. You want it thick but pourable. If you accidentally add too much milk and it’s too thin, whisk in a little more powdered sugar.
Can I make these ahead of time?
Absolutely! You can bake the cookie base up to 2 days in advance. Keep it covered at room temperature. On the day you need them, make the glaze and create the spiderweb. They’re best enjoyed within 24 hours of adding the glaze.
Why did my spiderweb lines blur together?
This usually happens if the glaze is too thin or if you waited too long to drag the toothpick. The glaze starts to set quickly. Make sure your black glaze is thick enough and work fast after spreading the white glaze. Also, wipe the toothpick clean between each line for the sharpest results.
Can I freeze these bars?
Yes, but only freeze the un-glazed bars. Wrap the entire block of baked, cooled bars tightly in plastic wrap and then foil. They’ll keep for up to 3 months. Thaw at room temperature, then add the glaze and spiderweb design fresh.
Pin This Recipe!
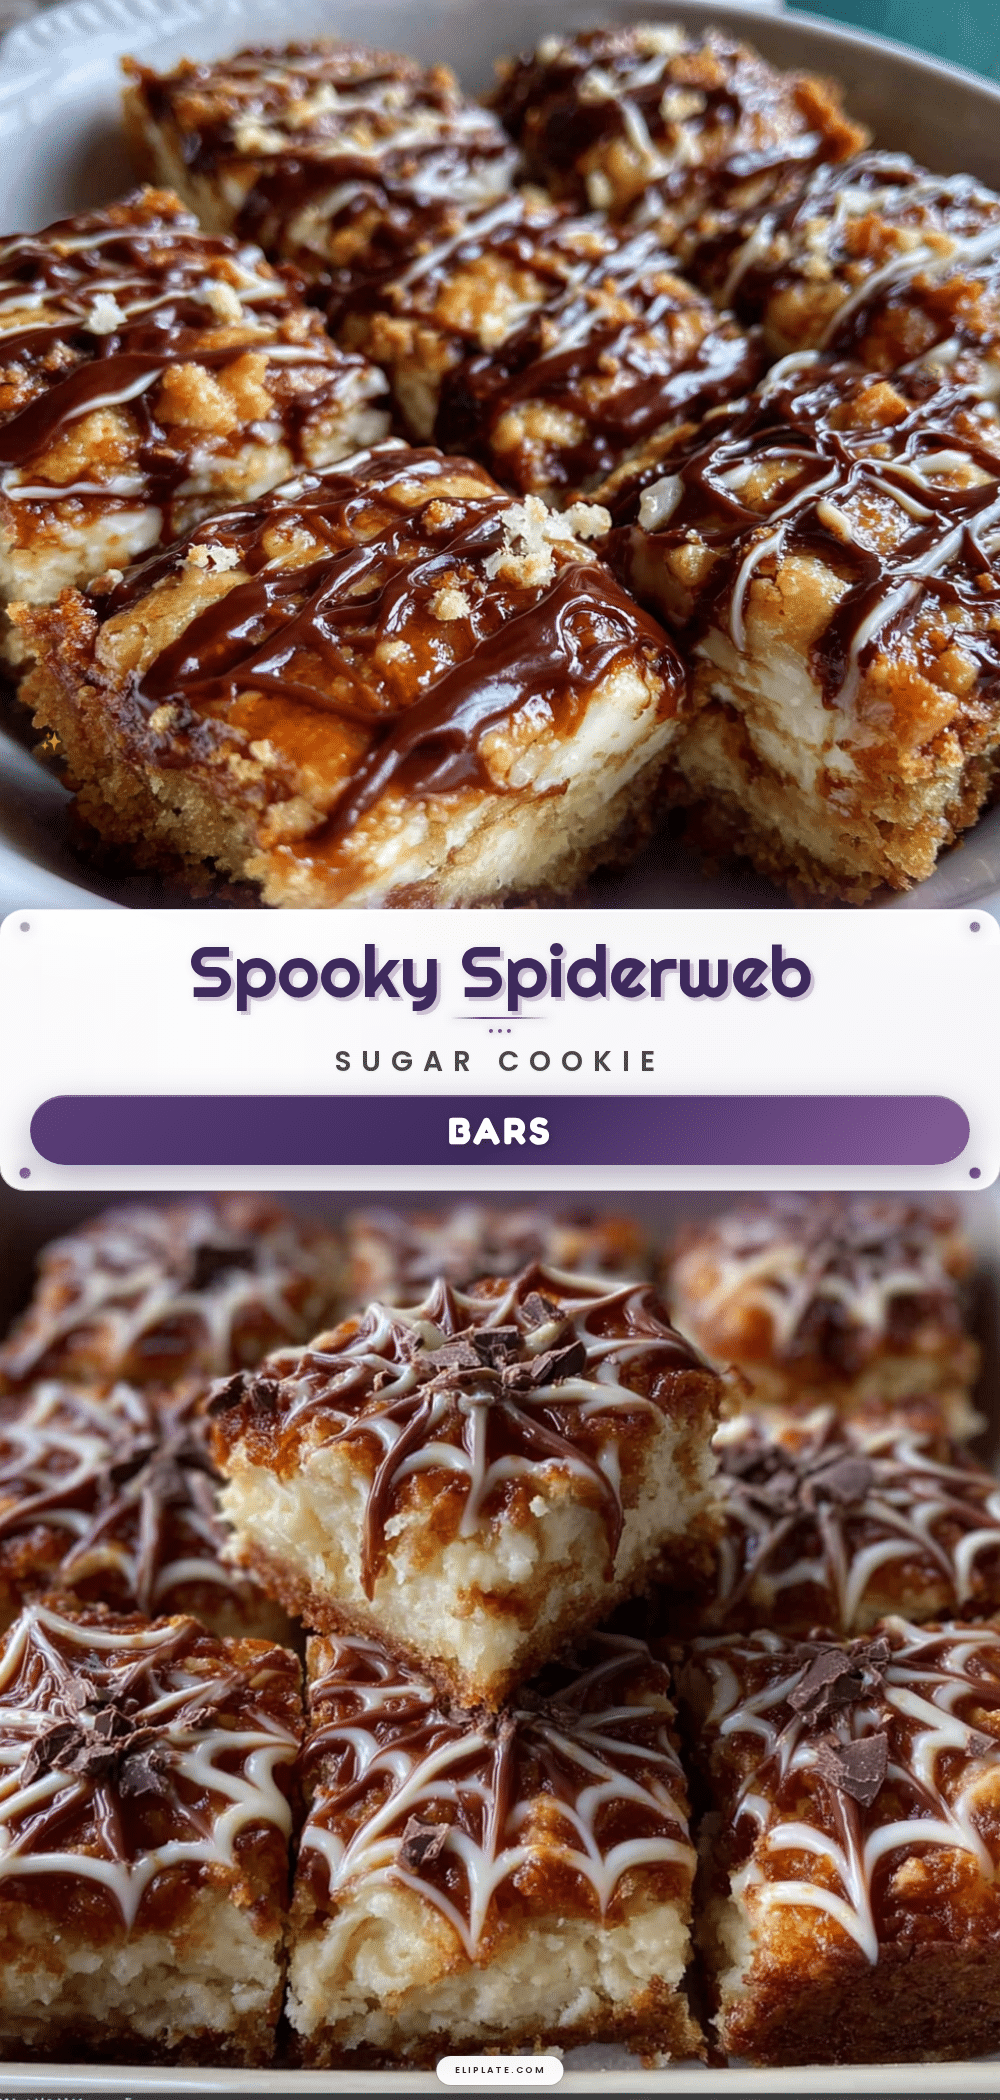
Easy Spiderweb Sugar Cookie Bars: Perfect Halloween Dessert

These Easy Spiderweb Sugar Cookie Bars are a soft, buttery sugar cookie bar topped with a sweet glaze and a stunning spiderweb design. They’re the perfect Halloween dessert that looks impressive but comes together in under an hour with simple pantry ingredients.
- Prep Time: 15 minutes
- Cook Time: 20 minutes
- Total Time: 35 minutes
- Yield: 24 servings 1x
- Category: Dessert
- Cuisine: American
Ingredients
- 1 cup (2 sticks) unsalted butter, softened
- 1 ½ cups granulated sugar
- 2 large eggs, room temperature
- 2 teaspoons vanilla extract
- 2 ½ cups all-purpose flour
- 1 teaspoon baking powder
- ½ teaspoon salt
- 2 cups powdered sugar
- 3–4 tablespoons milk
- ½ teaspoon vanilla extract
- Black gel food coloring
Instructions
- Preheat oven to 375°F (190°C). Line a 9×13-inch baking pan with parchment paper, leaving overhang on the long sides.
- In a large bowl, beat softened butter and granulated sugar with an electric mixer on medium speed until light, fluffy, and pale (about 2-3 minutes).
- Add eggs one at a time, beating well after each addition. Beat in vanilla extract.
- In a separate bowl, whisk together flour, baking powder, and salt.
- Gradually add dry ingredients to wet mixture, mixing on low speed just until combined. Do not overmix.
- Transfer dough to prepared pan and press evenly into corners (about ½-inch thick).
- Bake for 18-22 minutes until edges are lightly golden and center is set. Cool completely in pan on a wire rack.
- For the glaze: whisk together powdered sugar, 3 tablespoons milk, and ½ teaspoon vanilla until smooth. Add more milk if needed for a thick, pourable consistency.
- Spread white glaze evenly over cooled bars.
- Mix about 2 tablespoons of remaining white glaze with black gel food coloring until deep black. Transfer to a piping bag or Ziploc bag with a tiny corner snipped off.
- Pipe concentric black circles starting from the center of the pan. Immediately drag a toothpick from the center outward to create spiderweb lines. Repeat around the pan (about 8 lines). Wipe toothpick clean between lines.
- Let glaze set at room temperature for 30 minutes. Use parchment handles to lift bars out of pan. Cut into squares and serve.
Notes
Don’t overbake the bars; they should be soft and tender. Use gel food coloring for the black glaze to avoid thinning. Work quickly with the spiderweb design as the glaze sets fast. Bars can be made ahead by baking the base a day in advance and adding glaze later.
Nutrition
- Serving Size: 1 bar
- Calories: 185
- Sugar: 18
- Sodium: 85
- Fat: 8
- Saturated Fat: 5
- Carbohydrates: 27
- Protein: 2
Keywords: spiderweb sugar cookie bars, Halloween dessert, easy sugar cookie bars, spiderweb cookies, Halloween cookies, sugar cookie bars