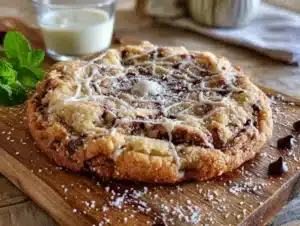
Sticky dough on my fingers, a smear of pumpkin puree on the counter, and the timer ticking down on the last tray of cookies—that’s when I finally cracked the code. For weeks, I’d been chasing the perfect pumpkin chocolate chip cookie, the kind that wasn’t a fluffy, cakey disappointment but something with a real chew. It was a Tuesday night, and I was about to toss another batch of sad, puffy discs in the trash when I grabbed the salt grinder out of pure frustration. A few cranks of flaky sea salt over the dough balls before they went into the oven, and honestly? It was like the clouds parted. The salt didn’t just sit on top; it pulled the deep, roasted sweetness of the pumpkin and the bitter chocolate into perfect, sharp focus.
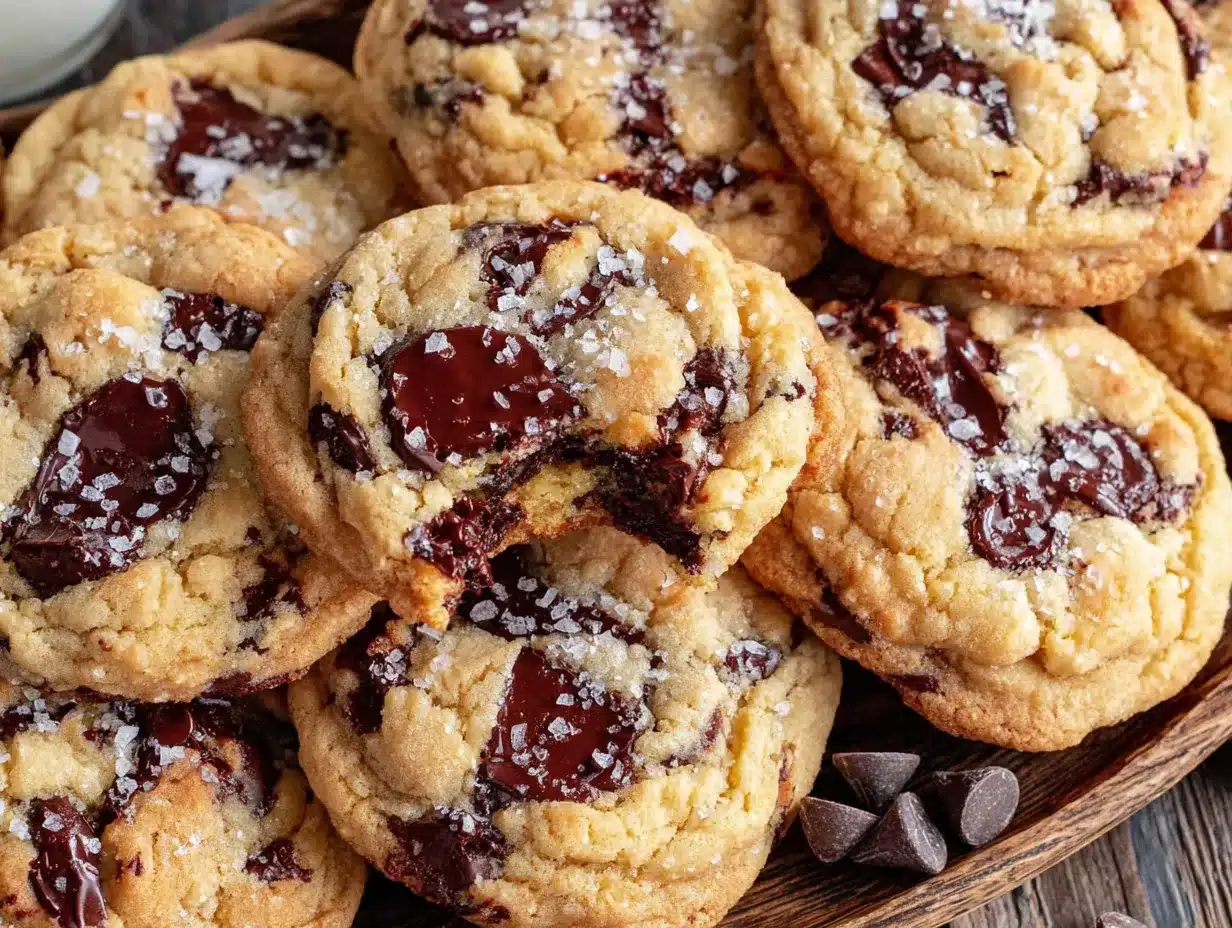
These Perfect Pumpkin Chocolate Chip Cookies with Sea Salt aren’t just another fall recipe. They’re the ones I’ve been making every single week since that night, the ones my neighbor texted me about at 10 PM asking for the recipe. They have a soft, tender center with slightly crisp edges—the kind of texture you get from a really good bakery cookie. The pumpkin keeps them moist without making them heavy, and that final sprinkle of sea salt? It’s the secret that turns a good cookie into a “close your eyes and savor it” kind of moment. If you’ve ever been let down by a pumpkin cookie that tasted more like a muffin, this is the one that changes everything.
Why You’ll Love This Recipe
I’ve tested these cookies more times than I care to admit. I’ve tried them with different fats, different flour blends, and different resting times. This version is the one that finally works without fail, and here’s why it stands out from every other pumpkin cookie recipe you’ve seen.
- Real Chew, Not Cake: Most pumpkin cookies are basically drop biscuits in disguise. By blotting the pumpkin puree and using the right ratio of butter to brown sugar, we get a cookie that actually bends before it breaks.
- Simple Pantry Ingredients: You don’t need a trip to a specialty store. Pumpkin puree, butter, sugar, flour, chocolate chips, and sea salt. That’s it. You probably have everything but the pumpkin.
- Perfect for Fall Gatherings: Whether it’s a cozy Friendsgiving, a Halloween party, or just a quiet Sunday with a cup of coffee, these cookies fit right in. They’re sturdy enough to pack for a bake sale and fancy enough to serve with a dollop of whipped cream.
- Crowd-Pleaser Guaranteed: I brought a batch to a work potluck last month, and they were gone in fifteen minutes. Someone actually asked if I’d cater their kid’s birthday party. Kids and adults both go crazy for the salty-sweet thing.
- Unbelievably Delicious: The combination of warm pumpkin spices, melty chocolate chips, and that crunchy, briny finish of sea salt is genuinely addictive. It’s the kind of cookie you eat three of before you realize you’ve had three.
What makes this recipe different from the rest is the simple act of blotting the pumpkin. It sounds silly, but it removes just enough moisture to prevent that dreaded gummy texture. Plus, using melted butter instead of creaming room-temperature butter gives the cookies a denser, chewier crumb. This isn’t just another pumpkin cookie recipe—it’s the one you’ll bookmark and use for years. It’s comfort food reimagined, a little healthier than a traditional chocolate chip cookie, but with the same soul-soothing satisfaction.
What Ingredients You Will Need
This recipe uses simple, wholesome ingredients to deliver bold flavor and satisfying texture without the fuss. Every component has a specific job to play, and I’ll walk you through the key players so you know exactly what to look for at the store.
- Unsalted Butter (1 cup, melted and slightly cooled): Melted butter is the secret to a chewy cookie. It coats the flour proteins differently than creamed butter, which reduces gluten formation and keeps the cookies tender. I always use unsalted so I can control the salt level myself.
- Pumpkin Puree (1 cup, blotted): Do not use pumpkin pie filling. We want 100% pure pumpkin puree. The blotting step is crucial—spread the puree on a paper towel-lined plate, top with another paper towel, and press gently. You’ll be amazed at how much liquid comes out. This prevents soggy cookies.
- Light Brown Sugar (1 cup, packed): Brown sugar is hygroscopic, meaning it attracts and holds moisture. This gives the cookies their soft, chewy center. The molasses in brown sugar also adds a deep, caramel-like flavor that pairs beautifully with pumpkin.
- Granulated Sugar (1/2 cup): White sugar helps the cookies spread and creates those slightly crisp edges. The balance of brown to white sugar is key.
- Large Egg (1, room temperature): A room-temperature egg incorporates more easily into the melted butter, creating a smoother, more uniform dough. Cold egg can seize the butter and make the dough grainy.
- Vanilla Extract (2 teaspoons): Real vanilla extract adds warmth and depth. I’m a fan of Nielsen-Massey, but any pure vanilla extract will work. Avoid imitation vanilla here; it can taste artificial.
- All-Purpose Flour (2 cups): Spoon and level your flour. Scooping directly from the bag can pack in too much flour, leading to dry, crumbly cookies. For a gluten-free option, use a 1:1 gluten-free baking blend with xanthan gum.
- Baking Soda (1 teaspoon): This is our leavening agent. It helps the cookies rise just a little and encourages browning. Make sure it’s fresh—old baking soda won’t give you the same lift.
- Pumpkin Pie Spice (2 teaspoons): You can use store-bought or make your own with a mix of cinnamon, nutmeg, ginger, and cloves. I sometimes add a pinch of extra cinnamon because I’m obsessed.
- Cinnamon (1 teaspoon): Because you can never have too much cinnamon in a pumpkin cookie.
- Salt (1/2 teaspoon): Salt balances the sweetness and enhances the pumpkin flavor. Don’t skip it.
- Semi-Sweet Chocolate Chips (1 1/2 cups): I prefer semi-sweet because it’s not too sugary and it holds its shape well during baking. Dark chocolate chips are also fantastic. Avoid milk chocolate chips—they can make the cookies overly sweet.
- Flaky Sea Salt (for finishing): This is non-negotiable. Maldon sea salt is my go-to. The large, delicate flakes provide a burst of salty crunch that cuts through the sweetness and makes the chocolate taste richer.
Equipment Needed
You don’t need a professional bakery setup to make these cookies. Here’s what you’ll need, along with a few tips from my own kitchen.
- Mixing Bowls (2): One large for the wet ingredients and one medium for the dry. I love my set of Pyrex glass bowls because they’re microwave-safe and easy to clean.
- Whisk and Rubber Spatula: A whisk for combining the dry ingredients and a sturdy spatula for folding in the chocolate chips.
- Baking Sheets (2): Heavy-duty, light-colored aluminum baking sheets are best. Dark sheets can cause the bottoms of the cookies to burn before the centers are set. I use Nordic Ware half-sheet pans.
- Parchment Paper or Silicone Baking Mat: Parchment paper is cheap and disposable, making cleanup a breeze. Silicone mats are reusable and provide a consistent non-stick surface. Either works great.
- Cookie Scoop (1.5-tablespoon size): A scoop ensures all your cookies are the same size, so they bake evenly. If you don’t have one, use two spoons to portion the dough.
- Cooling Rack: Letting the cookies cool on a rack prevents the bottoms from steaming and getting soggy. It’s a small step that makes a big difference.
- Paper Towels: For blotting the pumpkin puree. Trust me, it’s worth the extra step.
Preparation Method
Alright, let’s get baking. This process is straightforward, but I’ll share every little trick I’ve learned along the way to ensure your cookies turn out absolutely perfect.
- Blot the Pumpkin: Spread the 1 cup of pumpkin puree onto a plate lined with a double layer of paper towels. Place another double layer of paper towels on top and press down gently. Let it sit for 5-10 minutes while you gather the other ingredients. You’ll see the towels absorb a surprising amount of liquid. This is the single most important step for avoiding cakey cookies.
- Preheat and Prep: Preheat your oven to 350°F (175°C). Line two baking sheets with parchment paper or silicone mats. This ensures the cookies don’t stick and promotes even browning.
- Melt the Butter: In a large microwave-safe bowl, melt the 1 cup of unsalted butter in 30-second intervals. Let it cool for 5 minutes. It should be warm to the touch but not hot. If it’s too hot, it will cook the egg.
- Combine Wet Ingredients: Add the packed brown sugar and granulated sugar to the melted butter. Whisk vigorously for about 2 minutes until the mixture is smooth, glossy, and slightly thickened. This is called “blooming” the sugar, and it helps create that chewy texture. Add the egg and vanilla extract and whisk until fully combined and smooth.
- Add the Pumpkin: Gently fold the blotted pumpkin puree into the wet mixture with your rubber spatula. Don’t overmix; just stir until the pumpkin is evenly distributed. The dough will look a little loose and shiny.
- Whisk Dry Ingredients: In a separate medium bowl, whisk together the 2 cups of all-purpose flour, 1 teaspoon of baking soda, 2 teaspoons of pumpkin pie spice, 1 teaspoon of cinnamon, and 1/2 teaspoon of salt. Whisking aerates the flour and ensures the spices are evenly distributed.
- Combine Wet and Dry: Pour the dry ingredients into the wet ingredients. Fold gently with your spatula, scraping the bottom and sides of the bowl. Stop as soon as no streaks of flour remain. Overmixing at this stage develops gluten, which will make the cookies tough.
- Fold in Chocolate Chips: Add the 1 1/2 cups of semi-sweet chocolate chips. Fold just a few times until they are evenly distributed. The dough will be thick and slightly sticky.
- Chill the Dough (Optional but Recommended): For the absolute best texture, cover the bowl and refrigerate the dough for at least 30 minutes, or up to 24 hours. Chilling solidifies the butter, which prevents the cookies from spreading too much in the oven and deepens the flavor. If you’re in a rush, you can skip this step, but the cookies will be a little flatter.
- Scoop and Salt: Use your 1.5-tablespoon cookie scoop to portion the dough. Place the dough balls about 2 inches apart on the prepared baking sheets. Right before baking, sprinkle a generous pinch of flaky sea salt on top of each dough ball. Don’t be shy—the salt is the star.
- Bake: Bake one sheet at a time in the preheated oven for 10-12 minutes. The edges should be set and lightly golden, but the centers will look slightly underdone and puffy. That’s exactly what you want. Overbaking will result in dry cookies.
- Cool: Let the cookies cool on the baking sheet for 5 minutes. They will continue to set as they cool. After 5 minutes, transfer them to a wire cooling rack to cool completely. The centers will sink slightly, creating that perfect chewy texture.
Cooking Tips & Techniques
I’ve made every mistake in the book with pumpkin cookies, so you don’t have to. Here are the lessons I learned the hard way.
- Don’t Skip the Blotting: I know it feels like an extra, annoying step. But the first time I made these without blotting, I ended up with flat, greasy puddles of dough. Pumpkin is mostly water, and that extra moisture wreaks havoc on the cookie structure. Blotting removes about 2-3 tablespoons of liquid, which is a game-changer.
- Use a Cookie Scoop for Consistency: I used to wing it with spoons, and my cookies would bake unevenly—some burnt, some raw. A cookie scoop gives you uniform size, which means uniform baking. It’s a ten-dollar tool that will improve every batch of cookies you make.
- The Salt Timing Matters: Sprinkle the sea salt on the dough balls just before they go into the oven. If you add it too early, the salt will dissolve into the dough and you’ll lose that beautiful, crunchy pop of flavor. I learned this after a batch of bland cookies that had me scratching my head.
- Bake One Sheet at a Time: Your oven needs consistent heat to bake cookies properly. If you cram two sheets in there, the heat can’t circulate, and you’ll end up with unevenly baked cookies. It takes a little longer, but the results are worth it.
- Embrace the Underbaked Look: Pull the cookies out when the edges are set but the centers still look a little soft and puffy. They will continue to bake on the hot pan during the 5-minute cooling period. If you wait until the centers look fully done, they’ll be rock hard once they cool.
Variations & Adaptations
One of the best things about this recipe is how flexible it is. I’ve played around with it quite a bit, and here are some of my favorite twists.
- Gluten-Free Version: Swap the all-purpose flour for a good 1:1 gluten-free baking blend that contains xanthan gum (I like King Arthur Measure for Measure). The texture will be slightly more tender, but the flavor is spot on.
- Dark Chocolate and Pecan: Replace the semi-sweet chips with dark chocolate chunks and fold in 1/2 cup of toasted, chopped pecans. The nuttiness pairs beautifully with the pumpkin and the salty finish. This is my go-to version for a more sophisticated cookie.
- White Chocolate and Cranberry: Use white chocolate chips and 1/2 cup of dried cranberries. The tartness of the cranberries cuts through the sweetness, and the white chocolate adds a creamy, vanilla-like flavor. It’s like a pumpkin scone in cookie form.
- Vegan Adaptation: Substitute the melted butter with melted coconut oil (refined for no coconut flavor) or vegan butter. Use a flax egg (1 tablespoon ground flaxseed mixed with 3 tablespoons water, let sit for 5 minutes) instead of the egg. The cookies will be a little more delicate, but they’re still delicious.
- Spice It Up: Add 1/4 teaspoon of ground ginger and a pinch of cloves to the dry ingredients for a more complex, warming spice profile. I do this when I’m craving a taste of my grandmother’s pumpkin pie.
Serving & Storage Suggestions
These cookies are incredible fresh from the oven, but they’re also surprisingly good the next day—if they last that long.
- Serving Temperature: Serve them warm or at room temperature. For an extra treat, pop a cookie in the microwave for 10 seconds to soften the chocolate chips. They’re perfect with a glass of cold milk, a hot cup of coffee, or a mug of spiced apple cider.
- Presentation: Stack them on a rustic wooden board or a pretty cake stand. A light dusting of extra flaky sea salt right before serving makes them look bakery-worthy.
- Storage: Store the cookies in an airtight container at room temperature for up to 5 days. To keep them soft, add a slice of bread to the container—the cookies will absorb the moisture from the bread. Seriously, it works like magic.
- Freezing: You can freeze the baked cookies for up to 3 months. Layer them between sheets of parchment paper in a freezer-safe container. Thaw at room temperature for about 30 minutes. You can also freeze the unbaked dough balls. Scoop them onto a baking sheet, freeze until solid, then transfer to a freezer bag. Bake from frozen, adding 2-3 minutes to the baking time.
- Flavor Development: Honestly, these cookies taste even better on day two. The spices have time to meld, and the texture becomes incredibly soft and fudgy. If you can resist eating them all on day one, you’re in for a treat.
Nutritional Information & Benefits
While these are definitely a treat, they do offer a few redeeming qualities thanks to the star ingredient.
- Estimated Nutrition (per cookie, based on 24 cookies): Calories: 185, Fat: 10g, Carbs: 24g, Fiber: 1g, Sugar: 15g, Protein: 2g.
- Pumpkin Power: Pumpkin is packed with Vitamin A (in the form of beta-carotene), which is great for eye health and immune function. It’s also a good source of fiber and potassium.
- Dark Chocolate Benefits: Semi-sweet chocolate contains antioxidants called flavonoids, which can help support heart health. The darker the chocolate, the more benefits you get.
- Dietary Considerations: This recipe can easily be made gluten-free or vegan (see variations above). It is naturally nut-free if you stick to the base recipe.
- Potential Allergens: Contains wheat (gluten), dairy (butter), and eggs. Please check your chocolate chips for potential dairy or soy if you have severe allergies.
From a wellness perspective, I love that these cookies let me enjoy a seasonal favorite without feeling like I’m eating a pile of sugar. The pumpkin adds moisture and nutrients, and the sea salt helps balance the sweetness so you’re satisfied with one or two instead of a dozen.
Conclusion
These Perfect Pumpkin Chocolate Chip Cookies with Sea Salt are the fall baking project you’ve been waiting for. They’re not fussy, they don’t require a laundry list of ingredients, and they deliver that bakery-quality chew and flavor that’s so hard to find in homemade pumpkin cookies. The secret is in the details—blotting the pumpkin, using melted butter, and that final, glorious sprinkle of sea salt.
I really hope you give these a try. Play around with the variations, make them your own, and don’t be afraid to eat a few straight off the cooling rack (I certainly do). If you make them, I’d love to hear about it. Drop a comment below and tell me how they turned out, or share a photo on social media and tag me. Your feedback and adaptations are what make this community so wonderful. Happy baking, friends!
Frequently Asked Questions
Can I use pumpkin pie filling instead of pumpkin puree?
No, please don’t. Pumpkin pie filling is pre-sweetened and spiced, which will throw off the sugar and spice balance of this recipe. Stick with 100% pure pumpkin puree.
Why did my cookies turn out cakey?
This is almost always because the pumpkin wasn’t blotted enough. Too much moisture in the dough creates steam in the oven, which puffs up the cookies like little muffins. Make sure you press those paper towels firmly.
Can I make the dough ahead of time?
Absolutely. You can refrigerate the dough for up to 24 hours before baking. In fact, I recommend it. The flavors deepen and the texture improves. Just let the dough sit at room temperature for 10-15 minutes before scooping if it’s too firm.
How do I store these cookies to keep them soft?
Store them in an airtight container at room temperature with a slice of bread. The bread will absorb excess moisture and keep the cookies soft and chewy for days. Replace the bread slice every couple of days if needed.
Can I use a different type of chocolate?
Yes! Dark chocolate chips, milk chocolate chips, or even white chocolate chips all work well. Just keep in mind that milk chocolate chips will make the cookies significantly sweeter, so you might want to reduce the granulated sugar by a tablespoon or two.
Pin This Recipe!
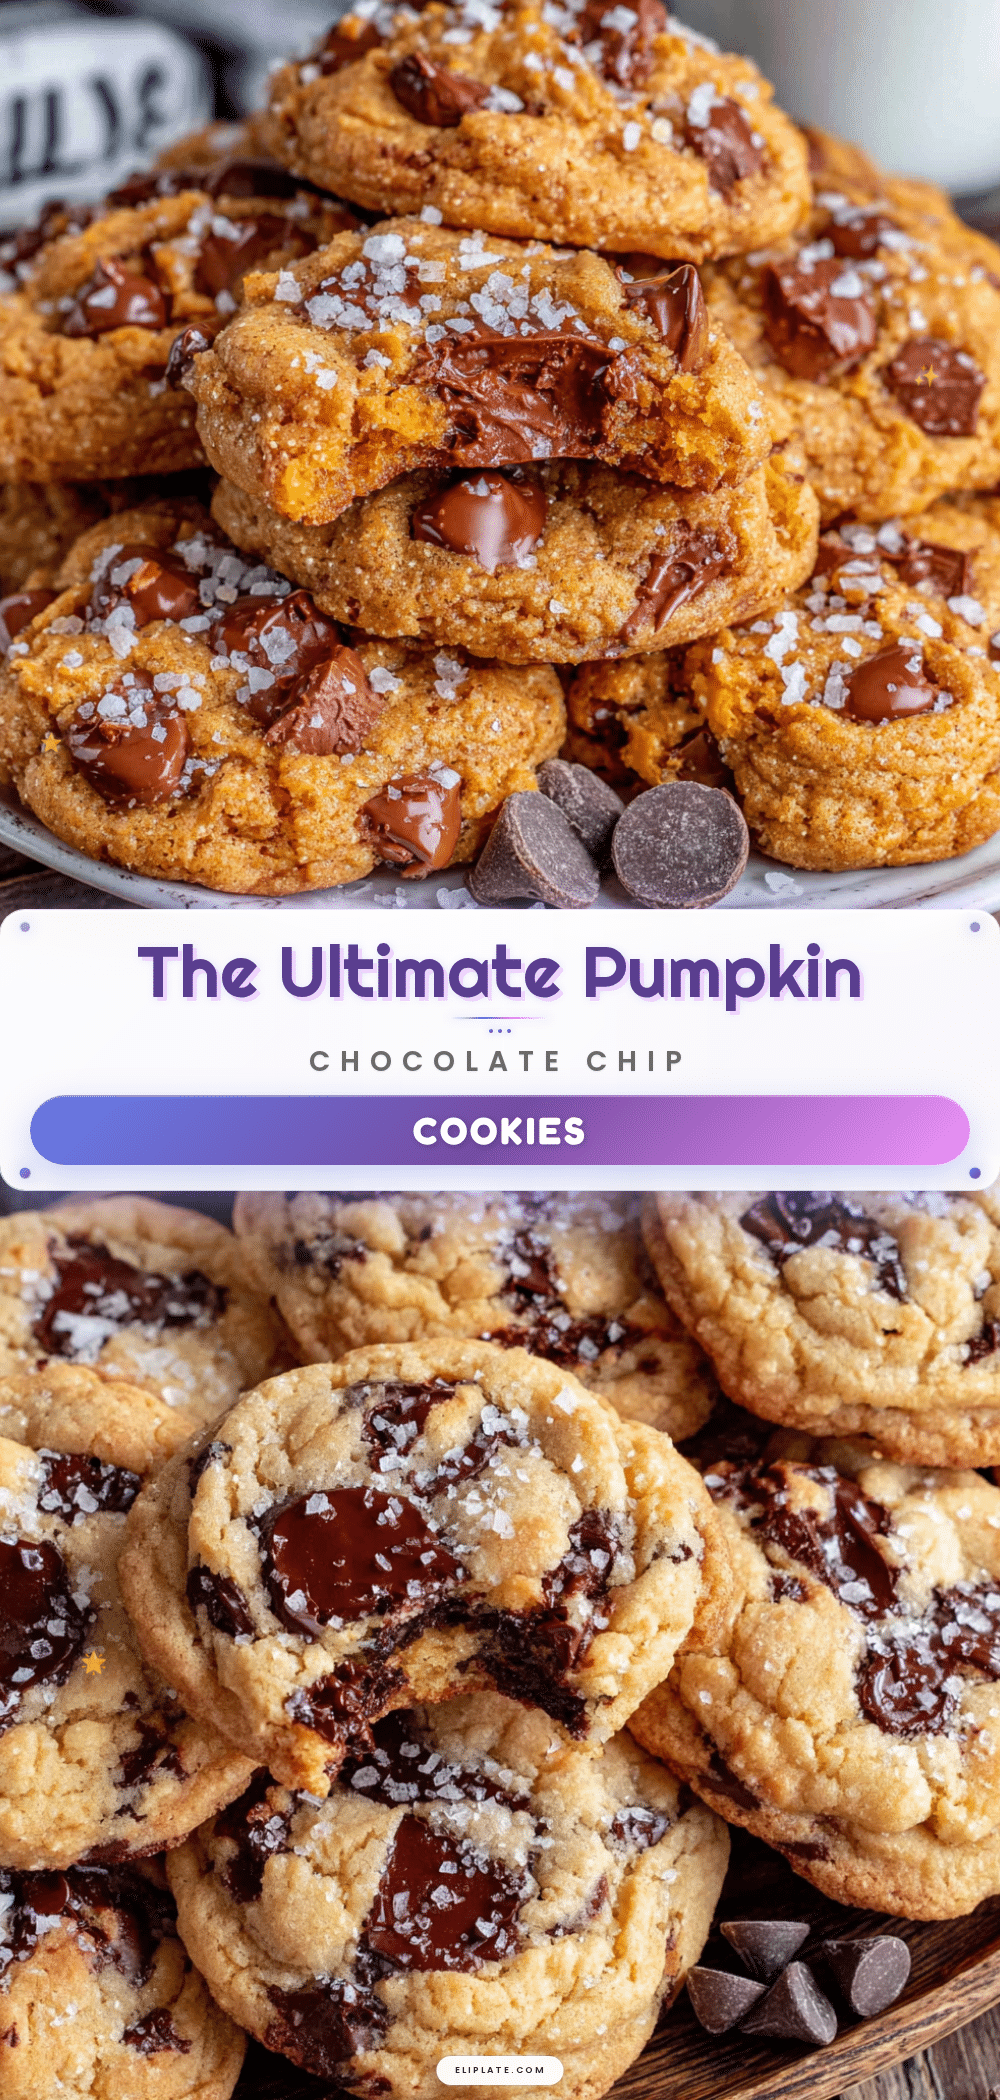
Perfect Pumpkin Chocolate Chip Cookies with Sea Salt

These Perfect Pumpkin Chocolate Chip Cookies with Sea Salt have a soft, tender center with slightly crisp edges. The pumpkin keeps them moist without making them heavy, and that final sprinkle of sea salt turns a good cookie into a ‘close your eyes and savor it’ kind of moment.
- Prep Time: 15 minutes
- Cook Time: 12 minutes
- Total Time: 27 minutes
- Yield: 24 servings 1x
- Category: Dessert
- Cuisine: American
Ingredients
- 1 cup unsalted butter, melted and slightly cooled
- 1 cup pumpkin puree, blotted
- 1 cup light brown sugar, packed
- 1/2 cup granulated sugar
- 1 large egg, room temperature
- 2 teaspoons vanilla extract
- 2 cups all-purpose flour
- 1 teaspoon baking soda
- 2 teaspoons pumpkin pie spice
- 1 teaspoon cinnamon
- 1/2 teaspoon salt
- 1 1/2 cups semi-sweet chocolate chips
- Flaky sea salt for finishing
Instructions
- Blot the pumpkin: Spread the 1 cup of pumpkin puree onto a plate lined with a double layer of paper towels. Place another double layer of paper towels on top and press down gently. Let it sit for 5-10 minutes while you gather the other ingredients.
- Preheat and prep: Preheat your oven to 350°F (175°C). Line two baking sheets with parchment paper or silicone mats.
- Melt the butter: In a large microwave-safe bowl, melt the 1 cup of unsalted butter in 30-second intervals. Let it cool for 5 minutes.
- Combine wet ingredients: Add the packed brown sugar and granulated sugar to the melted butter. Whisk vigorously for about 2 minutes until the mixture is smooth, glossy, and slightly thickened. Add the egg and vanilla extract and whisk until fully combined and smooth.
- Add the pumpkin: Gently fold the blotted pumpkin puree into the wet mixture with your rubber spatula until evenly distributed.
- Whisk dry ingredients: In a separate medium bowl, whisk together the 2 cups of all-purpose flour, 1 teaspoon of baking soda, 2 teaspoons of pumpkin pie spice, 1 teaspoon of cinnamon, and 1/2 teaspoon of salt.
- Combine wet and dry: Pour the dry ingredients into the wet ingredients. Fold gently with your spatula until no streaks of flour remain.
- Fold in chocolate chips: Add the 1 1/2 cups of semi-sweet chocolate chips. Fold just a few times until evenly distributed.
- Chill the dough (optional but recommended): Cover the bowl and refrigerate the dough for at least 30 minutes, or up to 24 hours.
- Scoop and salt: Use a 1.5-tablespoon cookie scoop to portion the dough. Place the dough balls about 2 inches apart on the prepared baking sheets. Right before baking, sprinkle a generous pinch of flaky sea salt on top of each dough ball.
- Bake: Bake one sheet at a time in the preheated oven for 10-12 minutes. The edges should be set and lightly golden, but the centers will look slightly underdone and puffy.
- Cool: Let the cookies cool on the baking sheet for 5 minutes. After 5 minutes, transfer them to a wire cooling rack to cool completely.
Notes
Blotting the pumpkin is crucial to avoid cakey cookies. Sprinkle sea salt just before baking for the best crunchy pop. Bake one sheet at a time for even results. Cookies can be stored in an airtight container at room temperature for up to 5 days; add a slice of bread to keep them soft. Freeze baked cookies for up to 3 months or unbaked dough balls for later use.
Nutrition
- Serving Size: 1 cookie
- Calories: 185
- Sugar: 15
- Sodium: 120
- Fat: 10
- Saturated Fat: 6
- Carbohydrates: 24
- Fiber: 1
- Protein: 2
Keywords: pumpkin cookies, chocolate chip cookies, sea salt cookies, fall baking, pumpkin recipes, chewy cookies