It was 11:47 PM on a random Tuesday in October, and I was hit with a very specific craving for something chocolatey and fun. I didn’t have any fancy Halloween cookie cutters or decorating kits, but I had a batch of my go-to chocolate chip cookie dough chilling in the fridge and a bottle of white icing that was probably a year past its prime. The idea just sort of arrived—what if I could turn these ordinary cookies into something that looked like a spider web? I mean, honestly, I was tired, the kitchen was a mess, and I almost talked myself out of it. But something about the late hour loosened all the usual rules. I grabbed a piping bag, made a royal mess, and ended up with the ugliest, most perfect spider web cookies I’d ever seen. Let me tell you, my kids devoured them the next morning before I could even get a picture. Maybe you’ve been there—staring into your pantry at 11 PM, wondering if you can make something magical out of what’s already there. That’s how these cookies were born, and honestly, they’ve been a Halloween staple in our house ever since.
Why You’ll Love This Recipe
Let’s face it—finding a Halloween treat that actually tastes good and doesn’t require a culinary degree can feel impossible. These cookies solve that problem. They start with a classic, foolproof chocolate chip cookie base that I’ve tested at least a dozen times. The spider web design looks impressive but takes about two minutes per cookie. It’s the kind of recipe that makes you look like a Pinterest pro without the stress.
- Quick & Easy : From start to finish, you’re looking at about 30 minutes. The decorating part takes maybe 10 minutes total. Perfect for those evenings when the kids announce they need a class treat tomorrow morning.
- Simple Ingredients : You probably have everything in your pantry right now. Butter, sugar, flour, chocolate chips, and some white icing. No weird food coloring or specialty items.
- Perfect for Halloween Parties : These are great for classroom parties, trick-or-treat gatherings, or just a fun weekend baking project. They travel well and stay fresh for days.
- Crowd-Pleaser : I’ve made these for three different Halloween events, and they disappear every single time. Kids love the spider web design, and adults appreciate that they’re actually good cookies, not just decoration.
- Unbelievably Delicious : The cookie itself is soft in the middle, crispy on the edges, and loaded with chocolate chips. The white icing adds a subtle sweetness that complements the chocolate perfectly.
What makes this recipe different from other Halloween cookies is the technique. Instead of using royal icing or fondant, which can taste awful, you’re working with a simple buttercream or store-bought icing that actually tastes good. The spider web pattern is forgiving—if you mess up, it just looks more organic and web-like. It’s comfort food reimagined for the spooky season, and it’s the kind of treat that makes you close your eyes after the first bite.
What Ingredients You Will Need
This recipe uses simple, everyday ingredients to create something special. Most of these are pantry staples, which means you can whip up a batch anytime the Halloween mood strikes.
For the Cookies
- 1 cup unsalted butter, softened (I use Land O’Lakes—it gives the best texture. Make sure it’s truly softened, not melted.)
- 3/4 cup granulated sugar (adds sweetness and helps with spreading)
- 3/4 cup packed brown sugar (I prefer light brown sugar for a milder molasses flavor, but dark works too)
- 2 large eggs, room temperature (cold eggs can make the dough seize up)
- 1 teaspoon vanilla extract (pure vanilla makes a difference, but imitation works in a pinch)
- 2 1/4 cups all-purpose flour (spoon and level it—don’t scoop directly from the bag)
- 1 teaspoon baking soda (check the expiration date—old baking soda won’t give you good spread)
- 1/2 teaspoon salt (I use fine sea salt)
- 2 cups semi-sweet chocolate chips (Ghirardelli is my go-to, but any brand works. You can also use milk chocolate if your kids prefer it.)
For the Spider Web Design
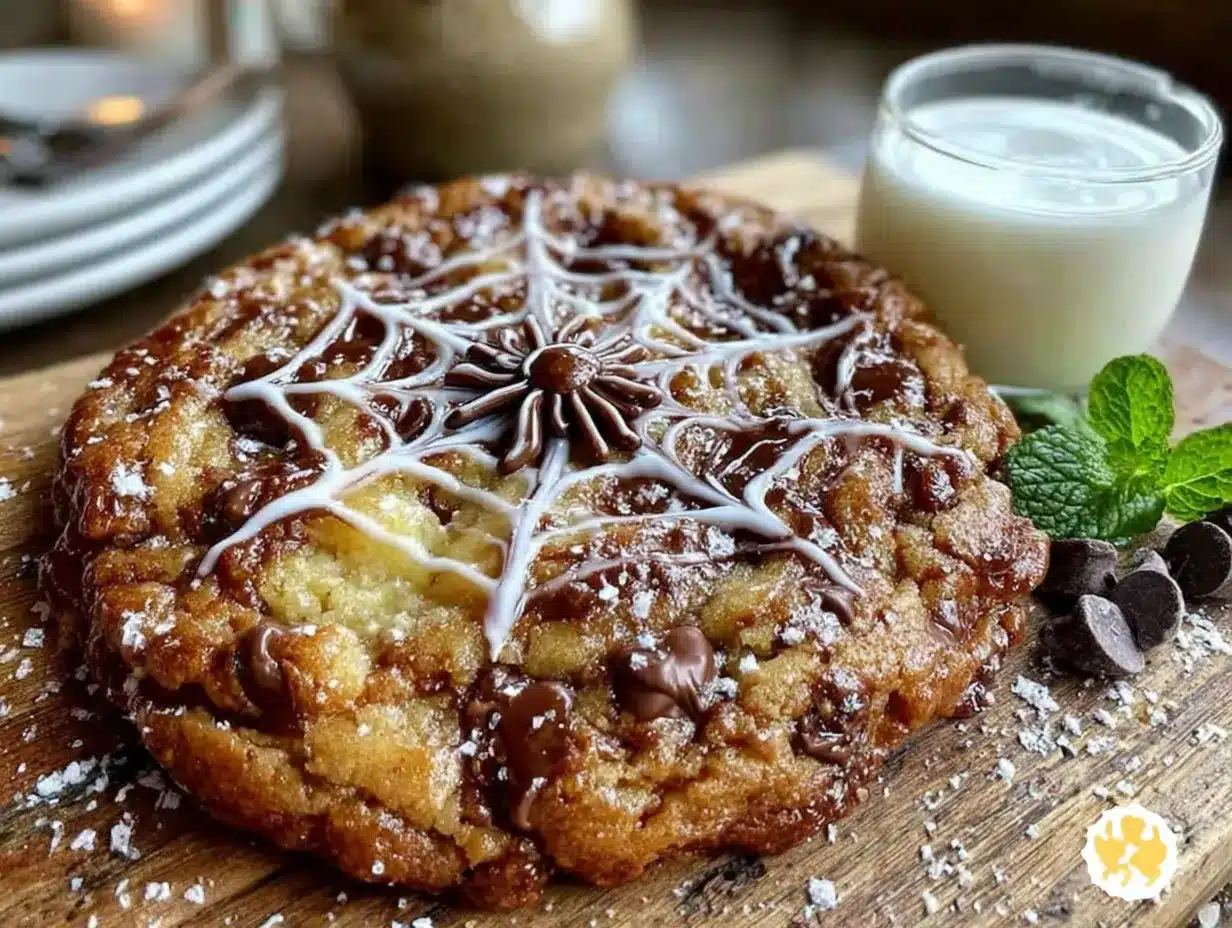
- 1/2 cup white icing (store-bought in a tube works great—Betty Crocker or Wilton are reliable. You can also make a quick buttercream with powdered sugar, butter, and milk.)
- Optional: Black gel icing (for the spider—completely optional but fun)
Substitution Guidance: If you need a dairy-free version, use vegan butter and dairy-free chocolate chips. The texture will be slightly different, but it still works. For a gluten-free option, swap the all-purpose flour with a 1:1 gluten-free baking flour. I’ve tried King Arthur’s Measure for Measure, and it works beautifully.
Ingredient Selection Tip: For the best spider web design, use a thicker icing. Runny icing will just drip off the cookie. If your store-bought icing seems too thin, pop it in the fridge for 10 minutes to firm up.
Equipment Needed
You don’t need much for this recipe, which is part of the beauty. Here’s what you’ll need:
- Large mixing bowl (any size works, but bigger is better for mixing without mess)
- Electric mixer (hand mixer or stand mixer—both work. I’ve made these with a whisk and some elbow grease, and it’s doable but tiring.)
- Baking sheets (I recommend using light-colored baking sheets for even browning. Dark sheets can burn the bottom.)
- Parchment paper (essential for easy cleanup and preventing sticking)
- Piping bag or zip-top bag (for the spider web design. A zip-top bag with a tiny corner snipped off works perfectly.)
- Cooling rack (helps the cookies cool evenly before decorating)
- Measuring cups and spoons (accurate measurements matter in baking)
Budget-Friendly Options: If you don’t have a piping bag, a zip-top bag works just as well. Just snip off a tiny corner—like 1/8 inch—and you’re good to go. No need to buy special equipment for this recipe.
Preparation Method
- Preheat your oven to 375°F (190°C). Line two baking sheets with parchment paper. This is non-negotiable—parchment paper prevents sticking and makes cleanup a breeze.
- Cream the butter and sugars together. In your large mixing bowl, beat the softened butter, granulated sugar, and brown sugar together until light and fluffy. This takes about 3-4 minutes with an electric mixer on medium speed. You’ll know it’s ready when the mixture looks pale and slightly increased in volume. Don’t rush this step—proper creaming is what gives cookies their tender texture.
- Add the eggs and vanilla. Beat in the eggs one at a time, making sure each is fully incorporated before adding the next. Then add the vanilla extract and beat for another 30 seconds. The mixture might look a little curdled at this point—don’t panic, that’s normal.
- Mix the dry ingredients. In a separate bowl, whisk together the flour, baking soda, and salt. This ensures the baking soda is evenly distributed. If you’re lazy like me sometimes, you can skip this step, but trust me—you’ll end up with pockets of baking soda that taste metallic.
- Combine wet and dry ingredients. Gradually add the dry ingredients to the wet mixture, mixing on low speed or by hand with a wooden spoon. Mix just until the flour disappears—overmixing develops gluten and makes tough cookies. Stop when you see a few streaks of flour remaining.
- Fold in the chocolate chips. Use a spatula to fold in the chocolate chips by hand. This prevents the mixer from breaking the chips and ensures even distribution. The dough will be thick and slightly sticky—that’s perfect.
- Chill the dough (optional but recommended). If you have time, cover the bowl and refrigerate the dough for 30 minutes. This prevents the cookies from spreading too much in the oven. I’ve skipped this step plenty of times when I’m in a hurry, and the cookies still turn out great—they just spread a bit more.
- Scoop the cookies. Use a cookie scoop or tablespoon to drop rounded balls of dough onto the prepared baking sheets, spacing them about 2 inches apart. I use about 1.5 tablespoons of dough per cookie. If you want uniform cookies, use a cookie scoop—it’s worth the investment.
- Bake the cookies. Bake for 9-11 minutes, or until the edges are golden brown and the centers look slightly underdone. The cookies will continue to bake on the hot baking sheet after you remove them from the oven. For soft, chewy cookies, pull them out when the centers still look a bit puffy and pale.
- Cool the cookies completely. Let the cookies cool on the baking sheet for 5 minutes, then transfer them to a wire rack to cool completely. This is crucial—if you try to decorate warm cookies, the icing will melt and slide right off.
- Create the spider web design. Once the cookies are completely cool, prepare your icing. If using a piping bag, fit it with a small round tip. If using a zip-top bag, snip off a tiny corner. Start by piping a small circle in the center of each cookie. Then pipe concentric circles around it, spacing them about 1/2 inch apart. Finally, use a toothpick or a knife to drag lines from the center outward, creating the web pattern. Start at the center and drag outward through all the circles. Repeat this 6-8 times around the cookie, and watch the web pattern magically appear.
- Add the spider (optional). If you’re feeling extra festive, use black gel icing to pipe a small spider on one of the webs. It’s a cute touch that kids absolutely love.
- Let the icing set. Allow the decorated cookies to sit at room temperature for about 15-20 minutes so the icing can firm up. Then they’re ready to serve or store.
Cooking Tips & Techniques
Let me save you from the mistakes I’ve made. First, don’t overbake these cookies. I can’t stress this enough. The first time I made them, I left them in the oven for 12 minutes because I wanted them “golden brown.” They came out like hockey pucks. The cookies should look slightly underdone when you pull them out—the carryover heat will finish the job.
Second, if your dough feels too sticky to handle, don’t add more flour. Just chill it for 15-20 minutes. Cold dough is much easier to work with and spreads less in the oven. I learned this the hard way when I added too much flour and ended up with dry, crumbly cookies.
Third, for the spider web design, practice on a piece of parchment paper first. It takes a couple tries to get the hang of the toothpick drag technique. The trick is to start from the center and pull outward in one smooth motion. If you stop halfway, the line will look broken. And don’t press too hard—you want to drag through the icing, not scrape it off the cookie.
Fourth, timing matters. Bake the cookies one day and decorate them the next. The cookies need to be completely cool, and decorating can be a messy activity that takes longer than you think. Spreading it over two days makes it more enjoyable, especially if you’re doing it with kids.
Finally, if you’re making these for a classroom party, double the batch. Trust me on this. They disappear fast, and you’ll want extras for yourself.
Variations & Adaptations
This recipe is incredibly flexible. Here are some variations I’ve tried and loved:
- Dietary Adaptation – Gluten-Free: Substitute the all-purpose flour with a 1:1 gluten-free baking flour. I’ve used Bob’s Red Mill and King Arthur, and both work well. Add an extra tablespoon of milk to the dough if it seems too dry.
- Flavor Twist – Peanut Butter Spider Webs: Add 1/2 cup of creamy peanut butter to the dough when creaming the butter and sugars. Use milk chocolate chips instead of semi-sweet. The peanut butter-chocolate combo is irresistible.
- Seasonal Variation – Christmas Spider Webs: Use red and green sprinkles on top of the icing instead of making spider webs. Or pipe snowflake patterns instead of webs. The cookie base works for any holiday.
- Dietary Adaptation – Dairy-Free: Use vegan butter and dairy-free chocolate chips. I recommend Miyoko’s vegan butter for the best texture. The cookies might spread a bit more, so chill the dough for a full hour before baking.
- Flavor Variation – Double Chocolate: Replace 1/4 cup of the flour with unsweetened cocoa powder. Use white chocolate chips instead of semi-sweet for a striking contrast. The spider web design really pops against the dark cookie.
I once tried a version with mint extract instead of vanilla, and it was surprisingly good. The mint-chocolate combo felt very Halloween-appropriate. Just use 1/2 teaspoon of mint extract and 1/2 teaspoon of vanilla, so it doesn’t overpower the cookie.
Serving & Storage Suggestions
These cookies are best served at room temperature. The icing sets firm enough that they stack well, so you can arrange them on a platter without worrying about smudging. I like to serve them on a dark plate or black platter to make the spider webs stand out.
For storage, keep the cookies in an airtight container at room temperature. They’ll stay fresh for up to 5 days. If you stack them, place a sheet of parchment paper between layers to prevent the icing from sticking. Don’t refrigerate them—the fridge dries out cookies and makes the icing brittle.
These cookies freeze beautifully. Place the undecorated cookies in a freezer-safe bag or container and freeze for up to 3 months. When you’re ready to serve, thaw them at room temperature, then decorate. The icing won’t hold up well to freezing, so always decorate after thawing.
Flavor-wise, these cookies actually get better after a day. The flavors meld together, and the texture softens slightly. If you can resist eating them all immediately, let them sit overnight in an airtight container. You’ll be rewarded with even better cookies the next day.
Nutritional Information & Benefits
Here’s the honest truth—these are cookies, not health food. But they’re made with real ingredients, which counts for something. Per cookie (based on a batch of 24), here’s the approximate breakdown:
- Calories: 220
- Fat: 12g
- Carbohydrates: 28g
- Protein: 3g
- Sugar: 18g
- Fiber: 1g
The butter provides a small amount of vitamin A, and the chocolate chips contain antioxidants from cocoa. The eggs add protein and healthy fats. If you use dark chocolate chips (60% cacao or higher), you’ll get more antioxidants and less sugar.
Dietary Considerations: This recipe contains wheat, dairy, and eggs. For a gluten-free version, see the variations section. For a dairy-free version, use vegan butter and dairy-free chocolate chips. There’s no easy egg substitute for this recipe, as eggs are crucial for structure and texture.
My personal wellness perspective? These cookies are a treat, and that’s okay. Halloween comes once a year. Let your kids (and yourself) enjoy them without guilt. Balance is about enjoying the special moments, not restricting them.
Conclusion
These Kid-Approved Spider Web Chocolate Chip Cookies are everything a Halloween treat should be—fun to make, delicious to eat, and impressive without being complicated. They start with a classic chocolate chip cookie that’s been tested and loved, then add a simple decorating technique that makes them look like you spent hours. Honestly, the spider web design is easier than it looks, and it’s the kind of activity that gets kids excited about baking.
I love this recipe because it brings together two things that matter to me: great food and making memories with my family. The late-night kitchen experiment that started it all has become a tradition in our house, and I hope it becomes one in yours too. Feel free to customize the design—add spiders, make ghost faces, or just keep it simple with the web pattern. There’s no wrong way to do it.
I’d love to hear how your cookies turn out! Drop a comment below and let me know if your kids approved (spoiler: they will). Share your photos on Pinterest and tag me so I can see your creations. Happy Halloween, and happy baking!
Frequently Asked Questions
Can I use store-bought cookie dough for this recipe?
Absolutely! If you’re short on time, use your favorite store-bought chocolate chip cookie dough. Just bake the cookies according to the package directions, let them cool completely, and then decorate with the spider web design. The results won’t be quite as good as homemade, but they’ll still look impressive and taste great.
How do I prevent the icing from smearing when I drag the toothpick?
The key is to let the icing circles set for about 30 seconds before dragging the toothpick. If the icing is too wet, the lines will smear instead of creating clean web patterns. Also, use a light touch—you’re dragging through the icing, not scraping it off. Practice on a piece of parchment paper first to get the feel.
Can I make these cookies ahead of time for a party?
Yes! Bake the cookies up to 3 days in advance and store them in an airtight container at room temperature. Decorate them the day you plan to serve them. The icing needs about 15-20 minutes to set, so plan accordingly. If you’re really pressed for time, you can decorate them the night before, just store them in a single layer so the webs don’t get smushed.
My cookies spread too much in the oven. What went wrong?
This usually happens for one of three reasons: the butter was too soft or melted, the dough wasn’t chilled, or the baking sheet was too hot. Make sure your butter is softened but not melted—it should still hold its shape. Chill the dough for at least 30 minutes before baking. And always use cool baking sheets—if you’re baking multiple batches, let the sheet cool completely between batches.
Can I use different colors for the spider web design?
Definitely! Orange icing for Halloween, green for a monster theme, or purple for a spooky vibe all work great. You can even use colored sanding sugar or sprinkles on the wet icing for extra sparkle. Just make sure the icing is thick enough to hold its shape—thin icing will run off the cookie and ruin the design.
Pin This Recipe!
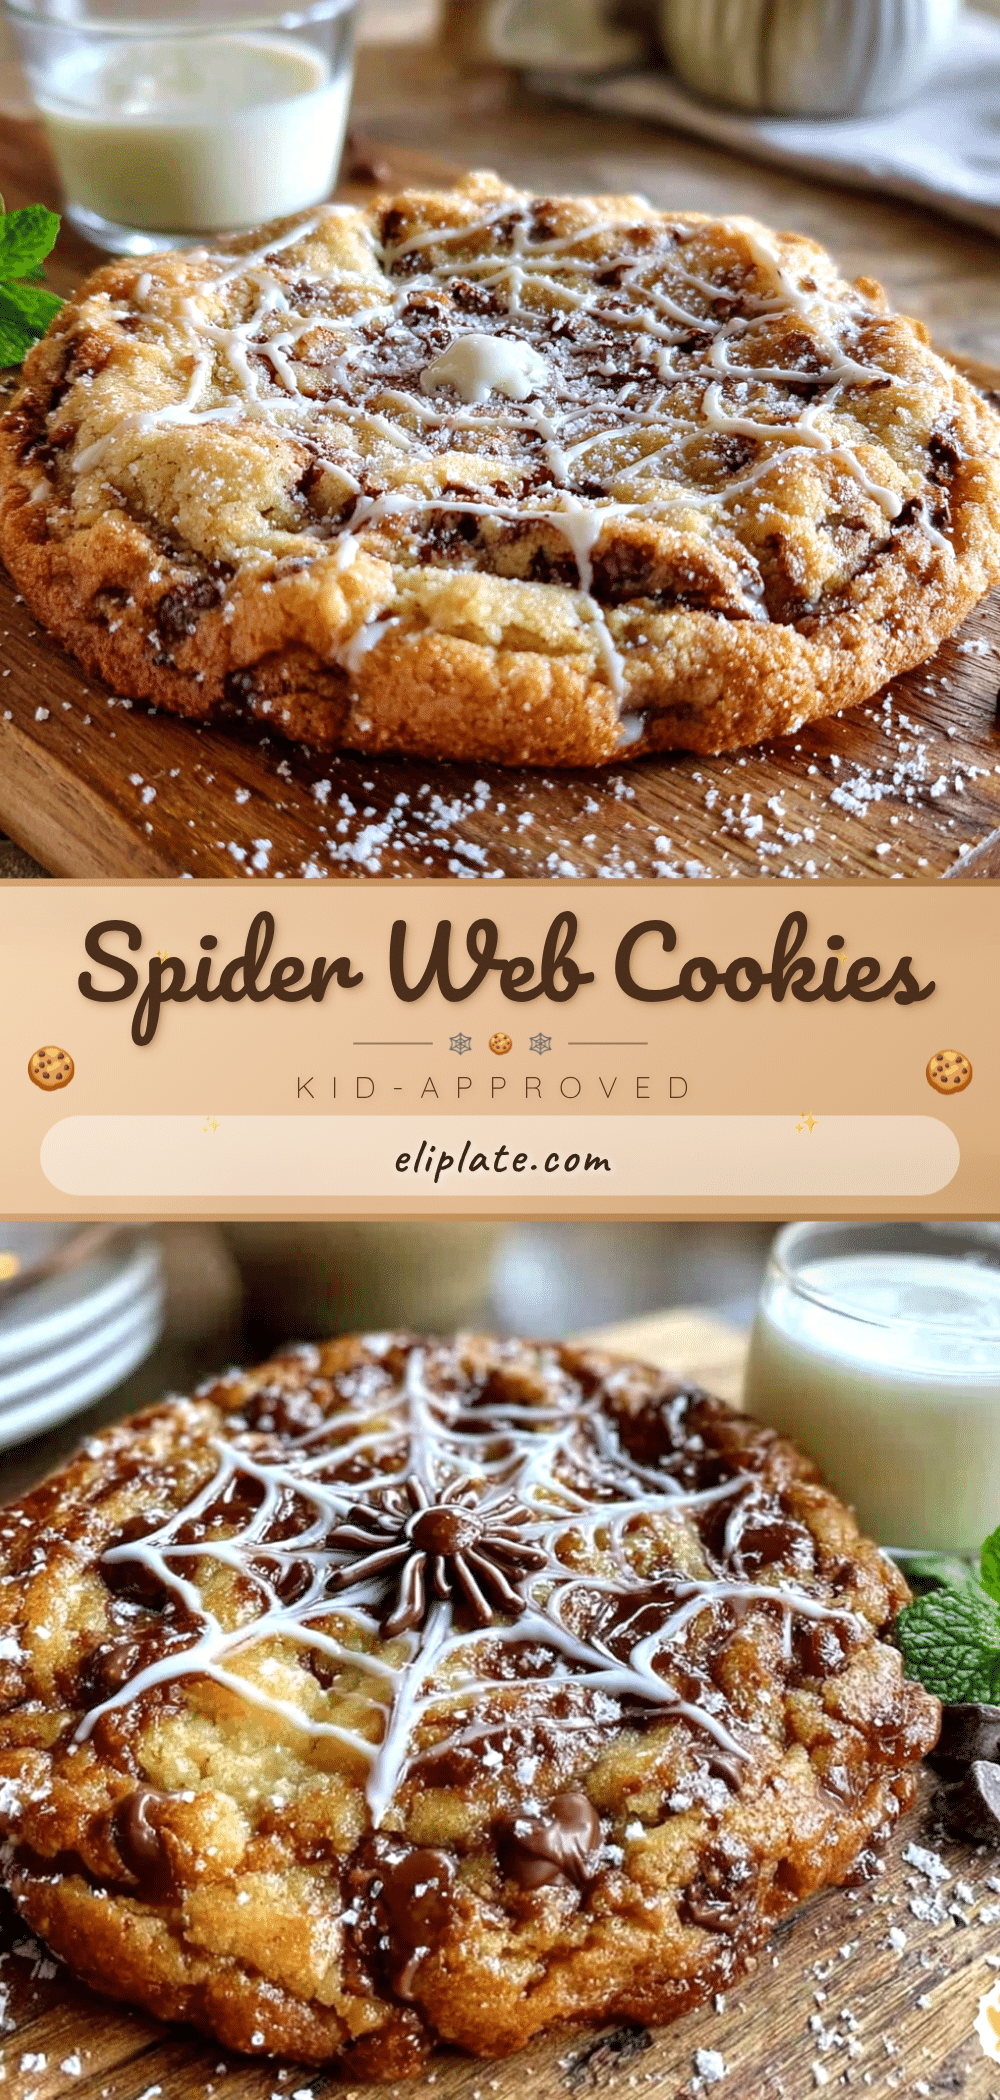
Kid-Approved Spider Web Chocolate Chip Cookies: Easy Halloween Treat

Turn classic chocolate chip cookies into spooky spider web treats with this easy Halloween recipe. Perfect for parties and classroom treats, these cookies are soft, chewy, and decorated with a simple icing web design.
- Prep Time: 15 minutes
- Cook Time: 10 minutes
- Total Time: 25 minutes (plus optional chilling time)
- Yield: 24 servings 1x
- Category: Dessert
- Cuisine: American
Ingredients
- 1 cup unsalted butter, softened
- 3/4 cup granulated sugar
- 3/4 cup packed brown sugar
- 2 large eggs, room temperature
- 1 teaspoon vanilla extract
- 2 1/4 cups all-purpose flour
- 1 teaspoon baking soda
- 1/2 teaspoon salt
- 2 cups semi-sweet chocolate chips
- 1/2 cup white icing (store-bought or homemade buttercream)
- Optional: Black gel icing for spider decoration
Instructions
- Preheat your oven to 375°F (190°C). Line two baking sheets with parchment paper.
- In a large mixing bowl, cream the softened butter, granulated sugar, and brown sugar together until light and fluffy, about 3-4 minutes.
- Beat in the eggs one at a time, then add the vanilla extract and beat for another 30 seconds.
- In a separate bowl, whisk together the flour, baking soda, and salt.
- Gradually add the dry ingredients to the wet mixture, mixing on low speed just until combined. Do not overmix.
- Fold in the chocolate chips with a spatula.
- Chill the dough for 30 minutes if time allows (optional but recommended).
- Scoop rounded balls of dough (about 1.5 tablespoons each) onto the prepared baking sheets, spacing them 2 inches apart.
- Bake for 9-11 minutes, until edges are golden brown and centers look slightly underdone.
- Let cookies cool on the baking sheet for 5 minutes, then transfer to a wire rack to cool completely.
- Once completely cool, prepare the icing. Pipe a small circle in the center of each cookie, then pipe concentric circles around it, spacing them about 1/2 inch apart.
- Use a toothpick to drag lines from the center outward through all the circles, creating a web pattern. Repeat 6-8 times around the cookie.
- Optional: Pipe a small spider using black gel icing.
- Let the icing set for 15-20 minutes before serving or storing.
Notes
For best results, chill the dough for 30 minutes to prevent spreading. Do not overbake; cookies should look slightly underdone when removed from the oven. Let cookies cool completely before decorating to prevent icing from melting. If icing is too thin, refrigerate for 10 minutes to firm up.
Nutrition
- Serving Size: 1 cookie
- Calories: 220
- Sugar: 18
- Sodium: 150
- Fat: 12
- Saturated Fat: 7
- Carbohydrates: 28
- Fiber: 1
- Protein: 3
Keywords: Halloween cookies, spider web cookies, chocolate chip cookies, easy Halloween treats, kid-friendly baking