My neighbor Karl showed up at my back door last September holding a six-pack of German lager and a package of bratwurst with this hopeful look on his face. “My Oktoberfest got cancelled,” he said. “But I bought the stuff anyway.” So there I was, staring at raw sausages and a fridge that definitely didn’t have sauerkraut or any of the traditional fixings. What I did have were two bell peppers starting to wrinkle, a sweet onion rolling around in the produce drawer, and a bottle of dark beer I’d been saving for no particular reason.
Honestly, I wasn’t planning on cooking that afternoon. I had a sink full of dishes and a to-do list that made me tired just looking at it. But Karl was already pulling up a chair, and the brats needed cooking. So I grabbed that onion, sliced the peppers into thick strips, and figured I’d just throw everything in a skillet and see what happened. I poured the beer in mostly because it seemed right — brats and beer just belong together, you know?
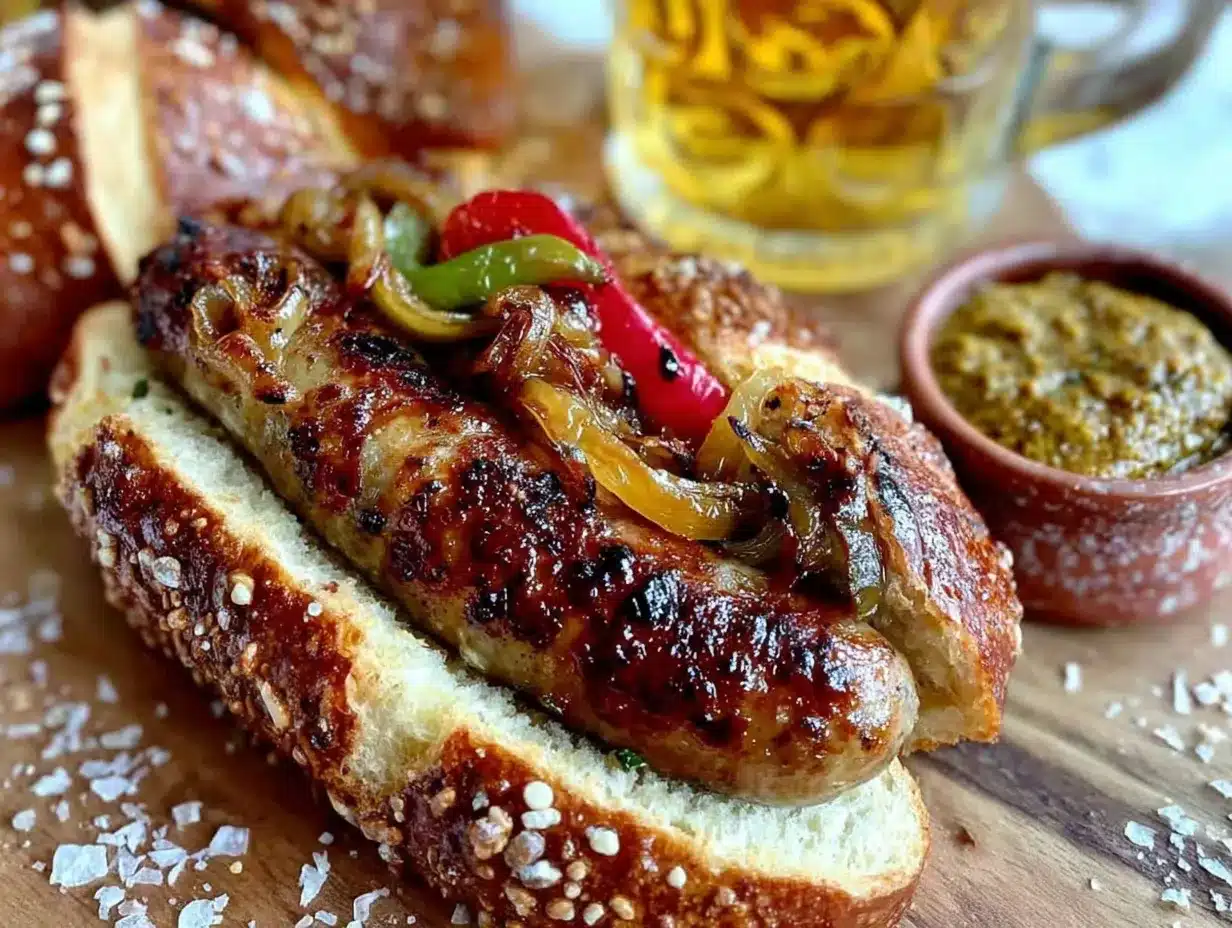
What came out of that skillet surprised both of us. The brats simmered in the beer until they were plump and juicy, then I finished them in the same pan with the caramelized onions and peppers soaking up all that savory goodness. Karl ate three. I ate two. We ran out of buns and just piled the onions and peppers right on top. That messy, improvised dinner turned into the recipe I now make every single Oktoberfest season, and honestly, it’s better than anything I’ve had at an actual festival tent. These Perfect Oktoberfest Beer Brats with Grilled Onions and Peppers are the real deal — and they came from a completely unplanned afternoon with a neighbor who just didn’t want to drink alone.
Why You’ll Love This Recipe
I’ve tested this recipe about a dozen times since that first accidental batch, tweaking the simmering time, the beer choice, and the way I handle the onions. Here’s what makes these brats stand out from every other version you’ve tried:
- Restaurant-Quality Results at Home : The two-step cooking method — simmering in beer first, then finishing with the peppers and onions — gives you brats that are juicy all the way through with that perfect crispy exterior. No dry, split sausages here.
- Simple Ingredients, Big Flavor : You only need bratwurst, beer, onions, bell peppers, butter, and a few seasonings. No fancy shopping trips required. Most of this stuff is probably already in your kitchen.
- Perfect for Oktoberfest Parties or Game Day : This recipe scales up beautifully for a crowd. I’ve made it for small gatherings and for big football watch parties, and it disappears every single time.
- One Skillet, Minimal Mess : Everything cooks in a single pan or griddle, which means less cleanup and more time enjoying your food. That’s my kind of cooking.
- Customizable Heat and Flavor : You can adjust the spice level, swap in different beers, or add extra toppings like spicy mustard or pickled jalapeños. This recipe is a template, not a rulebook.
The first time I made these for a group, my buddy Mike — who’s a self-proclaimed bratwurst snob — took one bite and asked me what I’d done differently. He couldn’t believe they weren’t grilled over charcoal. The secret is in that beer bath, which infuses the sausages with flavor while keeping them tender. Then the quick sear at the end gives you that caramelized exterior that makes people close their eyes while they chew. It’s the kind of recipe that makes you look like you spent hours in the kitchen when really, you just let the ingredients do the work.
What Ingredients You Will Need
This recipe uses straightforward ingredients that work together to create something genuinely special. The key is picking good-quality components and treating them right. Here’s what you’ll need and why each one matters:
- Bratwurst (4-6 links, about 1.5 lbs) : Look for fresh bratwurst from a butcher or a quality brand like Johnsonville or Usinger’s. Avoid pre-cooked or smoked sausages here — you want raw brats that will absorb the beer flavor during simmering. If you can find traditional Wisconsin-style brats, even better. (I’ve used both pork and chicken brats, and both work well, though pork gives you that classic richness.)
- Beer (12 oz bottle, one full can) : This is where you have options. A light lager or pilsner like Spaten Oktoberfest, Warsteiner, or even a domestic beer like Budweiser works perfectly. The beer should be drinkable but not overly hoppy — IPAs can make the brats bitter. I’ve also used a dark bock for a deeper, maltier flavor that’s incredible in colder months. Avoid light beers; they don’t add enough flavor to make a difference.
- Large Sweet Onion (1, sliced into half-rings) : Sweet onions like Vidalia or Walla Walla caramelize beautifully and add natural sweetness that balances the savory brats. Yellow onions work in a pinch, but they’re sharper and need a little more cooking time to soften. Red onions are too mild and will lose their color.
- Bell Peppers (2, assorted colors) : Use a mix of red, yellow, and orange peppers for sweetness and visual appeal. Green peppers are fine but they’re less sweet and can be slightly bitter. I usually go with one red and one yellow for that beautiful contrast against the golden onions.
- Unsalted Butter (2 tablespoons) : Butter adds richness and helps the onions and peppers caramelize without burning. You can use olive oil if you prefer, but butter gives that unmistakable savory flavor that makes everything taste more indulgent.
- Kosher Salt and Black Pepper : Season generously. The brats themselves are already seasoned, but the vegetables need salt to draw out their moisture and help them caramelize properly.
- Garlic (3 cloves, minced) : Fresh garlic adds a punch of flavor that complements the beer and onions. Don’t skip it — it makes a noticeable difference.
- Caraway Seeds (1 teaspoon, optional) : This is my personal touch. Caraway seeds add that subtle anise-like flavor that reminds me of traditional German cooking. If you’re not a fan, leave them out or substitute with a pinch of smoked paprika.
- Hoagie or Brat Buns (4-6) : Look for sturdy buns that can hold up to the juicy brats and toppings. I prefer a slightly crusty roll from a local bakery, but standard grocery store hoagie buns work fine. Toast them lightly if you want extra texture.
- Toppings (optional) : Spicy brown mustard, sauerkraut, pickled jalapeños, or even a smear of horseradish sauce. Let people customize their own — it’s part of the fun.
Equipment Needed
You don’t need a fancy setup for this recipe, which is one of the reasons I love it. Here’s what you’ll need:
- Large Skillet or Cast Iron Pan (12-inch) : This is your workhorse. A heavy-bottomed skillet distributes heat evenly and gives you room to cook all the brats without crowding. I use my trusty cast iron — it holds heat beautifully and gives the brats a gorgeous sear. If you don’t have cast iron, any large non-stick or stainless steel pan will work.
- Tongs : For flipping the brats and moving the vegetables around. A spatula works too, but tongs give you better control.
- Cutting Board and Sharp Knife : For slicing the onions and peppers. A sharp knife makes the job faster and safer — dull knives are actually more dangerous because they slip.
- Measuring Spoons : For the salt, pepper, and caraway seeds. Eyeballing is fine once you’ve made this a few times, but measuring helps the first time around.
- Small Bowl (optional) : For holding the sliced vegetables before cooking. Not strictly necessary, but it keeps your workspace organized.
If you’re cooking for a crowd, an electric griddle or large flat-top griddle works beautifully. I’ve used my Blackstone griddle for big Oktoberfest parties and it handles 12 brats at once without breaking a sweat. The wider surface area also lets you cook the peppers and onions alongside the brats without them getting steamed.
Preparation Method
This recipe comes together in about 40 minutes, and most of that time is hands-off simmering. Here’s how to make it:
- Prep the Vegetables : Slice the onion into half-rings about 1/4-inch thick. Slice the bell peppers into strips of similar thickness — you want them to cook at the same rate. Mince the garlic and set everything aside. (Pro tip: Cut the peppers and onions the night before if you’re meal prepping. Store them in a sealed container in the fridge and they’ll be ready to go.)
- Prick the Brats : Use a fork to poke each bratwurst 3-4 times. This prevents them from bursting while they simmer and allows the beer flavor to seep in. Don’t go overboard — you’re not trying to turn them into pincushions. Just a few gentle pokes per link.
- Simmer the Brats : Place the brats in your cold skillet in a single layer. Pour the entire bottle of beer over them — the beer should come about halfway up the sides of the sausages. Add enough water to barely cover the brats if needed. Bring the liquid to a gentle simmer over medium heat, then reduce the heat to low. Let them cook for 15-18 minutes, turning once halfway through. The liquid should be bubbling gently, not boiling aggressively. You’ll know they’re ready when the brats look plump and slightly firm to the touch.
- Remove the Brats and Start the Veggies : Use tongs to transfer the brats to a plate. Pour the beer liquid into a heat-safe bowl or measuring cup — don’t throw it away! You’ll use some of it later. Wipe the skillet clean with a paper towel (careful, it’s hot) and return it to the stove over medium-high heat.
- Caramelize the Onions and Peppers : Add the butter to the hot skillet. Once it melts and starts to foam, add the sliced onions and peppers. Season with a generous pinch of salt and the caraway seeds (if using). Cook for 8-10 minutes, stirring occasionally, until the vegetables are soft and starting to brown in spots. Add the minced garlic in the last 2 minutes of cooking — garlic burns quickly, so don’t add it too early. If the pan looks dry, splash in a tablespoon or two of the reserved beer liquid to deglaze the pan and keep things moist.
- Finish the Brats : Push the vegetables to one side of the skillet. Add the brats back to the pan and cook for 2-3 minutes per side, until they’re browned and crispy on the outside. This is where the magic happens — that beer-simmered interior meets the high-heat sear, giving you the perfect texture contrast. If you’re using a griddle, you can do this step simultaneously with the vegetables.
- Rest and Serve : Transfer the brats to a cutting board and let them rest for 2 minutes. This allows the juices to redistribute so they don’t squirt out when you bite into them. Slice each brat in half lengthwise if you’re serving them on buns, or leave them whole for a heartier sandwich. Pile the onions and peppers on top and serve immediately.
The whole process smells incredible — that combination of beer, caramelizing onions, and sizzling sausage is basically the scent of autumn in a skillet. Your kitchen will smell like a German beer hall, and anyone who walks in will immediately ask what you’re cooking.
Cooking Tips & Techniques
I’ve made this recipe enough times to learn a few things the hard way. Here are the tips that make the biggest difference:
Don’t Boil the Brats : This is the most common mistake. Boiling the brats makes them tough and rubbery because the high heat forces the fat out. You want a gentle simmer — just below a boil, with tiny bubbles breaking the surface. Low and slow is the way to go. I once rushed this step and ended up with dry, sad brats that tasted more like hot dogs than authentic bratwurst. Learn from my mistake.
Use the Right Beer : The beer you choose directly affects the flavor. A light lager gives you a mild, clean taste that lets the bratwurst shine. A dark bock adds malty sweetness and deeper color. Avoid anything too hoppy or bitter — IPAs and stouts can overwhelm the delicate pork flavor. If you’re unsure, go with a German-style pilsner or Oktoberfest lager. And please, don’t use non-alcoholic beer. It lacks the body and flavor that makes this recipe work.
Don’t Crowd the Pan : When you’re searing the brats at the end, give them space. If the pan is too crowded, the brats will steam instead of sear, and you’ll lose that crispy exterior. Cook them in batches if necessary. The same goes for the vegetables — they need room to caramelize, not steam in their own juices.
Save the Beer Liquid : That reserved beer mixture is liquid gold. You can use it to deglaze the pan, add moisture to the vegetables, or even brush it onto the buns before toasting. I’ve also used it as a base for a quick mustard sauce — just whisk in a tablespoon of Dijon mustard and a splash of cream for an incredible dipping sauce.
Toast the Buns : A toasted bun makes a huge difference. It adds texture and prevents the bun from getting soggy from the juicy brats and vegetables. Spread a little butter on the cut sides and toast them in the skillet for 30 seconds after you remove the brats. The residual heat and butter flavor will make your sandwich infinitely better.
Variations & Adaptations
This recipe is flexible enough to adapt to different tastes and dietary needs. Here are some variations I’ve tried and loved:
Spicy Oktoberfest Brats : Add 2-3 sliced jalapeños to the peppers and onions while they cook. You can also use spicy bratwurst (many brands offer a hot variety) or add a pinch of red pepper flakes to the beer simmering liquid. For extra heat, serve with pickled jalapeños or a drizzle of sriracha mayo.
Low-Carb / Keto Version : Skip the buns entirely and serve the brats and vegetables over a bed of sautéed cabbage or cauliflower rice. The brats themselves are naturally low-carb and high in protein, making this a great option for anyone watching their carb intake. I’ve done this for myself when I’m trying to eat lighter, and honestly, I don’t miss the bun at all.
Vegetarian Option : Use high-quality plant-based bratwurst (like Beyond Meat or Field Roast) and follow the same cooking process. The beer and vegetables will still infuse the sausages with flavor, and the caramelized onions and peppers are naturally vegan. Just be careful not to overcook the plant-based brats — they tend to dry out faster than pork.
Smoky Twist : Add 1/2 teaspoon of smoked paprika to the vegetables while they cook, or use a smoked beer like a rauchbier for the simmering liquid. The smokiness adds depth that pairs beautifully with the sweetness of the caramelized onions. I tried this version during a cold November weekend and it became an instant favorite.
Cheesy Brats : Lay a slice of provolone or Swiss cheese on top of each brat during the last minute of cooking. Cover the pan with a lid to melt the cheese quickly. The melted cheese adds richness and makes the sandwich feel extra indulgent. This is my go-to version when I want something really decadent.
Serving & Storage Suggestions
These brats are best served hot off the skillet, but they’re also great for meal prep and leftovers. Here’s how to handle both:
Serving : Place the brats on toasted hoagie buns and pile the caramelized onions and peppers on top. Serve with spicy brown mustard, sauerkraut, or pickled relish on the side. For a complete Oktoberfest meal, pair them with German potato salad, warm pretzels with beer cheese, or a simple cucumber salad. I like to serve them with a cold glass of the same beer I used in the recipe — it ties everything together beautifully.
Storage : Store leftover brats and vegetables separately in airtight containers in the refrigerator for up to 4 days. The brats will stay juicy, and the vegetables will continue to develop flavor as they sit. If you’ve already assembled the sandwiches, the buns will get soggy, so it’s better to store the components separately.
Reheating : Reheat the brats in a skillet over medium heat with a splash of beer or water to keep them moist. Cover the pan with a lid and cook for 3-4 minutes, flipping once. You can also reheat them in the microwave, but the texture won’t be as good. The vegetables can be reheated in the same pan or in the microwave for 30-45 seconds.
Freezing : These brats freeze exceptionally well. Let them cool completely, then wrap each brat individually in plastic wrap and place them in a freezer-safe bag. They’ll keep for up to 3 months. To reheat, thaw overnight in the refrigerator and follow the reheating instructions above. The vegetables don’t freeze as well — they get mushy when thawed — so I recommend making fresh vegetables when you’re ready to serve.
One thing I love about this recipe is that the flavors actually get better after a day in the fridge. The brats absorb more of the beer and onion flavor, making them even more delicious the next day. If you’re planning ahead, make the brats a day in advance and reheat them just before serving.
Nutritional Information & Benefits
Here’s the approximate nutritional breakdown for one bratwurst with vegetables (without bun):
- Calories: 320
- Protein: 18g
- Fat: 24g
- Carbohydrates: 8g
- Fiber: 2g
- Sugar: 4g
- Sodium: 680mg
These brats are a good source of protein, which helps keep you full and satisfied. The bell peppers are packed with vitamin C — one pepper provides more than 100% of your daily needs — and the onions contain quercetin, a powerful antioxidant that supports immune health. If you’re using leaner bratwurst (like chicken or turkey), the fat and calorie counts will be lower.
For those watching their sodium intake, look for low-sodium bratwurst or reduce the added salt in the vegetables. The brats themselves are already seasoned, so you might not need extra salt at all. If you’re gluten-sensitive, check the ingredient list on your bratwurst — some brands use fillers that contain gluten. Most traditional bratwurst is gluten-free, but it’s always worth verifying.
I personally love that this recipe feels indulgent without being over-the-top. It’s the kind of meal that satisfies a craving for something hearty and savory, but it’s balanced enough that you don’t feel sluggish afterward. Pair it with a side salad or roasted vegetables for a more balanced plate.
Conclusion
These Perfect Oktoberfest Beer Brats with Grilled Onions and Peppers have become a fall tradition in my house, and they started from a completely unplanned afternoon with a neighbor who just wanted company. That’s the thing about good food — it doesn’t always come from a carefully planned recipe. Sometimes it comes from looking at what you have and making it work anyway.
I love how forgiving this recipe is. You can use whatever beer you have on hand, swap in different peppers, or adjust the seasonings to match your taste. The brats come out juicy every time, the onions and peppers get that perfect caramelized sweetness, and the whole thing comes together in under an hour. It’s the kind of meal that makes you feel like you’re at a festival, even if you’re just eating in your kitchen with a friend.
If you make these brats, I’d love to hear how they turn out. Leave a comment below and let me know what beer you used, what toppings you added, or if you came up with a variation I haven’t tried yet. Share your photos on Pinterest and tag me — I love seeing your creations. And if you’re looking for more game-day recipes, check out my sheet pan nachos or these freezer-friendly mini turkey meatball subs for another crowd-pleasing option.
Here’s to good food, good company, and recipes that come together when you least expect them. Prost!
Frequently Asked Questions
Can I grill the brats instead of using a skillet?
Absolutely. Grilling adds a wonderful smoky flavor that’s hard to replicate on the stovetop. Simmer the brats in beer first (you can do this in a pot on the grill or on the stovetop), then transfer them to the grill grates over medium-high heat for 3-4 minutes per side. Cook the peppers and onions in a cast iron skillet or foil packet on the grill while the brats are searing.
What’s the best beer to use for this recipe?
A light lager or Oktoberfest-style beer is ideal. Look for something drinkable and not too hoppy — Spaten Oktoberfest, Warsteiner, or even a domestic beer like Budweiser works well. Dark bocks add a richer flavor, while IPAs can make the brats bitter. Avoid light beers and non-alcoholic options, as they don’t add enough flavor.
Can I make this recipe in a slow cooker?
Yes, but the texture will be different. Add the brats, beer, sliced onions, and peppers to a slow cooker and cook on low for 4-6 hours. The brats will be tender and flavorful, but they won’t have that crispy exterior from searing. For the best of both worlds, finish the brats in a hot skillet for 2 minutes per side after they come out of the slow cooker.
How do I prevent the brats from splitting while cooking?
Prick each brat 3-4 times with a fork before simmering to release steam and prevent bursting. Also, keep the heat low — a gentle simmer, not a rolling boil. If you see the liquid bubbling aggressively, turn the heat down immediately. Starting the brats in a cold pan and gradually bringing them up to temperature also helps.
Can I use frozen bratwurst for this recipe?
Yes, but you’ll need to adjust the cooking time. Thaw the brats in the refrigerator overnight for best results. If you’re cooking them from frozen, add 5-7 minutes to the simmering time and make sure they reach an internal temperature of 160°F (71°C) before serving. The texture won’t be quite as good as fresh brats, but it’s a perfectly fine option in a pinch.
Pin This Recipe!
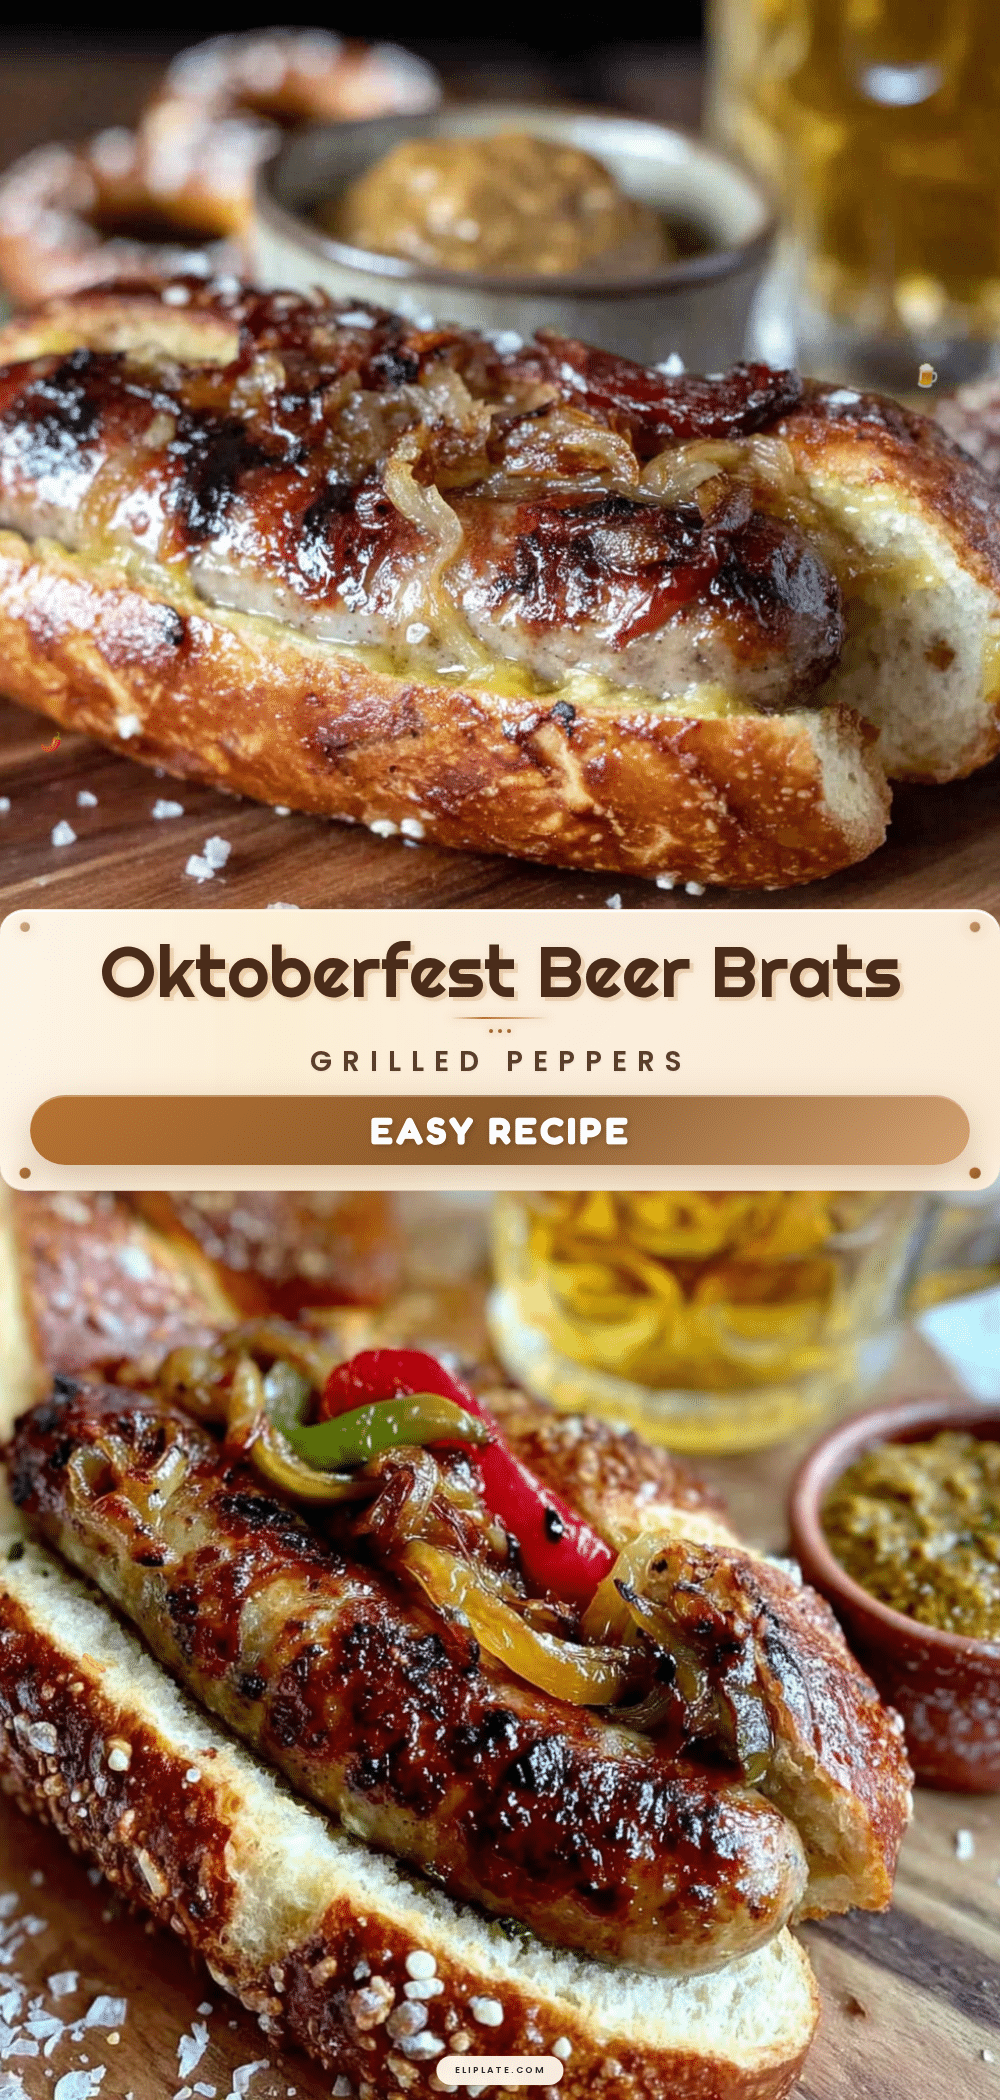
Best Oktoberfest Beer Brats with Grilled Onions & Peppers
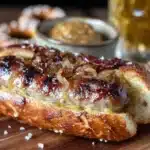
Juicy beer-simmered bratwurst finished with caramelized onions and bell peppers in a single skillet. This easy Oktoberfest recipe delivers restaurant-quality results with simple ingredients and minimal cleanup.
- Prep Time: 10 minutes
- Cook Time: 30 minutes
- Total Time: 40 minutes
- Yield: 4-6 servings 1x
- Category: Main Course
- Cuisine: German
Ingredients
- 4–6 bratwurst links (about 1.5 lbs)
- 12 oz beer (light lager, pilsner, or Oktoberfest-style)
- 1 large sweet onion, sliced into half-rings
- 2 bell peppers (assorted colors), sliced into strips
- 2 tablespoons unsalted butter
- 3 cloves garlic, minced
- 1 teaspoon caraway seeds (optional)
- Kosher salt and black pepper, to taste
- 4–6 hoagie or brat buns
- Optional toppings: spicy brown mustard, sauerkraut, pickled jalapeños
Instructions
- Prep the vegetables: Slice the onion into 1/4-inch thick half-rings and bell peppers into similar-sized strips. Mince the garlic and set aside.
- Prick each bratwurst 3-4 times with a fork to prevent bursting and allow flavor absorption.
- Place brats in a cold skillet in a single layer. Pour beer over them (liquid should come about halfway up the sides). Add water if needed to barely cover. Bring to a gentle simmer over medium heat, then reduce to low. Cook for 15-18 minutes, turning once halfway.
- Transfer brats to a plate. Reserve the beer liquid. Wipe the skillet clean and return to medium-high heat.
- Add butter to the hot skillet. Once melted and foaming, add onions and peppers. Season with salt and caraway seeds (if using). Cook for 8-10 minutes, stirring occasionally, until soft and browned. Add garlic in the last 2 minutes. Deglaze with a splash of reserved beer liquid if needed.
- Push vegetables to one side. Return brats to the pan and cook for 2-3 minutes per side until browned and crispy.
- Let brats rest for 2 minutes. Serve on toasted buns with onions and peppers piled on top. Add optional toppings as desired.
Notes
Don’t boil the brats—keep at a gentle simmer to avoid toughness. Use a drinkable lager or Oktoberfest beer; avoid hoppy IPAs. Save the reserved beer liquid for deglazing or making a mustard sauce. Toast the buns in butter for extra texture. For best results, let brats rest before serving.
Nutrition
- Serving Size: 1 bratwurst with veg
- Calories: 320
- Sugar: 4
- Sodium: 680
- Fat: 24
- Saturated Fat: 8
- Carbohydrates: 8
- Fiber: 2
- Protein: 18
Keywords: Oktoberfest, beer brats, bratwurst, grilled onions, bell peppers, game day, fall recipe, one skillet