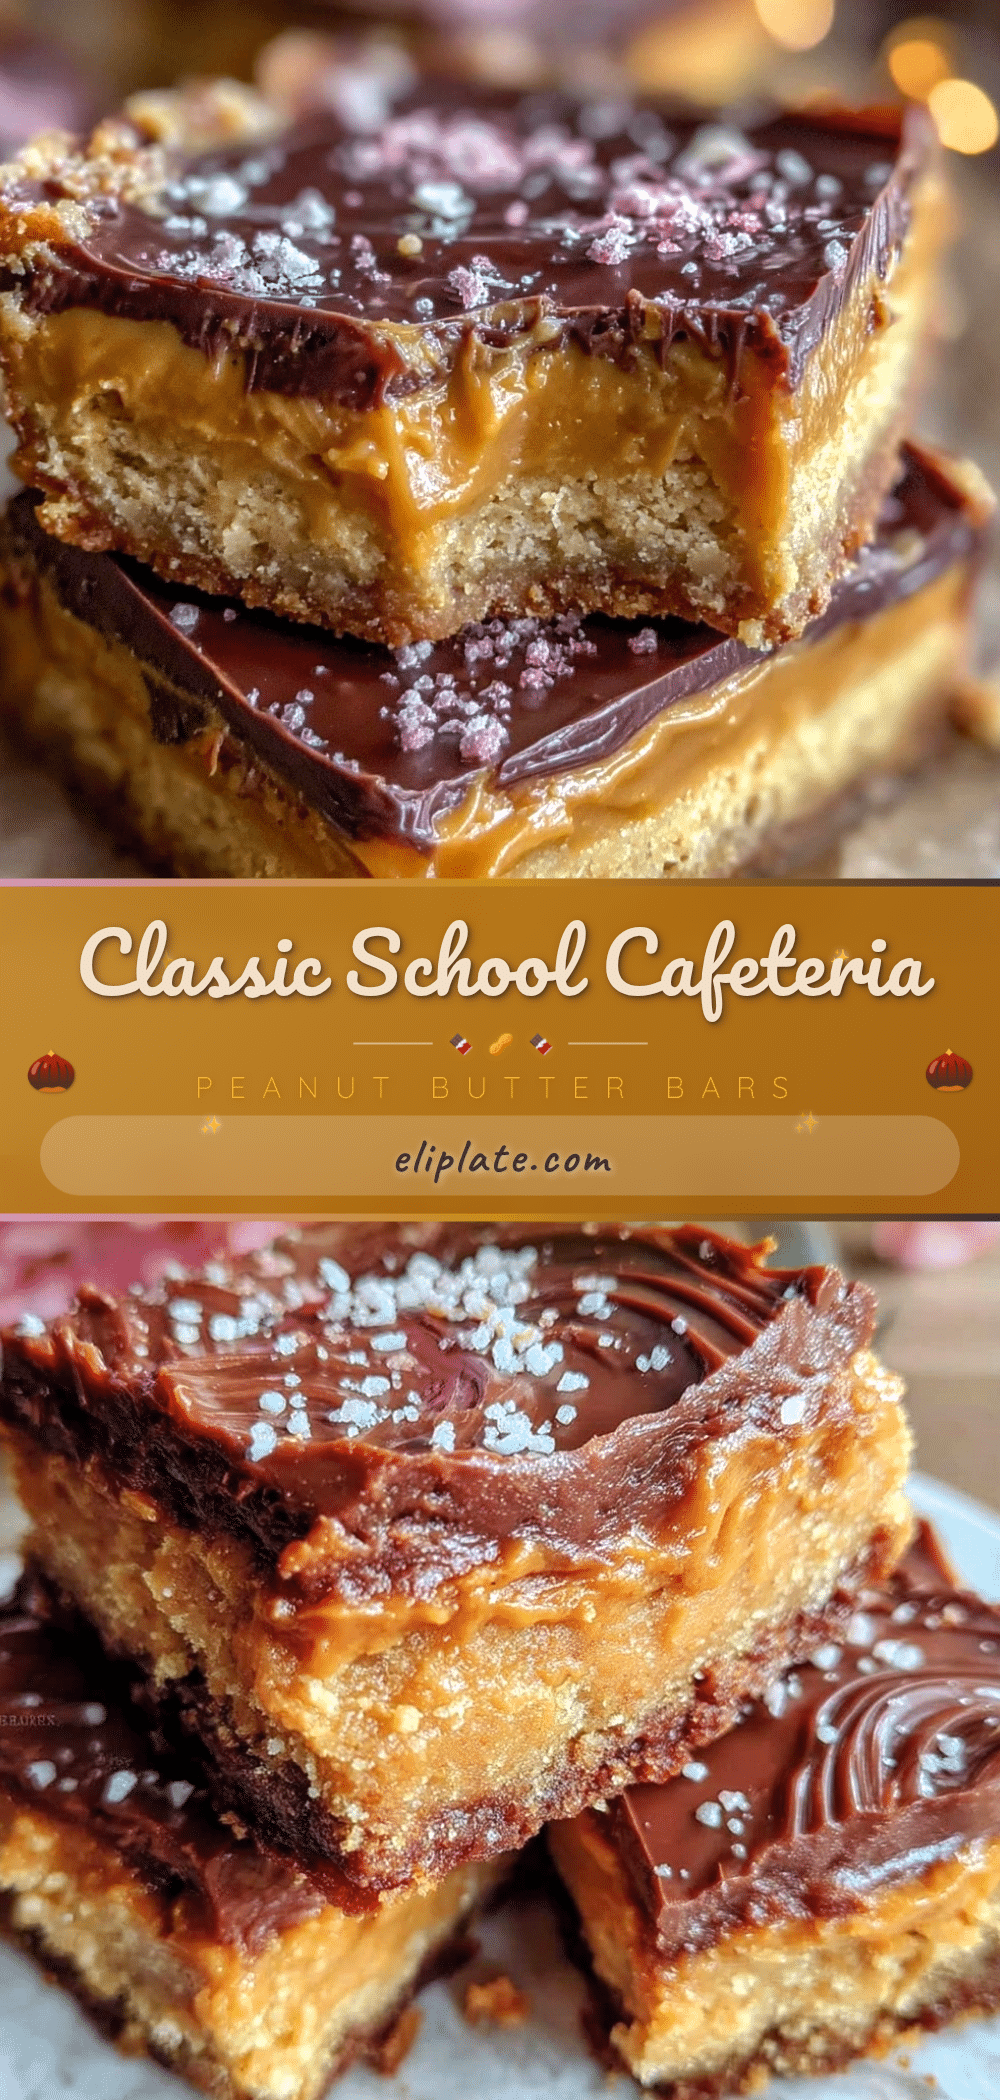
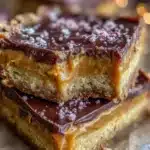
“Hey, don’t eat all the peanut butter bars before lunch!” That was the warning my friend shot across the cafeteria table, but honestly, it was already too late. The moment those classic comforting school cafeteria peanut butter bars hit the tray, the rush was on. I couldn’t believe how something so simple could turn into this irresistibly nostalgic treat that had everyone sneaking seconds when the lunch bell finally rang. I remember thinking, “Why didn’t my mom ever make these at home?” — and yet here I was, hooked on this cafeteria staple that was sweet, peanut buttery, and just the right kind of crumbly and chewy.
For years, I dismissed these bars as just “school food,” but then, one rainy afternoon, I found myself craving that exact flavor. I dug through old recipes and recreated a version that was even better than I remembered. It wasn’t fancy, but it was honest and satisfying. The buttery crust, the rich peanut butter filling, and that hint of vanilla all came together in a way that felt like a warm, quiet hug on a hectic day. I made a batch and shared it at work, and suddenly, everyone was asking for the recipe, just like those old school days. Funny how comfort food sneaks up on you, right?
These peanut butter bars aren’t about fancy techniques or exotic ingredients — they’re about simple, real flavors and that unmistakable taste of childhood. And honestly, whenever I’m in the mood for a little sweet pick-me-up, this recipe is my go-to. It’s exactly the kind of treat that makes you pause and smile, reminding you that sometimes, the simplest things are the best.
Why You’ll Love This Recipe
So, why should you try these classic comforting school cafeteria peanut butter bars? Well, from my own kitchen experiments and sharing with friends and family, I can say this recipe ticks all the boxes for a sweet treat that’s quick, easy, and downright addictive.
- Quick & Easy: Whip these up in about 30 minutes from start to finish, perfect for those busy afternoons or last-minute dessert cravings.
- Simple Ingredients: No need to hunt down anything exotic — most of this stuff is probably already sitting in your pantry.
- Perfect for Any Occasion: Whether it’s a school bake sale, a cozy weekend snack, or a casual get-together, these bars fit right in.
- Crowd-Pleaser: I’ve never met a kid or adult who turned these down. They catch a few curious glances at first, but then… gone in minutes.
- Unbelievably Delicious: The combination of a buttery base and that creamy peanut butter filling is comfort food at its finest.
What makes this peanut butter bars recipe stand out? It’s the balance — not too sweet, not too dense, with a bit of a crumbly bite that melts in your mouth. I experimented with blending the peanut butter until silky smooth and carefully measured the sugar to keep it from going overboard. The result is a bar that brings back those school cafeteria memories without feeling heavy or cloying. If you love treats like my creamy banana pudding or crave rich peanut flavors similar to the brown butter chocolate chip cookies I shared earlier, these bars will be right up your alley.
What Ingredients You Will Need
This recipe uses simple, wholesome ingredients to deliver bold peanut butter flavor with a satisfying texture that’s easy to make. Most of these are pantry staples, and substitutions are straightforward if you need them.
- For the Crust:
- All-purpose flour, 1 ½ cups (180g) — provides the structure, use unbleached for best texture.
- Unsalted butter, ½ cup (115g), softened — gives richness and that tender crumb.
- Granulated sugar, ¼ cup (50g) — balances the peanut butter’s saltiness.
- Salt, ¼ teaspoon — enhances all the flavors.
- For the Peanut Butter Filling:
- Creamy peanut butter, 1 cup (250g) — I prefer natural peanut butter with no added sugars for a purer taste.
- Powdered sugar, 1 cup (120g) — to sweeten and thicken the filling.
- Unsalted butter, ¼ cup (57g), melted — adds silkiness and helps with spreading.
- Vanilla extract, 1 teaspoon — for that subtle warmth.
- Milk, 2 tablespoons (30ml) — smooths the filling, use dairy or plant-based as you like.
Pro tip: Look for peanut butter brands like Smucker’s Natural or Justin’s Creamy for the best texture. If you want a gluten-free version, swap the all-purpose flour for a 1:1 gluten-free blend. I’ve also swapped dairy milk with almond milk when needed, and it works just fine without compromising flavor. In summer, try adding a few chocolate chips on top for a fun twist!
Equipment Needed
- 8×8-inch (20×20 cm) baking pan — I use a metal pan for even baking, but glass works too.
- Mixing bowls — one large for the crust and another for the filling.
- Electric mixer or sturdy whisk — mixing by hand is possible but takes a bit more elbow grease.
- Spatula — for spreading the filling evenly over the crust.
- Measuring cups and spoons — accuracy matters here for the right texture.
- Parchment paper — optional, but helps with easy removal and cleanup.
If you don’t have a mixer, no worries — just mix the peanut butter filling slowly to avoid lumps. I once tried making these in a smaller 7×7 pan for a thicker bar, which worked fine but required a longer bake time. For budget-friendly baking, a non-stick pan or even a well-greased glass pan will get the job done without fuss.
Preparation Method

- Preheat your oven to 350°F (175°C). Line your 8×8-inch baking pan with parchment paper, leaving a little overhang for easy lifting later.
- Make the crust: In a large mixing bowl, combine 1 ½ cups (180g) all-purpose flour, ¼ cup (50g) granulated sugar, and ¼ teaspoon salt. Add ½ cup (115g) softened unsalted butter. Using a pastry cutter or your fingers, work the butter into the dry ingredients until the mixture looks like coarse crumbs with some pea-sized bits.
- Press the crust mixture firmly and evenly into the bottom of your prepared pan. This should take about 2-3 minutes. A flat-bottomed glass or measuring cup works great to pack it down tightly.
- Bake the crust for 15 minutes, or until the edges are just starting to turn golden. It won’t look fully baked in the center, but that’s okay. Remove it from the oven and set aside to cool slightly.
- Prepare the peanut butter filling: In a clean bowl, whisk together 1 cup (250g) creamy peanut butter, 1 cup (120g) powdered sugar, ¼ cup (57g) melted unsalted butter, 1 teaspoon vanilla extract, and 2 tablespoons (30ml) milk. Mix until smooth and spreadable. If the mixture feels too stiff, add a splash more milk, but be careful not to make it runny.
- Spread the filling evenly over the warm crust. Use a spatula to smooth the top, pressing gently to create an even layer without disturbing the crust below.
- Chill the bars in the refrigerator for at least 2 hours, or until firm. This step is key — it helps the peanut butter filling set perfectly and makes slicing easier.
- Cut into squares with a sharp knife. For cleaner cuts, wipe the knife between slices.
If the crust feels crumbly or the filling cracks a bit, don’t stress. These bars are charmingly rustic, and that’s part of their appeal. The smell while baking is pure peanut butter heaven, and you’ll notice the kitchen slowly filling with a warm, nutty aroma that’s hard to ignore.
Cooking Tips & Techniques
Here’s what I learned after a handful of trials making these peanut butter bars:
- Butter temperature matters. Too cold and it won’t mix well; too melted and the crust can get greasy. Softened butter at room temp is the sweet spot.
- Don’t rush chilling. The bars need time to firm up. I once skipped this step and ended up with peanut butter goo everywhere — not pretty or tasty.
- Use a sturdy spatula. It helps spread the filling evenly without breaking the crust.
- Powdered sugar is key. It smooths the peanut butter filling and gives that classic creamy texture you want, unlike granulated sugar which can feel gritty.
- Cutting tips: Warm the knife blade under hot water, dry it off, and slice. This helps make cleaner edges.
- Multitasking: While the crust bakes, prep the filling — it saves time and keeps the workflow smooth.
My first batch was a little too sweet and dense, so I trimmed the sugar and added a splash of milk to lighten the filling. This small tweak made all the difference. Cooking is often about these tiny adjustments that transform a recipe into your signature version.
Variations & Adaptations
Want to mix it up? These peanut butter bars are a great base for a few fun twists:
- Chocolate Swirl: Melt ½ cup (90g) semi-sweet chocolate chips and gently swirl it into the peanut butter filling before chilling. Adds a rich, fudgy contrast.
- Gluten-Free: Substitute the all-purpose flour with a 1:1 gluten-free baking blend. I’ve tested this with Bob’s Red Mill and it works well, though the crust is a bit more crumbly.
- Crunchy Peanut Butter: Use crunchy peanut butter for extra texture in the filling. It adds a nice surprise in every bite.
- Nut-Free Alternative: Swap peanut butter for sunflower seed butter to accommodate allergies without losing that creamy feel.
- Salted Caramel Drizzle: Drizzle a bit of salted caramel sauce on top right before serving for an indulgent twist.
Personally, I once tried these bars with a dusting of flaky sea salt on top. The salty-sweet combo made these bars even more addictive! And if you’re feeling like a sandwich-style treat, try layering these peanut butter bars alongside the fluffy sourdough discard cinnamon roll pancakes I love to make on slow weekend mornings.
Serving & Storage Suggestions
Serve these bars chilled or slightly warmed — both ways have their charm. I find chilling keeps them firm and neat, perfect for packing in lunchboxes or passing around at potlucks. Warming them for 10 seconds in the microwave softens the filling beautifully, making them taste a bit like peanut butter fudge.
These bars pair wonderfully with a glass of cold milk or a simple cup of coffee for a mid-afternoon pick-me-up. For a bigger spread, consider serving alongside other simple desserts like the creamy spinach artichoke pasta for a satisfying savory-sweet balance.
To store, keep them in an airtight container in the refrigerator for up to 5 days. They also freeze well — wrap individual bars in plastic wrap and freeze in a sealed container for up to 3 months. Thaw in the fridge overnight and enjoy.
Over time, the flavors meld and soften, making each bite even more comforting. Just don’t expect them to last long once people find out you have a batch!
Nutritional Information & Benefits
These classic comforting school cafeteria peanut butter bars offer a decent energy boost with protein and healthy fats from the peanut butter. Here’s an estimate per bar (assuming 16 bars per pan):
| Nutrient | Amount per bar |
|---|---|
| Calories | 180 kcal |
| Protein | 5 g |
| Fat | 12 g (mostly healthy fats) |
| Carbohydrates | 15 g |
| Sugar | 9 g |
| Fiber | 1 g |
Peanut butter provides heart-healthy monounsaturated fats and some vitamins like E and B6. If you’re watching carbs, you can reduce powdered sugar or try a sugar substitute. Just note the texture might change a bit.
Do keep in mind these bars contain nuts and gluten (unless adapted). From a wellness perspective, they’re a treat best enjoyed in moderation but bring joy that’s hard to beat.
Conclusion
Classic comforting school cafeteria peanut butter bars might seem humble, but their nostalgic charm and perfect balance of flavors make them a recipe worth revisiting—whether you’re craving a sweet bite that reminds you of simpler times or need a quick treat that everyone will enjoy. They’re easy to tweak and forgiving enough for even “not really a baker” types (believe me, I was once there!).
Try making them your own by playing with the variations or pairing them with your favorite drinks. Personally, I love having a batch ready when I need a little midweek pick-me-up or a no-fuss treat after a busy day. It’s the kind of recipe that turns everyday moments into something a bit sweeter.
I’d love to hear how your batch turns out or any creative twists you come up with—feel free to share in the comments!
FAQs About Classic Comforting School Cafeteria Peanut Butter Bars
Can I use natural peanut butter in this recipe?
Absolutely! Natural peanut butter works great, but because it’s thinner, you might need to chill the bars a bit longer for the filling to set firmly.
How do I store leftover peanut butter bars?
Keep them in an airtight container in the fridge for up to 5 days or freeze for up to 3 months. Thaw in the refrigerator before eating.
Can I make these bars dairy-free?
Yes, just swap the butter for a dairy-free alternative like coconut oil or vegan margarine, and use plant-based milk in the filling.
What’s the best way to cut the bars without crumbling?
Use a sharp knife warmed under hot water and wiped dry between cuts to get clean slices without much crumble.
Are these bars suitable for a gluten-free diet?
They can be, if you substitute the all-purpose flour with a gluten-free baking blend, like Bob’s Red Mill 1:1 gluten-free flour.
Pin This Recipe!
Classic Comforting School Cafeteria Peanut Butter Bars
A nostalgic, easy-to-make peanut butter bar recipe with a buttery crust and creamy peanut butter filling, perfect for a sweet treat that’s quick and addictive.
- Prep Time: 10 minutes
- Cook Time: 15 minutes
- Total Time: 2 hours 25 minutes
- Yield: 16 bars 1x
- Category: Dessert
- Cuisine: American
Ingredients
- 1 ½ cups (180g) all-purpose flour
- ½ cup (115g) unsalted butter, softened
- ¼ cup (50g) granulated sugar
- ¼ teaspoon salt
- 1 cup (250g) creamy peanut butter (natural preferred)
- 1 cup (120g) powdered sugar
- ¼ cup (57g) unsalted butter, melted
- 1 teaspoon vanilla extract
- 2 tablespoons (30ml) milk (dairy or plant-based)
Instructions
- Preheat your oven to 350°F (175°C). Line an 8×8-inch baking pan with parchment paper, leaving a little overhang for easy lifting.
- In a large mixing bowl, combine flour, granulated sugar, and salt. Add softened unsalted butter and work it into the dry ingredients until the mixture resembles coarse crumbs with some pea-sized bits.
- Press the crust mixture firmly and evenly into the bottom of the prepared pan, about 2-3 minutes.
- Bake the crust for 15 minutes or until the edges start to turn golden. The center may look slightly underbaked. Remove from oven and let cool slightly.
- In a clean bowl, whisk together peanut butter, powdered sugar, melted butter, vanilla extract, and milk until smooth and spreadable. Add a splash more milk if too stiff, but avoid making it runny.
- Spread the peanut butter filling evenly over the warm crust using a spatula, smoothing the top gently.
- Chill the bars in the refrigerator for at least 2 hours until firm.
- Cut into squares with a sharp knife, wiping the knife between slices for cleaner cuts.
Notes
Use softened butter at room temperature for best crust texture. Chill bars for at least 2 hours to set the filling properly. Warm knife blade under hot water and dry it before slicing for cleaner cuts. Variations include adding chocolate swirl, using gluten-free flour, crunchy peanut butter, or sunflower seed butter for nut-free option.
Nutrition
- Serving Size: 1 bar (assuming 16 b
- Calories: 180
- Sugar: 9
- Fat: 12
- Carbohydrates: 15
- Fiber: 1
- Protein: 5
Keywords: peanut butter bars, school cafeteria bars, easy peanut butter dessert, nostalgic dessert, peanut butter recipe, homemade peanut butter bars