The rain was tapping steadily against my kitchen window when I realized I hadn’t planned dinner and the stores were closed. Honestly, I was a bit frazzled, juggling work emails and the odd whine of my restless pup. I glanced over at my flour and yeast, almost as an afterthought, thinking, “Why not give homemade bread a shot?” I’d always admired those crusty, warm loaves but figured it was a serious ordeal—turns out, making this cozy rainy day homemade bread loaf was way simpler than I thought. The smell of baking bread filled the room, wrapping me in a quiet kind of comfort. That little loaf turned out so well, I found myself slicing it and slathering butter on it for a midnight snack, feeling like I’d just wrapped myself in a warm blanket. It’s funny how the simplest things—flour, water, yeast—can create something that feels like a hug when the world outside is gray and wet.
This bread loaf stuck with me not just because it was easy, but because it brought calm to a chaotic evening. I’ve since made it countless times, tweaking it just a little each time, and it never fails to deliver that perfect balance of crusty exterior and soft, tender crumb inside. Honestly, it’s become my go-to when I want something wholesome and satisfying without fuss. It’s the kind of recipe that invites you to slow down, breathe, and enjoy the little things—even on the rainiest of days.
Why You’ll Love This Recipe
After testing this cozy rainy day homemade bread loaf multiple times, I can confidently say it ticks all the boxes for anyone who loves fresh bread but isn’t keen on complicated baking. Here’s why it’s become a staple in my kitchen:
- Quick & Easy: The dough comes together in under 10 minutes, then you let the yeast do its magic—perfect for when you want fresh bread without all the hassle.
- Simple Ingredients: No exotic flours or additives here—just basic pantry staples like flour, yeast, salt, and water.
- Perfect for Cozy Evenings: Ideal for rainy days, lazy weekends, or whenever you want to curl up with a warm slice and a cup of tea.
- Crowd-Pleaser: The crusty outside and soft inside make it a hit with family and friends, whether you’re serving it alongside soup or just with butter.
- Unbelievably Delicious: The flavor develops beautifully with a bit of time, and the texture is so satisfying—it’s true comfort food.
What sets this recipe apart is its forgiving nature. I love that you don’t have to be a bread pro to get it right. The secret is a slightly longer rising time that lets the flavors deepen and the crumb soften, making it feel like you’ve spent hours in the kitchen when really, the hands-on time is minimal. Plus, it pairs wonderfully with homemade soups, like the comforting lemon chicken orzo soup I often make on chilly nights.
What Ingredients You Will Need
This recipe calls for straightforward, wholesome ingredients that combine to create a bread loaf with great texture and flavor. Most of these are pantry staples, so you might already have everything ready to go:
- All-purpose flour: 3 ½ cups (440 g) – I prefer King Arthur flour for consistent results.
- Warm water: 1 ½ cups (360 ml), about 110°F (43°C) – warm but not hot to activate the yeast properly.
- Active dry yeast: 2 ¼ teaspoons (one packet) – make sure it’s fresh for the best rise.
- Salt: 2 teaspoons – balances flavor and strengthens the dough.
- Sugar: 1 tablespoon – feeds the yeast and adds a touch of sweetness.
- Olive oil: 2 tablespoons – adds moisture and helps create a tender crumb.
You can always swap in bread flour if you want a chewier texture or use a mix of whole wheat flour for a heartier loaf (just keep an eye on hydration). If you prefer a dairy-free version, this recipe is naturally free of dairy, so you’re all set there. For a little extra flair, sprinkling some coarse sea salt or dried herbs on top before baking works wonders.
Equipment Needed
- Large mixing bowl: For combining and kneading the dough. I use a sturdy glass bowl that’s easy to clean.
- Measuring cups and spoons: Accurate measurements make a big difference, especially with yeast and salt.
- Wooden spoon or dough scraper: Helpful for mixing and handling the sticky dough.
- Kitchen towel or plastic wrap: To cover the dough while it rises—keeps it cozy and draft-free.
- Loaf pan (optional): You can bake the dough freeform on a baking sheet or use a 9×5 inch (23×13 cm) loaf pan for a classic shape.
- Oven: Preheated to 375°F (190°C) for that perfect crust.
You don’t need any fancy bread machines or mixers here—just some patience and a little elbow grease. If you’re short on equipment, a clean bowl and your hands are enough to get started. I once baked this loaf on a pizza stone, which gave the crust an extra crispiness, but a regular baking sheet works just fine for everyday baking.
Preparation Method
- Activate the yeast: In your large mixing bowl, stir the warm water and sugar together. Sprinkle the active dry yeast on top and let it sit for 5–7 minutes until it becomes foamy. This means the yeast is alive and ready to work.
- Mix dry ingredients: While the yeast is blooming, whisk together the flour and salt in a separate bowl.
- Combine dough: Once the yeast mixture is foamy, add the olive oil and gradually add the flour mixture, stirring with a wooden spoon or dough scraper until a shaggy dough forms. It’ll be sticky—that’s good!
- Knead the dough: Turn the dough onto a lightly floured surface and knead for about 8–10 minutes until it feels smooth and elastic. If it’s too sticky, sprinkle a little more flour, but try not to add too much or the bread can get dense.
- First rise: Place the dough in a lightly oiled bowl and cover it with a kitchen towel or plastic wrap. Let it rise in a warm spot for 1 to 1 ½ hours, or until it doubles in size. I like to put mine near the warm oven or by a sunny window.
- Shape the loaf: Gently punch down the dough to release air bubbles. Shape it into a loaf by folding the edges underneath and place it in a greased loaf pan or on a parchment-lined baking sheet if you prefer a rustic shape.
- Second rise: Cover the shaped dough and let it rise again for 30–45 minutes until it puffs up nicely.
- Preheat oven: While the dough is rising, preheat your oven to 375°F (190°C).
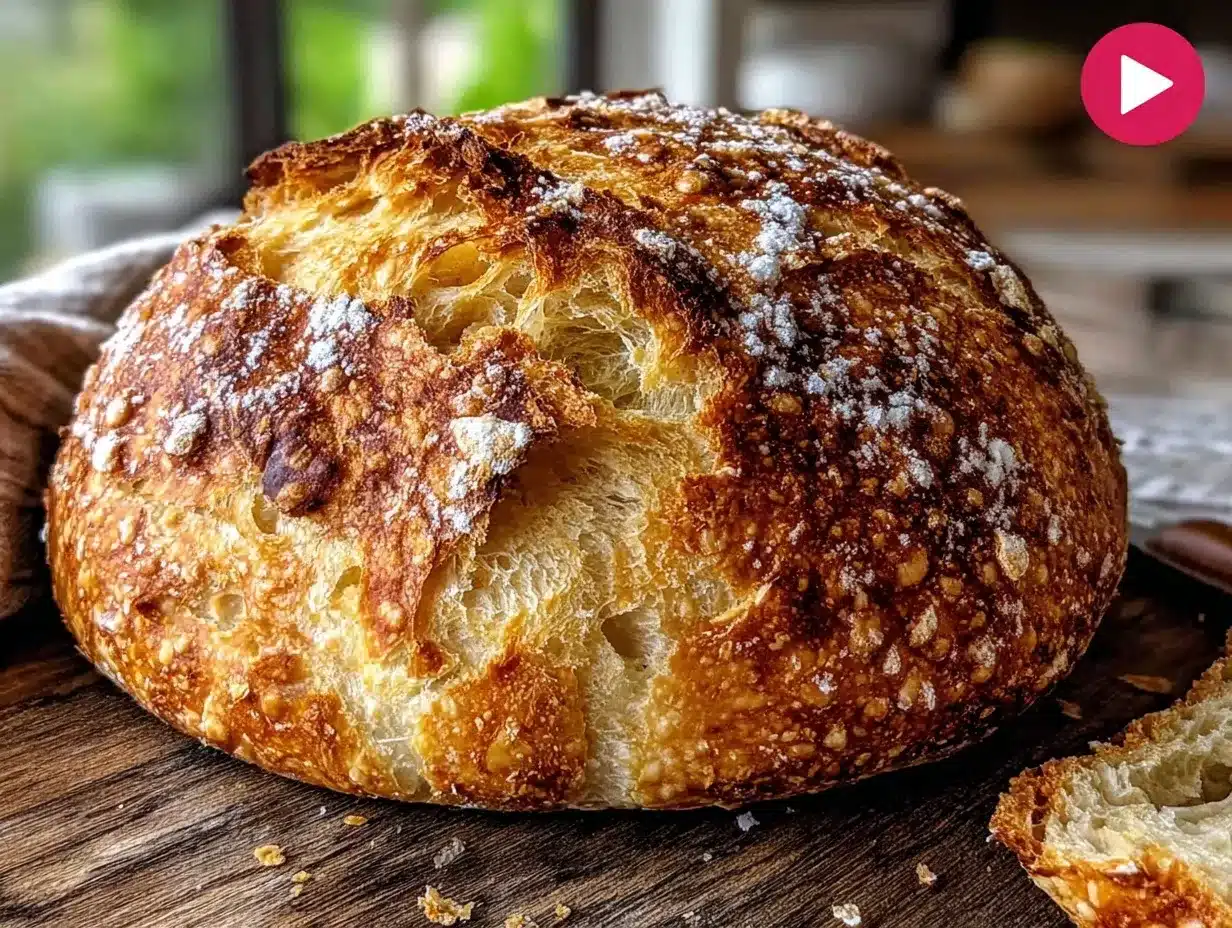
- Bake the bread: Place the loaf in the oven and bake for 30–35 minutes. The crust should turn golden brown, and the bread should sound hollow when tapped on the bottom.
- Cool down: Remove the bread and let it cool on a wire rack for at least 30 minutes before slicing. This resting time lets the crumb set properly.
Pro tip: If you want an extra crusty loaf, place a small oven-safe dish with water on the bottom rack while baking to create steam. It’s a trick I picked up after trying some artisan techniques and it really makes a difference.
Cooking Tips & Techniques
One thing I learned early on is patience with the rising time pays off. Rushing the yeast can lead to dense, chewy bread. Letting it double in size in a warm spot is key, but not too hot—about 75°F (24°C) is ideal. If your kitchen is chilly, I sometimes turn the oven on for just a couple of minutes, then turn it off and place the dough inside covered with a towel.
Kneading the dough is another stage where many get tripped up. It should be sticky but manageable. I recommend flouring your hands lightly and keeping the surface just dusted. Too much flour can dry out your loaf, and too little makes it a sticky mess. Use the windowpane test—stretch a small piece of dough; if it holds without tearing, you’re good.
Also, don’t skip the cooling step! Slicing too soon can leave you with gummy bread. I know it’s tempting, especially when it smells this good, but a little wait makes slicing cleaner and the texture better.
I once tried baking this loaf in a cast-iron skillet and the crust was incredible, but the shape was different. So, if you want a particular look, stick to a loaf pan or baking sheet. For a rustic vibe, freeform on parchment is lovely, too.
Variations & Adaptations
This cozy rainy day homemade bread loaf is a fantastic base that you can tweak easily to suit your cravings or dietary needs:
- Whole Wheat Twist: Substitute half the all-purpose flour with whole wheat for a nuttier flavor and extra fiber. You might need a bit more water since whole wheat absorbs more.
- Herb Infusion: Add fresh or dried herbs like rosemary, thyme, or sage to the dough for an aromatic touch that pairs beautifully with soups or roasted dishes.
- Gluten-Free Version: Use a gluten-free flour blend designed for bread baking and add xanthan gum if your blend doesn’t include it. The texture will differ, but it’s still delicious.
- Seeded Loaf: Mix in sunflower seeds, flaxseeds, or pumpkin seeds for crunch and nutrition. Sprinkle a few on top before baking for extra eye appeal.
One variation I keep coming back to is adding a swirl of garlic butter right before the second rise—it creates a subtle, savory surprise when you tear into the loaf. If you love baking, you might also enjoy trying the sourdough discard cinnamon roll pancakes for a sweet twist on sourdough!
Serving & Storage Suggestions
This homemade bread shines when served warm, fresh out of the oven, but it’s also fantastic the next day toasted with a bit of butter or jam. For a cozy meal, slice it thick and serve alongside a bowl of soup or stew. It pairs especially well with creamy dishes like the spinach artichoke pasta, where the bread is perfect for mopping up every last bit.
Store leftover bread in a paper bag or wrapped loosely in a kitchen towel at room temperature for up to 2 days. Refrigeration can dry it out, so I avoid that. For longer storage, slice and freeze the loaf in a zip-top bag; just toast slices straight from the freezer when you want them.
Reheating is simple—pop slices into a toaster or warm the whole loaf wrapped in foil in a 350°F (175°C) oven for 10 minutes. The flavors develop nicely after a day, making it even better for sandwiches or dipping in olive oil and balsamic.
Nutritional Information & Benefits
This bread loaf offers a wholesome source of carbohydrates for energy and contains minimal additives—just simple ingredients you can trust. A typical slice (about 50g) provides roughly 130 calories, 3 grams of protein, and 25 grams of carbs. Using olive oil adds heart-healthy fats, and swapping some flour for whole wheat boosts fiber content.
Because it’s homemade, you control the salt and sugar levels, which is great for anyone watching their intake. This recipe is naturally dairy-free and can be modified for gluten-free diets with appropriate flour blends. I appreciate how this loaf fits into a balanced lifestyle—comforting, nourishing, and free from preservatives.
Conclusion
This cozy rainy day homemade bread loaf is more than just a recipe—it’s a little ritual of comfort when the world outside feels gray and unsettled. It’s straightforward enough for a newbie but satisfying enough to keep coming back to. The way the crust crisps up and the crumb stays soft makes it a trusty companion for everything from simple breakfasts to hearty dinners.
Feel free to make it your own, whether that means adding herbs, seeds, or trying out different flours. It’s a recipe that welcomes your twists and turns, just like those quiet rainy afternoons it was born for. I love this bread because it reminds me that even the smallest kitchen moments can bring warmth and calm. If you give it a try, I’d love to hear how your loaf turned out or any adaptations you made—there’s always room for more cozy bread stories.
FAQs About Cozy Rainy Day Homemade Bread Loaf
Can I use instant yeast instead of active dry yeast?
Yes, you can substitute instant yeast for active dry yeast by reducing the amount slightly (use about 1 ¾ teaspoons) and mixing it directly with the flour. No need to bloom it in water first.
What if my dough doesn’t rise properly?
Check that your yeast is fresh and your water is the right temperature (warm, not hot). Also, ensure the dough is kept in a warm, draft-free spot. If it’s too cold, rising can take longer.
Can I make this bread without a loaf pan?
Absolutely! You can shape the dough into a round boule and bake it on a parchment-lined baking sheet for a rustic loaf with a crustier edge.
How do I get the perfect crust on this bread?
Creating steam in the oven by placing a pan of hot water on the bottom rack helps develop a crisp crust. Also, baking at 375°F (190°C) until golden brown does the trick.
Can I add mix-ins like nuts or dried fruit?
Yes, adding nuts, seeds, or dried fruit during the kneading stage works well. Just keep quantities moderate (about ½ cup) so the dough still rises properly.
Pin This Recipe!
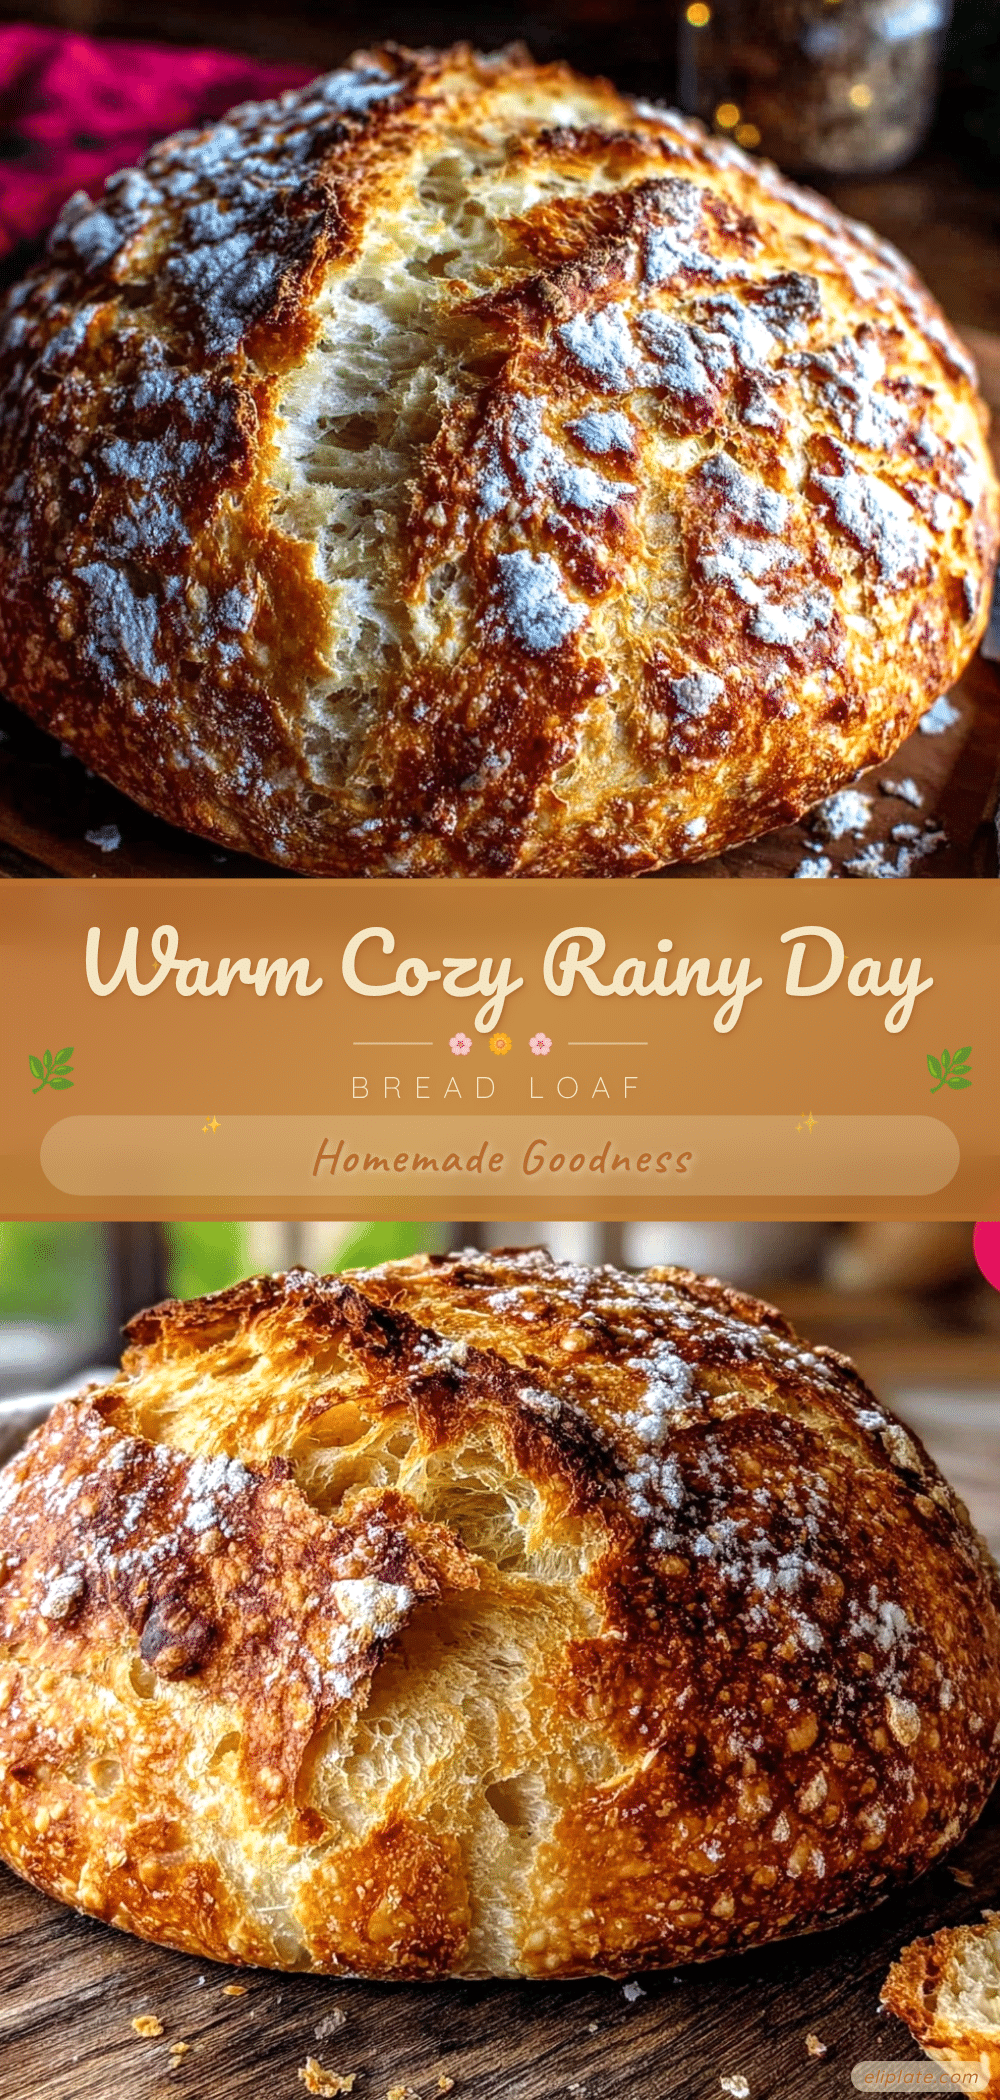
Cozy Rainy Day Homemade Bread Loaf

A simple and comforting homemade bread loaf recipe perfect for cozy rainy days, featuring a crusty exterior and soft, tender crumb made with basic pantry ingredients.
- Prep Time: 10 minutes
- Cook Time: 30-35 minutes
- Total Time: 2 hours 15 minutes
- Yield: 1 loaf (about 12 slices) 1x
- Category: Bread
- Cuisine: American
Ingredients
- 3 ½ cups (440 g) all-purpose flour
- 1 ½ cups (360 ml) warm water (about 110°F / 43°C)
- 2 ¼ teaspoons (one packet) active dry yeast
- 2 teaspoons salt
- 1 tablespoon sugar
- 2 tablespoons olive oil
Instructions
- Activate the yeast: In a large mixing bowl, stir the warm water and sugar together. Sprinkle the active dry yeast on top and let it sit for 5–7 minutes until foamy.
- Mix dry ingredients: Whisk together the flour and salt in a separate bowl.
- Combine dough: Once the yeast mixture is foamy, add the olive oil and gradually add the flour mixture, stirring with a wooden spoon or dough scraper until a shaggy dough forms.
- Knead the dough: Turn the dough onto a lightly floured surface and knead for about 8–10 minutes until smooth and elastic. Add a little flour if too sticky, but avoid adding too much.
- First rise: Place the dough in a lightly oiled bowl and cover with a kitchen towel or plastic wrap. Let it rise in a warm spot for 1 to 1 ½ hours until doubled in size.
- Shape the loaf: Punch down the dough to release air bubbles. Shape into a loaf by folding edges underneath and place in a greased loaf pan or on a parchment-lined baking sheet.
- Second rise: Cover the shaped dough and let it rise again for 30–45 minutes until puffed up.
- Preheat oven: Preheat oven to 375°F (190°C).
- Bake the bread: Bake the loaf for 30–35 minutes until golden brown and sounds hollow when tapped on the bottom.
- Cool down: Remove bread and cool on a wire rack for at least 30 minutes before slicing.
Notes
For an extra crusty loaf, place a small oven-safe dish with water on the bottom rack while baking to create steam. Use the windowpane test to check dough elasticity. Let bread cool completely before slicing to avoid gummy texture. You can bake freeform on a baking sheet for a rustic loaf or use a loaf pan for classic shape.
Nutrition
- Serving Size: 1 slice (about 50g)
- Calories: 130
- Sugar: 1
- Sodium: 300
- Fat: 3
- Saturated Fat: 0.4
- Carbohydrates: 25
- Fiber: 1
- Protein: 3
Keywords: homemade bread, easy bread recipe, rainy day bread, crusty bread, simple bread loaf, no bread machine, beginner bread recipe