“Mom, can I have the chicken with the shiny sauce again?” My six-year-old asked this while staring into the fridge like it held the secrets to the universe. I had no idea what she meant at first. Then it hit me—the teriyaki chicken I’d thrown together two nights ago when I was too tired to think. She’d picked every piece out of her stir-fry and saved it for last. That’s when I knew I needed to make this a thing. A real, repeatable, lunchbox-ready thing.
I started experimenting with a bento box version because honestly, my kid eats better when food is in tiny compartments. Something about small portions makes vegetables less scary and chicken more exciting. The first few attempts were messy. Too much sauce made everything soggy by lunchtime. Not enough seasoning and she’d push it around her plate. But eventually, I landed on this Easy DIY Chicken Teriyaki Bento Box for Kids, and let me tell you—it solved our lunch struggles in a way I didn’t expect.
This isn’t just another chicken recipe. It’s a system. A way to pack a lunch that actually comes home empty. The teriyaki chicken stays tender, the veggies stay crisp, and the whole thing feels like a treat instead of a chore. My daughter calls it “special lunch day” whenever I pack one. And honestly? That feeling never gets old.
Why You’ll Love This Recipe
I’ve tested this bento box concept about a dozen times across different lunch scenarios—school days, weekend picnics, even car trips. Every time, the chicken teriyaki comes out perfectly balanced. Not too sweet, not too salty, and just sticky enough to cling to the rice without making a mess.
- Quick & Easy: From start to finish, this comes together in under 30 minutes. The chicken cooks fast, and the sauce simmers while you steam the rice.
- Simple Ingredients: You probably have soy sauce, honey, and garlic in your kitchen right now. No fancy grocery runs required.
- Perfect for Lunchboxes: This bento box stays fresh for hours. The compartments keep everything separate, so nothing gets soggy or sad by lunchtime.
- Crowd-Pleaser: I’ve served this to picky eaters, adventurous kids, and adults who claim they don’t like “Asian food.” Everyone cleans their plate.
- Unbelievably Delicious: The secret is in the sauce reduction. It coats every piece of chicken like a glaze, not a drowning pool.
What sets this recipe apart is the technique. Instead of marinating for hours, you build flavor directly in the pan. The chicken gets caramelized edges while the sauce reduces into something thick and glossy. It’s the kind of cooking trick that makes you look like a pro without any extra effort.
This is comfort food that works for real life. It’s the lunch your kid will actually eat, the dinner you can make on a Tuesday, and the recipe that makes you feel like you’ve got this whole parenting thing figured out. At least for one meal.
What Ingredients You Will Need
This recipe relies on pantry staples and a few fresh ingredients to create that signature teriyaki flavor. Every component plays a role in building the perfect balance of sweet, savory, and umami.
- Boneless, skinless chicken thighs (1 lb or 450g): Thighs stay juicier than breasts during cooking. I prefer them for kid-friendly meals because they’re harder to overcook. Cut them into bite-sized pieces (about 1-inch cubes) so they cook quickly and fit neatly into bento compartments.
- Soy sauce (⅓ cup or 80ml): Use low-sodium soy sauce to control the salt level. I’ve tried regular soy sauce and it works fine, but the low-sodium version lets you adjust seasoning without making everything too salty. For a gluten-free option, tamari works beautifully.
- Honey (¼ cup or 60ml): This adds sweetness and helps create that glossy glaze. Local honey gives a milder flavor, while wildflower honey adds more depth. Maple syrup works as a substitute, but the texture will be slightly thinner.
- Rice vinegar (2 tablespoons or 30ml): The acidity balances the sweetness and prevents the sauce from tasting one-dimensional. If you don’t have rice vinegar, apple cider vinegar works in a pinch.
- Fresh garlic (3 cloves, minced): Garlic is non-negotiable here. It adds that savory punch that makes teriyaki sauce so addictive. Pre-minced garlic from a jar works, but fresh gives a brighter flavor.
- Fresh ginger (1-inch piece, grated): Ginger adds warmth and a slight peppery kick. I grate mine on a microplane for the best texture. Ground ginger works in a pinch (use ½ teaspoon), but fresh is worth the extra step.
- Cornstarch (1 tablespoon or 8g) mixed with 2 tablespoons water: This slurry thickens the sauce to the perfect consistency. Without it, the sauce stays too thin and won’t coat the chicken properly.
- Sesame oil (1 teaspoon or 5ml): A tiny amount adds nutty depth. Don’t skip this—it’s what gives teriyaki its signature aroma. Toasted sesame oil is stronger than regular, so use it sparingly.
- Sushi rice (1 cup or 200g, uncooked): Short-grain rice sticks together better than long-grain, making it easier for little hands to pick up with chopsticks or forks. Cook according to package directions and season with a splash of rice vinegar and sugar for authentic flavor.
- Steamed broccoli florets (1 cup or 150g): Broccoli holds up well in a lunchbox and doesn’t get mushy. Steam for 2-3 minutes until bright green but still firm.
- Edamame (½ cup or 75g, shelled): These add protein and fun color. Kids love popping them in their mouths. Frozen edamame works perfectly—just thaw and add.
- Carrot sticks (½ cup or 60g): Crunchy carrots add texture and natural sweetness. Cut them into thin matchsticks for easy eating.
- Optional garnishes: Sesame seeds for sprinkling, sliced green onions for freshness, and a small container of extra teriyaki sauce for dipping.
I buy my soy sauce from a local Asian market because they carry brands with cleaner ingredient lists. Kikkoman is my go-to for consistency, but San-J tamari is excellent for gluten-free needs. For the honey, I use whatever local brand is available at the farmers’ market—it makes the sauce taste more complex.
Equipment Needed
You don’t need fancy equipment to make this bento box. Most of these tools are probably already in your kitchen.
- Large skillet or wok: A non-stick skillet works best for even browning. I use a 12-inch cast iron skillet because it holds heat well and creates those caramelized edges on the chicken.
- Small saucepan: For cooking the rice. A medium pot with a tight-fitting lid works too.
- Steamer basket or microwave-safe bowl: For steaming broccoli. I prefer a bamboo steamer for even cooking, but a microwave works in a pinch (cover with a damp paper towel and cook for 90 seconds).
- Cutting board and sharp knife: A good chef’s knife makes cutting chicken and vegetables quick and safe.
- Microplane or fine grater: For grating ginger. A box grater works too, but a microplane gives a finer texture that blends into the sauce seamlessly.
- Measuring cups and spoons: Accuracy matters for the sauce. I use glass measuring cups for liquids and metal spoons for dry ingredients.
- Bento box or compartmentalized container: Any container with dividers works. I love the PlanetBox brand because it’s stainless steel and dishwasher safe. A simple divided meal prep container from the grocery store works just as well.
- Small mixing bowl: For the cornstarch slurry and any dipping sauce.
- Tongs or spatula: For flipping chicken pieces without breaking them apart.
If you don’t have a bento box, don’t stress. A regular lunch container with silicone muffin cups works perfectly to separate the components. I’ve used this trick many times when my daughter wanted a “bento” lunch but I hadn’t washed the actual box yet.
Preparation Method
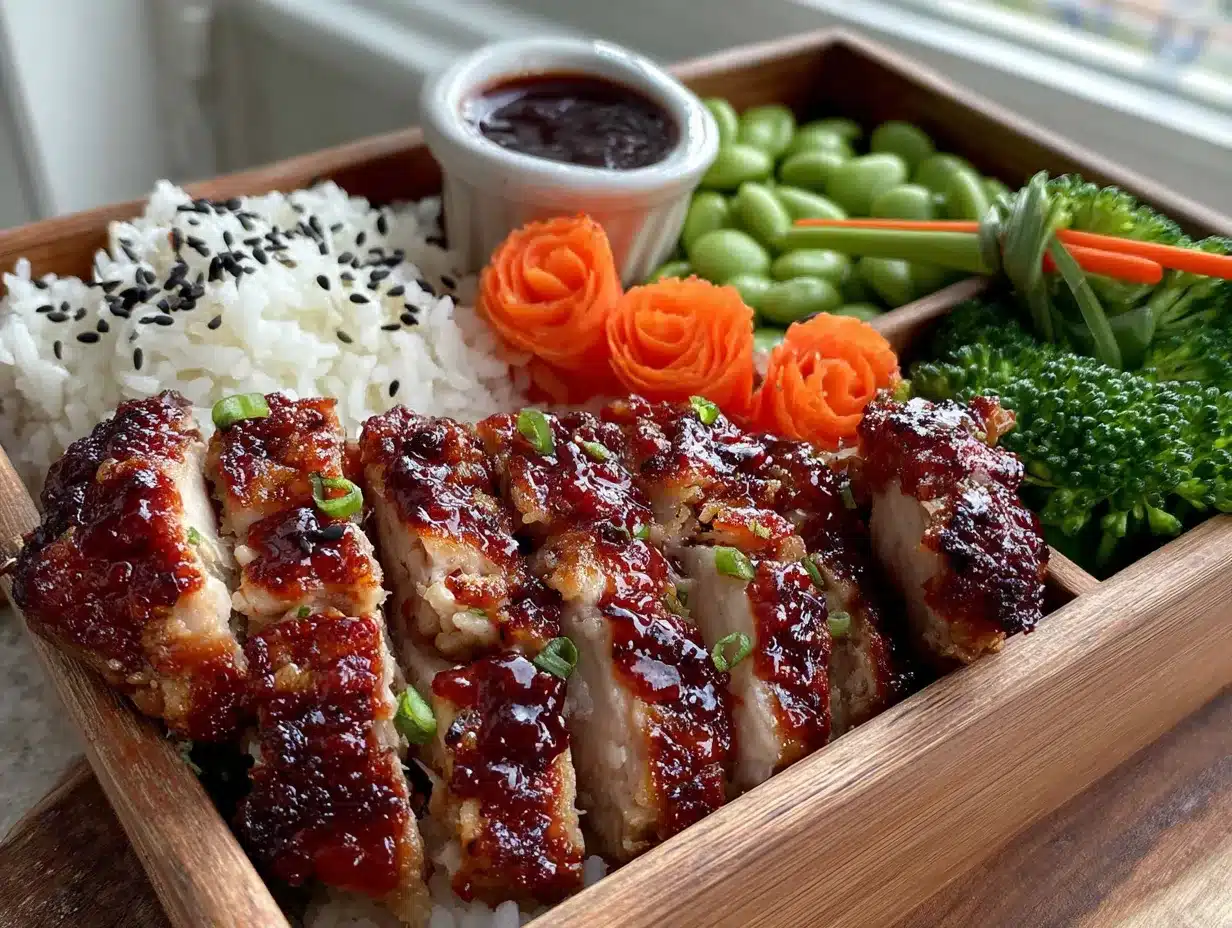
- Cook the rice first (20 minutes before everything else). Rinse 1 cup of sushi rice under cold water until the water runs clear. This removes excess starch and prevents gummy rice. Add 1¼ cups water to a small saucepan, bring to a boil, then reduce heat to low, cover, and simmer for 15 minutes. Remove from heat and let it sit covered for 5 minutes. Fluff with a fork and season with a splash of rice vinegar and a pinch of sugar if desired.
- While the rice cooks, prepare the chicken. Pat 1 lb of chicken thighs dry with paper towels. This step is crucial—wet chicken won’t brown properly. Cut into 1-inch cubes and season lightly with salt and pepper. Don’t go heavy on salt since the soy sauce will add plenty.
- Make the teriyaki sauce. In a small bowl, whisk together ⅓ cup low-sodium soy sauce, ¼ cup honey, 2 tablespoons rice vinegar, 3 minced garlic cloves, and 1 tablespoon grated ginger. Set aside. In another small bowl, mix 1 tablespoon cornstarch with 2 tablespoons cold water until smooth. This slurry will thicken the sauce later.
- Cook the chicken. Heat 1 tablespoon vegetable oil in a large skillet over medium-high heat. Add the chicken pieces in a single layer—don’t overcrowd the pan. Cook for 4-5 minutes without moving them. You want a deep golden brown crust on the bottom. Flip each piece and cook another 3-4 minutes until cooked through (internal temperature should reach 165°F or 74°C). The chicken should look caramelized and slightly charred in spots.
- Add the sauce. Pour the teriyaki sauce over the cooked chicken. Stir to coat every piece. Let it bubble for 1-2 minutes, then give the cornstarch slurry a quick stir and pour it in. Stir constantly for 30-60 seconds until the sauce thickens to a glossy glaze. It should coat the back of a spoon. Remove from heat immediately to prevent burning.
- Steam the broccoli. While the chicken cooks, steam 1 cup of broccoli florets for 2-3 minutes until bright green and tender-crisp. Drain and set aside. If using frozen edamame, thaw it under warm water or microwave for 30 seconds.
- Assemble the bento box. Let everything cool slightly before packing. Spoon the rice into one compartment (about ½ cup per serving). Add the teriyaki chicken to another compartment (about 4-5 ounces). Fill the remaining spaces with broccoli, edamame, and carrot sticks. Sprinkle sesame seeds over the chicken for a finishing touch.
- Cool completely before sealing. This is the most important step for food safety and texture. Hot food creates condensation that makes everything soggy. Let the assembled bento box sit uncovered for 10-15 minutes, then add the lid and refrigerate.
One thing I learned the hard way—don’t pour extra sauce over the rice. It makes the rice mushy by lunchtime. Keep any extra sauce in a small separate container for dipping. My daughter loves having a “dip cup” with her lunch.
Cooking Tips & Techniques
I’ve made this recipe enough times to know where things can go wrong. Here’s what I’ve learned through trial and error.
Don’t skip drying the chicken. The first time I made this, I was in a hurry and skipped patting the chicken dry. The result was steamed chicken instead of seared chicken. Moisture is the enemy of browning. Take those extra 30 seconds to blot with paper towels—it makes a huge difference.
Watch the sauce carefully. Teriyaki sauce goes from perfect to burnt in about 30 seconds. The sugar content means it caramelizes fast. Once you add the cornstarch slurry, keep stirring and remove the pan from heat as soon as it thickens. I once walked away to answer a text and came back to a sticky, black mess. Lesson learned.
Cut chicken pieces uniformly. I used to rush through cutting and ended up with some pieces the size of my thumb and others tiny. The small pieces overcooked while the large ones stayed raw in the center. Take your time to cut even 1-inch cubes. Your future self will thank you.
Multitask strategically. Start the rice first because it takes the longest. While it simmers, prep the chicken and vegetables. Cook the chicken while the rice rests. Steam the broccoli while the sauce reduces. This flow saves about 10 minutes compared to doing everything sequentially.
Use a meat thermometer. Chicken thighs are forgiving, but I still recommend checking the internal temperature. 165°F (74°C) is the sweet spot. Any higher and the meat starts drying out, even with thighs. I use a Thermapen instant-read thermometer because it gives readings in 2 seconds.
Let the chicken rest after cooking. This is a step I used to skip. Letting the cooked chicken sit for 2-3 minutes before assembling the bento box allows the juices to redistribute. If you cut or pack it immediately, the juices run out and make everything watery.
Variations & Adaptations
This bento box is endlessly customizable. Here are some variations I’ve tried and loved.
Vegetarian version: Swap the chicken for firm tofu or tempeh. Press the tofu for 15 minutes to remove excess moisture, then cube and pan-fry until golden before adding the teriyaki sauce. My vegetarian friend raved about this version and said it’s better than most restaurant tofu dishes.
Gluten-free adaptation: Use tamari or coconut aminos instead of soy sauce. Both are gluten-free and work beautifully in the sauce. Tamari is slightly thicker and richer, while coconut aminos are milder and sweeter. I’ve tested both and prefer tamari for authenticity.
Spicy kick: Add 1 teaspoon of sriracha or gochujang to the sauce for adults who want heat. My husband loves this version, but I keep it separate from the kids’ portions. A sprinkle of red pepper flakes over the chicken before serving also works.
Seasonal vegetable swaps: In summer, use snap peas and bell peppers instead of broccoli and carrots. In fall, roasted sweet potato cubes add sweetness and color. In winter, steamed green beans and edamame hold up well. The key is choosing vegetables that stay crisp and don’t release too much moisture.
Baked version: For a hands-off approach, bake the chicken at 400°F (200°C) for 15-18 minutes, then toss with the sauce and bake another 5 minutes. The sauce caramelizes beautifully in the oven. This method works great when you’re making multiple servings for the week.
Low-carb option: Replace the rice with cauliflower rice or zucchini noodles. The teriyaki chicken pairs surprisingly well with both. My sister-in-law does this for her keto diet and says it satisfies her takeout cravings without the carbs.
Serving & Storage Suggestions
This bento box is designed to be served cold or at room temperature, making it perfect for packed lunches. The flavors actually meld together nicely after a few hours in the fridge.
Serving temperature: Kids typically prefer room temperature food. If packing for school, take the bento box out of the fridge 15 minutes before leaving so it warms up slightly. For picnics, pack everything cold and let it come to temperature naturally over 30 minutes.
Presentation tips: Use silicone muffin cups or small silicone cups to separate components visually. I like using colorful cups—blue for edamame, green for broccoli, orange for carrots. It makes the bento box look like a rainbow and kids love the visual appeal.
Complementary additions: Add a small container of fruit (grapes, apple slices, or mandarin oranges) for a complete meal. A few peanut butter energy bites on the side make a great dessert or afternoon snack. For a fun treat, include a frozen banana popsicle wrapped in a napkin—it thaws by lunchtime.
Storage instructions: Refrigerate assembled bento boxes in an airtight container for up to 4 days. Keep the sauce separate if possible to maintain texture. For freezer storage, freeze the chicken and rice separately for up to 3 months. Thaw overnight in the refrigerator before assembling.
Reheating methods: If serving warm, reheat the chicken and rice separately. Microwave the chicken for 45-60 seconds and the rice for 30-45 seconds with a damp paper towel over it. Steam the vegetables for 1 minute to refresh them. Avoid microwaving the entire bento box together—the vegetables get mushy and the rice dries out.
Flavor development: The teriyaki chicken actually tastes better the next day. The flavors meld together and the sauce absorbs into the meat more deeply. I often make a double batch specifically for leftover lunches throughout the week.
For a complete lunchbox solution, pair this bento box with some DIY snack board lunchbox ideas for variety throughout the week. The combination keeps lunches interesting without extra work.
Nutritional Information & Benefits
This bento box provides a balanced meal with protein, carbohydrates, healthy fats, and vegetables. Here’s the estimated nutritional breakdown per serving (one bento box with 4 oz chicken, ½ cup rice, and assorted vegetables):
| Nutrient | Amount |
|---|---|
| Calories | 420-450 |
| Protein | 32g |
| Carbohydrates | 48g |
| Fat | 12g |
| Fiber | 5g |
| Sugar | 18g (from honey and natural sugars) |
| Sodium | 680mg (varies with soy sauce brand) |
Health benefits: Chicken thighs provide high-quality protein and essential B vitamins for energy. Broccoli is packed with vitamin C, fiber, and antioxidants. Edamame adds plant-based protein and folate. Carrots offer beta-carotene for eye health. The ginger in the sauce has anti-inflammatory properties and aids digestion.
Dietary considerations: This recipe is dairy-free and nut-free (if using tamari instead of soy sauce for gluten-free). For a lower sodium option, use low-sodium soy sauce and reduce the added salt. The honey can be swapped with maple syrup for a vegan version.
Potential allergens: Contains soy (soy sauce) and sesame (sesame oil). For soy-free options, use coconut aminos. The recipe is naturally egg-free and can be made gluten-free with tamari.
I personally love that this lunch keeps my daughter full until after school without a sugar crash. The protein and fiber combination provides steady energy, and the vegetables sneak in nutrients she might otherwise skip.
Conclusion
This Easy DIY Chicken Teriyaki Bento Box for Kids has become a staple in our house for good reason. It’s simple enough for a busy weekday morning but special enough that my daughter requests it for her birthday lunch at school. The teriyaki chicken is perfectly balanced, the vegetables stay crisp, and the whole thing comes together in under 30 minutes.
I love that this recipe gives me control over what goes into my kid’s lunch without making me feel like a short-order cook. The ingredients are clean, the portions are just right, and the presentation makes healthy food feel like a treat. Plus, the bento box format encourages trying new foods because everything is separated and approachable.
Try this recipe and make it your own. Swap in your kid’s favorite vegetables, adjust the sweetness of the sauce, or add a fun dipping sauce on the side. The beauty of a bento box is its flexibility—you can customize it every single day and never get bored.
I’d love to hear how this works for your family. Drop a comment below and tell me what variations you tried or if your kids had any funny reactions to their bento lunch. And if you’re looking for more lunchbox inspiration, check out our easy yogurt parfait cups for a quick breakfast option or these make-ahead egg muffins for another grab-and-go meal. Happy packing!
Frequently Asked Questions
Can I use chicken breast instead of thighs?
Absolutely. Chicken breast works well, but it cooks faster and can dry out if overcooked. Cut breasts into 1-inch cubes and cook for 3-4 minutes per side instead of 4-5. Check internal temperature at 160°F (71°C) and let carryover cooking bring it to 165°F. The sauce helps keep breast meat moist, so it’s a good option if you prefer leaner protein.
How long does the teriyaki sauce last in the fridge?
The sauce keeps for up to 2 weeks in an airtight container in the refrigerator. Store it separately from the cooked chicken for best results. The cornstarch may settle, so give it a good stir before using. If the sauce thickens too much in the fridge, thin it with a teaspoon of water at a time while reheating.
Can I make this bento box ahead for the whole week?
Yes! Cook the chicken and rice on Sunday, then assemble bento boxes for Monday through Thursday. Store the chicken and rice separately in the fridge and assemble each morning. The vegetables should be prepped fresh or added right before serving to maintain crunch. For best texture, don’t assemble more than 2 days in advance.
What if my kid doesn’t like broccoli?
Swap it with any vegetable your child enjoys. Snap peas, cucumber slices, bell pepper strips, or cherry tomatoes all work beautifully. The key is choosing vegetables that hold up well in a lunchbox. Steamed green beans or roasted zucchini are also excellent options. Let your child pick their vegetable to increase buy-in.
Is this bento box safe for school nut-free policies?
Yes, this recipe is naturally nut-free as written. The sesame oil is made from sesame seeds, which are seeds, not tree nuts. However, always check the labels on your soy sauce and other ingredients for potential cross-contamination warnings. Some brands process soy sauce in facilities that also handle nuts. For absolute safety, use certified nut-free soy sauce brands like San-J or Bragg’s.
Pin This Recipe!
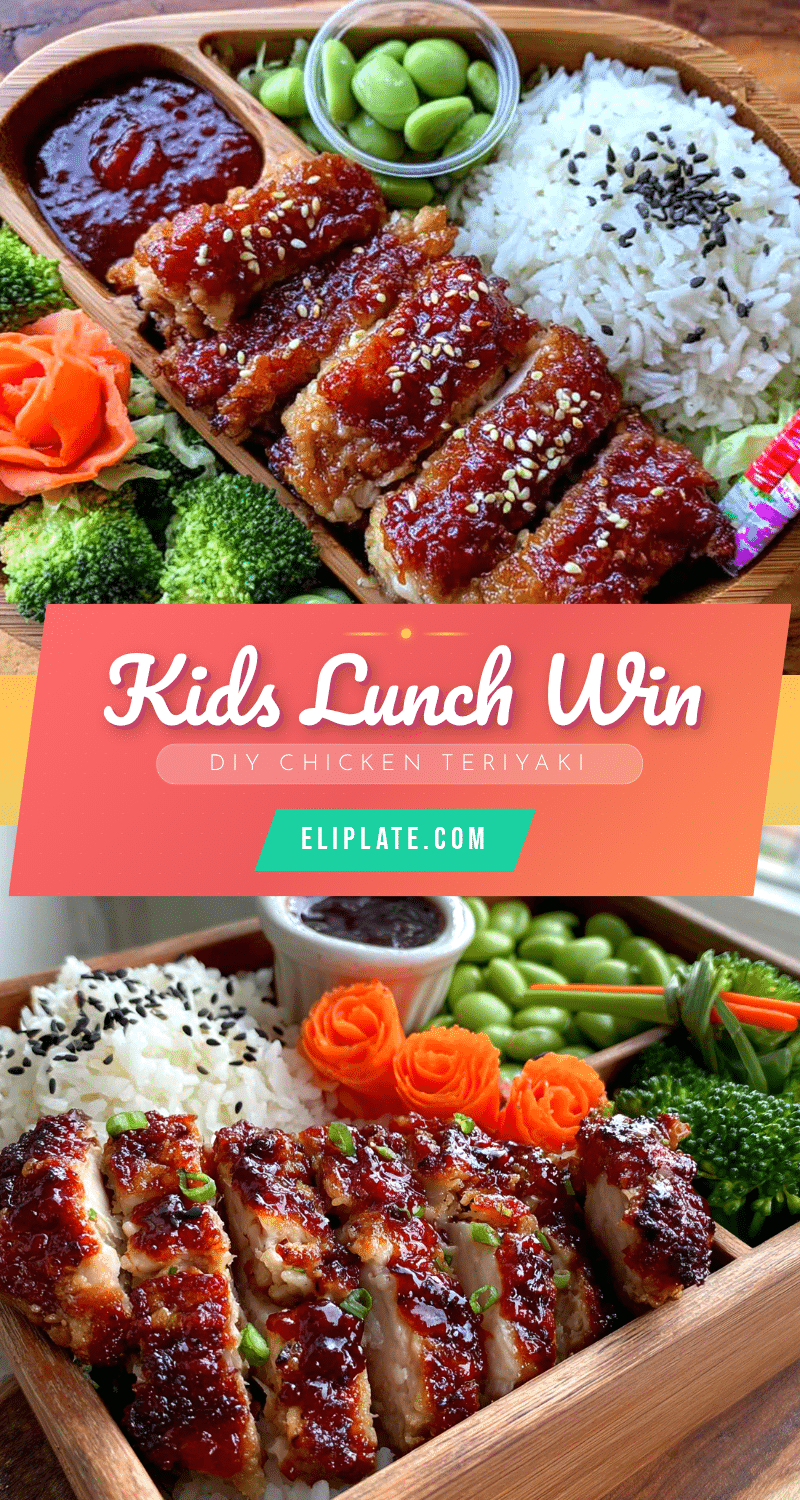
Easy DIY Chicken Teriyaki Bento Box for Kids
A quick and easy bento box featuring tender teriyaki chicken, crisp vegetables, and sushi rice, perfect for kid-friendly lunches that stay fresh and delicious.
- Prep Time: 10 minutes
- Cook Time: 20 minutes
- Total Time: 30 minutes
- Yield: 4 servings 1x
- Category: Main Course
- Cuisine: Japanese
Ingredients
- 1 lb (450g) boneless, skinless chicken thighs, cut into 1-inch cubes
- 1/3 cup (80ml) low-sodium soy sauce
- 1/4 cup (60ml) honey
- 2 tablespoons (30ml) rice vinegar
- 3 cloves garlic, minced
- 1-inch piece fresh ginger, grated
- 1 tablespoon (8g) cornstarch mixed with 2 tablespoons water
- 1 teaspoon (5ml) sesame oil
- 1 cup (200g) uncooked sushi rice
- 1 cup (150g) steamed broccoli florets
- 1/2 cup (75g) shelled edamame
- 1/2 cup (60g) carrot sticks
- Optional: sesame seeds, sliced green onions, extra teriyaki sauce for dipping
Instructions
- Cook the rice: Rinse 1 cup sushi rice under cold water until water runs clear. Add 1 1/4 cups water to a small saucepan, bring to a boil, reduce heat to low, cover, and simmer for 15 minutes. Remove from heat and let sit covered for 5 minutes. Fluff with a fork and season with a splash of rice vinegar and a pinch of sugar if desired.
- Prepare the chicken: Pat 1 lb chicken thighs dry with paper towels. Cut into 1-inch cubes and season lightly with salt and pepper.
- Make the teriyaki sauce: In a small bowl, whisk together 1/3 cup low-sodium soy sauce, 1/4 cup honey, 2 tablespoons rice vinegar, 3 minced garlic cloves, and 1 tablespoon grated ginger. Set aside. In another small bowl, mix 1 tablespoon cornstarch with 2 tablespoons cold water until smooth.
- Cook the chicken: Heat 1 tablespoon vegetable oil in a large skillet over medium-high heat. Add chicken pieces in a single layer. Cook for 4-5 minutes without moving, then flip and cook another 3-4 minutes until cooked through (internal temperature 165°F/74°C).
- Add the sauce: Pour teriyaki sauce over cooked chicken. Stir to coat. Let bubble for 1-2 minutes, then stir in cornstarch slurry. Cook for 30-60 seconds until sauce thickens to a glossy glaze. Remove from heat.
- Steam the broccoli: Steam 1 cup broccoli florets for 2-3 minutes until bright green and tender-crisp. Drain. Thaw edamame if frozen.
- Assemble the bento box: Let everything cool slightly. Spoon rice into one compartment (about 1/2 cup per serving). Add teriyaki chicken to another compartment (about 4-5 ounces). Fill remaining spaces with broccoli, edamame, and carrot sticks. Sprinkle sesame seeds over chicken.
- Cool completely before sealing: Let assembled bento box sit uncovered for 10-15 minutes, then add lid and refrigerate.
Notes
Don’t pour extra sauce over the rice to prevent sogginess. Keep extra sauce in a separate container for dipping. Let the chicken rest for 2-3 minutes after cooking before assembling. For best texture, assemble bento boxes no more than 2 days in advance.
Nutrition
- Serving Size: 1 bento box (4 oz ch
- Calories: 420450
- Sugar: 18
- Sodium: 680
- Fat: 12
- Saturated Fat: 3
- Carbohydrates: 48
- Fiber: 5
- Protein: 32
Keywords: chicken teriyaki, bento box, kid-friendly lunch, easy lunchbox, teriyaki chicken, bento lunch, school lunch