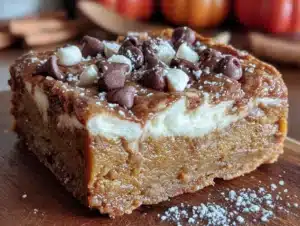
I figured maple pumpkin baked oatmeal cups would be a decent grab-and-go breakfast—something to keep me from skipping the morning meal entirely. It took about three minutes after pulling the first batch out of the oven for that assumption to fall apart completely. My kitchen smelled like a candle shop had exploded in the best possible way, and I stood there holding a warm, slightly crumbly oatmeal cup thinking, I actually want to eat breakfast now.
That was a few autumns ago, and these little cups have become my fall breakfast lifeline. They are not fussy, they do not require you to stand over a stove stirring oats for twenty minutes, and they make your house smell like Sunday morning even if it is a chaotic Tuesday. I have made them for busy school mornings, for myself on slow weekends with coffee and a book, and for friends who looked at me funny when I said “oatmeal cup” like it was something special. Then they tried one.
Look, I am not someone who naturally gravitates toward make-ahead breakfasts. I am more of a “pour cereal and hope for the best” kind of person. But these maple pumpkin baked oatmeal cups changed something for me. They are not too sweet, not too heavy, and they somehow manage to taste like a cozy sweater feels. If you have ever wanted a breakfast that feels both indulgent and practical, this is it. And honestly, they are way better than they have any right to be.
Why You Will Love This Recipe
These maple pumpkin baked oatmeal cups have earned a permanent spot in my fall rotation, and here is why they will probably end up in yours too. They come together in under 35 minutes from start to finish, which means you can make them on a weekday morning without losing your mind. The ingredients are almost certainly already in your pantry—canned pumpkin, maple syrup, oats, eggs, and a few spices. No special trips to the store for obscure items.
- Quick and Easy : Mix everything in one bowl, scoop into a muffin tin, and bake. That is it. No complicated steps, no waiting for dough to chill.
- Perfect for Busy Mornings : Make a batch on Sunday and grab one on your way out the door all week. They reheat beautifully in about 20 seconds.
- Naturally Sweetened : Real maple syrup does the heavy lifting here, so you get that deep, woodsy sweetness without refined sugar overload.
- Kid-Approved and Adult-Friendly : My niece calls them “pumpkin muffins that are good for you” and asks for them every time she visits. I call that a win.
- Freezer-Friendly : Double the batch and stash half in the freezer. Future you will be very grateful on a frantic Wednesday morning.
What makes these different from other baked oatmeal recipes is the texture. They are not mushy or dense—they hold their shape like a muffin but stay tender and moist inside. The pumpkin keeps them from drying out, and the maple syrup adds a warmth that artificial sweeteners just cannot replicate. I have tried versions with brown sugar and honey, and nothing hits quite like real maple syrup here.
This is the kind of recipe that makes you feel like you have your life together, even if you are eating breakfast in the car while running late. It is comfort food that actually works for real life, and that is rare.
What Ingredients You Will Need
This recipe keeps things simple with everyday ingredients that work together to create something genuinely delicious. Here is what you will need and a few notes on each one.
- Rolled oats (old-fashioned) : 2 cups (180g). Do not use instant oats here—they turn mushy. Rolled oats give these cups structure and a pleasant chew. I prefer Quaker or Bob’s Red Mill for consistent results.
- Canned pumpkin puree : 1 cup (240g). Make sure you grab pure pumpkin, not pumpkin pie filling. The filling has added sugar and spices that will throw off the balance. Libby’s is my go-to brand.
- Pure maple syrup : 1/2 cup (120ml). Use the real stuff, not pancake syrup. Grade A dark amber works beautifully here. The maple flavor is front and center, so do not skimp.
- Large eggs : 2, at room temperature. Eggs bind everything together and add richness. If you forget to take them out of the fridge, place them in a bowl of warm water for 5 minutes.
- Milk (any kind) : 1/2 cup (120ml). I use whole milk for extra creaminess, but oat milk or almond milk work fine if you are dairy-free.
- Coconut oil or melted butter : 3 tablespoons (42g). Coconut oil keeps these dairy-free if needed, but melted butter adds a lovely richness. Both work equally well.
- Vanilla extract : 1 teaspoon. Pure vanilla makes a difference here. Skip the imitation stuff if you can.
- Pumpkin pie spice : 2 teaspoons. You can use a store-bought blend or make your own with cinnamon, nutmeg, ginger, and cloves. I usually make my own because I like a little extra cinnamon.
- Ground cinnamon : 1 teaspoon. Because you can never have too much cinnamon in a pumpkin recipe.
- Baking powder : 1 teaspoon. This gives the cups a little lift so they are not dense hockey pucks.
- Salt : 1/4 teaspoon. Just enough to balance the sweetness and bring out the warm spices.
- Optional mix-ins : 1/2 cup chopped pecans or walnuts, 1/3 cup chocolate chips, or 1/4 cup dried cranberries. I usually add pecans because the crunch contrasts nicely with the soft oatmeal.
One thing I have learned over the years is that ingredient temperature matters more than you think. Room temperature eggs and milk blend into the batter more smoothly, which means a better texture overall. It is a small step that makes a noticeable difference.
Equipment Needed
You do not need a fancy kitchen to make these oatmeal cups. Here is what you will need and a few alternatives if you are working with limited tools.
- Muffin tin : A standard 12-cup muffin tin works perfectly. If you only have a 6-cup tin, just bake in two batches. The batter holds up fine while waiting.
- Muffin liners : Paper liners make cleanup a breeze, but you can also grease the tin well with butter or cooking spray. I prefer parchment liners because nothing sticks to them.
- Large mixing bowl : Any medium-to-large bowl will do. I use a glass mixing bowl so I can see if everything is fully combined.
- Whisk : For mixing the wet ingredients. A fork works in a pinch, but a whisk gets things smoother faster.
- Spatula or wooden spoon : For folding the oats into the wet mixture. A rubber spatula is my favorite because it scrapes the bowl clean.
- Measuring cups and spoons : Accurate measurements matter in baking, even for something as forgiving as oatmeal cups. Use dry measuring cups for oats and liquid measuring cups for maple syrup and milk.
- Ice cream scoop or large spoon : For portioning the batter evenly into the muffin cups. A scoop makes the process faster and gives you uniform cups.
If you do not have a muffin tin, you can bake this mixture in an 8×8 baking dish for about 25 minutes and cut it into squares. It is not as portable, but it tastes just as good.
Preparation Method
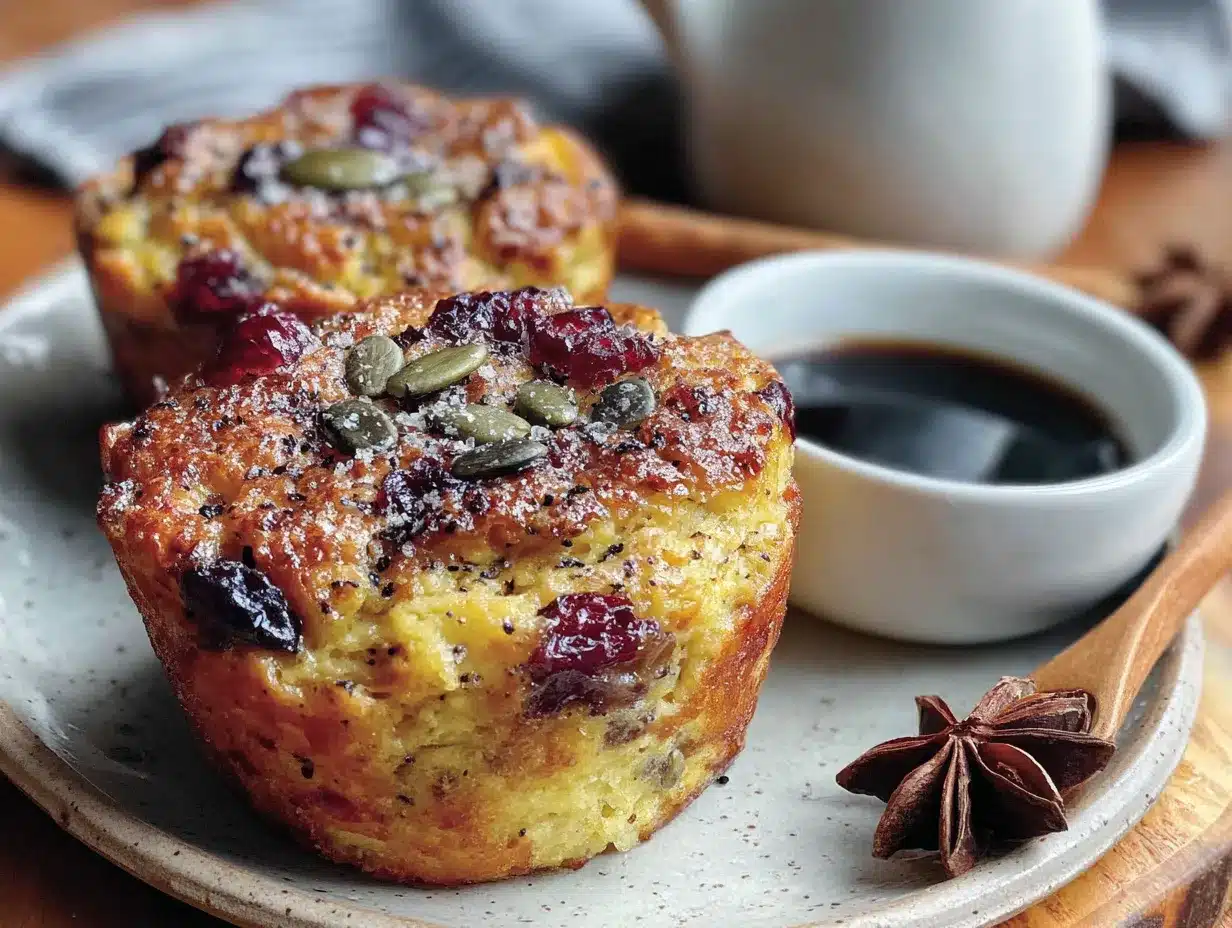
Making these maple pumpkin baked oatmeal cups is straightforward, but a few details make the difference between good and great. Follow these steps and you will have perfect cups every time.
- Preheat your oven to 350°F (175°C) and line a 12-cup muffin tin with paper liners. I like to lightly spray the liners with cooking spray too—it guarantees nothing sticks, especially if you are adding mix-ins like chocolate chips.
- In a large bowl, whisk together the wet ingredients : pumpkin puree, maple syrup, eggs, milk, melted coconut oil (or butter), and vanilla extract. Whisk until the mixture is completely smooth and uniform. It should look like a thick, glossy orange sauce. This takes about 30 seconds of steady whisking.
- Add the dry ingredients directly to the same bowl : rolled oats, pumpkin pie spice, cinnamon, baking powder, and salt. Stir with a spatula until everything is evenly combined. Do not overmix—just stir until you see no more dry spots. The batter will look looser than you expect, but that is correct. It thickens as the oats absorb the liquid.
- Fold in any mix-ins : If you are using pecans, chocolate chips, or dried cranberries, gently fold them in now. I add about half a cup of chopped pecans most of the time, but sometimes I go rogue and add dark chocolate chips instead. Both are excellent choices.
- Let the batter rest for 5 minutes : This step is easy to skip, but do not. Letting the oats sit for a few minutes allows them to start absorbing the liquid, which gives the cups a better texture. The batter will thicken noticeably during this time.
- Scoop the batter into the prepared muffin cups : Fill each cup almost to the top—about 3/4 full is perfect. An ice cream scoop makes this step quick and mess-free. The batter should be evenly distributed among all 12 cups.
- Bake for 20-25 minutes : The cups are done when the edges are golden brown and the centers are set. Insert a toothpick into the center of one—if it comes out clean or with just a few moist crumbs, they are ready. If it looks wet, give them another 2-3 minutes.
- Cool in the pan for 5 minutes : This is important. The cups are delicate when they first come out of the oven, and trying to remove them immediately can cause them to fall apart. Let them rest in the tin for 5 minutes, then transfer to a wire rack to cool completely.
- Enjoy warm or at room temperature : These are fantastic warm, with a little pat of butter melting on top. But they are equally good at room temperature, which makes them perfect for meal prep.
One thing I have learned the hard way: do not overbake these. They go from perfectly moist to dry surprisingly fast. Start checking at 20 minutes and go from there. Your oven might run hot or cool, so trust the toothpick test over the timer.
Cooking Tips and Techniques
After making these maple pumpkin baked oatmeal cups more times than I can count, I have picked up a few tricks that make the process smoother and the results more consistent. Here are the ones worth passing along.
Do not skip the rest time. I know it feels like an unnecessary pause, but letting the batter sit for 5 minutes before baking makes a real difference. The oats absorb some of the liquid, which prevents them from floating to the top during baking. You get a more even texture throughout the cup instead of a layer of oats on top and mush underneath.
Use a cookie scoop for even portions. I use a medium-sized cookie scoop (about 2 tablespoons) to fill the muffin cups. It gives me exactly 12 evenly sized cups every time. If you eyeball it, you will end up with some tiny cups and some overflowing monsters. The smaller ones will dry out while the bigger ones are still underdone.
Line your muffin tin well. Paper liners are fine, but they can stick if the cups are not fully cooled. Parchment liners are my secret weapon—they peel off cleanly every single time. If you are using paper liners, give the cups a full 10 minutes in the pan before trying to remove them.
Watch your oven like a hawk. Oven temperatures vary wildly. I have baked these in three different ovens, and the baking time has ranged from 18 to 28 minutes. Start checking early and trust your senses. The kitchen should smell like pumpkin and maple, and the edges should look set and slightly golden.
Make them ahead without worry. These cups actually taste better the next day. The flavors meld together overnight, and the texture evens out. I often make a batch on Sunday evening, let them cool completely, and store them in an airtight container. They are perfect for grabbing on Monday morning.
I once forgot to add the baking powder to a batch, and the cups came out flat and dense. They still tasted good, but they lacked that pleasant lift. So double-check your ingredients if something seems off. Baking powder is easy to overlook when you are in a hurry.
Variations and Adaptations
One of the best things about this recipe is how flexible it is. You can tweak it to fit your dietary needs, your mood, or whatever is in your pantry. Here are a few variations I have tried and loved.
Gluten-free version : Use certified gluten-free rolled oats instead of regular oats. That is literally the only change needed. The recipe is naturally gluten-free beyond that, so celiac friends can enjoy these without worry. I have made them this way for a friend and she could not tell the difference.
Dairy-free version : Use melted coconut oil instead of butter, and swap the milk for oat milk or almond milk. Everything else stays the same. Coconut oil adds a subtle flavor that pairs nicely with the pumpkin and maple.
Lower sugar option : Reduce the maple syrup to 1/3 cup and add an extra tablespoon of milk to maintain moisture. The cups will be less sweet but still flavorful, especially if you add mix-ins like chopped dates or raisins for natural sweetness.
Protein boost : Add a scoop of vanilla or unflavored protein powder to the dry ingredients. You may need to add an extra tablespoon or two of milk to keep the batter from getting too thick. I have done this with collagen powder and it worked great—no weird texture or taste.
Seasonal twist : In the fall, I sometimes add a tablespoon of pumpkin seeds on top before baking for extra crunch. In the winter, I swap the pecans for dried cranberries and white chocolate chips for a festive touch. In the summer, fresh blueberries are a lovely addition—just fold them in gently so they do not burst.
My personal favorite variation is adding dark chocolate chips and a pinch of flaky sea salt on top before baking. The combination of sweet maple, warm pumpkin, bitter chocolate, and salty crunch is absolutely irresistible. I may or may not have eaten three of those in one sitting.
Serving and Storage Suggestions
These maple pumpkin baked oatmeal cups are versatile when it comes to serving. Here is how I like to enjoy them and how to keep them fresh.
At room temperature : Straight from the container, no fuss. This is my weekday morning move. I grab one, pour a coffee, and I am out the door. They are soft and satisfying without any reheating.
Warm with butter : Pop one in the microwave for 15-20 seconds and add a small pat of butter. The butter melts into the warm oatmeal cup and makes it feel like a treat. This is my weekend move, usually accompanied by a second cup of coffee and a good book.
With yogurt and fruit : Crumble an oatmeal cup over a bowl of Greek yogurt and top with fresh berries. It is like a deconstructed parfait, and it makes breakfast feel fancy without any extra effort.
Storage : Keep the cups in an airtight container at room temperature for up to 3 days. If your kitchen is warm or humid, store them in the refrigerator instead—they will last up to a week. Place a paper towel in the container to absorb excess moisture and keep the cups from getting soggy.
Freezing : These freeze beautifully. Let the cups cool completely, then place them in a single layer on a baking sheet and freeze for an hour. Transfer to a freezer-safe bag or container. They will keep for up to 3 months. To reheat, microwave one for 30-40 seconds straight from frozen, or let it thaw at room temperature for about 30 minutes.
Flavor development : Here is something I did not expect—these cups actually taste better on day two. The maple flavor deepens, the spices mellow out, and the texture becomes more cohesive. So do not be disappointed if they are not mind-blowing straight from the oven. Give them a day, and they will surprise you.
Nutritional Information and Benefits
These oatmeal cups are a solid breakfast choice that balances comfort with nutrition. Here is a rough breakdown per cup (based on the recipe as written, without mix-ins).
- Calories : Approximately 180-200
- Protein : 5-6 grams
- Carbohydrates : 28-30 grams
- Fiber : 4-5 grams
- Fat : 6-8 grams
- Sugar : 12-14 grams (mostly from maple syrup)
Health benefits : Rolled oats are a great source of soluble fiber, which helps keep you full and supports heart health. Pumpkin is packed with vitamin A and antioxidants, and it adds moisture without a lot of calories. Maple syrup provides manganese and zinc, plus it is a more natural sweetener than refined sugar.
Dietary considerations : This recipe is naturally vegetarian and can easily be made dairy-free, gluten-free, or vegan (use flax eggs and plant-based milk). It contains eggs and dairy in the standard version, so keep that in mind for allergies. The cups are relatively low in added sugar compared to most baked breakfast options, which is a nice bonus.
I am not a nutritionist, but I have learned to pay attention to how food makes me feel. These oatmeal cups give me steady energy through the morning without the crash that comes from sugary pastries. That alone is worth the 25 minutes it takes to make them.
Conclusion
These easy maple pumpkin baked oatmeal cups have become my fall breakfast staple for good reason. They are simple enough for a busy weekday, special enough for a lazy weekend, and forgiving enough that even a distracted cook can pull them off. The combination of warm pumpkin, real maple syrup, and cozy spices is exactly what autumn mornings call for.
I hope you make these your own. Add your favorite mix-ins, adjust the sweetness to your liking, or double the batch and share with friends. That is the beauty of a recipe like this—it works with you, not against you. If you try them, I would love to hear how they turn out. Drop a comment below and let me know what variations you tried or how they worked for your family.
And if you are looking for more fall breakfast inspiration, you might enjoy these pumpkin cream cheese muffins or these baked pumpkin spice donuts. Both are equally cozy and just as forgiving. Happy baking, and may your kitchen smell like autumn all season long.
Frequently Asked Questions
Can I use quick oats instead of rolled oats?
You can, but the texture will be different. Quick oats break down more during baking, so the cups will be softer and less chewy. They will still taste good, just not as substantial. If you only have quick oats, reduce the milk by 2 tablespoons since they absorb liquid faster.
How do I know when the oatmeal cups are done?
The edges should be golden brown and the center should look set, not jiggly. Insert a toothpick into the center of a cup—if it comes out clean or with a few moist crumbs, they are ready. If the toothpick is wet, bake for another 2-3 minutes and check again.
Can I make these without eggs?
Yes. Substitute each egg with a flax egg (1 tablespoon ground flaxseed mixed with 3 tablespoons water, let sit for 5 minutes). The texture will be slightly denser, but they will still hold together well. I have made them this way for vegan friends and they were a hit.
Why did my oatmeal cups turn out dry?
Overbaking is the most common culprit. Start checking at 20 minutes and pull them out as soon as they are set. Another possibility is that you used too many oats or not enough liquid. Make sure you are measuring accurately and using rolled oats, not steel-cut oats, which require much more liquid.
Can I double this recipe?
Absolutely. Double all the ingredients and bake in two muffin tins. You may need to rotate the pans halfway through baking for even results. The baking time stays roughly the same, but start checking at 18 minutes since your oven may heat differently with two pans inside.
Pin This Recipe!
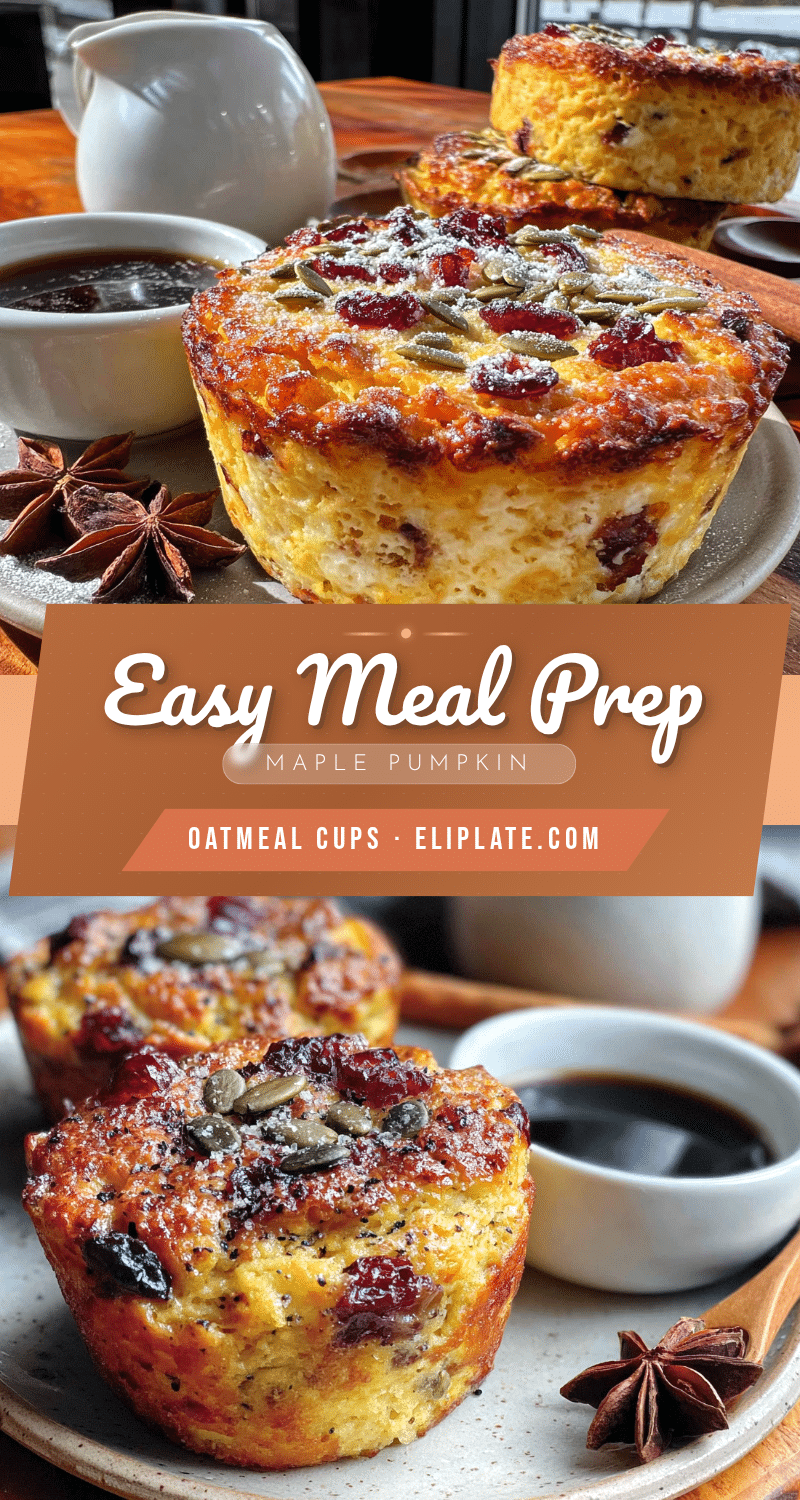
Easy Maple Pumpkin Baked Oatmeal Cups (Best Fall Breakfast)

These maple pumpkin baked oatmeal cups are a quick, one-bowl breakfast that comes together in under 35 minutes. They are naturally sweetened with real maple syrup, perfectly spiced, and have a tender, moist texture that holds its shape like a muffin.
- Prep Time: 10 minutes
- Cook Time: 20-25 minutes
- Total Time: 30-35 minutes
- Yield: 12 servings 1x
- Category: Breakfast
- Cuisine: American
Ingredients
- 2 cups (180g) rolled oats (old-fashioned)
- 1 cup (240g) canned pumpkin puree (not pumpkin pie filling)
- 1/2 cup (120ml) pure maple syrup
- 2 large eggs, at room temperature
- 1/2 cup (120ml) milk (any kind; whole milk, oat milk, or almond milk)
- 3 tablespoons (42g) coconut oil or melted butter
- 1 teaspoon vanilla extract
- 2 teaspoons pumpkin pie spice
- 1 teaspoon ground cinnamon
- 1 teaspoon baking powder
- 1/4 teaspoon salt
- Optional mix-ins: 1/2 cup chopped pecans or walnuts, 1/3 cup chocolate chips, or 1/4 cup dried cranberries
Instructions
- Preheat your oven to 350°F (175°C) and line a 12-cup muffin tin with paper liners. Lightly spray the liners with cooking spray to prevent sticking.
- In a large bowl, whisk together the wet ingredients: pumpkin puree, maple syrup, eggs, milk, melted coconut oil (or butter), and vanilla extract. Whisk until completely smooth and uniform, about 30 seconds.
- Add the dry ingredients directly to the same bowl: rolled oats, pumpkin pie spice, cinnamon, baking powder, and salt. Stir with a spatula until evenly combined. Do not overmix—just stir until no dry spots remain.
- Fold in any mix-ins, such as chopped pecans, chocolate chips, or dried cranberries.
- Let the batter rest for 5 minutes to allow the oats to absorb some liquid. The batter will thicken noticeably.
- Scoop the batter into the prepared muffin cups, filling each about 3/4 full. An ice cream scoop works well for even portions.
- Bake for 20-25 minutes, until the edges are golden brown and the centers are set. Insert a toothpick into the center of a cup—if it comes out clean or with a few moist crumbs, they are ready.
- Cool in the pan for 5 minutes, then transfer to a wire rack to cool completely.
- Enjoy warm or at room temperature. For meal prep, store in an airtight container at room temperature for up to 3 days, or refrigerate for up to a week.
Notes
Do not overbake—start checking at 20 minutes. Letting the batter rest for 5 minutes before baking improves texture. These cups taste even better the next day as flavors meld. For freezing, cool completely, freeze in a single layer, then store in a freezer-safe bag for up to 3 months. Reheat in microwave for 30-40 seconds from frozen.
Nutrition
- Serving Size: 1 oatmeal cup
- Calories: 180200
- Sugar: 1214
- Sodium: 100150
- Fat: 68
- Saturated Fat: 23
- Carbohydrates: 2830
- Fiber: 45
- Protein: 56
Keywords: maple pumpkin baked oatmeal cups, fall breakfast, pumpkin oatmeal cups, easy baked oatmeal, healthy breakfast, make-ahead breakfast, gluten-free option, dairy-free option