“You know, I wasn’t even planning on making a cake that day,” I said, half-joking while stirring the batter. It was the kind of morning that started with a spilled coffee and a last-minute text from my niece: “Can you bring dessert for graduation?” Honestly, my mind was somewhere between the chaos of the day and wondering how to pull off something sweet without losing my cool.
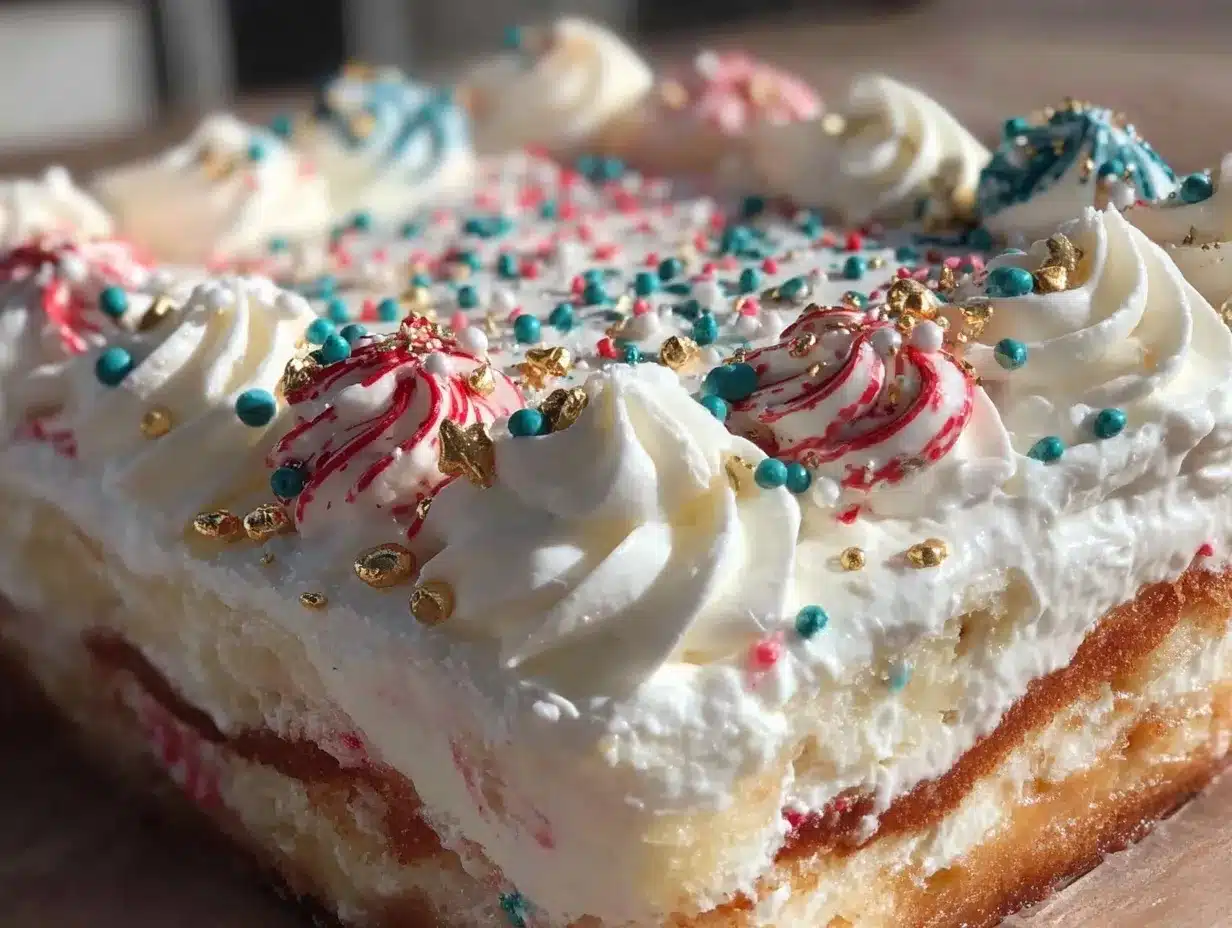
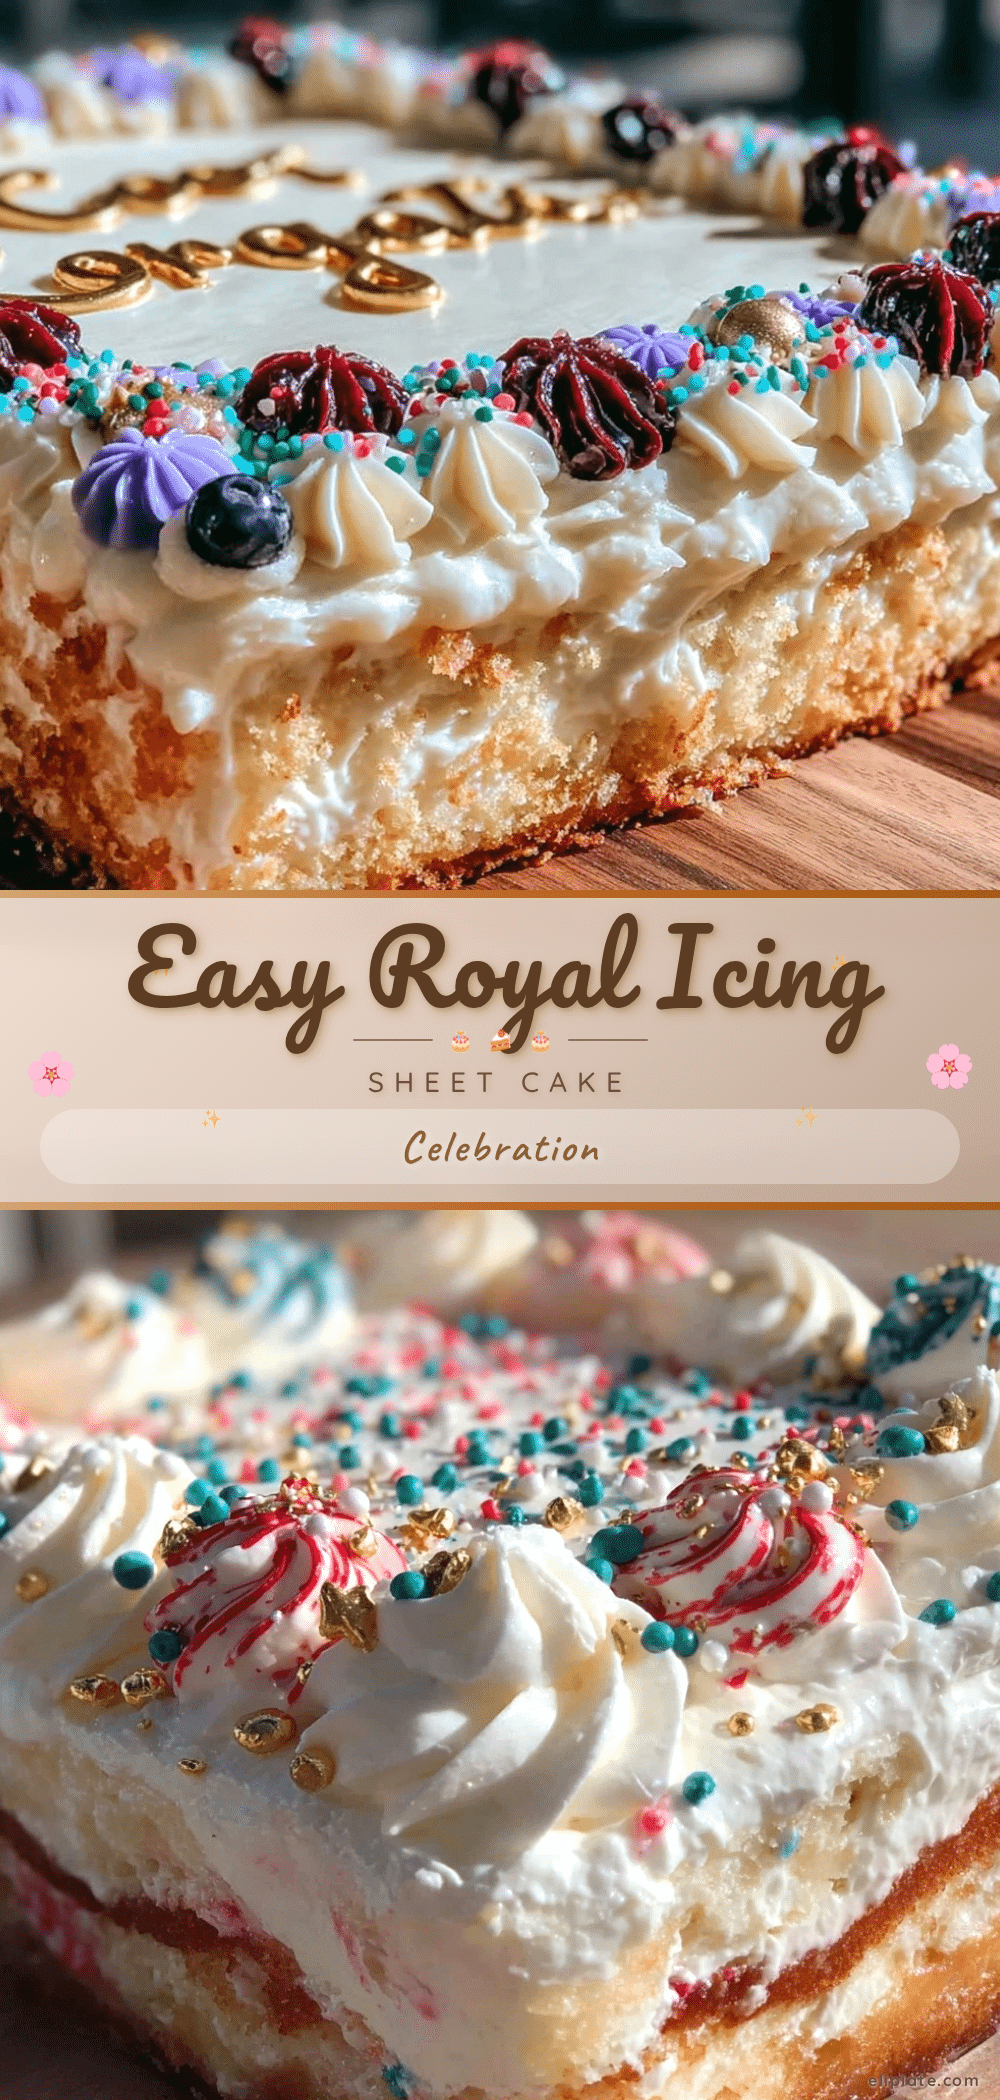
So, I grabbed a simple sheet pan and whipped up this easy royal icing sheet cake — it felt like the quickest rescue mission in the baking world. The icing, silky and smooth, spread like a dream, and the cake itself was surprisingly moist and tender. It ended up being the centerpiece of the celebration, with folks asking for the recipe—twice! What struck me most was how approachable it was; no fancy gadgets, no complicated steps, just a few pantry staples and a little patience.
There’s something about royal icing on a sheet cake that says “special occasion” but without the fuss of elaborate decorating. It’s straightforward yet elegant, the perfect sweet note to celebrate achievements. And if you’re like me, sometimes the best recipes come from moments when you just need a win—fast, reliable, and delicious. This recipe stuck with me because it’s that kind of humble champion that makes celebrations feel a little brighter without stress.
Why You’ll Love This Recipe
After making this Easy Royal Icing Sheet Cake for several graduations, friends’ parties, and even impromptu gatherings, I can say it hits several key marks that make it a go-to dessert:
- Quick & Easy: The entire process takes under 90 minutes, including baking and icing, perfect when you’re juggling a busy schedule.
- Simple Ingredients: No hunting for rare items here. Everything is either a pantry staple or easy to find in any grocery store.
- Perfect for Graduation Celebrations: The smooth royal icing provides a clean canvas for custom decorations or messages, making it ideal for marking milestones.
- Crowd-Pleaser: This cake gets rave reviews from kids and adults alike—moist crumb, balanced sweetness, and that glossy icing everyone loves.
- Unbelievably Delicious: The secret is in the balance—the cake’s light texture complements the slightly firm but creamy royal icing, creating a satisfying bite every time.
What sets this recipe apart is how the royal icing is whipped just right—not too stiff, so it spreads easily, but firm enough to hold delicate piped decorations. Also, the cake uses a touch of buttermilk, which adds subtle tang and tenderness, making it taste far from basic. I’ve tried other sheet cakes, but this one consistently feels like the best version for celebrations that demand both style and substance.
It’s the kind of recipe that lets you put your own spin on things—whether that’s adding colored sprinkles, edible glitter, or a personalized message—without worrying about flaws. Honestly, it’s the kind of cake you can trust to look good and taste even better, which is why it’s become my secret weapon for graduations and other joyous occasions.
What Ingredients You Will Need
This Easy Royal Icing Sheet Cake recipe uses straightforward ingredients that come together to deliver a moist, tender cake topped with a smooth, classic royal icing. Each ingredient plays a simple but crucial role, and you probably have most of them ready to go.
- For the Cake:
- All-purpose flour, 2 ½ cups (315g) – I prefer King Arthur for consistent results
- Baking powder, 2 ½ teaspoons – helps the cake rise evenly
- Baking soda, ½ teaspoon – works with buttermilk for perfect texture
- Salt, ½ teaspoon – balances sweetness
- Unsalted butter, 1 cup (227g), softened – room temperature for smooth batter
- Granulated sugar, 1 ¾ cups (350g) – classic sweetness
- Large eggs, 3, at room temperature – adds richness and structure
- Buttermilk, 1 cup (240ml) – the tang keeps the crumb tender; can swap with plain yogurt thinned with milk if needed
- Pure vanilla extract, 2 teaspoons – for warm, familiar flavor
- For the Royal Icing:
- Powdered sugar, 4 cups (480g), sifted – for smoothness
- Pasteurized egg whites, 4 tablespoons (or 3 tablespoons meringue powder + 5 tablespoons water) – key for that shiny, firm finish
- Fresh lemon juice, 1 teaspoon – adds a subtle tang and stabilizes the icing
- Vanilla extract, 1 teaspoon – optional, for flavor depth
- Food coloring (optional) – gel colors work best without thinning the icing
Looking for a dairy-free or vegan option? You can experiment with plant-based butter alternatives and aquafaba for egg whites, though texture might vary slightly. For a gluten-free twist, try substituting the flour with a trusted gluten-free blend like Bob’s Red Mill 1-to-1.
In summer, I sometimes swap the vanilla for an almond extract, which pairs nicely with fresh fruit garnish on top. The key is using fresh, room-temperature ingredients to get the best rise and smooth batter texture.
Equipment Needed
- 9×13-inch (23×33 cm) rimmed baking sheet or sheet cake pan – a standard size that bakes evenly
- Electric mixer (stand or handheld) – essential for creaming butter and sugar, as well as whipping the royal icing
- Mixing bowls – at least two, for cake batter and icing
- Sifter or fine mesh sieve – for powdered sugar and dry ingredients to avoid lumps
- Offset spatula or butter knife – perfect for spreading the royal icing smoothly across the cake
- Measuring cups and spoons – precise measurements make a big difference in cake texture
- Parchment paper – optional, to line the pan for easy cake removal and cleanup
If you don’t have a stand mixer, a handheld electric mixer works just fine. When it comes to royal icing, I’ve found that using a clean, grease-free bowl is crucial; even a tiny bit of oil can stop the egg whites from whipping properly. For those on a budget, a simple whisk and good elbow grease can substitute for a mixer when preparing the royal icing, though it will take more time and patience.
Preparation Method
- Preheat and Prepare: Preheat your oven to 350°F (175°C). Lightly grease a 9×13-inch sheet pan and line it with parchment paper for easy removal. Set aside.
- Mix Dry Ingredients: In a medium bowl, sift together 2 ½ cups (315g) of all-purpose flour, 2 ½ teaspoons baking powder, ½ teaspoon baking soda, and ½ teaspoon salt. Whisk to blend evenly. This ensures your cake rises uniformly without any surprises.
- Cream Butter and Sugar: In a large bowl, beat 1 cup (227g) unsalted butter (softened) with 1 ¾ cups (350g) granulated sugar using an electric mixer on medium speed. This should take about 3-4 minutes until fluffy and pale. Don’t rush this step—proper creaming traps air for a light crumb.
- Add Eggs: Crack in 3 large eggs one at a time, beating well after each addition. The batter might look a little curdled here, but that’s normal. Add 2 teaspoons vanilla extract and mix briefly.
- Combine Wet and Dry: Alternate adding the dry ingredients and 1 cup (240ml) buttermilk to the butter mixture, starting and ending with the dry. Mix on low speed to avoid overworking the batter. Stop once the batter looks smooth and combined—overmixing can make the cake tough.
- Pour and Bake: Pour batter evenly into the prepared sheet pan. Give the pan a gentle tap on the counter to release any air bubbles. Bake for 35-40 minutes, or until a toothpick inserted in the center comes out clean. The edges should pull away slightly from the pan.
- Cool Completely: Let the cake cool in the pan for 15 minutes, then transfer to a wire rack (parchment helps here) to cool fully. Spreading royal icing on a warm cake will cause melting and ruin the finish.
- Prepare Royal Icing: In a large, clean bowl, beat 4 cups (480g) sifted powdered sugar with 4 tablespoons pasteurized egg whites and 1 teaspoon fresh lemon juice. Start on low speed to avoid a sugar cloud, then increase to medium-high. Beat until the icing holds stiff peaks but still spreads easily, about 5-7 minutes. Add 1 teaspoon vanilla if desired. Adjust consistency with tiny drops of water or more powdered sugar as needed.
- Ice the Cake: Using an offset spatula, spread the royal icing evenly over the cooled cake, smoothing top and edges. If you want, add piped decorations once the base layer sets for 10-15 minutes. Let the icing dry at room temperature for 1-2 hours before slicing.
If the icing becomes too thick while spreading, a few drops of warm water can loosen it—but add sparingly to avoid it running off the cake. For best results, avoid refrigerating the iced cake immediately as condensation can dull the shiny finish.
Cooking Tips & Techniques
Royal icing can be intimidating — I get that. But with a couple of tricks, it’s surprisingly manageable. First, always make sure your mixing bowl and beaters are spotless and free of grease. Even a hint of fat can prevent egg whites from whipping properly.
When creaming butter and sugar, patience is key. Give yourself the 3-4 minutes for fluffiness; it makes a noticeable difference in texture. Also, don’t skip sifting powdered sugar for the icing — lumps can wreck the smooth finish. If you see any clumps, press them through a fine sieve gently with a spatula.
Another tip: when spreading the royal icing, work quickly but gently. The icing starts to set fast, so if you wait too long, it can get lumpy. If you want a perfectly smooth surface, keep your offset spatula damp and use long, fluid strokes.
Watch the baking time closely. Overbaking dries out sheet cakes, so test with a toothpick at the 35-minute mark. Also, let the cake cool completely before icing; warm cake melts the icing and causes it to slide off.
Lastly, multitasking helps. While the cake bakes, prep the royal icing so you can spread it as soon as the cake cools. This way, you avoid waiting around and keep the icing fresh.
Variations & Adaptations
This recipe is a fantastic base for customization. Here are a few ways to make it your own:
- Flavor Variations: Swap vanilla for almond or lemon extract in the cake and icing for a bright twist.
- Dietary Adjustments: Use a gluten-free flour blend to make it gluten-free or substitute butter with a dairy-free spread for lactose intolerance. For egg-free, aquafaba can replace egg whites in the icing, but results vary.
- Decorating Options: Add edible gold leaf, colored sprinkles, or piped royal icing flowers to match school colors. I once made a personalized version with tiny piped mortarboards and diplomas using edible food markers.
- Seasonal Twists: Stir in fresh berries or swap buttermilk for coconut milk for tropical vibes. For fall graduations, a dash of cinnamon or pumpkin spice in the batter works wonders.
For a different cooking method, you can bake this cake in two 8-inch round pans for a layered effect. Adjust baking time to 25-30 minutes and stack with royal icing in between layers.
One variation I tried recently was adding a thin layer of raspberry jam between the cake and royal icing—unexpected but delightful. The tartness balanced the sweet icing perfectly for a grown-up twist.
Serving & Storage Suggestions
This cake is best served at room temperature to enjoy the full flavor and creamy texture of the royal icing. I usually slice it into generous squares and serve with fresh berries or a light fruit salad to balance the sweetness.
Graduations often call for easy transport, so this cake holds up well for travel if you keep it covered gently with plastic wrap or in a cake carrier.
Store leftovers in an airtight container at room temperature for up to 2 days. The royal icing tends to harden a bit, which some people love for that classic crunch. If you prefer softer icing, cover loosely or store in the fridge for up to 4 days, then bring back to room temp before serving.
For longer storage, freeze the uniced cake wrapped tightly in plastic and foil. Thaw completely before adding royal icing. This works well if you want to prep the cake base ahead of time.
Reheat slices gently in the microwave for 10-15 seconds if you want that just-baked warmth. The icing will soften beautifully but avoid overheating or it will melt away.
Nutritional Information & Benefits
This Easy Royal Icing Sheet Cake is a treat, so enjoy it as an occasional indulgence. Roughly, one serving (1/12 of the cake) contains about 350 calories, 15 grams fat, 50 grams carbohydrates, and 3 grams protein.
Key ingredients like eggs provide protein and vitamins, while butter adds richness and fat-soluble nutrients. The buttermilk adds calcium and gives a subtle tang without extra sugar.
For those watching gluten or dairy, the recipe adapts well with substitutions. Royal icing made with pasteurized egg whites offers a lower-fat alternative to buttercream, and it dries firm—great for decorating without heavy frosting.
Remember, moderation is key, but it’s nice to have a reliable, relatively simple cake recipe that doesn’t go overboard on sugar or butter.
Conclusion
This Easy Royal Icing Sheet Cake has become a quiet hero in my baking repertoire. It’s the kind of recipe that feels like a secret handshake for celebrations—simple enough to make last minute, but special enough to impress your guests. I love how it balances ease and elegance, and how the royal icing turns an everyday sheet cake into a memorable centerpiece.
Feel free to tweak the flavors or decorations to suit your style and occasion. Whether you’re a seasoned baker or just looking for a dependable dessert, this recipe won’t let you down. And hey, if you’re juggling busy days like I do, this cake is a gentle reminder that sweet moments don’t have to be complicated.
When you try this recipe, I’d love to hear how you make it your own or what celebrations it brightened. Sharing those little victories is what food is all about.
FAQs
Can I make the royal icing ahead of time?
Yes, royal icing can be made a day in advance. Store it covered tightly with plastic wrap to prevent it from drying out. Before using, give it a quick stir and adjust consistency with a few drops of water if needed.
What if I don’t have buttermilk? Can I substitute it?
Absolutely! You can make a simple buttermilk substitute by adding 1 tablespoon of white vinegar or lemon juice to 1 cup of milk. Let it sit for 5 minutes before using.
How do I fix royal icing that’s too runny?
Add more sifted powdered sugar a tablespoon at a time and beat until you reach the desired thickness. Be careful not to add too much liquid at once.
Can I use this recipe for cupcakes instead of a sheet cake?
Yes! The batter works well for cupcakes. Bake at 350°F (175°C) for about 18-22 minutes, checking doneness with a toothpick.
How should I store leftover cake with royal icing?
Store cake at room temperature in an airtight container for up to 2 days. For longer storage, refrigerate for up to 4 days or freeze the uniced cake separately.
If you enjoyed the simplicity of this cake, you might appreciate the comfort of a creamy one-pot chicken pasta or the satisfying crunch of crispy gluten-free chicken tenders. Both recipes share that same balance of ease and flavor perfect for busy days and special moments alike.
Pin This Recipe!
Easy Royal Icing Sheet Cake Recipe for Perfect Graduation Celebrations

A quick and easy sheet cake topped with smooth royal icing, perfect for graduation celebrations and special occasions. Moist, tender, and simple with pantry staples.
- Prep Time: 20 minutes
- Cook Time: 40 minutes
- Total Time: 1 hour
- Yield: 12 servings 1x
- Category: Dessert
- Cuisine: American
Ingredients
- 2 ½ cups (315g) all-purpose flour
- 2 ½ teaspoons baking powder
- ½ teaspoon baking soda
- ½ teaspoon salt
- 1 cup (227g) unsalted butter, softened
- 1 ¾ cups (350g) granulated sugar
- 3 large eggs, at room temperature
- 1 cup (240ml) buttermilk
- 2 teaspoons pure vanilla extract
- 4 cups (480g) powdered sugar, sifted
- 4 tablespoons pasteurized egg whites (or 3 tablespoons meringue powder + 5 tablespoons water)
- 1 teaspoon fresh lemon juice
- 1 teaspoon vanilla extract (optional)
- Food coloring (optional)
Instructions
- Preheat oven to 350°F (175°C). Lightly grease a 9×13-inch sheet pan and line with parchment paper.
- Sift together flour, baking powder, baking soda, and salt in a medium bowl. Whisk to blend.
- In a large bowl, beat softened butter and granulated sugar with an electric mixer on medium speed for 3-4 minutes until fluffy and pale.
- Add eggs one at a time, beating well after each addition. Mix in vanilla extract briefly.
- Alternate adding dry ingredients and buttermilk to the butter mixture, starting and ending with dry ingredients. Mix on low speed until smooth; avoid overmixing.
- Pour batter evenly into prepared pan. Tap pan gently to release air bubbles.
- Bake for 35-40 minutes or until a toothpick inserted in the center comes out clean. Edges should pull away slightly.
- Cool cake in pan for 15 minutes, then transfer to wire rack to cool completely.
- Prepare royal icing by beating powdered sugar, egg whites, and lemon juice starting on low speed, then medium-high until stiff peaks form but icing still spreads easily (5-7 minutes). Add vanilla if desired. Adjust consistency with water or powdered sugar as needed.
- Spread royal icing evenly over cooled cake using an offset spatula. Add piped decorations if desired after base layer sets for 10-15 minutes.
- Let icing dry at room temperature for 1-2 hours before slicing.
Notes
Use room-temperature ingredients for best results. Ensure mixing bowl and beaters are grease-free for royal icing. If icing is too thick, add a few drops of warm water sparingly. Avoid refrigerating iced cake immediately to prevent dulling the finish. For dairy-free or vegan options, substitute butter with plant-based alternatives and use aquafaba for egg whites. Gluten-free flour blends can replace all-purpose flour for gluten-free version.
Nutrition
- Serving Size: 1 slice (1/12 of cak
- Calories: 350
- Fat: 15
- Carbohydrates: 50
- Protein: 3
Keywords: royal icing, sheet cake, graduation cake, easy cake recipe, celebration dessert, moist cake, simple ingredients