Fourth time in two weeks and I finally stopped pressing the edges with a fork. That one change—just using my fingers to crimp the dough—made the seal hold better, and suddenly the jelly stopped leaking out during the second thaw. I know that sounds ridiculous, obsessing over a sandwich my kid takes to school, but here we are.
It started because my son’s classroom went nut-free this year. No peanut butter, no almond butter, not even a granola bar that says “may contain traces of tree nuts.” The lunchbox staple we relied on for years—those store-bought frozen uncrustables—was suddenly off the table. And honestly? The sunflower butter versions at the grocery store cost twice as much and somehow taste like cardboard dipped in sadness.
So I started making my own. Sunflower butter and jelly uncrustables, from scratch, with a $2 cookie cutter from Amazon and a bag of sunflower seeds I already had in the pantry. The first batch was a disaster—the bread tore, the filling leaked, and my son looked at me like I’d handed him a science experiment. But by batch three, something clicked. By batch four, I was freezing two dozen at a time and texting photos to my sister.
These aren’t fancy. They’re not going to win any food photography awards. But they’re reliable, they’re nut-free, and they taste exactly like the ones from the store—except better, because you made them yourself and that always counts for something.
Why You’ll Love This Recipe
Let me be real with you for a second. I’ve tested this recipe about a dozen times across different bread brands, sunflower butter consistencies, and freezing methods. What I’m sharing with you today is the version that worked every single time, no matter what variables I threw at it.
- Completely Nut-Free : Perfect for school lunchboxes, daycare centers, and any place with nut restrictions. Sunflower butter is naturally nut-free and widely available.
- Budget-Friendly : A jar of sunflower butter costs about the same as peanut butter, and you’re using basic sandwich bread and jelly. Way cheaper than the pre-made frozen ones.
- Make-Ahead Magic : Spend 20 minutes on Sunday making a batch, freeze them, and grab one each morning for the next month. No morning assembly required.
- Customizable for Picky Eaters : Use any flavor jelly, jam, or preserves. Swap the bread type. Add a sprinkle of cinnamon or chia seeds. You’re in control.
- Texture That Holds Up : Unlike some homemade versions that turn soggy, these stay perfectly intact through freezing and thawing because of a simple trick I’ll show you.
What makes this recipe different from the dozen other tutorials you’ll find online? I spent an embarrassing amount of time testing bread thickness, spread amounts, and sealing techniques. I even compared different brands of sunflower butter to find which one stays creamy after freezing (spoiler: it’s the one with added oil, not the natural stir kind). This isn’t just a recipe thrown together—it’s the result of actual trial and error so you don’t have to make the same mistakes I did.
What Ingredients You Will Need
This recipe uses simple, everyday ingredients that you probably already have in your kitchen. The beauty of these sunflower butter and jelly uncrustables is that there’s nothing fancy or hard-to-find here—just good, basic components that come together into something genuinely useful.
- 8 slices soft white bread (or whole wheat, brioche, or your favorite sandwich bread) — The bread needs to be soft and pliable so it presses together without cracking. I’ve tested this with artisanal crusty bread and it tears every time. Save the sourdough for toast and use something squishy here. Store-brand white bread works perfectly.
- ½ cup sunflower butter (creamy, not crunchy) — Look for sunflower butter that has added oil (like sunflower oil or palm oil) on the ingredient list. The natural stir kind separates too much and makes the filling grainy after freezing. My go-to is SunButter Natural Creamy, but any brand with a smooth consistency will work.
- ¼ cup jelly, jam, or preserves (any flavor you like) — Grape jelly is the classic, but strawberry, raspberry, apricot, or even apple butter all work beautifully. Just avoid anything with large fruit chunks or seeds that might poke through the bread seal. I personally love using blackberry preserves for a slightly tangy twist.
- Optional: 1 tablespoon honey or maple syrup — If your sunflower butter is unsweetened, a tiny drizzle of honey mixed in adds a touch of sweetness. My son prefers it without, but I like the extra flavor.
- Optional: Pinch of cinnamon or chia seeds — For a little extra texture or warmth. I sometimes add a sprinkle of cinnamon to the jelly side before sealing.
A note on ingredient selection: I’ve tried making these with natural, no-stir sunflower butter that separates in the jar, and the texture after freezing was noticeably grainier. The added oil in standard sunflower butter helps keep everything creamy even after a month in the freezer. If you’re using natural sunflower butter, give it a very thorough stir and consider adding a teaspoon of coconut oil to smooth it out.
For the bread, I’ve had the best luck with standard sandwich bread that’s soft but not too airy. Brioche works beautifully but makes these a little richer than necessary. Whole wheat is fine, just make sure it’s the soft kind, not the dense, seedy variety that crumbles when pressed.
Equipment Needed
You don’t need much for this recipe, which is honestly my favorite part. Here’s what you’ll want to have on hand:
- Uncrustables cutter or round cookie cutter (about 4 inches in diameter) — This is the key tool. You can buy an actual Uncrustables sandwich sealer on Amazon for around $10, or use a wide-mouth mason jar ring or a round cookie cutter. I started with a cookie cutter and eventually bought the sealer because it crimps the edges automatically.
- Rolling pin — For flattening the bread slightly before adding the filling. This helps prevent tearing and creates a better seal. A wine bottle works in a pinch.
- Butter knife or offset spatula — For spreading the sunflower butter and jelly evenly without tearing the bread.
- Baking sheet or plate — To hold the assembled uncrustables before freezing. You need a flat surface that fits in your freezer.
- Parchment paper or wax paper — To line the baking sheet so the sandwiches don’t stick. Also useful for wrapping individual sandwiches for storage.
- Freezer-safe zip-top bags or container — For storing the frozen uncrustables. I use quart-size bags and squeeze out as much air as possible before sealing.
If you don’t have a round cutter at all, you can actually use a sharp knife to cut the crusts off and press the edges with a fork. It’s not as pretty, but it works. I did that for the first two batches and nobody complained.
Preparation Method
Alright, let’s get into the actual making of these. I’m going to walk you through every step with the exact details that took me four batches to figure out.
- Flatten the bread slices. Take each slice of bread and gently roll over it with a rolling pin until it’s about half its original thickness. Don’t press too hard or the bread will tear—just a few firm rolls in each direction. This step is crucial because flattened bread seals better and holds the filling without leaking. I learned this the hard way after my first batch turned into a sticky mess.
- Spread the sunflower butter. Place 4 slices of the flattened bread on your work surface. Using a butter knife, spread about 2 tablespoons of sunflower butter on each slice, leaving a ½-inch border around the edges. The border is important—if you spread all the way to the edge, the filling will squeeze out when you press the sandwich together.
- Add the jelly. Spoon about 1 tablespoon of jelly onto the center of the sunflower butter on each slice. Don’t spread it all the way to the edges. Leave it in a small mound in the middle. This might seem counterintuitive, but the jelly will spread naturally when you press the sandwich together. Spreading it too much beforehand causes leaks.
- Top with remaining bread. Take the remaining 4 slices of flattened bread and place them on top of the filled slices, pressing gently around the edges to create a preliminary seal. Don’t press in the center yet—you want the jelly to stay in the middle.
- Cut and seal the sandwiches. Place your round cutter or Uncrustables sealer over the center of each sandwich and press down firmly. If using a cutter, press the edges together with your fingers or a fork to create a seal. If using a sealer, it will crimp the edges automatically. Make sure the seal is tight all the way around—any gaps will let jelly escape during freezing.
- Remove the crusts. Lift the sealed round sandwich out of the cutter. The crusts will remain as scraps around the cutter. You can save these for breadcrumbs or compost them. I usually eat them while I’m working because I have zero self-control around warm bread.
- Flash freeze. Place the finished uncrustables on a parchment-lined baking sheet in a single layer, not touching each other. Put the baking sheet in the freezer for at least 2 hours, or until the sandwiches are completely frozen solid. This step prevents them from sticking together when you transfer them to storage bags.
- Transfer to storage. Once the uncrustables are fully frozen, transfer them to a freezer-safe zip-top bag or container. Squeeze out as much air as possible before sealing. Label the bag with the date and type of filling. They’ll keep for up to 3 months.
A few important notes on timing: The flash freezing step is non-negotiable in my opinion. I tried skipping it once and just putting the sandwiches directly into a bag, and they all froze into one giant clump that I had to pry apart with a butter knife. Not worth it. Give them those 2 hours on the baking sheet and your future self will thank you.
Also, work quickly when spreading the fillings. If the bread sits out too long, it starts to dry out and becomes harder to seal. I usually work with 4 slices at a time, keeping the remaining bread in the bag to stay soft.
Cooking Tips & Techniques
After making these roughly thirty-seven times (yes, I counted), I’ve collected some tips that make the whole process smoother. Let me share the ones that actually matter.
Don’t overfill. I know it’s tempting to pile on the sunflower butter and jelly, but more filling means more leakage. Stick to the measurements I gave you. The sandwiches should look slightly flat, not bulging. If you see filling squeezing out the sides when you press, you’ve used too much.
Use room temperature sunflower butter. Cold sunflower butter is stiff and tears the bread when you try to spread it. Let your jar sit out on the counter for 15-20 minutes before you start. If you’re in a hurry, microwave it for 10 seconds and stir well. This single tip improved my success rate by about 40%.
Toast the bread slightly for a different texture. This is an optional variation, but if you lightly toast the bread before assembling (just until it’s warm, not brown), the sandwiches hold their shape even better after thawing. The downside is they’re not as soft, so picky kids might notice the difference. I prefer them untoasted for the classic soft texture.
Double up on the seal. If you’re using a fork to crimp the edges, go around the sandwich twice. The first pass creates the basic seal, and the second pass reinforces it. I learned this after losing an entire batch to jelly that leaked out during the first freeze. Waste of good blackberry preserves, that was.
Label everything. I cannot stress this enough. Frozen uncrustables all look the same, and you will forget which ones have grape jelly and which have strawberry. Write the flavor on the bag with a permanent marker. Your future self will be so grateful.
Variations & Adaptations
One of the best things about this recipe is how easy it is to change up. Here are some variations I’ve tried and loved:
Flavor Variations:
- Sunflower Butter & Honey — Replace the jelly with a thin layer of honey. These are less messy and my son’s personal favorite. Just spread the honey thinly so it doesn’t drip out.
- Sunflower Butter & Banana — Add a few thin slices of banana on top of the sunflower butter before sealing. These don’t freeze as well (banana gets mushy), so make them fresh instead.
- Sunflower Butter & Chocolate Spread — Swap the jelly for a nut-free chocolate spread. This is basically dessert, but who’s judging? Perfect for after-school treats.
Dietary Adaptations:
- Gluten-Free — Use gluten-free bread, but choose a soft variety. Gluten-free bread tends to be more fragile, so be extra gentle when pressing and sealing. I’ve had good luck with Schär brand.
- Low-Sugar — Use sugar-free jelly and unsweetened sunflower butter. The texture stays the same, just with less sweetness.
- Vegan — This recipe is already vegan if you use plant-based bread. Most standard sandwich bread is vegan, but check the label to be sure.
Method Variations:
- Air Fryer Uncrustables — If you want a warm, crispy version, cook a frozen uncrustable in the air fryer at 350°F for 5-6 minutes. The outside gets golden and the inside stays soft. It’s a completely different experience and honestly delightful.
- Toasted Sandwich Style — Make these fresh (not frozen) and cook them in a buttered skillet like a grilled sandwich. The sunflower butter gets warm and melty, and the jelly becomes almost jammy. This is my weekend treat.
I once tried adding a thin layer of cream cheese to one batch, thinking it would add richness. It did not freeze well—the cream cheese separated and left a weird texture. Stick to the simple combinations for freezing, and save the experiments for fresh eating.
Serving & Storage Suggestions
These sunflower butter and jelly uncrustables are designed for convenience, so let’s talk about how to serve and store them properly.
For serving: Take a frozen uncrustable out of the freezer and place it in a lunchbox in the morning. By lunchtime (about 4 hours later), it will be thawed and ready to eat. The texture is soft, the filling is creamy, and there’s no sogginess. If you’re packing them for an adult lunch or a picnic, they’re perfect as-is. For a warm treat, pop one in the microwave for 15-20 seconds—the sunflower butter gets slightly warm and the jelly becomes runny. Delicious.
For presentation: These are meant to be casual, but if you’re serving them at a party or playdate, arrange them on a platter with some fresh fruit and a side of easy DIY snack board lunchbox ideas with hummus, crackers, and fresh fruit for a complete nut-free spread. The contrast of sweet and savory makes everyone happy.
Storage instructions: Keep the uncrustables in a sealed freezer bag or container for up to 3 months. Make sure to squeeze out as much air as possible to prevent freezer burn. I’ve kept some for 4 months and they were still fine, but the texture starts to degrade slightly after the 3-month mark. Don’t store them in the refrigerator—they’ll get soggy. Keep them frozen until you’re ready to use them.
Reheating tips: If you want to serve these warm, microwave a frozen uncrustable for 20-25 seconds on a paper towel. Let it sit for a minute before eating, as the filling gets very hot. For a crispier option, air fry at 350°F for 5 minutes. The outside gets toasty while the inside stays soft and warm.
One thing I love about these is that the flavors actually develop a bit after a week or two in the freezer. The sunflower butter and jelly meld together somehow, creating a more cohesive taste. It’s subtle, but noticeable. So don’t eat them all fresh—let a few sit in the freezer for a while and see what you think.
Nutritional Information & Benefits
Here’s the approximate nutritional breakdown for one sunflower butter and jelly uncrustable (made with white bread, creamy sunflower butter, and grape jelly):
| Nutrient | Amount per Uncrustable |
|---|---|
| Calories | 280-320 |
| Total Fat | 14g |
| Saturated Fat | 1.5g |
| Carbohydrates | 35g |
| Fiber | 3g |
| Sugar | 12g |
| Protein | 8g |
| Sodium | 200mg |
Sunflower butter is a fantastic source of vitamin E, which supports immune function and skin health. It also contains healthy fats that help keep kids full and focused through the school day. Compared to peanut butter, sunflower butter has slightly less protein but more vitamin E and magnesium.
These uncrustables are naturally nut-free, soy-free (depending on your bread), and can easily be made gluten-free. They’re a solid choice for school lunchboxes where nut restrictions are in place. The combination of complex carbs from the bread, healthy fats from the sunflower butter, and natural sugars from the jelly provides steady energy without the crash that comes from processed snacks.
If you’re watching sugar intake, you can reduce it by using sugar-free jelly or reducing the amount of jelly to a teaspoon. The sunflower butter is naturally slightly sweet on its own, so you won’t miss the extra sugar.
Conclusion
These sunflower butter and jelly uncrustables have honestly become a staple in our house, and I never expected them to. What started as a desperate solution to a nut-free lunch problem turned into something I actually look forward to making. There’s something satisfying about spending 20 minutes on a Sunday and knowing you’ve got a month’s worth of lunches sorted.
The best part? You can tweak them endlessly. Use different jellies, try honey instead, add a sprinkle of cinnamon, or experiment with different breads. They’re forgiving and flexible, which is exactly what a busy parent needs. And if your kid is anything like mine, they’ll never know the difference between these and the store-bought version—except these cost about a third of the price and have ingredients you can actually pronounce.
If you make these, I’d love to hear how they turn out. Drop a comment below with your favorite jelly flavor combination, or tag me in your photos if you share them online. And if you’re looking for more easy, nut-free lunch ideas, check out my easy 5-ingredient peanut butter energy bites perfect for school snacks (made with sunflower butter, of course) or these easy make-ahead egg muffin cups with 12 savory variations for a protein-packed morning option.
Happy lunch packing, friends. You’ve got this.
Frequently Asked Questions
Can I use crunchy sunflower butter instead of creamy?
You can, but the texture changes after freezing. The crunchy bits can feel a little gritty once thawed. I’d recommend creamy for the best result, but if crunchy is all you have, go for it—just know the texture won’t be as smooth.
How long do these last in the freezer?
Up to 3 months for best quality. After that, the bread can start to develop freezer burn and the texture gets slightly dry. I’ve pushed it to 4 months and they were still edible, just not as good. Label your bags with the date so you know which ones to use first.
Can I make these with homemade bread?
Absolutely, but homemade bread needs to be soft and thinly sliced. If your homemade bread is dense or has a thick crust, it won’t seal properly. Let it cool completely, slice it thin, and flatten it well before assembling. I’ve done it with a soft brioche recipe and it worked beautifully.
Why did my jelly leak out during freezing?
This usually happens for one of three reasons: too much jelly, jelly spread too close to the edges, or a weak seal. Use less jelly than you think you need, keep it in the center, and make sure the edges are crimped firmly. If you’re using a fork, go around twice.
Can I use these in an air fryer?
Yes! Cook a frozen uncrustable at 350°F for 5-6 minutes until golden and warm. The outside gets crispy and the inside stays soft and gooey. Let it cool for a minute before eating because the filling gets extremely hot. This is my favorite way to eat them on weekends.
Pin This Recipe!
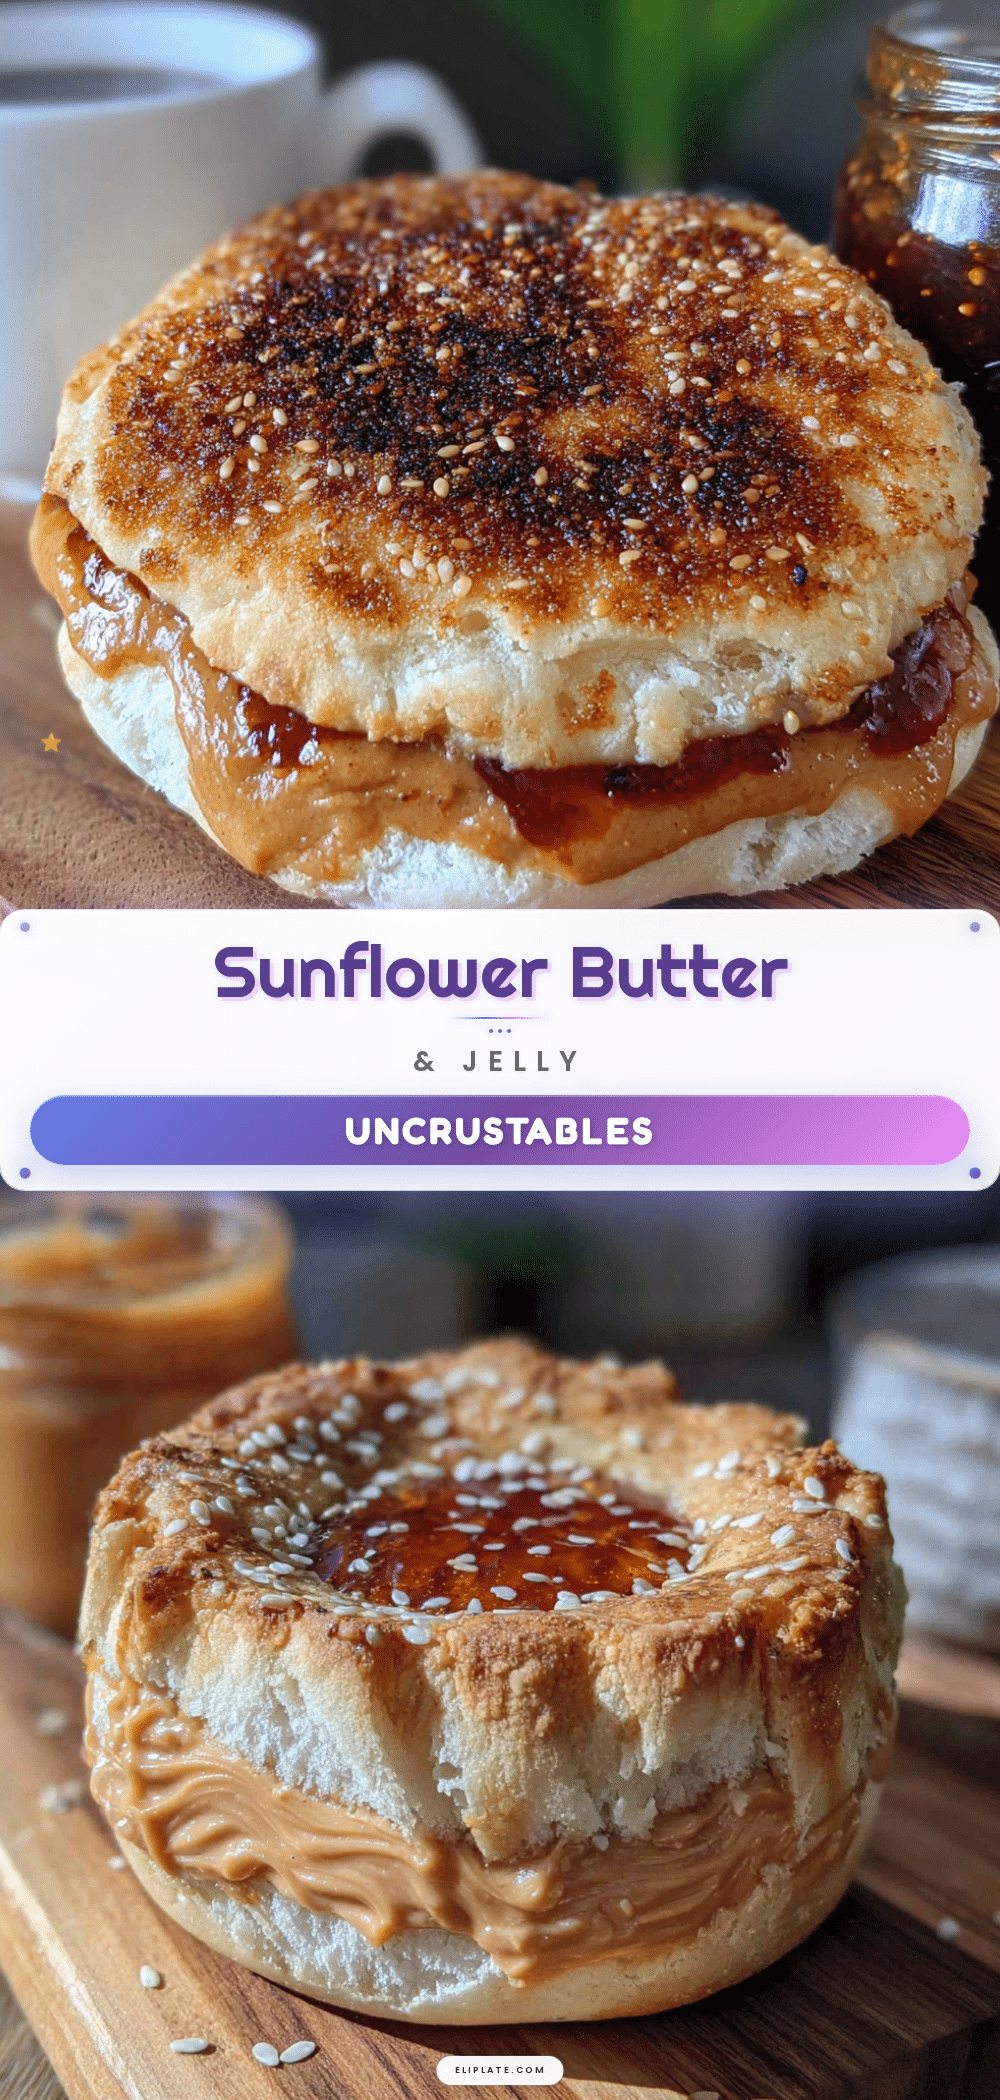
Easy Sunflower Butter and Jelly Uncrustables: Best Nut-Free Lunch
These homemade sunflower butter and jelly uncrustables are completely nut-free, budget-friendly, and perfect for school lunchboxes. With a simple trick to prevent leaks, they freeze beautifully and taste just like the store-bought version—only better.
- Prep Time: 20 minutes
- Cook Time: 0 minutes
- Total Time: 2 hours 20 minutes (includes freezing)
- Yield: 4 servings 1x
- Category: Lunch
- Cuisine: American
Ingredients
- 8 slices soft white bread (or whole wheat, brioche, or your favorite sandwich bread)
- ½ cup sunflower butter (creamy, not crunchy)
- ¼ cup jelly, jam, or preserves (any flavor you like)
- Optional: 1 tablespoon honey or maple syrup
- Optional: Pinch of cinnamon or chia seeds
Instructions
- Flatten the bread slices: Take each slice of bread and gently roll over it with a rolling pin until it’s about half its original thickness. Don’t press too hard or the bread will tear—just a few firm rolls in each direction.
- Spread the sunflower butter: Place 4 slices of the flattened bread on your work surface. Using a butter knife, spread about 2 tablespoons of sunflower butter on each slice, leaving a ½-inch border around the edges.
- Add the jelly: Spoon about 1 tablespoon of jelly onto the center of the sunflower butter on each slice. Don’t spread it all the way to the edges. Leave it in a small mound in the middle.
- Top with remaining bread: Take the remaining 4 slices of flattened bread and place them on top of the filled slices, pressing gently around the edges to create a preliminary seal. Don’t press in the center yet.
- Cut and seal the sandwiches: Place your round cutter or Uncrustables sealer over the center of each sandwich and press down firmly. If using a cutter, press the edges together with your fingers or a fork to create a seal. If using a sealer, it will crimp the edges automatically.
- Remove the crusts: Lift the sealed round sandwich out of the cutter. The crusts will remain as scraps around the cutter.
- Flash freeze: Place the finished uncrustables on a parchment-lined baking sheet in a single layer, not touching each other. Put the baking sheet in the freezer for at least 2 hours, or until the sandwiches are completely frozen solid.
- Transfer to storage: Once the uncrustables are fully frozen, transfer them to a freezer-safe zip-top bag or container. Squeeze out as much air as possible before sealing. Label the bag with the date and type of filling. They’ll keep for up to 3 months.
Notes
Flattening the bread is crucial for a good seal. Use room temperature sunflower butter to prevent tearing. Don’t overfill—stick to the measurements. For a crispy version, air fry a frozen uncrustable at 350°F for 5-6 minutes.
Nutrition
- Serving Size: 1 uncrustable
- Calories: 300
- Sugar: 12
- Sodium: 200
- Fat: 14
- Saturated Fat: 1.5
- Carbohydrates: 35
- Fiber: 3
- Protein: 8
Keywords: sunflower butter and jelly, uncrustables, nut-free lunch, school lunch, make-ahead, freezer-friendly, kid-friendly