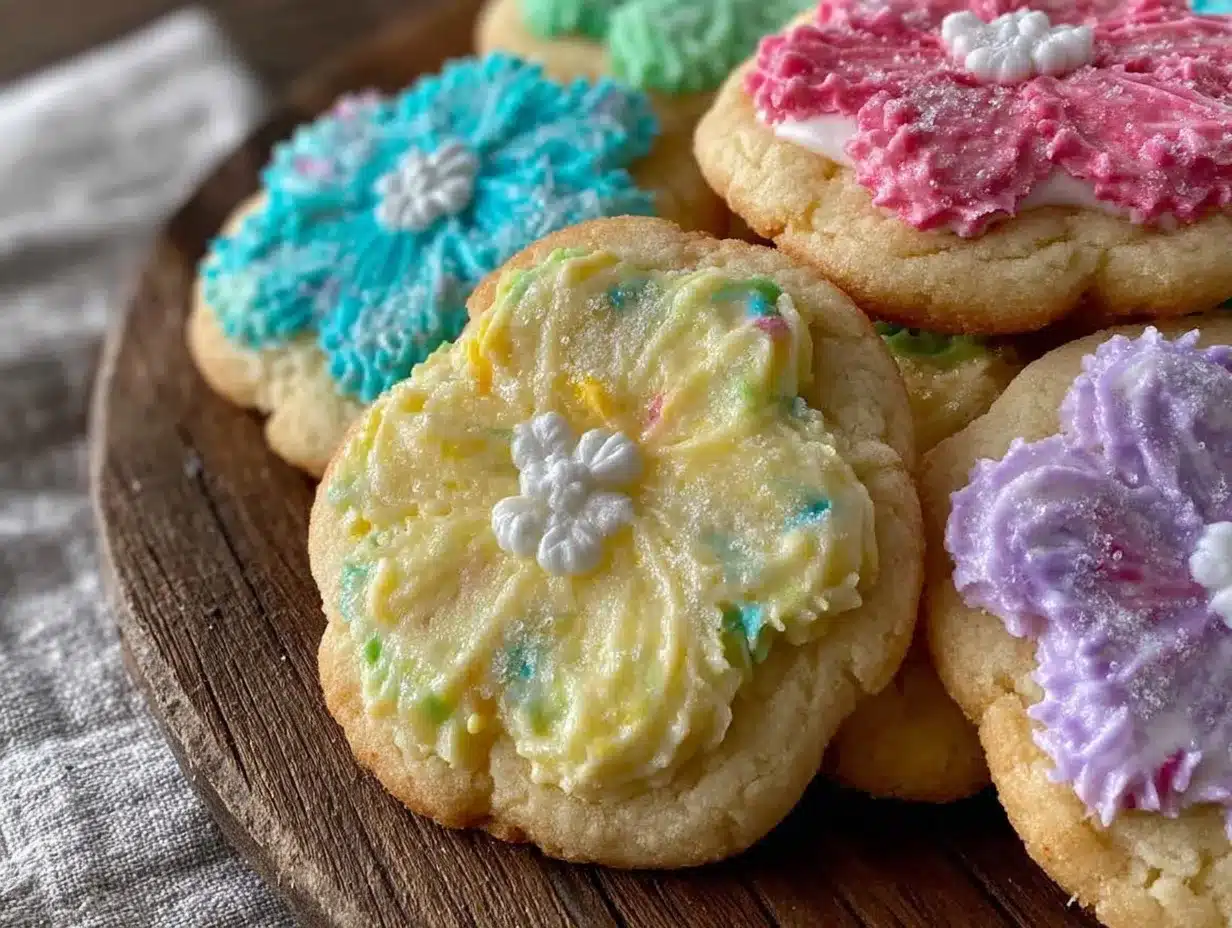
“Are you sure these are just sugar cookies?” my friend asked, eyeing the delicate pastel petals I’d spent the afternoon piping onto a batch of flower-shaped treats. Honestly, I wasn’t convinced myself at first. I mean, sugar cookies can be a bit… well, boring, right? But something about shaping them like flowers and topping them with that dreamy, smooth royal icing made all the difference.
This recipe came about on a rainy Saturday when I had zero plans and a sudden craving for baking something whimsical. The kitchen was quiet except for the hum of the mixer, and I found myself fiddling with cookie cutters and pastel hues, experimenting more than following any strict recipe. What started as a casual trial turned into a mini obsession—I made these cookies three times that week, tweaking the dough for the perfect soft yet crisp bite and adjusting the icing for that just-right sheen.
Now, whenever I make these perfect flower-shaped sugar cookies with pastel royal icing, there’s this calm satisfaction that settles over me. It’s the kind of recipe that’s as much about the process as the result—the slow swirl of icing, the soft petals taking shape, the pastel colors that just feel like spring, no matter the season. And it quietly reminds me that sometimes, the simplest ingredients and a little patience can turn into a moment of charm in the middle of a hectic day.
Why You’ll Love This Recipe
Having tested this recipe multiple times (yes, I’m a bit of a perfectionist when it comes to sugar cookies), I can confidently say it’s a winner for both beginners and more seasoned bakers. Here’s what makes these flower-shaped sugar cookies stand out:
- Quick & Easy: The dough comes together in under 15 minutes, and the royal icing dries fairly fast, making it great for last-minute celebrations or a fun weekend project.
- Simple Ingredients: You probably have all these pantry staples on hand—no need for specialty shops or hard-to-find items.
- Perfect for Special Occasions: Whether it’s a baby shower, spring brunch, or a sweet gift, these cookies bring a delicate touch that’s sure to impress.
- Crowd-Pleaser: Kids love the pastel colors and flower shapes, while adults appreciate the buttery, melt-in-your-mouth texture.
- Unbelievably Delicious: The royal icing adds just the right sweetness and a slight crunch that pairs perfectly with the tender cookie base.
What really sets this recipe apart is the balance between a soft sugar cookie and that smooth, glossy royal icing. Plus, I’ve shared my little trick of chilling the dough twice to keep the shapes crisp and clean during baking—trust me, it works wonders. This isn’t just another sugar cookie recipe; it’s one with personality, charm, and a little bit of magic baked right in.
What Ingredients You Will Need
This recipe uses simple, wholesome ingredients to deliver bold flavor and satisfying texture without the fuss. Most are common kitchen staples, and I’ve included a few tips for substitutions or upgrades.
- For the Sugar Cookie Dough:
- 2 ¾ cups (350 g) all-purpose flour (for a gluten-free option, try a 1:1 gluten-free baking flour)
- 1 teaspoon baking powder (helps keep cookies light, but you can skip if unavailable)
- ½ teaspoon salt
- 1 cup (225 g) unsalted butter, softened (I recommend using European-style butter for richer flavor)
- 1 ½ cups (300 g) granulated sugar
- 1 large egg, room temperature
- 2 teaspoons pure vanilla extract (or almond extract for a subtle twist)
- 2 tablespoons whole milk (adds tenderness; use any dairy-free milk if preferred)
- For the Pastel Royal Icing:
- 3 cups (360 g) powdered sugar, sifted (I prefer Domino or C&H for smooth results)
- 2 large egg whites or 4 tablespoons meringue powder mixed with 6 tablespoons water (choose pasteurized egg whites for safety)
- ½ teaspoon lemon juice (adds brightness and helps the icing set)
- Gel food coloring in pastel shades (soft pink, lavender, mint, pale yellow—gel colors won’t thin the icing)
- Optional: ¼ teaspoon vanilla or almond extract (for a little flavor boost)
For decorating, I use basic flower-shaped cookie cutters around 3 inches (7.5 cm) wide. If you want, you can swap out the vanilla for citrus zest in the dough for a fresh zing, or replace the powdered sugar in the icing with a natural powdered sweetener for a different twist. These cookies are forgiving and easy to customize.
Equipment Needed
- Stand mixer or hand mixer (I use a KitchenAid stand mixer, but any mixer works fine)
- Mixing bowls (preferably glass or metal for easy cleaning)
- Rolling pin (a silicone one helps prevent sticking)
- Flower-shaped cookie cutters (various sizes can be fun)
- Baking sheets lined with parchment paper or silicone mats
- Cooling racks (to avoid soggy bottoms)
- Piping bags and small round tips (I use Wilton #2 or #3 for icing outlines and flooding)
- Spoons and spatulas for mixing and spreading
If you don’t have piping tips, no worries—you can use a zip-top bag with a tiny corner snipped off. For quick clean-up, silicone mats are a lifesaver, and I always recommend keeping your tools in tip-top shape by washing them right after use to avoid hardened icing buildup. Budget-friendly options like plastic cookie cutters and disposable piping bags work just as well for beginners.
Preparation Method
- Mix the Dry Ingredients: In a medium bowl, whisk together 2 ¾ cups (350 g) all-purpose flour, 1 teaspoon baking powder, and ½ teaspoon salt. Set aside. This step ensures even distribution of leavening and seasoning, giving your cookies a uniform texture.
- Cream Butter and Sugar: Using your mixer, beat 1 cup (225 g) softened unsalted butter with 1 ½ cups (300 g) granulated sugar on medium speed until light and fluffy—about 3-4 minutes. You’ll notice the color lighten and the texture become airy, which is key for tender cookies.
- Add Egg and Vanilla: Beat in 1 large egg and 2 teaspoons pure vanilla extract until combined. Scrape down the sides to avoid any streaks of unmixed dough.
- Incorporate the Dry Ingredients: Gradually add the flour mixture to the wet ingredients in 3 parts, mixing on low speed just until combined. Overmixing here will make the cookies tough, so be gentle.
- Add Milk: Stir in 2 tablespoons whole milk to bring the dough together—it should be soft but not sticky. If it’s too wet, add a little more flour, a tablespoon at a time.
- Chill the Dough: Shape the dough into two discs, wrap in plastic wrap, and refrigerate for at least 1 hour (or up to overnight). This step helps the dough firm up, preventing spreading during baking and preserving the flower shapes.
- Roll and Cut: Preheat your oven to 350°F (175°C). On a lightly floured surface, roll out one dough disc to about ¼-inch (6 mm) thickness. Use your flower cookie cutters to stamp shapes, transferring them to a parchment-lined baking sheet.
- Second Chill: Chill the cut cookies on the baking sheet for 10-15 minutes before baking. This little trick keeps edges sharp and prevents puffing.
- Bake: Bake for 8-10 minutes until edges just start to turn golden. The centers should remain pale and soft. Let cookies cool on the sheet for 5 minutes before transferring to a wire rack to cool completely.
- Prepare Royal Icing: While cookies bake, whisk 3 cups (360 g) powdered sugar with 2 large egg whites (or meringue powder mixture) and ½ teaspoon lemon juice until glossy and stiff peaks form—about 7-10 minutes. Divide icing into bowls and tint with gel food coloring to pastel shades.
- Decorate: Fill piping bags fitted with small round tips. Outline each cookie with a slightly thicker icing border, then flood the center with thinner icing (thin with a few drops of water if needed). Use a toothpick or scribe tool to smooth out any bubbles and create petal details.
- Dry and Set: Let decorated cookies dry at room temperature for several hours or overnight until icing hardens. Avoid stacking until completely dry to preserve decoration.
Pro tip: Keep a damp cloth over your icing bowls when not piping to prevent it from drying out too fast. Also, if your icing thickens too much during decorating, stir in a bit of water gradually to regain the right consistency.
Cooking Tips & Techniques
Creating these flower-shaped sugar cookies with pastel royal icing is easier than you might think, but a few insider tips can make the process smooth and enjoyable.
- Don’t Skip the Double Chill: Chilling the dough before and after cutting is a game-changer. It keeps the cookies from puffing up and losing their floral shape in the oven.
- Flour Lightly: When rolling out the dough, use just enough flour to prevent sticking but not so much that the dough dries out. Too much flour can lead to tougher cookies.
- Test Your Oven: Oven temperatures vary, so check your cookies a minute or two before the minimum baking time to avoid over-browning.
- Getting Royal Icing Consistency Right: For outlining, aim for a thick, pipeable consistency that holds its shape. For flooding, thin with water until it flows smoothly but isn’t runny.
- Practice Flooding: Don’t worry if your first few attempts feel messy. Use a toothpick to gently nudge icing into corners or smooth out surface bubbles.
- Keep Your Work Area Clean: I learned this the hard way—icing dries fast, so cover bowls and clean tools frequently to maintain flow.
- Use Gel Colors: They add vibrant pastel hues without changing icing texture. Liquid colors risk thinning it too much.
- Patience Pays Off: Let icing dry fully before stacking or packaging; otherwise, colors can smear.
Over the years, I’ve found that taking your time with these steps really makes a difference. You know, sometimes it’s less about rushing and more about enjoying the process—like when I make my creamy one-pot chicken pasta which also demands a bit of patience for that perfect tender finish!
Variations & Adaptations
One of the best things about this perfect flower-shaped sugar cookies with pastel royal icing recipe is how versatile it is. Here are a few ways to switch things up:
- Dietary Adaptation: Swap all-purpose flour for a gluten-free blend and use egg replacer to make these cookies gluten- and egg-free. The texture will be slightly different but still delicious.
- Flavor Twists: Add lemon or orange zest to the dough for a citrusy note, or sprinkle finely chopped lavender into the batter for a floral hint that complements the icing.
- Seasonal Colors: Instead of pastels, try rich jewel tones for fall or bright primary colors for kid’s parties. You can even add edible glitter or pearl dust for extra sparkle.
- Alternative Icings: If royal icing isn’t your thing, try a simple glaze made from powdered sugar and milk, then decorate with sprinkles or edible flowers.
- Personal Favorite: I once made these cookies with a cream cheese-based icing tinted pale pink—softer and tangier, perfect for a cozy afternoon tea.
For a hands-off variation, you might enjoy pairing these with an easy crockpot meal like the chicken taco bowls—cookies for dessert, slow cooker magic for dinner. It’s a balance of effort and reward that works well in my busy kitchen.
Serving & Storage Suggestions
These flower-shaped sugar cookies are best served at room temperature to enjoy the full flavors and the crisp yet tender texture. Arrange them on a pretty platter with a cup of tea or a light, fruity punch for a charming presentation.
If you’re gifting, stack them with parchment paper layers inside an airtight container to keep the icing intact. Store cookies at room temperature for up to 5 days. For longer storage, freeze undecorated cookies in a single layer, wrapped tightly, then decorate after thawing.
To reheat, just bring cookies to room temperature from the fridge or freezer—avoid microwaving as it can soften the icing and change the texture. Flavors tend to mellow after a day or two, so sometimes I like to make these a day ahead to let the vanilla and butter notes really settle in.
Nutritional Information & Benefits
Each cookie (assuming about 24 cookies per batch) contains roughly 150-170 calories, with 7 grams of fat and 20 grams of carbohydrates. While these treats are definitely a sweet indulgence, the use of real butter and natural flavorings means no weird additives here.
The egg whites in the royal icing add protein without fat, and lemon juice brings a small vitamin C boost. If you want to lighten the recipe, swapping half the sugar for a natural sweetener like erythritol (used in my keto stuffed peppers) can help reduce carbs without sacrificing much flavor.
Keep in mind, these cookies contain gluten, dairy, and eggs, so they’re not suitable for everyone. But for most, they fit nicely as an occasional, joyful treat.
Conclusion
Making these perfect flower-shaped sugar cookies with pastel royal icing has become a little ritual I look forward to—something that turns an ordinary day into a gentle celebration. The recipe’s simplicity, combined with the pretty presentation, lets you customize and enjoy the process without stress.
Whether you’re baking for a special occasion or just because, these cookies offer a sweet moment that’s both satisfying and pretty enough to share. I hope you find the same quiet joy in these treats as I have, and maybe—just maybe—they’ll become your go-to recipe for sugar cookies with a floral twist.
Feel free to share your own icing colors or flavor twists in the comments—I’d love to hear how you make these your own!
Frequently Asked Questions
- Can I make the dough ahead of time? Absolutely! The dough can be refrigerated for up to 3 days or frozen for up to 3 months. Just thaw in the fridge before rolling out.
- What if I don’t have egg whites for the royal icing? You can use pasteurized powdered meringue powder mixed with water as a safe alternative.
- How do I fix royal icing that’s too runny? Add a little more powdered sugar, a tablespoon at a time, until it thickens to your desired consistency.
- Can I use liquid food coloring instead of gel? It’s better to use gel coloring to avoid thinning the icing and affecting its drying quality.
- What’s the best way to store decorated cookies? Store them in an airtight container at room temperature, layered with parchment paper, and keep them away from humidity to preserve the icing.
Pin This Recipe!
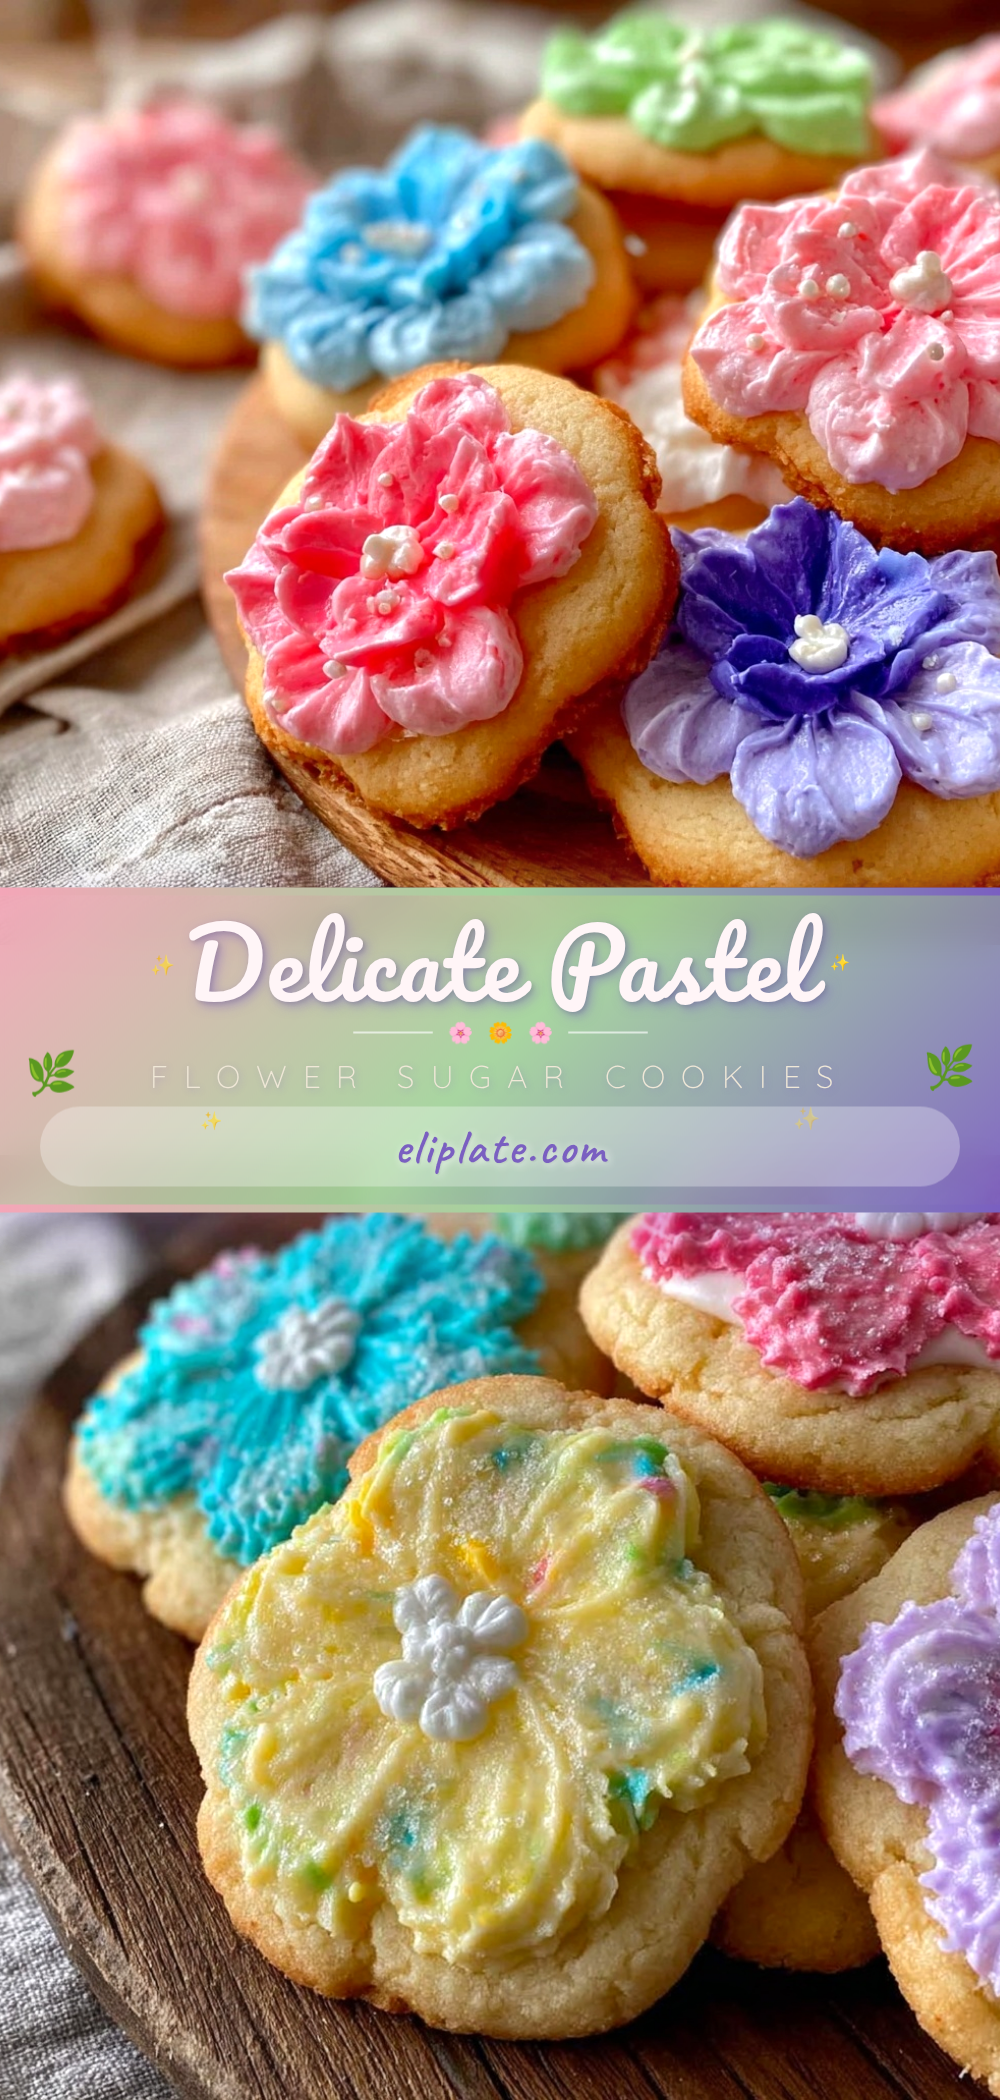
Perfect Flower-Shaped Sugar Cookies Recipe with Easy Pastel Royal Icing Tutorial

Delicate flower-shaped sugar cookies topped with smooth pastel royal icing, offering a soft yet crisp bite and a charming presentation perfect for special occasions.
- Prep Time: 15 minutes
- Cook Time: 10 minutes
- Total Time: 1 hour 25 minutes
- Yield: 24 cookies 1x
- Category: Dessert
- Cuisine: American
Ingredients
- 2 ¾ cups (350 g) all-purpose flour (for gluten-free option, use 1:1 gluten-free baking flour)
- 1 teaspoon baking powder (optional)
- ½ teaspoon salt
- 1 cup (225 g) unsalted butter, softened (European-style recommended)
- 1 ½ cups (300 g) granulated sugar
- 1 large egg, room temperature
- 2 teaspoons pure vanilla extract (or almond extract)
- 2 tablespoons whole milk (or any dairy-free milk)
- 3 cups (360 g) powdered sugar, sifted
- 2 large egg whites or 4 tablespoons meringue powder mixed with 6 tablespoons water (pasteurized egg whites preferred)
- ½ teaspoon lemon juice
- Gel food coloring in pastel shades (soft pink, lavender, mint, pale yellow)
- Optional: ¼ teaspoon vanilla or almond extract for icing flavor boost
Instructions
- Mix the dry ingredients: whisk together flour, baking powder, and salt in a medium bowl; set aside.
- Cream butter and sugar: beat softened butter with granulated sugar on medium speed until light and fluffy, about 3-4 minutes.
- Add egg and vanilla extract; beat until combined, scraping down sides.
- Gradually add flour mixture in three parts, mixing on low speed just until combined; avoid overmixing.
- Stir in milk to bring dough together; if too wet, add flour a tablespoon at a time.
- Shape dough into two discs, wrap in plastic wrap, and refrigerate for at least 1 hour or overnight.
- Preheat oven to 350°F (175°C). Roll out one dough disc on lightly floured surface to ¼-inch thickness.
- Cut dough with flower-shaped cookie cutters and transfer shapes to parchment-lined baking sheet.
- Chill cut cookies on baking sheet for 10-15 minutes before baking.
- Bake cookies for 8-10 minutes until edges start to turn golden but centers remain pale and soft.
- Cool cookies on baking sheet for 5 minutes, then transfer to wire rack to cool completely.
- Prepare royal icing: whisk powdered sugar with egg whites (or meringue powder mixture) and lemon juice until glossy and stiff peaks form, about 7-10 minutes.
- Divide icing into bowls and tint with gel food coloring to pastel shades.
- Fill piping bags fitted with small round tips; outline cookies with thicker icing border, then flood centers with thinner icing.
- Use a toothpick or scribe tool to smooth bubbles and create petal details.
- Let decorated cookies dry at room temperature for several hours or overnight until icing hardens before stacking or storing.
Notes
Chill dough twice (before rolling and after cutting) to keep shapes crisp and prevent puffing. Use gel food coloring to avoid thinning icing. Keep icing bowls covered with a damp cloth to prevent drying. Thin icing with water gradually if too thick during decorating. Let icing dry fully before stacking or packaging.
Nutrition
- Serving Size: 1 cookie
- Calories: 160
- Sugar: 14
- Sodium: 70
- Fat: 7
- Saturated Fat: 4
- Carbohydrates: 20
- Protein: 1
Keywords: sugar cookies, flower-shaped cookies, royal icing, pastel cookies, easy sugar cookies, cookie decorating, baking tutorial