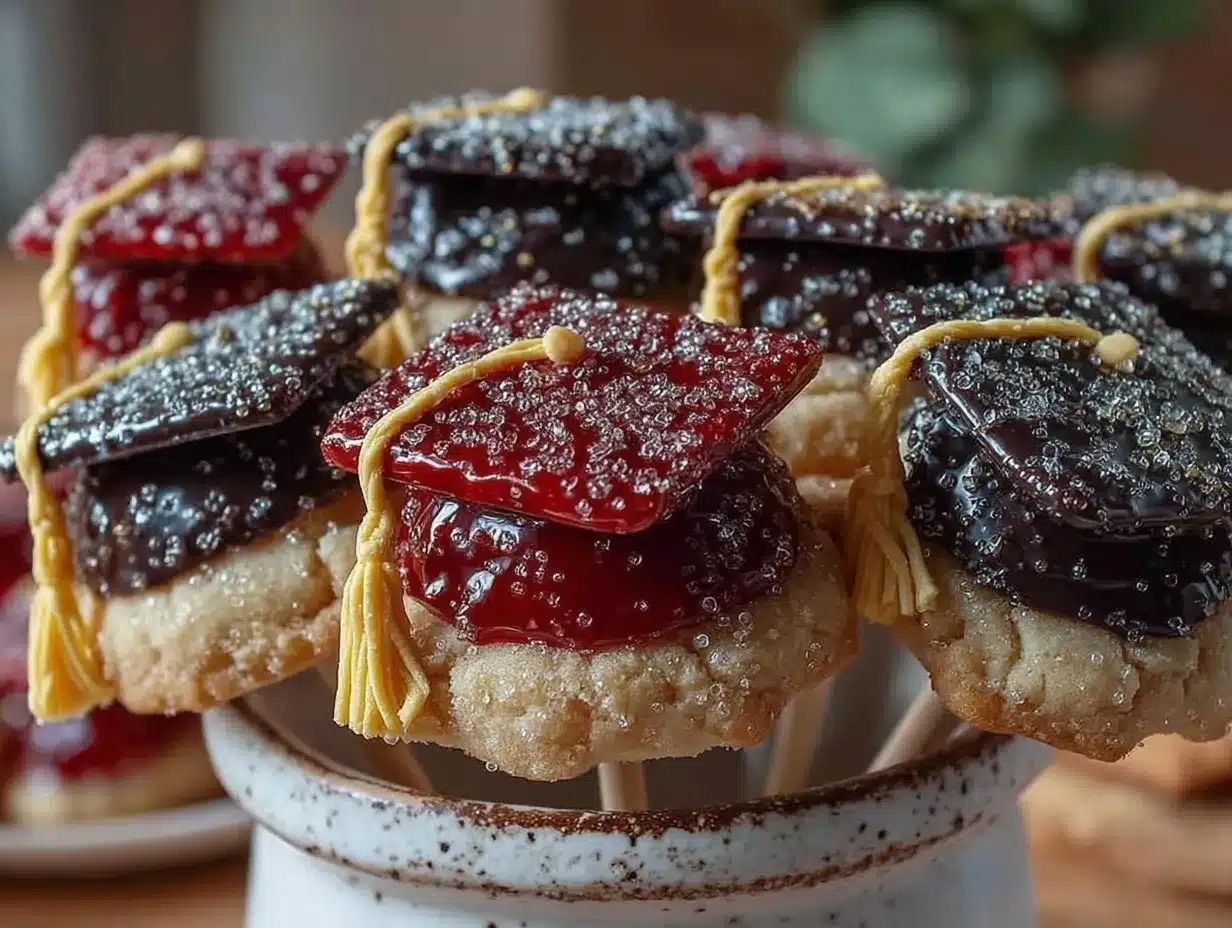
“Hey, can you make those cookie pops with the tassels again?” That text popped up just days before my niece’s graduation party, and honestly, I wasn’t sure if I still had the magic touch. The first time I stumbled onto this idea, it was a total happy accident—I was scrambling to throw together a last-minute treat with whatever I had on hand (and no fancy tools). I figured, why not combine classic sugar cookies with a playful twist for the occasion? Turns out, those graduation cookie pops with school colors and tassels quickly became the star of the dessert table.
What really sticks with me about this recipe is how those simple, sweet pops can carry so much meaning—each little cookie, dressed up with colored icing and a handmade tassel, feels like a tiny celebration of achievement. I kept making them over and over that week, testing different color combos, tweaking the icing consistency, and perfecting the tassel design. They’re not just cookies; they’re keepsakes in edible form.
Now, whenever I think about graduation season, I find myself quietly smiling at the memory of those joyful faces, the clink of lemonade glasses, and the unmistakable scent of freshly baked sugar cookies mingling with the excitement in the air. These cookie pops aren’t just a sweet treat—they’re a little moment of pride you can hold in your hand.
Why You’ll Love This Recipe
Trust me, if you’re looking for a graduation treat that’s both fun and meaningful, this recipe hits the spot. After making these cookie pops for several celebrations, here’s why I’m convinced they should be your go-to:
- Quick & Easy: You can whip these up in about 1.5 hours, including baking and decorating—perfect for last-minute party prep or a weekend project with the kids.
- Simple Ingredients: Nothing fancy here—just pantry staples like flour, sugar, butter, and a few decorating essentials. No need to run all over town for specialty supplies.
- Perfect for Graduation Parties: Whether you’re celebrating at home, school, or a casual backyard gathering, these cookie pops add a festive flair that’s all about school spirit.
- Crowd-Pleaser: From little cousins to grandparents, everyone loves a treat on a stick. Plus, the personalized school colors and tassels make them extra special.
- Unbelievably Delicious: The buttery sugar cookie base paired with smooth royal icing creates a delightful texture and taste combo that’s hard to resist.
What sets this recipe apart is the attention to detail in the decoration—using a simple piping technique to create delicate tassels and incorporating school colors makes a big difference. It’s not just about baking cookies; it’s about crafting a little celebration on a stick. Honestly, this recipe is the kind of treat that makes you pause after the first bite, smile, and think, “Yep, this is exactly what a graduation party deserves.”
What Ingredients You Will Need
This recipe uses simple, wholesome ingredients to deliver bold flavor and that satisfying sugar cookie texture without any fuss. Most are pantry staples, and you can easily swap a few to fit preferences or dietary needs.
- For the Sugar Cookies:
- 2 ½ cups (310 g) all-purpose flour (for a softer cookie, I sometimes use half all-purpose, half pastry flour)
- 1 teaspoon baking powder
- ½ teaspoon salt
- ¾ cup (170 g) unsalted butter, softened (I prefer Plugrá for its rich flavor)
- 1 cup (200 g) granulated sugar
- 1 large egg, room temperature
- 1 teaspoon pure vanilla extract
- For the Royal Icing:
- 3 cups (360 g) powdered sugar, sifted
- 2 tablespoons meringue powder
- 5-6 tablespoons warm water (adjust for desired consistency)
- Gel food coloring in school colors (I recommend AmeriColor gels for vivid, vibrant shades)
- For Decoration:
- Wooden lollipop sticks or cake pop sticks
- Edible gold or silver glitter dust (optional, for a little sparkle)
- Small piping bags or zip-top bags with tiny cut corners
Substitution tips: Use almond flour for a gluten-free twist, but expect a slightly different texture. For a dairy-free version, swap butter with vegan margarine or coconut oil and ensure your icing ingredients are egg-free.
Equipment Needed
- Mixing bowls (medium and large sizes)
- Electric hand mixer or stand mixer (makes creaming butter and sugar much easier)
- Rolling pin (a non-stick or silicone one works best to avoid excess flour)
- Cookie cutters in circle or graduation cap shapes (your choice; a simple round cutter works great for pops)
- Baking sheets lined with parchment paper or silicone baking mats (I swear by silicone mats for even baking)
- Cooling racks to let cookies rest before decorating
- Small piping tips (size #1 or #2 works well for tassels and fine details)
- Measuring cups and spoons
- Wooden lollipop or cake pop sticks (available at most craft stores)
If you don’t have a stand mixer, a sturdy hand mixer will do the job just fine. For piping, if you’re new to decorating, simple zip-top bags with a snipped corner are a budget-friendly alternative to fancy bags and tips. Just remember to keep the icing consistency right for smooth piping—more on that later.
Preparation Method
- Mix Dry Ingredients: In a medium bowl, whisk together 2 ½ cups (310 g) flour, 1 teaspoon baking powder, and ½ teaspoon salt. Set aside. This keeps the rising agent and salt evenly distributed.
- Cream Butter and Sugar: Using an electric mixer, beat ¾ cup (170 g) softened unsalted butter with 1 cup (200 g) granulated sugar on medium speed until light and fluffy—about 3 to 4 minutes. The texture should be pale and airy, which helps the cookies stay tender.
- Add Egg and Vanilla: Beat in 1 large room-temperature egg and 1 teaspoon vanilla extract until fully combined. The mixture might look slightly curdled—that’s normal.
- Incorporate Dry Ingredients: Gradually add the dry ingredient mix, beating on low speed just until the dough comes together. Avoid overmixing to keep cookies tender. The dough should be soft but not sticky.
- Chill Dough: Wrap the dough in plastic wrap and chill for at least 1 hour, or up to overnight. This step helps the dough firm up for cleaner cookie shapes and prevents spreading while baking.
- Preheat Oven and Prepare Baking Sheets: Set oven to 350°F (175°C). Line baking sheets with parchment paper or silicone mats.
- Roll and Cut Dough: On a lightly floured surface, roll dough to about ¼ inch (6 mm) thickness. Use a round or graduation cap cookie cutter to cut out shapes. Insert a wooden stick halfway into each cookie, pressing gently so it stays secure. If the dough is too soft, return to the fridge for 10 minutes.
- Bake Cookies: Arrange cookie pops on baking sheets about 2 inches (5 cm) apart. Bake for 10-12 minutes until edges are just starting to turn golden. Watch closely to avoid overbaking; cookies should be pale with a hint of color.
- Cool Completely: Remove from oven and let cookies cool on the baking sheet for 5 minutes, then transfer to cooling racks. Cooling fully is critical before decorating to avoid icing melt.
- Prepare Royal Icing: In a clean bowl, combine 3 cups (360 g) powdered sugar, 2 tablespoons meringue powder, and 5 tablespoons warm water. Beat on medium speed until stiff peaks form, about 5 minutes. Adjust water dropwise for piping consistency—thicker for details, thinner for flooding.
- Color and Decorate: Divide icing into small bowls and tint with gel colors matching the school palette. Use piping bags to outline cookie edges, flood center with thinner icing, and pipe tiny tassel details on top. Let cookies dry 4-6 hours or overnight.
- Add Final Touches: If desired, dust with edible glitter or add small accents like stars or initials with contrasting icing. These little touches bring the pops to life.
Pro tip: If your icing is too runny, add a little more powdered sugar; if too stiff, a drop or two of water will loosen it. And, don’t rush drying—patience pays off with smooth, crack-free icing.
Cooking Tips & Techniques
One of the biggest challenges with cookie pops is getting the sticks to stay put. I learned the hard way that inserting sticks before baking is the way to go—just gently press them halfway through the dough. This method stops the stick from sliding out during baking, and the cookie bakes around it like a charm.
When it comes to royal icing, consistency is king. Too thick and it’s a struggle to pipe; too thin and it runs off the cookie. I keep two consistencies on hand: one thick for outlining and tassel details, one thinner for flooding the cookie surface. Mixing small batches helps avoid waste.
Another tip: let your cookies cool fully before decorating. I’ve had plenty of icing melt-offs when impatience took over.
For multitasking, I usually bake all cookies first, then switch gears to icing prep while cookies cool. This way, I’m not waiting around and can keep the flow going, especially when making large batches.
Also, practice your tassels on parchment paper before piping on cookies—it helps build confidence and keeps mistakes off the final pops.
Variations & Adaptations
Want to mix things up? Here are a few ways to customize your graduation cookie pops:
- Flavor Twist: Add lemon zest or almond extract to the dough for a subtle flavor boost. I once tried orange zest, which added a fresh zing that was surprisingly delicious.
- Seasonal Theme: Instead of school colors, match the tassel and icing to seasonal palettes—think fall orange and brown for autumn graduations or pastel shades for spring ceremonies.
- Dietary Needs: Substitute all-purpose flour with almond or oat flour for gluten-free options. For dairy-free, swap butter with coconut oil and use egg replacer or flax egg.
- Shape Variations: Beyond circles or caps, try star-shaped cookies with tassels or mini diplomas using rectangular cutters for a creative twist.
- Cooking Method: Though baking is preferred, some folks have experimented with air fryer baking for smaller batches, adjusting time to about 8-10 minutes at 320°F (160°C). Just watch closely!
Personally, I once made a batch with a chocolate dough base using cocoa powder, which paired beautifully with white and gold icing for a classy look. It was a hit at my nephew’s graduation party.
Serving & Storage Suggestions
These cookie pops are best served at room temperature to enjoy the full buttery flavor and smooth icing texture. Arrange them standing upright in a decorative vase or foam block to show off the tassels and colors—presentation matters, you know?
Pair them with sparkling lemonade, iced tea, or a light punch to balance the sweetness. On the savory side, these pops make a fun contrast when served alongside chicken taco bowls or other casual finger foods.
For storage, keep cookie pops in an airtight container at room temperature for up to 3 days. If you need more time, freezing is an option—wrap individually in plastic wrap and place in a freezer-safe container. Thaw at room temperature before serving.
Reheating isn’t recommended since it can soften the icing and make the sticks soggy. Flavors actually mellow and develop a little more depth after a day or two, so if you can wait, that’s even better.
Nutritional Information & Benefits
Each cookie pop contains approximately 150-180 calories, depending on size and icing amount. They’re a sweet treat best enjoyed in moderation, but the simple ingredients mean you’re not loading up on artificial additives or preservatives.
The sugar cookie base provides quick energy, and using real butter adds a touch of richness without artificial fats. The egg brings protein and structure, while the powdered sugar and meringue powder in the icing keep it light and airy.
For those mindful of allergens, note that this recipe contains gluten, dairy, and egg. However, with substitutions like almond flour and dairy-free butter, it can be adapted for gluten-free and dairy-free diets.
From my experience, the joy these cookie pops bring at celebrations is a kind of wellness on its own—sharing sweet moments with loved ones is priceless.
Conclusion
In the end, the perfect graduation cookie pops with school colors and tassels are more than just desserts. They’re sweet symbols of accomplishment, crafted with care and a bit of fun. Whether you’re baking for your own graduate or helping a friend celebrate, this recipe offers a simple way to add personality and charm to the party table.
Feel free to tweak the colors, shapes, or flavors to make them your own. I love how these little pops bring smiles and spark conversations, and I hope they do the same for you.
If you give this recipe a try, I’d love to hear about your decorating adventures or any creative twists you discover—sharing those moments makes it all the sweeter.
Here’s to making celebrations tastier, one cookie pop at a time!
FAQs
- Can I make the cookie dough ahead of time? Yes! The dough can be wrapped and refrigerated for up to 48 hours before rolling and cutting.
- What if I don’t have lollipop sticks? You can use sturdy wooden skewers trimmed to size or even sturdy paper straws as a fun alternative.
- How do I fix royal icing that’s too runny? Add a little more powdered sugar, a tablespoon at a time, until it thickens to the desired consistency.
- Can I use store-bought sugar cookies instead? You can, but homemade dough ensures the best texture and sturdiness for holding the sticks and icing.
- How long do decorated cookie pops last? Stored in an airtight container at room temperature, they stay fresh for about 3 days. Avoid refrigeration as it can cause the icing to sweat.
Pin This Recipe!
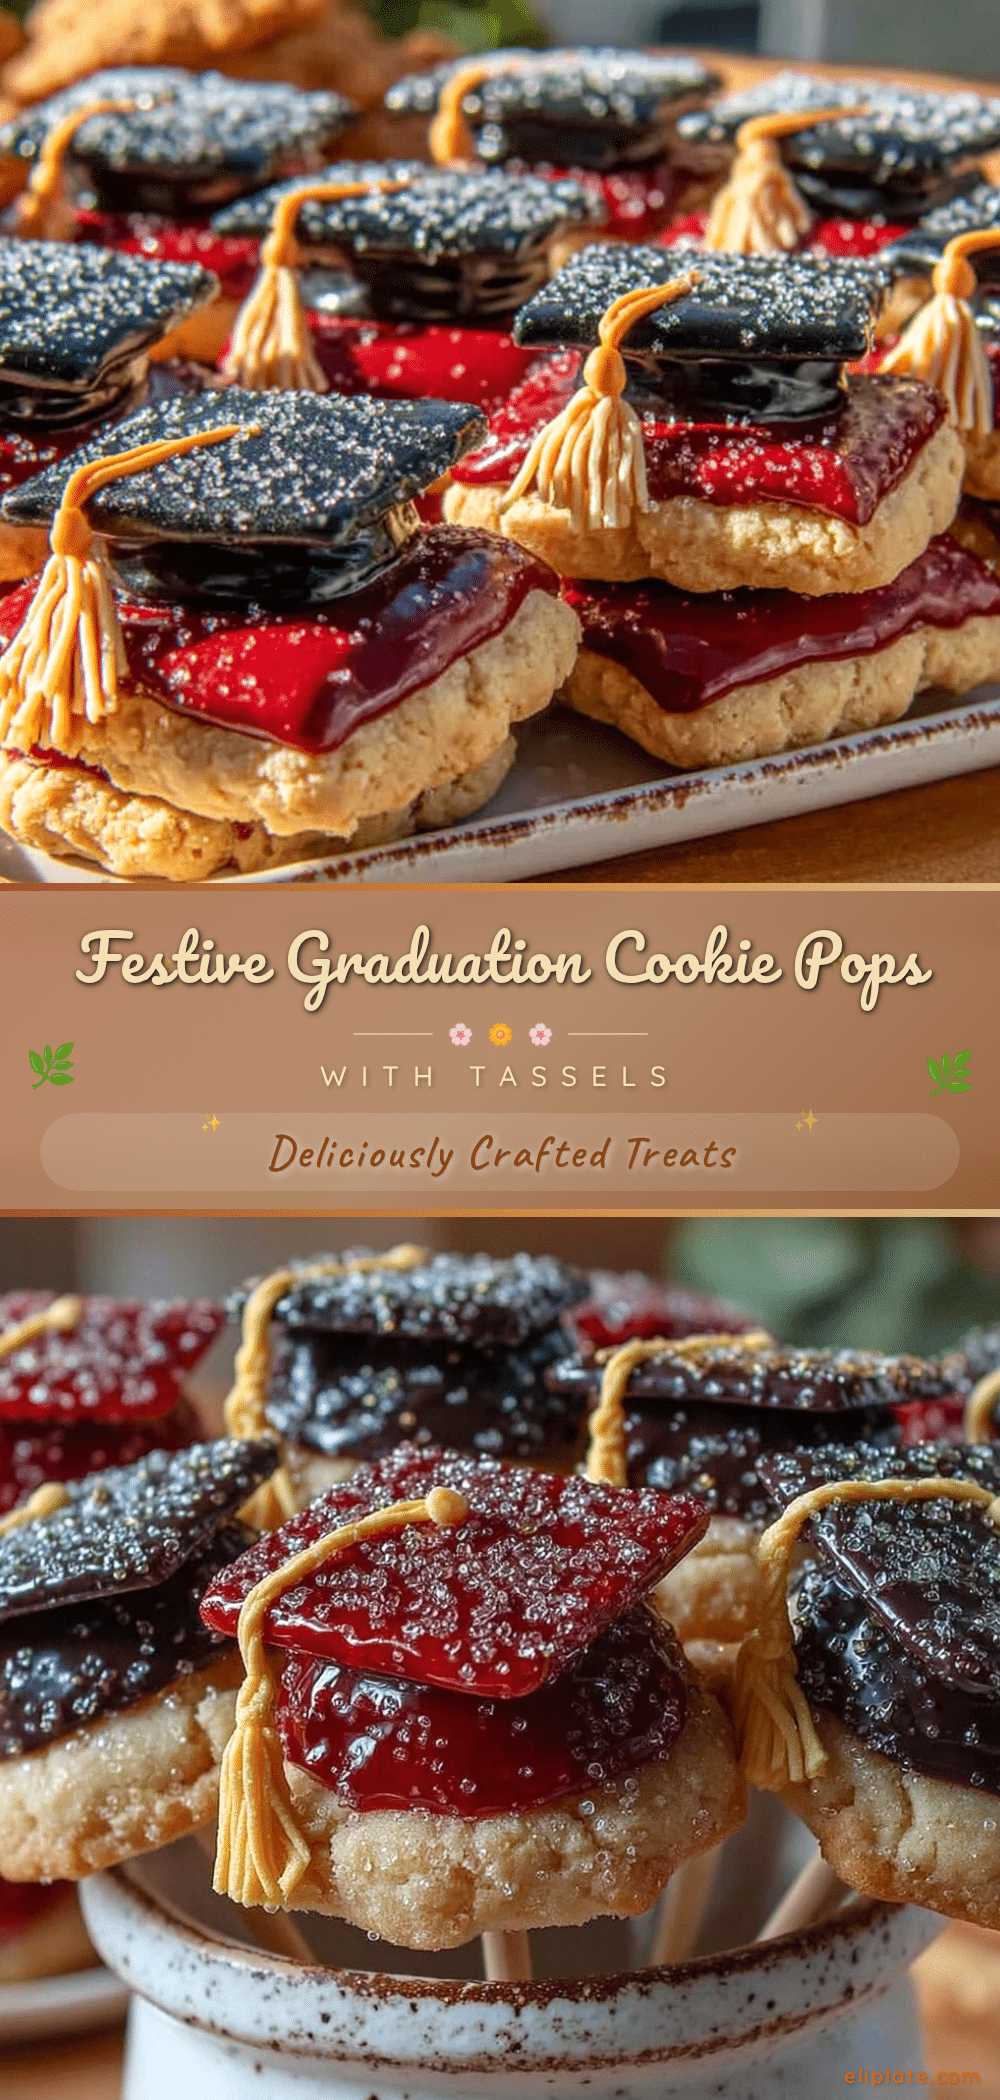
Perfect Graduation Cookie Pops Recipe 5 Easy Steps with School Colors and Tassels
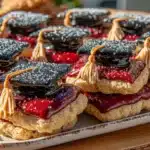
Celebrate graduation with these fun and meaningful cookie pops featuring buttery sugar cookies decorated with royal icing in school colors and delicate tassels. Quick to make and perfect for parties, these treats are both festive and delicious.
- Prep Time: 20 minutes
- Cook Time: 12 minutes
- Total Time: 1 hour 45 minutes
- Yield: 24 cookie pops 1x
- Category: Dessert
- Cuisine: American
Ingredients
- 2 ½ cups (310 g) all-purpose flour (or half all-purpose, half pastry flour for softer cookies)
- 1 teaspoon baking powder
- ½ teaspoon salt
- ¾ cup (170 g) unsalted butter, softened
- 1 cup (200 g) granulated sugar
- 1 large egg, room temperature
- 1 teaspoon pure vanilla extract
- 3 cups (360 g) powdered sugar, sifted
- 2 tablespoons meringue powder
- 5–6 tablespoons warm water (adjust for desired consistency)
- Gel food coloring in school colors
- Wooden lollipop sticks or cake pop sticks
- Edible gold or silver glitter dust (optional)
- Small piping bags or zip-top bags with tiny cut corners
Instructions
- Mix dry ingredients: whisk together flour, baking powder, and salt in a medium bowl; set aside.
- Cream butter and sugar: beat softened butter and granulated sugar on medium speed until light and fluffy, about 3-4 minutes.
- Add egg and vanilla: beat in the egg and vanilla extract until fully combined.
- Incorporate dry ingredients: gradually add dry mix, beating on low speed just until dough forms; avoid overmixing.
- Chill dough: wrap dough in plastic wrap and chill for at least 1 hour or up to overnight.
- Preheat oven to 350°F (175°C) and line baking sheets with parchment paper or silicone mats.
- Roll and cut dough: roll dough to ¼ inch thickness, cut shapes with cookie cutters, and insert wooden sticks halfway into each cookie.
- Bake cookies: place cookie pops 2 inches apart on baking sheets and bake for 10-12 minutes until edges just start to turn golden.
- Cool completely: let cookies cool on baking sheet for 5 minutes, then transfer to cooling racks.
- Prepare royal icing: combine powdered sugar, meringue powder, and warm water; beat until stiff peaks form, adjusting water for piping consistency.
- Color and decorate: divide icing, tint with gel colors, pipe outlines and flood centers, then pipe tassel details; let dry 4-6 hours or overnight.
- Add final touches: optionally dust with edible glitter or add small accents with contrasting icing.
Notes
Insert sticks halfway into dough before baking to keep them secure. Maintain two consistencies of royal icing: thick for details and tassels, thin for flooding. Let cookies cool completely before decorating to prevent icing melt. Practice tassels on parchment paper before piping on cookies. Dough can be refrigerated up to 48 hours before rolling. Store cookie pops in airtight container at room temperature for up to 3 days; freezing is possible with proper wrapping.
Nutrition
- Serving Size: 1 cookie pop
- Calories: 165
- Sugar: 16
- Sodium: 90
- Fat: 7
- Saturated Fat: 4.5
- Carbohydrates: 25
- Fiber: 0.3
- Protein: 2
Keywords: graduation cookie pops, sugar cookies, royal icing, school colors, tassels, party treats, easy cookie recipe