I did not trust a layered dessert that wasn’t served in a glass. It felt like a gamble—too much potential for sogginess, for flavors to blur into one sad, beige mess. So when my neighbor Linda showed up to our annual block party barbecue with a massive glass bowl full of red, white, and blue layers, I smiled politely and mentally prepared myself to take a tiny, diplomatic scoop. That first bite, though? It stopped me mid-conversation. The cake was still tender, the cream was light and not overly sweet, and the berries—fresh and tart—cut through everything perfectly. I went back for seconds. Then thirds. By the time the fireworks started, the bowl was scraped clean and I was already asking for the recipe.
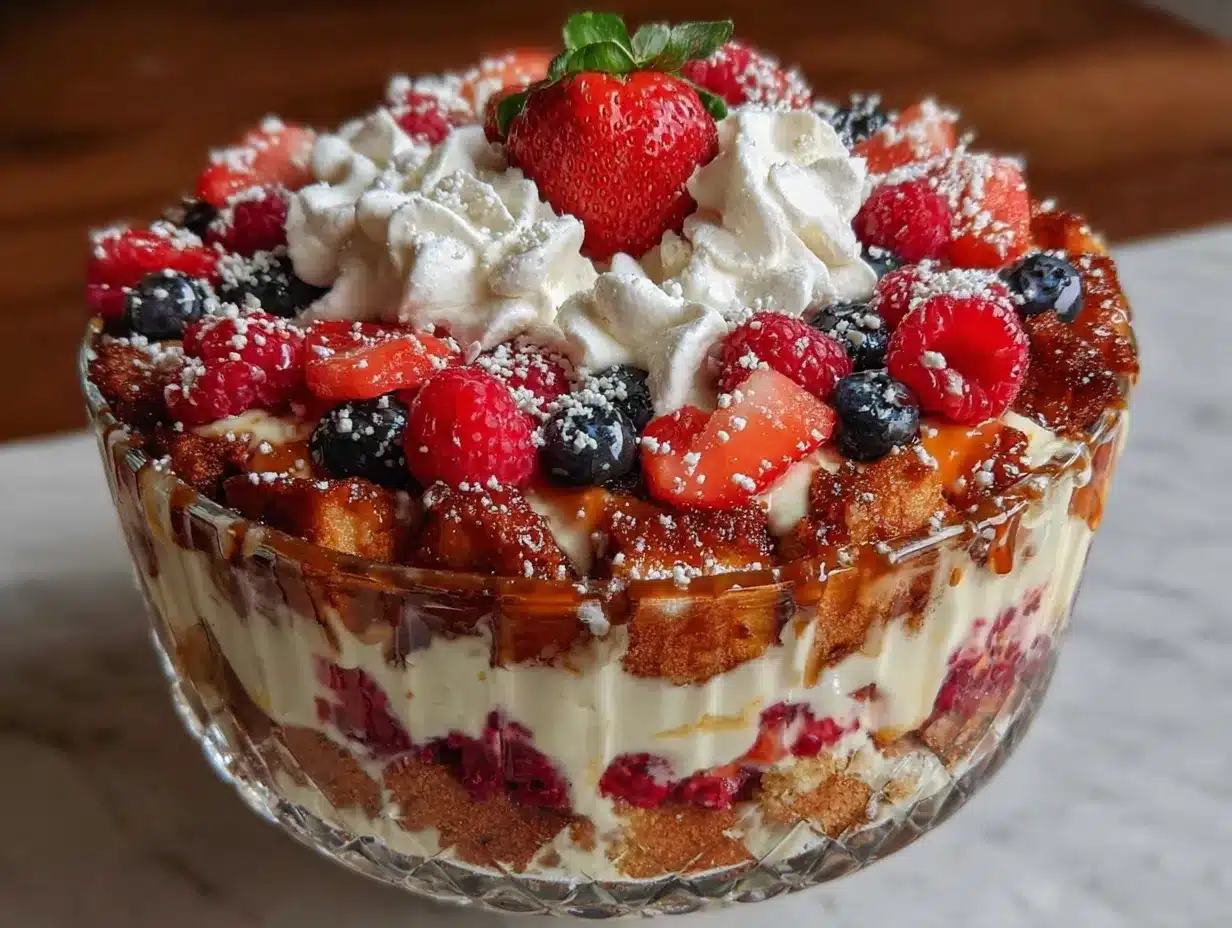
This Perfect Red White & Blue Berry Trifle for Labor Day is that dessert. It’s the one that disappears before the burgers are even off the grill, the one people stand around eating with their plastic forks, nodding in approval. It’s deceptively simple—store-bought pound cake, a quick homemade vanilla pudding, and a mountain of fresh berries layered into something that looks and tastes like you spent all day on it. Honestly, you don’t even need a special occasion. But for Labor Day, with the red, white, and blue theme and the last taste of summer berries, it just feels right. This is the dessert that turned me into a trifle believer, and I think it’ll do the same for you.
Why You’ll Love This Recipe
This isn’t just another pretty dessert. It’s the kind of recipe that earns a permanent spot in your summer rotation because it actually delivers on every single promise. I’ve tested it at family gatherings, potlucks, and quiet backyard dinners, and it never fails to get that happy, surprised look from people who take their first bite.
- Quick & Easy: No baking required. You just assemble the components—store-bought cake, a stovetop pudding, and fresh fruit—and layer them in a bowl. Total active time is about 20 minutes, plus a couple of hours to chill.
- Simple Ingredients: Pound cake, milk, sugar, vanilla, egg yolks, cornstarch, heavy cream, and fresh berries. That’s it. No weird extracts or hard-to-find specialty items.
- Perfect for Labor Day: The red, white, and blue layers are a natural fit for the holiday, but honestly, this trifle works for the Fourth of July, Memorial Day, or any summer gathering where you want something festive without the fuss.
- Crowd-Pleaser: Kids love the creamy sweetness, adults appreciate the fresh berries and light texture, and everyone goes back for seconds. I’ve watched people who “don’t do desserts” take a second helping.
- Unbelievably Delicious: The combination of soft, vanilla-soaked cake, velvety pudding, billowy whipped cream, and tart, juicy berries is pure comfort. It’s not trying to be fancy—it’s just really, really good.
What makes this version different is the technique. Instead of using instant pudding mix (which can be grainy and overly sweet), you make a quick stovetop vanilla pudding. It takes maybe 10 minutes and the texture is silky and luxurious. The whipped cream is stabilized with a little powdered sugar so it holds its shape for hours, even on a warm day. And the berries? I toss them with a tiny bit of sugar and lemon zest to draw out their juices and make every layer pop. It’s a small effort for a massive payoff.
This is the dessert you bring when you want to impress but also want to actually enjoy the party. It sits beautifully on a buffet table, serves a crowd, and tastes even better the next day. Honestly, what’s not to love?
What Ingredients You Will Need
This recipe uses simple, grocery-store ingredients that come together to create something genuinely special. The key is using good-quality vanilla and the freshest berries you can find—especially since they’re the star of the show.
- For the Vanilla Pudding:
- 2 cups whole milk (adds richness and a silky texture)
- 1/2 cup granulated sugar
- 3 large egg yolks (room temperature, for smooth emulsification)
- 3 tablespoons cornstarch (the thickener, gives that classic pudding consistency)
- 1 teaspoon vanilla bean paste or pure vanilla extract (vanilla bean paste gives those lovely specks, but extract works beautifully too)
- Pinch of salt
- For the Whipped Cream:
- 2 cups heavy cream, cold (I prefer Horizon Organic or Organic Valley for consistent whipping)
- 3 tablespoons powdered sugar (adds sweetness and stability)
- 1 teaspoon vanilla extract
- For the Berry Layers:
- 2 cups fresh strawberries, hulled and sliced (look for deep red, fragrant berries)
- 2 cups fresh blueberries (wild blueberries are sweeter and smaller, perfect for layering)
- 1 cup fresh raspberries (adds a beautiful pop of red and a slightly tart edge)
- 2 tablespoons granulated sugar (to macerate the berries and draw out their juices)
- 1 teaspoon lemon zest (brightens the berry flavor beautifully)
- For the Cake Layer:
- 1 store-bought pound cake (about 10-12 ounces), cut into 1-inch cubes (I use Sara Lee or the bakery section at my grocery store—just avoid anything with a hard, dry crust)
- 1/4 cup milk or cream (to brush on the cake cubes, softens them without making them soggy)
Ingredient Tips & Substitutions: If you’re dairy-free, you can substitute full-fat oat milk for the whole milk in the pudding (though the texture will be slightly less rich) and use a dairy-free whipped topping. For a gluten-free version, make sure your pound cake is certified gluten-free—most store-bought ones aren’t, but you can often find them in the freezer section. If strawberries aren’t in season, use all blueberries and raspberries, or swap in blackberries for a deeper flavor. And if you want to go all out, try a lemon pound cake instead of vanilla—the citrus notes pair beautifully with the berries and cream.
Equipment Needed
You don’t need a lot of fancy tools for this recipe, which is one of the reasons I love it. Here’s what you’ll need:
- Large glass trifle bowl or deep serving dish: A clear glass bowl (about 3-4 quarts) lets the beautiful layers shine. If you don’t have one, a large glass baking dish works fine—it just won’t have the same visual impact.
- Medium saucepan: For making the vanilla pudding. A heavy-bottomed pan helps prevent scorching.
- Whisk: A good quality whisk is essential for a lump-free pudding. I prefer a silicone-coated one to protect my non-stick pans.
- Large mixing bowls: One for the pudding, one for whipping the cream, and one for the berries.
- Electric hand mixer or stand mixer: For whipping the cream to stiff peaks. You can do it by hand with a whisk, but your arm will get a workout.
- Rubber spatula: For folding the whipped cream into the pudding and for scraping every last bit of goodness.
- Pastry brush: For brushing the milk onto the cake cubes. A spoon works in a pinch.
- Chef’s knife and cutting board: For slicing strawberries and cubing the pound cake.
Budget-Friendly Alternatives: No trifle bowl? A large glass salad bowl or even a clear plastic punch bowl works perfectly. No electric mixer? A whisk and some elbow grease will get you there—just make sure the cream is very cold. And if you don’t have a pastry brush, just drizzle the milk over the cake cubes with a spoon.
Preparation Method
- Make the Vanilla Pudding (10 minutes + cooling time): In a medium saucepan, whisk together the sugar, cornstarch, and salt. In a separate bowl, whisk the egg yolks, then gradually whisk in about 1/2 cup of the milk until smooth. Pour the egg mixture into the saucepan with the dry ingredients and whisk to combine. Place the saucepan over medium heat and gradually whisk in the remaining 1 1/2 cups of milk. Cook, whisking constantly, until the mixture thickens and comes to a gentle boil—about 5-7 minutes. You’ll know it’s ready when it’s thick enough to coat the back of a spoon and you can see the whisk marks. Remove from heat and stir in the vanilla bean paste and a pinch of salt. Pour the pudding through a fine-mesh strainer into a clean bowl to catch any lumps (this step is optional but gives you the silkiest texture). Press a piece of plastic wrap directly onto the surface of the pudding to prevent a skin from forming. Let it cool at room temperature for 20 minutes, then refrigerate for at least 1 hour until completely chilled.
- Prepare the Berries (5 minutes): While the pudding chills, combine the sliced strawberries, blueberries, and raspberries in a large bowl. Add the 2 tablespoons of sugar and the lemon zest. Gently toss everything together with a rubber spatula. Let the berries sit at room temperature for about 15-20 minutes, stirring occasionally. You’ll notice they start releasing their beautiful, ruby-red juices—this is exactly what you want. The sugar draws out the natural sweetness and creates a syrupy base that will soak into the cake layers.
- Whip the Cream (5 minutes): In a large mixing bowl (or the bowl of a stand mixer), combine the cold heavy cream, powdered sugar, and vanilla extract. Beat on medium-high speed until soft peaks form—about 2-3 minutes with an electric mixer. Be careful not to over-whip; you want the cream to be billowy and soft, not stiff and buttery. Set aside in the refrigerator while you assemble the other components.
- Prepare the Cake (5 minutes): Cut the pound cake into 1-inch cubes. You should have about 4-5 cups of cubes. Place them in a shallow dish or on a baking sheet. Using a pastry brush, lightly brush each cube with a little milk or cream. This step is crucial—it softens the cake just enough so it absorbs the berry juices and pudding without turning into mush. Don’t soak them; just a light brush on each side.
- Assemble the Trifle (10 minutes): Now for the fun part. Take your trifle bowl and start layering. Begin with a single layer of cake cubes—about 1/3 of the total. Spread them evenly across the bottom of the bowl. Next, spoon about 1/3 of the macerated berries over the cake, including some of the juices. Then, spread about 1/3 of the chilled pudding over the berries. Finally, add a layer of whipped cream—about 1/3 of the total. Repeat these layers two more times: cake, berries, pudding, whipped cream. End with a final layer of whipped cream on top. Reserve a few berries for garnish.
- Chill and Garnish (2 hours minimum): Cover the trifle loosely with plastic wrap and refrigerate for at least 2 hours, or up to 8 hours. This resting time is non-negotiable—it allows the flavors to meld and the cake to absorb all that fruity, creamy goodness. Just before serving, garnish the top with the reserved berries. I like to arrange them in a pattern: a ring of blueberries, then raspberries, then sliced strawberries in the center. It looks stunning and says “I made an effort” without actually being hard.
- Serve and Enjoy: Spoon the trifle into individual serving bowls or glasses, making sure each serving gets a bit of every layer. The contrast of textures—soft cake, creamy pudding, light whipped cream, and juicy berries—is pure magic. Serve chilled.
Cooking Tips & Techniques
I’ve made this trifle at least a dozen times, and I’ve learned a few things the hard way. Here are my best tips to make sure yours turns out perfect.
Don’t rush the pudding. The first time I made this, I got impatient and turned the heat up too high. The pudding scorched on the bottom and had a faint burnt taste. Whisk constantly over medium heat and be patient. When it starts to thicken, it happens fast, so stay with it. If you see small lumps forming, don’t panic—just whisk vigorously and they’ll usually smooth out. And always strain the pudding through a fine-mesh sieve. It takes 30 seconds and guarantees a silky texture.
Macerate the berries properly. This is not a step to skip. The sugar and lemon zest do more than just sweeten the berries—they create a syrup that soaks into the cake layers and adds incredible flavor. Let them sit for at least 15 minutes, and give them a gentle stir halfway through. If your berries are especially tart, you can add an extra tablespoon of sugar. If they’re perfectly ripe and sweet, reduce the sugar to 1 tablespoon.
Stabilize your whipped cream. Nothing ruins a beautiful trifle faster than weeping, deflated whipped cream. The powdered sugar helps stabilize it, but here’s another trick: make sure your cream, bowl, and beaters are all very cold. I pop my mixing bowl and beaters in the freezer for 10 minutes before I start whipping. And don’t over-whip—stop as soon as you see soft, billowy peaks. If you go too far, you’ll end up with butter.
Layer with intention. The way you layer matters. Start with cake on the bottom so it has a chance to absorb the juices from the berries above. Don’t press the cake down—just let it sit naturally. And when you spread the pudding and cream, use the back of a spoon to create an even layer that reaches the edges of the bowl. This is what gives you those beautiful, distinct stripes when you cut into it.
Let it rest. I know it’s tempting to dig in right away, but trust me on this one. The trifle needs at least 2 hours in the fridge to let everything meld together. The cake softens, the flavors deepen, and the texture becomes cohesive. I’ve made it the night before a party and it was even better the next day. Just don’t garnish with the berries until right before serving, or they’ll start to weep and discolor the top layer of cream.
Variations & Adaptations
One of the best things about this trifle is how adaptable it is. Here are some of my favorite variations, all of which I’ve tried and loved.
- Mixed Berry & Lemon Trifle: Swap the vanilla pound cake for a lemon pound cake and add 1 tablespoon of lemon zest to the pudding along with the vanilla. The bright citrus notes cut through the richness and make the berries taste even more vibrant. I made this version for a bridal shower and it was gone in 20 minutes.
- Chocolate & Raspberry Trifle: For the chocolate lovers in your life, use chocolate pound cake (or brownie cubes) and add 2 tablespoons of cocoa powder to the pudding. Use raspberries as your primary berry—their tartness pairs beautifully with the chocolate. Top with shaved dark chocolate and fresh raspberries. This is my personal favorite for a cozy fall gathering.
- Vegan & Dairy-Free Version: Use a vegan pound cake (many store-bought options are accidentally vegan) and substitute the whole milk with full-fat oat milk or canned coconut milk for the pudding. For the whipped cream, use a can of chilled full-fat coconut cream—whip it with powdered sugar and vanilla just like regular cream. The texture is slightly different but still delicious. I’ve served this to both vegan and non-vegan friends and no one complained.
- Grilled Peach & Berry Trifle: This is a late-summer twist that takes advantage of peak peach season. Grill 4 ripe peaches (halved and pitted) over medium heat for about 3 minutes per side, then slice them into wedges. Layer them with the berries and skip the lemon zest—the smoky-sweet peaches add a whole new dimension. I made this for a Labor Day cookout and it was a huge hit.
- Individual Mason Jar Trifles: For a party or picnic, layer the components in 8-ounce mason jars. They’re portable, portion-controlled, and look adorable. Just follow the same layering order and let them chill in the fridge for at least 2 hours. These are perfect for a quick breakfast treat or a grab-and-go dessert.
Serving & Storage Suggestions
This trifle is best served chilled, straight from the refrigerator. The contrast between the cool, creamy layers and the juicy, bright berries is what makes it so satisfying. I like to serve it in a large glass trifle bowl so everyone can see the beautiful layers, but individual glasses or bowls work beautifully for a more formal presentation.
What to Serve With It: This trifle is rich enough to stand on its own, but if you want to round out the dessert table, try pairing it with something simple like grilled peaches with vanilla ice cream or a plate of chocolate-dipped pretzel rods for a salty-sweet contrast. A cup of hot coffee or iced tea is all you need to drink alongside it.
Storage Instructions: Leftover trifle can be covered with plastic wrap and stored in the refrigerator for up to 2 days. The texture will soften as it sits—the cake will become very tender and the cream will start to absorb some of the berry juices. Some people actually prefer it this way, but if you want to keep it fresher longer, store the components separately and assemble just before serving. If you do have leftovers, don’t freeze them—the cream will separate and the texture will be unpleasant.
Reheating: This is a cold dessert, so there’s no reheating involved. But if you’ve stored it in the fridge and the cake has become very soft, let it sit at room temperature for about 10 minutes before serving. It takes the edge off the chill and lets the flavors come back to life.
Nutritional Information & Benefits
Let’s be honest—this is a dessert, not a health food. But that doesn’t mean it’s devoid of nutritional value. Here’s an approximate breakdown per serving (based on 12 servings):
- Calories: 380-420
- Fat: 22g
- Saturated Fat: 13g
- Carbohydrates: 45g
- Sugar: 32g
- Protein: 6g
- Fiber: 3g
- Sodium: 220mg
Health Benefits: The fresh berries are the real stars here from a nutritional standpoint. Blueberries and raspberries are packed with antioxidants, particularly anthocyanins, which have been linked to heart health and reduced inflammation. Strawberries are an excellent source of vitamin C—a single serving provides about 50% of your daily needs. The dairy in the pudding and cream provides calcium and protein, which help with bone health and satiety. And while the pound cake and sugar aren’t exactly health foods, using real, whole ingredients means you’re avoiding the artificial flavors, preservatives, and high-fructose corn syrup found in many store-bought desserts.
Dietary Considerations: This recipe contains dairy, eggs, and gluten (from the pound cake). For a gluten-free version, use a certified gluten-free pound cake. For a dairy-free version, see the variations section above. The recipe is nut-free, soy-free, and contains no artificial colors or flavors.
Conclusion
This Perfect Red White & Blue Berry Trifle for Labor Day is more than just a pretty dessert—it’s the kind of recipe that brings people together. It’s the dish that gets passed around the table with happy murmurs, the one that sparks conversations about summer berries and family gatherings and the last long weekend before fall. I’ve made it for block parties, backyard barbecues, and quiet dinners with close friends, and every single time, it delivers.
What I love most about this trifle is that it doesn’t require any special skills or fancy equipment. It’s forgiving, adaptable, and always impressive. You can make it ahead of time, you can customize it to your taste, and you can serve it with confidence knowing that everyone will love it. It’s the dessert equivalent of a warm hug—comforting, familiar, and just a little bit special.
So go ahead and make this for your Labor Day gathering. Or make it for a Tuesday night because you deserve something beautiful and delicious. And when you do, I’d love to hear about it. Leave a comment below with your favorite variation, or tag me in your photos if you share them on social media. Happy Labor Day, and happy eating!
Frequently Asked Questions
Can I make this trifle the night before?
Absolutely. In fact, I recommend it. Making the trifle a day ahead gives the flavors time to meld and the cake time to soften perfectly. Just hold off on the final garnish of fresh berries until right before serving so they stay bright and fresh. Cover the bowl tightly with plastic wrap and refrigerate for up to 24 hours.
Can I use frozen berries instead of fresh?
You can, but I don’t recommend it for the best texture. Frozen berries release a lot of water as they thaw, which can make the trifle watery and the cake soggy. If you’re in a pinch, use frozen berries but don’t thaw them first—add them straight to the bowl with the sugar and lemon zest and let them macerate for just 10 minutes. You’ll still get some juice, but less than with thawed berries.
Why did my pudding turn out lumpy?
Lumpy pudding usually happens when the heat is too high or you’re not whisking constantly. The egg yolks can scramble if they get too hot too quickly. To fix it, pour the pudding through a fine-mesh strainer into a clean bowl—this will catch any lumps. If the lumps are very small, you can also use an immersion blender to smooth them out. And next time, whisk constantly and keep the heat at medium.
Can I use instant pudding mix instead of making it from scratch?
You can, but the texture won’t be the same. Homemade pudding is silkier, less sweet, and has a cleaner vanilla flavor. Instant pudding mix often has a slightly grainy texture and a more artificial taste. If you’re short on time, a high-quality vanilla pudding mix (like Jell-O Cook & Serve, not instant) is a better option than instant—it still requires cooking but uses fewer ingredients.
How long will this trifle keep in the fridge?
This trifle is best within the first 2 days. After that, the cake becomes very soft and the cream starts to break down. If you have leftovers, cover them tightly and eat within 48 hours. I don’t recommend freezing the assembled trifle—the texture will be unpleasantly watery when thawed. If you want to prep ahead, make the pudding and whip the cream separately, then assemble the day you plan to serve it.
Pin This Recipe!
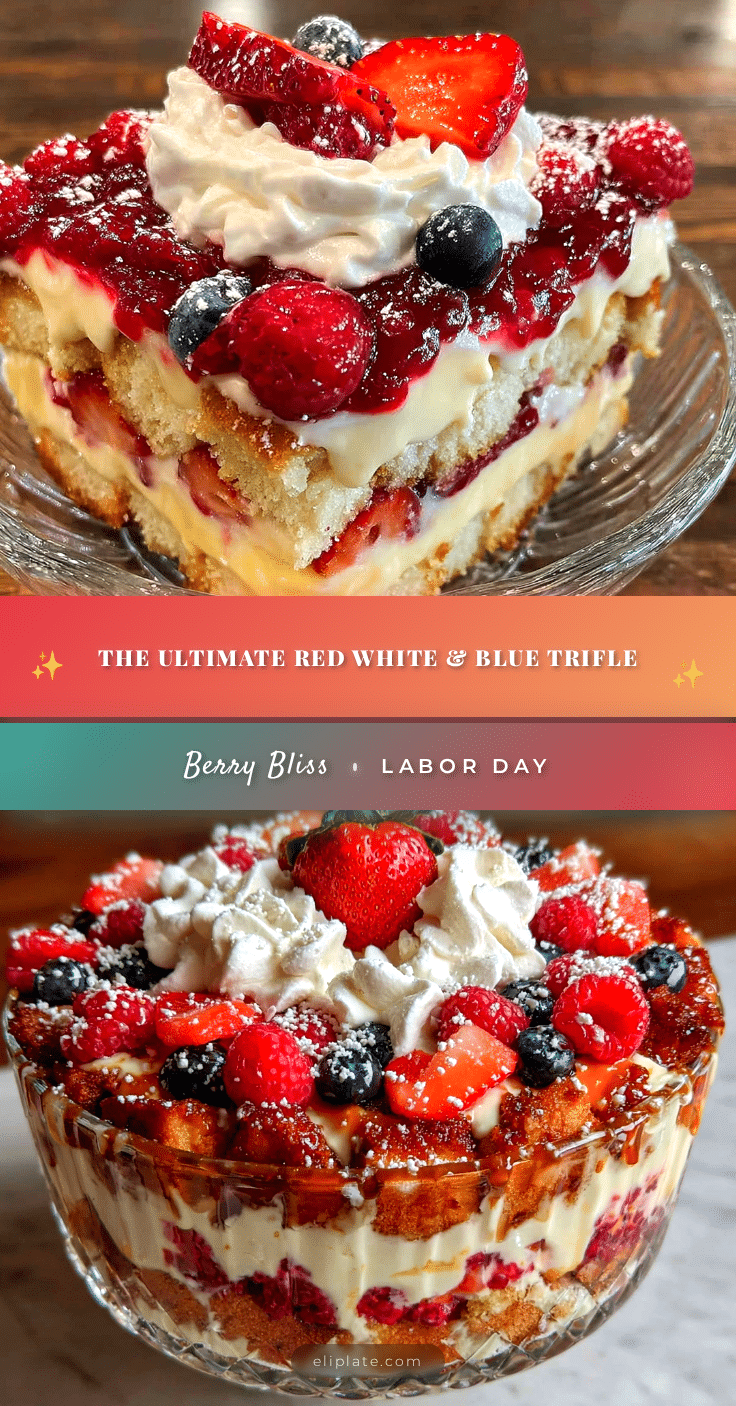
Perfect Red White & Blue Berry Trifle for Labor Day

This stunning red, white, and blue berry trifle is the ultimate Labor Day dessert. Layers of tender pound cake, silky homemade vanilla pudding, billowy whipped cream, and fresh macerated berries create a show-stopping treat that’s deceptively easy to make.
- Prep Time: 20 minutes
- Cook Time: 10 minutes
- Total Time: 2 hours 30 minutes (includes chilling)
- Yield: 12 servings 1x
- Category: Dessert
- Cuisine: American
Ingredients
- 2 cups whole milk
- 1/2 cup granulated sugar
- 3 large egg yolks, room temperature
- 3 tablespoons cornstarch
- 1 teaspoon vanilla bean paste or pure vanilla extract
- Pinch of salt
- 2 cups heavy cream, cold
- 3 tablespoons powdered sugar
- 1 teaspoon vanilla extract
- 2 cups fresh strawberries, hulled and sliced
- 2 cups fresh blueberries
- 1 cup fresh raspberries
- 2 tablespoons granulated sugar
- 1 teaspoon lemon zest
- 1 store-bought pound cake (10–12 ounces), cut into 1-inch cubes
- 1/4 cup milk or cream
Instructions
- Make the Vanilla Pudding: In a medium saucepan, whisk together sugar, cornstarch, and salt. In a separate bowl, whisk egg yolks, then gradually whisk in about 1/2 cup of milk until smooth. Pour egg mixture into saucepan with dry ingredients and whisk to combine. Place over medium heat and gradually whisk in remaining 1 1/2 cups milk. Cook, whisking constantly, until mixture thickens and comes to a gentle boil (5-7 minutes). Remove from heat and stir in vanilla bean paste and a pinch of salt. Pou…
- Prepare the Berries: Combine sliced strawberries, blueberries, and raspberries in a large bowl. Add 2 tablespoons sugar and lemon zest. Gently toss together. Let sit at room temperature for 15-20 minutes, stirring occasionally.
- Whip the Cream: In a large mixing bowl, combine cold heavy cream, powdered sugar, and vanilla extract. Beat on medium-high speed until soft peaks form (2-3 minutes). Refrigerate until ready to use.
- Prepare the Cake: Cut pound cake into 1-inch cubes (about 4-5 cups). Place in a shallow dish. Using a pastry brush, lightly brush each cube with milk or cream.
- Assemble the Trifle: In a large glass trifle bowl, start layering: 1/3 of the cake cubes, 1/3 of the macerated berries (with juices), 1/3 of the chilled pudding, and 1/3 of the whipped cream. Repeat layers two more times, ending with a final layer of whipped cream. Reserve a few berries for garnish.
- Chill and Garnish: Cover loosely with plastic wrap and refrigerate for at least 2 hours, or up to 8 hours. Just before serving, garnish top with reserved berries.
- Serve and Enjoy: Spoon into individual serving bowls or glasses, making sure each serving gets a bit of every layer. Serve chilled.
Notes
Don’t rush the pudding; whisk constantly over medium heat to avoid scorching. Macerate the berries properly to create a syrup that soaks into the cake. Stabilize whipped cream by using cold cream and bowl. Layer with intention: start with cake on the bottom. Let the trifle rest for at least 2 hours before serving. For best results, make a day ahead and garnish with fresh berries just before serving.
Nutrition
- Serving Size: 1 serving (1/12 of t
- Calories: 400
- Sugar: 32
- Sodium: 220
- Fat: 22
- Saturated Fat: 13
- Carbohydrates: 45
- Fiber: 3
- Protein: 6
Keywords: berry trifle, red white blue dessert, Labor Day dessert, no-bake dessert, summer dessert, trifle recipe, pound cake trifle