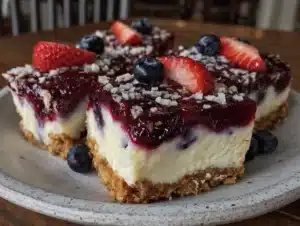
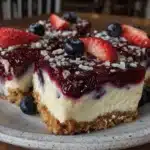
Scrambling through the kitchen with one eye on the clock and a toddler who suddenly decided the floor was the best place to launch a toy rocket, I realized the dessert I planned was nowhere near ready. Half the ingredients were missing, and honestly, the thought of a complicated recipe was making me break out in a cold sweat. That’s when these Perfect Red White and Blue Layered Cheesecake Bars came into play — a last-minute save for a backyard summer bash. The vibrant layers were easy enough to whip up in bursts between the chaos, and the way those creamy reds and blues peeked through the white layer made the whole thing feel festive without any fuss.
The texture? Smooth, rich, and just the right balance of sweet and tangy. The best part is that despite the hurried start, the bars held their shape beautifully, so they were perfect for passing around. Honestly, these cheesecake bars became my go-to for every holiday after that, from Fourth of July cookouts to Memorial Day picnics, because they look stunning and taste like you spent way more time on them than you actually did. The recipe’s simplicity is what makes it stick around in my rotation — no stress, no mess, just that classic red, white, and blue charm that brings everyone to the table.
It quickly dawned on me that this wasn’t just a dessert; it was a quiet promise of a celebration made sweeter and more memorable without the usual kitchen frenzy. That’s why I keep coming back to this recipe — it’s the kind of dessert that feels like a little victory, every single time.
Why You’ll Love This Recipe
From my many trials in the kitchen juggling family and festivities, these Red White and Blue Layered Cheesecake Bars have proven themselves over and over again. Here’s why they’re a winner:
- Quick & Easy: Ready in under 45 minutes of active prep, perfect when time is tight but you want a showstopper dessert.
- Simple Ingredients: No fancy or hard-to-find items — most of these are pantry staples or easy to grab at any grocery store.
- Perfect for Celebrations: Whether it’s a 4th of July picnic, a summer party, or a casual get-together, these bars add a festive touch without fuss.
- Crowd-Pleaser: Everyone, from kids to adults, loves the creamy texture combined with that fresh burst of berry flavor.
- Unbelievably Delicious: The layering technique creates a balanced bite — tangy cream cheese, sweet berries, and a buttery crust all in one.
What sets this cheesecake bar apart from other patriotic desserts is the careful balance of flavors and textures. The trick I picked up after a few batches is blending the cottage cheese with the cream cheese for an ultra-smooth, luscious layer that’s lighter but still rich. Plus, instead of just slapping on red and blue food coloring, I use real berry purees that bring fresh flavor and natural color. It’s not just a pretty dessert — it’s something you’ll savor.
Honestly, this recipe isn’t about impressing anyone with complicated steps. It’s those moments when you need a dessert that feels special but doesn’t keep you in the kitchen all day. This layered cheesecake bar does exactly that — a simple, sweet celebration on a plate.
What Ingredients You Will Need
This recipe keeps things straightforward by relying on wholesome ingredients that come together to create bold flavors and that classic cheesecake texture without any fuss. Most ingredients are pantry staples or easy to find fresh items, and there’s room for simple substitutions if needed.
- For the crust:
- 1 ½ cups graham cracker crumbs (about 10 full sheets, finely crushed) — I prefer Nabisco for consistent flavor
- ⅓ cup unsalted butter, melted (adds richness and holds the base together)
- 2 tablespoons granulated sugar (balances the buttery crust)
- For the cheesecake layers:
- 16 oz (450 g) cream cheese, softened (full fat for best texture)
- ½ cup cottage cheese, blended smooth (look for small-curd for creaminess)
- ¾ cup granulated sugar (adjust to taste for sweetness)
- 2 large eggs, room temperature (helps set the bars)
- 1 teaspoon pure vanilla extract (adds warmth and depth)
- ½ cup sour cream (for tang and moisture)
- For the red layer:
- 1 cup fresh or frozen strawberries, pureed (strained for smoothness)
- 1 tablespoon lemon juice (brightens the berry flavor)
- 2 tablespoons granulated sugar (optional, depending on sweetness of berries)
- For the blue layer:
- 1 cup fresh or frozen blueberries, pureed and strained (to avoid seeds)
- 1 tablespoon lemon juice
- 2 tablespoons sugar (optional)
Substitution tips: If you want a gluten-free option, swap graham crackers for almond flour crust or gluten-free graham crumbs. For a dairy-free version, try vegan cream cheese and coconut yogurt instead of sour cream. Seasonal swaps work well here, too — in summer, fresh berries shine best, but frozen works just fine off-season.
Equipment Needed
- 9×9-inch (23×23 cm) square baking pan — I like glass for even baking, but metal pans work fine
- Mixing bowls — large and medium size for layering and blending
- Electric mixer or stand mixer — hand beaters work but expect a bit more arm work
- Food processor or blender — essential to blend cottage cheese and puree berries smoothly
- Spatula — for folding and smoothing layers
- Sieve or fine mesh strainer — to remove seeds from berry purees (optional but recommended)
- Measuring cups and spoons — accuracy matters for cheesecake consistency
If you don’t have a food processor, a high-speed blender can do the trick for the puree and cottage cheese blending. I’ve also baked these bars in disposable foil pans for easy cleanup at picnics and they turned out just as good. For budget-conscious cooks, using a hand mixer and a sturdy whisk can get you through with a little extra elbow grease.
Preparation Method
- Preheat your oven to 325°F (163°C). Line your 9×9 baking pan with parchment paper, leaving some overhang on the sides for easy removal later. This step saves you from any sticking mishaps.
- Make the crust: In a medium bowl, combine 1 ½ cups graham cracker crumbs, ⅓ cup melted unsalted butter, and 2 tablespoons sugar. Stir until the crumbs are evenly coated and look like wet sand. Press this mixture firmly into the bottom of the prepared pan. Use the back of a spoon or a flat-bottomed glass for a compact crust. Bake for 10 minutes, then remove from oven and let cool while you prepare the filling.
- Prepare the cheesecake base: In a large bowl, beat 16 oz softened cream cheese and ½ cup blended cottage cheese with an electric mixer on medium speed until creamy and smooth — this usually takes 2-3 minutes. Add ¾ cup sugar gradually, then beat in 2 eggs one at a time. Mix in 1 teaspoon vanilla extract and ½ cup sour cream until just combined. Avoid overmixing here to prevent cracks.
- Divide the cheesecake batter evenly into three bowls. Keep the portions as equal as possible — I use a kitchen scale to be precise.
- Prepare berry layers: In separate small bowls, mix the strawberry puree with 1 tablespoon lemon juice and sugar if using, and do the same for the blueberry puree. Gently fold each puree into one of the cheesecake batter portions (one gets strawberries, another blueberries), leaving the third plain for the white layer.
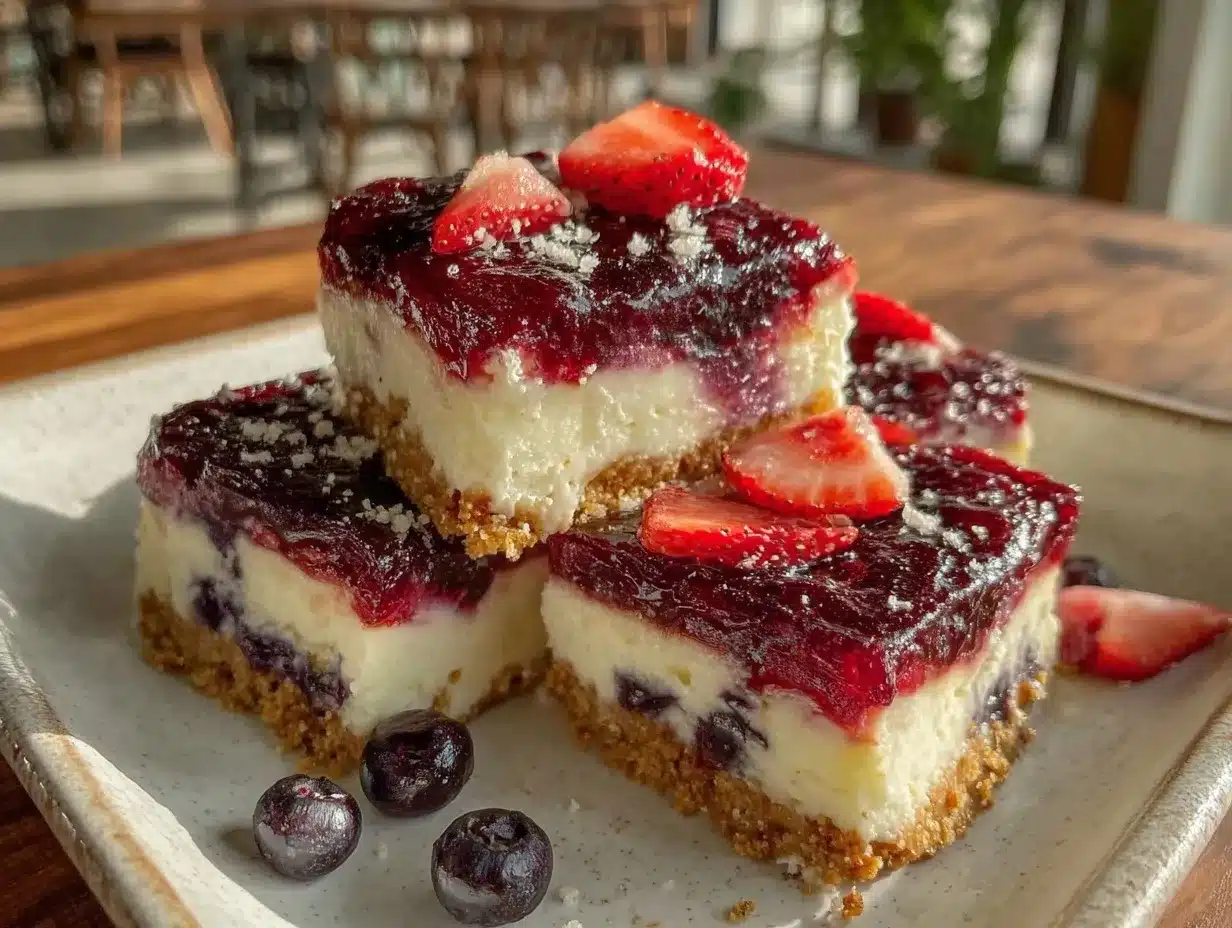
- Layer the batter: Pour the blueberry cheesecake mixture over the cooled crust and spread evenly with a spatula. Next, pour the plain cheesecake batter carefully over the blue layer — try to avoid mixing the layers. Finally, add the strawberry cheesecake layer on top, smoothing it out gently.
- Bake the bars: Place the pan in the oven and bake for 40-45 minutes, until the edges are set but the center still jiggles slightly when nudged. This ensures a creamy, not dry, texture.
- Cool completely: Let the bars cool at room temperature for about an hour. Then refrigerate for at least 3 hours or overnight — this chilling step is crucial for the layers to firm up and the flavors to meld.
- Slice and serve: Use the parchment overhang to lift the bars out of the pan. Slice into squares with a sharp knife, wiping it clean between cuts for neat edges.
If your layers start to swirl too much, try chilling the batter briefly before layering next time. Also, don’t skip straining the purees to avoid seeds interfering with that smooth creamy texture — trust me, it’s worth the extra step.
Cooking Tips & Techniques
When making these cheesecake bars, timing and texture are everything. Here are some tips I learned the hard way:
- Softened cream cheese is key: Cold cream cheese will make your batter lumpy. Let it sit out 30 minutes or microwave in 10-second bursts to get that perfect spreadable consistency.
- Blend cottage cheese fully: I used to skip this step, but blending cottage cheese with cream cheese makes a silky texture that’s lighter without sacrificing richness.
- Don’t overmix eggs: Once eggs are in, mix just until combined to avoid incorporating too much air, which can cause cracks.
- Use fresh or frozen berries: Frozen works fine, but thaw and strain well to avoid watery batter.
- Chill before slicing: Cheesecake bars need time to set properly. Cutting too soon leads to a crumbly mess.
- Multitask efficiently: While the crust bakes, prep your fillings and purees. This keeps you moving and reduces stress.
Also, I’ve found that chilling the batter slightly before layering stops the colors from bleeding into one another. It’s a trick I picked up after my first attempt looked more like a berry smoothie than layered bars!
Variations & Adaptations
These cheesecake bars are a great canvas for customization. Here are some ways to make them your own:
- Flavor swaps: Use raspberries for the red layer or blackberries for a deeper blue tone. You can also add a teaspoon of lemon zest to the white layer for a citrusy twist.
- Crust alternatives: Try a chocolate cookie crust for a richer base, or use gluten-free graham crackers to keep it allergy-friendly.
- Non-dairy version: Substitute cream cheese and sour cream with vegan alternatives like cashew-based cream cheese and coconut yogurt.
- Layered mousse bars: For a lighter dessert, fold whipped cream into the berry layers instead of sour cream.
- Personal favorite: I once swirled in a bit of homemade blueberry jam into the blue layer for extra sweetness and texture — it was a hit at a summer potluck.
If you’re planning a picnic, these bars can even be made in muffin tins for individual servings. Adjust baking time to about 25 minutes and watch closely for a slight jiggle.
Serving & Storage Suggestions
Serve these cheesecake bars chilled, straight from the fridge. The layers hold best cold, and the creamy texture is at its peak. For a festive presentation, arrange the bars on a white platter to really make those reds and blues pop.
Pair them with a light sparkling lemonade or a fresh berry iced tea for a refreshing complement. If you want a little extra flair, a dollop of whipped cream or a sprinkle of fresh mint leaves works well.
Store leftovers covered tightly in the fridge for up to 4 days. For longer storage, these bars freeze beautifully — wrap tightly in plastic wrap and foil, and freeze for up to 2 months. Thaw overnight in the fridge before serving.
Flavors actually deepen after a day or two, so if you can resist, letting them rest overnight will reward you with an even better dessert experience. Just don’t be like me and hide them from the kids too well, or they’ll be gone before the party even starts!
Nutritional Information & Benefits
Each serving of these Red White and Blue Layered Cheesecake Bars packs approximately:
| Calories | 280 |
|---|---|
| Fat | 18g |
| Carbohydrates | 22g |
| Protein | 5g |
| Fiber | 1g |
| Sugar | 15g |
With real fruit purees and cottage cheese blended into the filling, these bars offer a nice dose of protein and calcium compared to many traditional cheesecake recipes. The berries bring antioxidants and vitamins, making this a dessert that feels a little less indulgent and more like a treat with some nutritional perks.
For those watching gluten, swapping out the graham cracker crust keeps this recipe gluten-free. And because it’s naturally low in added ingredients, you avoid artificial colors and flavors — a small win when feeding a crowd.
Conclusion
These Perfect Red White and Blue Layered Cheesecake Bars are a celebration staple that brings together ease, flavor, and that unmistakable festive look. Whether you’re rushing through the kitchen like I was or planning ahead, this recipe holds up as a reliable, crowd-pleasing dessert that looks far more complicated than it really is.
Make it your own by swapping berries, experimenting with crusts, or adding your favorite flavor twists — it’s flexible enough to suit any celebration. I keep coming back to this recipe because it’s the kind of dessert that not only tastes amazing but also makes me feel like I pulled off something special, even on the busiest days.
If you give these bars a try, I’d love to hear how you made them yours! Share your tweaks, your pics, or just your favorite part of the recipe — let’s keep the celebration going.
Frequently Asked Questions
Can I make these cheesecake bars ahead of time?
Absolutely! They actually taste better after chilling overnight, which helps the layers set and flavors meld. Just keep them covered in the fridge.
What’s the best way to prevent cracking in cheesecake bars?
Don’t overmix the eggs, bake at a moderate temperature (325°F/163°C), and avoid opening the oven door during baking. Also, letting the bars cool gradually helps.
Can I use frozen berries for the red and blue layers?
Yes, thaw them completely and strain the purees to remove excess liquid and seeds before mixing into the batter.
Is there a gluten-free option for the crust?
Definitely. Substitute the graham cracker crumbs with almond flour or gluten-free graham crumbs. Just press firmly and bake as usual.
How should I store leftover cheesecake bars?
Store them in an airtight container in the fridge for up to 4 days. For longer storage, freeze wrapped tightly for up to 2 months.
For a well-rounded celebration menu, these bars pair wonderfully with fresh sides like the fresh Asian cucumber salad or the creamy Southern coleslaw. Both add crisp, refreshing contrast to the creamy richness of the cheesecake bars.
Pin This Recipe!
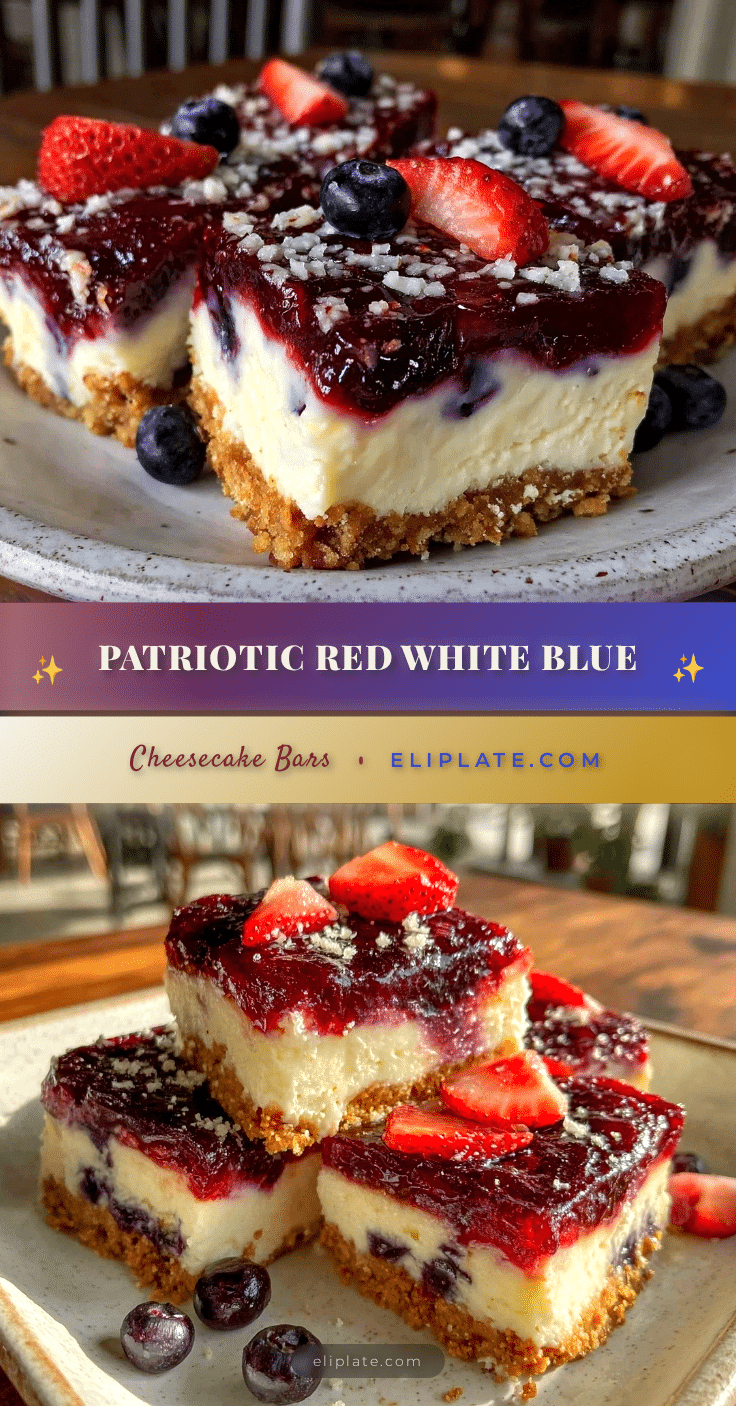
Perfect Red White and Blue Layered Cheesecake Bars
These easy patriotic cheesecake bars feature vibrant red, white, and blue layers made with real berry purees and a creamy cheesecake filling, perfect for celebrations like Fourth of July and Memorial Day.
- Prep Time: 15 minutes
- Cook Time: 45 minutes
- Total Time: 4 hours
- Yield: 16 servings 1x
- Category: Dessert
- Cuisine: American
Ingredients
- 1 ½ cups graham cracker crumbs (about 10 full sheets, finely crushed)
- ⅓ cup unsalted butter, melted
- 2 tablespoons granulated sugar
- 16 oz cream cheese, softened
- ½ cup cottage cheese, blended smooth
- ¾ cup granulated sugar
- 2 large eggs, room temperature
- 1 teaspoon pure vanilla extract
- ½ cup sour cream
- 1 cup fresh or frozen strawberries, pureed and strained
- 1 tablespoon lemon juice (for red layer)
- 2 tablespoons granulated sugar (optional, for red layer)
- 1 cup fresh or frozen blueberries, pureed and strained
- 1 tablespoon lemon juice (for blue layer)
- 2 tablespoons granulated sugar (optional, for blue layer)
Instructions
- Preheat oven to 325°F (163°C). Line a 9×9-inch baking pan with parchment paper, leaving overhang for easy removal.
- Make the crust: In a medium bowl, combine graham cracker crumbs, melted butter, and sugar. Stir until evenly coated. Press firmly into the bottom of the pan. Bake for 10 minutes, then cool.
- Prepare cheesecake base: Beat cream cheese and blended cottage cheese until smooth. Gradually add sugar, then eggs one at a time. Mix in vanilla extract and sour cream until just combined.
- Divide cheesecake batter evenly into three bowls.
- Prepare berry layers: Mix strawberry puree with lemon juice and sugar if using; mix blueberry puree with lemon juice and sugar if using.
- Fold strawberry puree into one portion of batter, blueberry puree into another, leaving one plain for the white layer.
- Layer the batter in the pan: pour blueberry layer first, spread evenly; then pour plain layer carefully over it; finally add strawberry layer on top and smooth gently.
- Bake for 40-45 minutes until edges are set but center jiggles slightly.
- Cool at room temperature for about 1 hour, then refrigerate at least 3 hours or overnight.
- Use parchment overhang to lift bars from pan. Slice into squares with a sharp knife, wiping clean between cuts.
Notes
Use softened cream cheese for smooth batter. Blend cottage cheese fully for silky texture. Avoid overmixing eggs to prevent cracks. Strain berry purees to remove seeds. Chill batter briefly before layering to prevent color bleeding. Let bars chill overnight for best flavor and texture. For gluten-free crust, substitute graham crackers with almond flour or gluten-free crumbs. For dairy-free, use vegan cream cheese and coconut yogurt.
Nutrition
- Serving Size: 1 bar (1/16 of recip
- Calories: 280
- Sugar: 15
- Fat: 18
- Carbohydrates: 22
- Fiber: 1
- Protein: 5
Keywords: cheesecake bars, patriotic dessert, red white and blue dessert, Fourth of July dessert, easy cheesecake bars, berry cheesecake