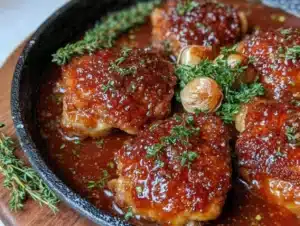
The neighborhood potluck was in four hours and I’d completely forgotten. I mean, completely. I was standing in my kitchen at 3 PM on a Saturday, staring into the fridge like it held the answers to the universe. Everyone else would be bringing their signature dishes—the slow-braised short ribs that took two days, the from-scratch lasagnas, the artfully decorated cakes. And me? I had a pack of chicken thighs I’d bought on sale and a jar of honey that was starting to crystallize. Not exactly potluck royalty material.
Let me tell you, there’s a special kind of panic that sets in when you realize you’re about to show up empty-handed to an event where people take their food very seriously. I’d already RSVP’d and said I was bringing a main dish. I mean, who does that without planning ahead? This girl, apparently. I grabbed the honey, some soy sauce I’d bought for a stir-fry that never happened, and a few garlic cloves that were looking a little sad but still usable. Honestly, I was just throwing things together and hoping for the best.
The chicken went into a hot skillet—skin side down, because that’s what I remembered from some cooking show I’d half-watched—and I threw together a sauce that was basically a fridge lottery. Honey, soy sauce, garlic, a splash of vinegar, maybe some red pepper flakes if I was feeling brave. I didn’t have time to overthink it. The whole thing came together in maybe 25 minutes, which is good because I also hadn’t showered yet. Maybe you’ve been there—that frantic scramble where you’re cooking and trying to get ready at the same time, praying you don’t catch your sleeve on fire.
I walked into that potluck with my one pan of chicken thighs, feeling like I was bringing a bag of chips to a gourmet dinner. And then people started eating it. And then they wouldn’t stop eating it. Someone actually asked me for the recipe before they’d even finished chewing. The short rib lady came over and asked what my secret was. My secret was desperation and a lack of options, but I just smiled and said it was the honey. That was three years ago, and I still make these chicken thighs at least twice a month. They’re the recipe that taught me you don’t need a whole day and a specialty grocery run to make something people actually remember.
Why You’ll Love This Recipe
Look, I’ve tested a lot of chicken recipes in my time. Some of them were absolute disasters—dry, bland, or just not worth the cleanup. This one-pan honey garlic chicken is different. It’s the recipe I turn to when I’ve had a long day and I need dinner on the table without a whole production. Here’s why it works:
- Quick & Easy: From start to finish, you’re looking at about 30 minutes. No marinating overnight, no complicated techniques. Just sear, sauce, and finish in the oven.
- Simple Ingredients: You probably have most of these in your pantry right now. Honey, soy sauce, garlic, chicken thighs—that’s the backbone of this dish. No fancy trips to specialty stores.
- Perfect for Weeknights: This is the definition of a busy-person dinner. One pan means minimal cleanup, and the hands-on time is maybe 10 minutes. The oven does the rest of the work.
- Crowd-Pleaser: I’ve served this to picky eaters, food snobs, and kids who usually only eat chicken nuggets. Everyone loves it. The sweet-savory combo is basically irresistible.
- Unbelievably Delicious: The sauce caramelizes into this sticky, glossy coating that’s honestly better than most restaurant versions. The chicken stays juicy because thighs are forgiving, and the skin gets this perfect crispy edge.
What makes this version different from the hundreds of other honey garlic chicken recipes out there? It’s the balance. A lot of recipes go too sweet, or the garlic burns before the chicken is cooked through. I’ve adjusted the ratios so the honey is present but not overwhelming, and the garlic gets that mellow sweetness without turning bitter. Plus, the one-pan method means the sauce reduces right in the pan with the chicken, so every bit of flavor stays where it belongs.
This isn’t just good chicken—it’s the kind of meal that makes you close your eyes after the first bite. It’s comfort food that comes together fast enough for a Tuesday night, but tastes like you spent hours on it. And honestly, that’s the best kind of cooking.
What Ingredients You Will Need
This recipe uses simple, everyday ingredients to create something that tastes way more complex than it is. Most of these are pantry staples, which is exactly what you want for a weeknight dinner you can throw together without a grocery run.
- Chicken Thighs: 6 bone-in, skin-on chicken thighs (about 2 pounds / 900g). The bone keeps them juicy, and the skin gets beautifully crispy. You can use boneless if you’re in a rush, but reduce the cooking time by about 10 minutes.
- Honey: 1/3 cup (110g) of good-quality honey. I prefer a mild honey like clover or orange blossom—stronger honeys like buckwheat can overpower the dish. If your honey is crystallized, just warm it up in the microwave for 10 seconds.
- Soy Sauce: 1/4 cup (60ml) low-sodium soy sauce. Regular works too, but the dish might be saltier. Tamari or coconut aminos work great for gluten-free options.
- Garlic: 6 cloves, minced. Fresh garlic is non-negotiable here—the jarred stuff won’t give you the same flavor. I know it’s an extra step, but trust me on this.
- Rice Vinegar: 2 tablespoons (30ml). This brightens up the sauce and balances the sweetness. Apple cider vinegar or white wine vinegar work in a pinch.
- Olive Oil: 2 tablespoons (30ml) for searing. Avocado oil works too—you just need something with a decent smoke point.
- Red Pepper Flakes: 1/2 teaspoon (or to taste). This is optional but recommended. It doesn’t make the dish spicy—it just adds a little warmth that makes the flavors pop.
- Salt and Pepper: To taste. Go easy on the salt since the soy sauce adds plenty of sodium.
- Optional Garnishes: Sliced green onions, sesame seeds, and fresh cilantro. These aren’t essential, but they make the dish look restaurant-worthy with almost zero effort.
I recommend using a brand like Mike’s Hot Honey if you want a little extra kick, or just stick with regular honey and add the red pepper flakes yourself. For the soy sauce, I’m partial to Kikkoman—it’s consistent and widely available. And please, for the love of good cooking, use fresh garlic. I know it’s tempting to use the pre-minced stuff in a jar, but it has a bitter, almost metallic taste that ruins the sauce. You’re worth the 30 seconds it takes to mince a few cloves.
Equipment Needed
One of the best things about this recipe is how little equipment it requires. You don’t need a stand mixer, a food processor, or any of those specialty gadgets that take up cabinet space and get used once a year.
- Large Oven-Safe Skillet: A 12-inch cast iron skillet is ideal, but any oven-safe pan works. I use my trusty Lodge cast iron—it heats evenly and holds temperature well. If you don’t have cast iron, a stainless steel or oven-safe nonstick pan will work. Just make sure the handle is oven-safe up to 400°F.
- Cutting Board and Knife: For mincing garlic and trimming any excess skin or fat from the chicken. A sharp chef’s knife makes this job much easier.
- Small Bowl: For whisking together the sauce ingredients before adding them to the pan. You could also mix them right in the pan, but pre-mixing ensures the honey dissolves evenly.
- Tongs: For flipping the chicken and moving it around the pan. Metal tongs are best—plastic ones might melt if they touch the hot pan.
- Meat Thermometer: Optional but highly recommended. Chicken is done at 165°F (74°C), and a thermometer takes the guesswork out of cooking. I’ve had too many dry chicken breasts in my life to wing it anymore.
If you don’t have an oven-safe skillet, you can transfer the chicken to a baking dish after searing. It’s one extra dish to wash, but it works perfectly fine. I’ve done it when my cast iron was already occupied with another dish, and the results were still excellent.
Preparation Method
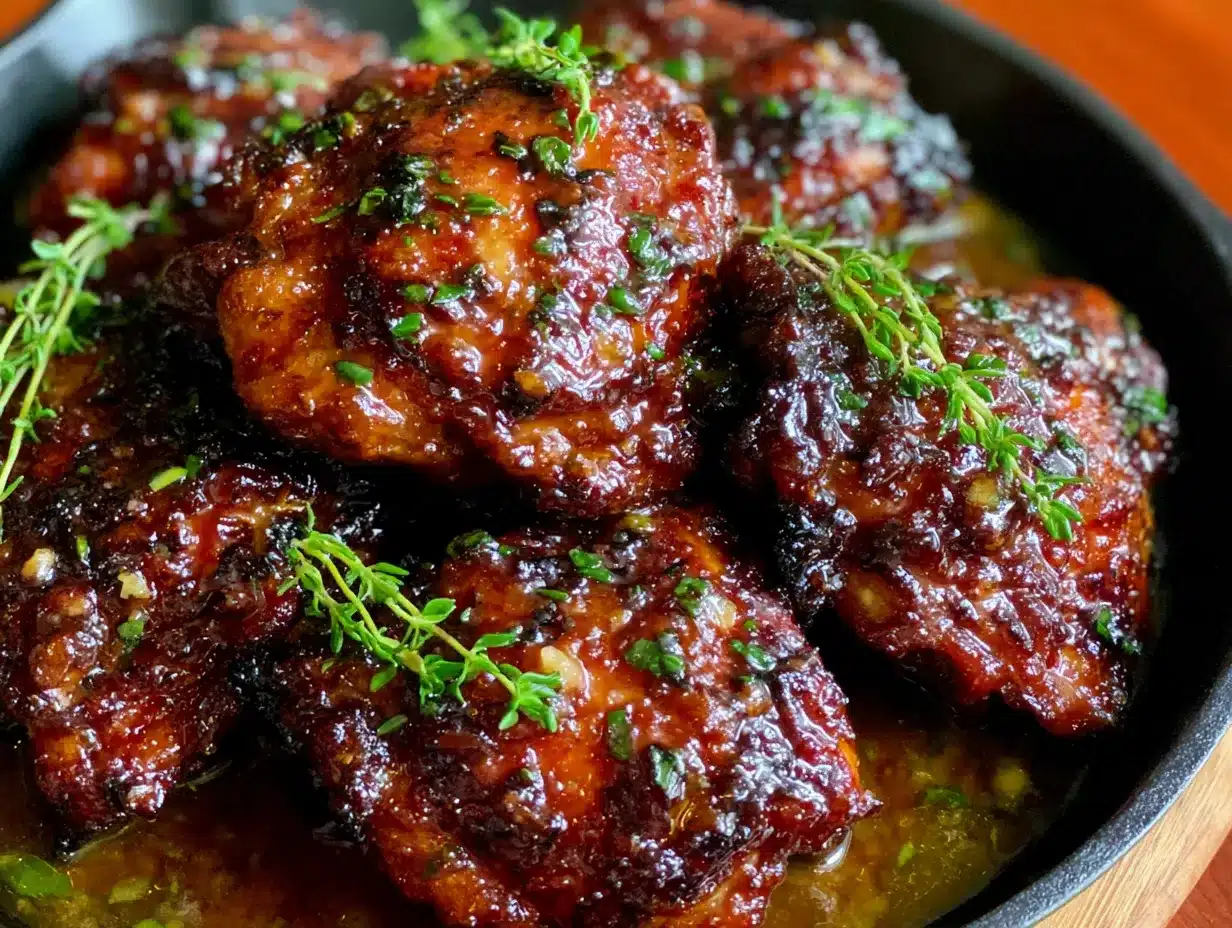
Let’s get cooking. This whole process takes about 30 minutes from start to finish, and most of that is hands-off oven time. Here’s exactly how to do it:
- Preheat your oven to 400°F (200°C). Position the rack in the middle of the oven. Getting the oven hot before you start cooking saves time and ensures even cooking.
- Pat the chicken thighs dry with paper towels. This is crucial for crispy skin. Wet skin steams instead of sears, and you’ll end up with sad, rubbery chicken. Season both sides generously with salt and pepper. Don’t be shy—the salt helps the skin crisp up and seasons the meat all the way through.
- Heat the olive oil in your skillet over medium-high heat. Wait until the oil is shimmering—almost smoking—before adding the chicken. If you add the chicken too early, it will stick to the pan and won’t develop that golden-brown crust. I learned this the hard way after scraping burnt chicken off my pan more times than I’d like to admit.
- Place the chicken thighs skin-side down in the hot skillet. Don’t crowd the pan—if your skillet is too small, cook them in batches. The chicken should sizzle immediately when it hits the oil. Let them cook undisturbed for 5-6 minutes. I know it’s tempting to peek or move them around, but leave them alone. The skin needs that uninterrupted contact to get properly crispy.
- While the chicken sears, make the sauce. In a small bowl, whisk together the honey, soy sauce, minced garlic, rice vinegar, and red pepper flakes. The honey will be thick at first, but it will loosen up as you whisk. Set the bowl aside near the stove so it’s ready when you need it.
- Flip the chicken thighs. They should be deep golden brown and release easily from the pan. If they stick, give them another minute—they’ll release naturally when they’re ready. Cook the second side for 2-3 minutes, just to get some color. The second side doesn’t need as long since it won’t have skin.
- Pour the sauce over the chicken. It will sizzle and bubble immediately—that’s the sound of flavor happening. Use your tongs to turn the chicken a couple of times in the sauce, making sure each piece gets coated. The sauce will look thin now, but it will thicken and caramelize in the oven.
- Transfer the skillet to the preheated oven. Bake for 15-20 minutes, or until the chicken reaches an internal temperature of 165°F (74°C) when tested with a meat thermometer. The sauce should be bubbling and thickened, and the chicken skin should be crispy and glossy. If you want extra caramelization, switch the oven to broil for the last 2 minutes—just watch it closely so it doesn’t burn.
- Let the chicken rest for 5 minutes before serving. This allows the juices to redistribute throughout the meat. I know it’s hard to wait when your kitchen smells this good, but it makes a real difference. Spoon some of the pan sauce over the chicken before serving.
A few things to watch for: If the sauce starts to look too dark or smells burnt, your oven might run hot. Check the chicken a few minutes early. If the sauce isn’t thickening enough, you can transfer the skillet to the stovetop and simmer for 2-3 minutes after the chicken is done. The sauce should be thick enough to coat the back of a spoon—not watery, but not syrupy either.
The first time I made this, I forgot to pat the chicken dry and ended up with pale, soggy skin. It was still edible, but it wasn’t the crispy, caramelized masterpiece I was aiming for. Now I’m obsessive about drying the chicken. It’s one of those small steps that makes a huge difference, and once you start doing it, you’ll never skip it again.
Cooking Tips & Techniques
After making this recipe probably fifty times (I’m not exaggerating—it’s my go-to for potlucks, weeknights, and even dinner parties), I’ve picked up a few tricks that make the process smoother and the results better.
Don’t skip the searing step. I know it’s tempting to just throw everything in a pan and bake it, but that initial sear is what gives you the crispy skin and deep flavor. The Maillard reaction—that browning that happens when protein hits high heat—is where all the flavor lives. If you skip it, you’ll end up with pale, soft chicken that tastes more boiled than roasted.
Use a meat thermometer. Chicken thighs are more forgiving than breasts, but they can still dry out if you overcook them. I use a Thermapen instant-read thermometer, and it’s been a game-changer. Stick it into the thickest part of the thigh without touching the bone. When it hits 165°F, you’re done. No more cutting into the chicken to check if it’s done, no more dry meat.
Watch the garlic. Garlic burns easily, especially when combined with honey, which has a lower burning point. If your pan is too hot, the garlic can turn bitter and acrid before the chicken is cooked. Keep the heat at medium-high for searing, and don’t leave the garlic in the pan for too long before adding the rest of the sauce. If you see the garlic turning dark brown, pull the pan off the heat immediately.
Let the sauce reduce properly. The sauce will look thin when you first pour it over the chicken, but don’t panic. As it bakes, the honey caramelizes and the liquid evaporates, leaving you with a thick, glossy glaze. If your sauce is still runny after 20 minutes, your oven might not be hot enough, or you might have added too much liquid. Next time, reduce the soy sauce slightly or add an extra tablespoon of honey.
Multitask like a pro. While the chicken is searing, prep your side dishes. I usually throw some broccoli or green beans in the oven on a separate tray during the last 10 minutes of cooking. Or I make a quick rice in the Instant Pot while the chicken bakes. The key is to use that oven time wisely so everything finishes at the same time.
One of my biggest failures with this recipe happened when I tried to double it in a pan that was too small. The chicken steamed instead of searing, the sauce didn’t reduce properly, and I ended up with a watery mess. Now I always use a pan that gives the chicken room to breathe. If I’m cooking for a crowd, I use two pans or cook in batches. It’s worth the extra few minutes.
Variations & Adaptations
This recipe is endlessly adaptable, which is one of the reasons I keep coming back to it. Here are some of my favorite variations:
Spicy Honey Garlic Chicken: Double the red pepper flakes and add a finely chopped serrano pepper to the sauce. The heat cuts through the sweetness beautifully. I made this version for a friend who loves spicy food, and she said it was the best chicken she’d ever had. High praise.
Lemon Honey Garlic Chicken: Add the zest and juice of one lemon to the sauce, and reduce the rice vinegar to 1 tablespoon. The lemon brightens everything up and makes it feel lighter—perfect for spring or summer. I serve this with a simple arugula salad and crusty bread.
Gluten-Free Version: Use tamari or coconut aminos instead of soy sauce. Coconut aminos are slightly sweeter, so you might want to reduce the honey by a tablespoon. Everything else stays the same. I’ve tested this version multiple times, and it’s just as good as the original.
Boneless, Skinless Option: If you’re in a hurry or watching calories, use boneless, skinless chicken thighs. Reduce the oven time to 12-15 minutes, and don’t bother with the searing step—just brown them quickly on both sides. The skin won’t be crispy, but the sauce will still be delicious. I do this on nights when I’m really short on time.
Sheet Pan Version: For even easier cleanup, toss the chicken with the sauce and spread it on a lined baking sheet with some chopped vegetables (broccoli, bell peppers, and red onion work great). Bake at 400°F for 20-25 minutes, flipping halfway through. Everything cooks together on one pan, and the vegetables soak up the sauce. This is my go-to when I want dinner with literally zero dishes to wash.
I once tried adding a tablespoon of Dijon mustard to the sauce, thinking it would add some tang. It was… fine. Not bad, but not better than the original. Sometimes the simplest version really is the best. That’s a lesson I’ve learned over and over in the kitchen.
Serving & Storage Suggestions
This chicken is incredibly versatile when it comes to serving. Here’s how I like to do it:
Serving Temperature: Serve hot, straight from the oven. The sauce is at its best when it’s warm and glossy. Let the chicken rest for 5 minutes after baking, then spoon the pan sauce over the top. Garnish with sliced green onions and sesame seeds for a restaurant-quality presentation.
What to Serve With It: Steamed jasmine rice is my go-to—it soaks up the sauce perfectly. For something lighter, try cauliflower rice or quinoa. Roasted vegetables like broccoli, asparagus, or green beans are excellent on the side. If you’re feeling indulgent, serve with mashed potatoes and let the sauce pool into them. I’ve also served this over a bed of mixed greens for a warm chicken salad, and it was amazing.
Beverage Pairings: A crisp white wine like Sauvignon Blanc or Pinot Grigio cuts through the sweetness nicely. For beer drinkers, a light lager or pilsner works well. If you’re going non-alcoholic, iced green tea with a squeeze of lemon is a refreshing choice.
Storage: Store leftover chicken in an airtight container in the refrigerator for up to 4 days. The flavors actually deepen and meld together overnight, so leftovers might be even better than the first serving. I’ve been known to make a double batch just so I have leftovers for lunch.
Reheating: The best way to reheat is in a skillet over medium heat with a splash of water or chicken broth. Cover the pan and let it steam for 3-4 minutes, then uncover and let the sauce reduce again. The microwave works in a pinch, but the chicken skin won’t be crispy. If you’re reheating in the microwave, cover the plate with a damp paper towel to keep the chicken from drying out.
Freezing: This chicken freezes beautifully. Let it cool completely, then transfer to a freezer-safe container or bag. It will keep for up to 3 months. Thaw overnight in the refrigerator and reheat as directed above. I usually make a double batch and freeze half for busy weeks—it’s like having a homemade meal in the bank.
The sauce will thicken as it cools, so don’t worry if it looks different after refrigeration. Just add a splash of water when reheating to loosen it up. The flavors will be just as good, if not better.
Nutritional Information & Benefits
Here’s the estimated nutritional breakdown for one serving (one chicken thigh with sauce, based on 6 servings):
| Nutrient | Amount per Serving |
|---|---|
| Calories | 320 |
| Protein | 25g |
| Fat | 18g |
| Saturated Fat | 5g |
| Carbohydrates | 16g |
| Fiber | 0g |
| Sugar | 15g |
| Sodium | 580mg |
Chicken thighs are often overlooked in favor of breasts, but they’re actually more nutritious in some ways. They have more iron and zinc than chicken breasts, and the higher fat content keeps them moist and flavorful. The skin does add fat and calories, but it also provides a good amount of collagen, which is great for skin and joint health.
Honey is a natural sweetener with antioxidants and antibacterial properties. While it’s still sugar and should be used in moderation, it’s a better choice than refined sugar. The garlic in this recipe is packed with allicin, a compound linked to immune support and heart health. And red pepper flakes contain capsaicin, which can boost metabolism and reduce inflammation.
This recipe is naturally dairy-free and can be made gluten-free with a simple swap. It’s also relatively low in carbs compared to many comfort food dishes. If you’re watching your sodium, use low-sodium soy sauce and go easy on the added salt. The dish is still plenty flavorful without it.
I’m not a nutritionist, but I’ve learned that balance is the key to healthy eating. This recipe gives you protein, healthy fats, and flavor without a laundry list of processed ingredients. It’s the kind of meal you can feel good about eating on a regular basis.
Conclusion
This one-pan honey garlic chicken thighs recipe has become a staple in my kitchen for a reason. It’s fast, it’s forgiving, and it delivers flavor that feels way beyond the effort you put in. Whether you’re cooking for a busy weeknight, a potluck where you forgot to plan ahead, or just because you want something delicious without a sink full of dishes, this recipe has your back.
I love that I can customize it based on what I have in the fridge or how much time I have. Sometimes I add extra garlic, sometimes I throw in some ginger, sometimes I let it broil until the edges are almost charred. It’s a recipe that rewards experimentation while still being foolproof in its basic form.
If you try this recipe, I’d love to hear how it goes. Did you add your own twist? Did it save you on a busy night? Did your family ask for seconds? Drop a comment below and let me know. And if you share it on social media, tag me—I love seeing your creations. Happy cooking, and remember: some of the best recipes come from a little bit of panic and a whole lot of honey.
Frequently Asked Questions
Can I use chicken breasts instead of thighs?
Yes, but you’ll need to adjust the cooking time. Chicken breasts cook faster and dry out more easily. Use boneless, skinless breasts and reduce the oven time to 12-15 minutes. Check the temperature at 12 minutes—you’re looking for 165°F. The sauce will be the same, but the result will be leaner and less forgiving.
How do I prevent the honey from burning?
Keep your oven temperature at 400°F and don’t go higher. If your oven runs hot, check the chicken at 15 minutes instead of 20. You can also cover the pan with foil for the first 10 minutes, then remove it for the last 10 to let the sauce caramelize without burning. Watch for dark spots on the sauce—if you see them, pull the pan out immediately.
Can I make this recipe in a slow cooker?
You can, but you’ll lose the crispy skin. Sear the chicken first, then transfer everything to a slow cooker and cook on low for 4-6 hours. The sauce will be thinner, so you’ll need to thicken it on the stovetop afterward. I prefer the oven method for the texture, but the slow cooker works in a pinch.
What can I substitute for soy sauce?
Coconut aminos are the best substitute—they’re gluten-free and have a similar flavor profile. Tamari works too. If you’re out of both, you can use a mix of fish sauce and water, but the flavor will be different. Avoid using just salt water—it won’t give you the depth that soy sauce provides.
How do I get the sauce thicker?
If your sauce is too thin after baking, transfer the skillet to the stovetop and simmer over medium heat for 2-3 minutes. The sauce will reduce and thicken as the water evaporates. You can also mix 1 teaspoon of cornstarch with 2 teaspoons of cold water and stir it into the sauce before simmering. Just make sure to let it bubble for at least a minute to cook out the raw cornstarch taste.
Pin This Recipe!
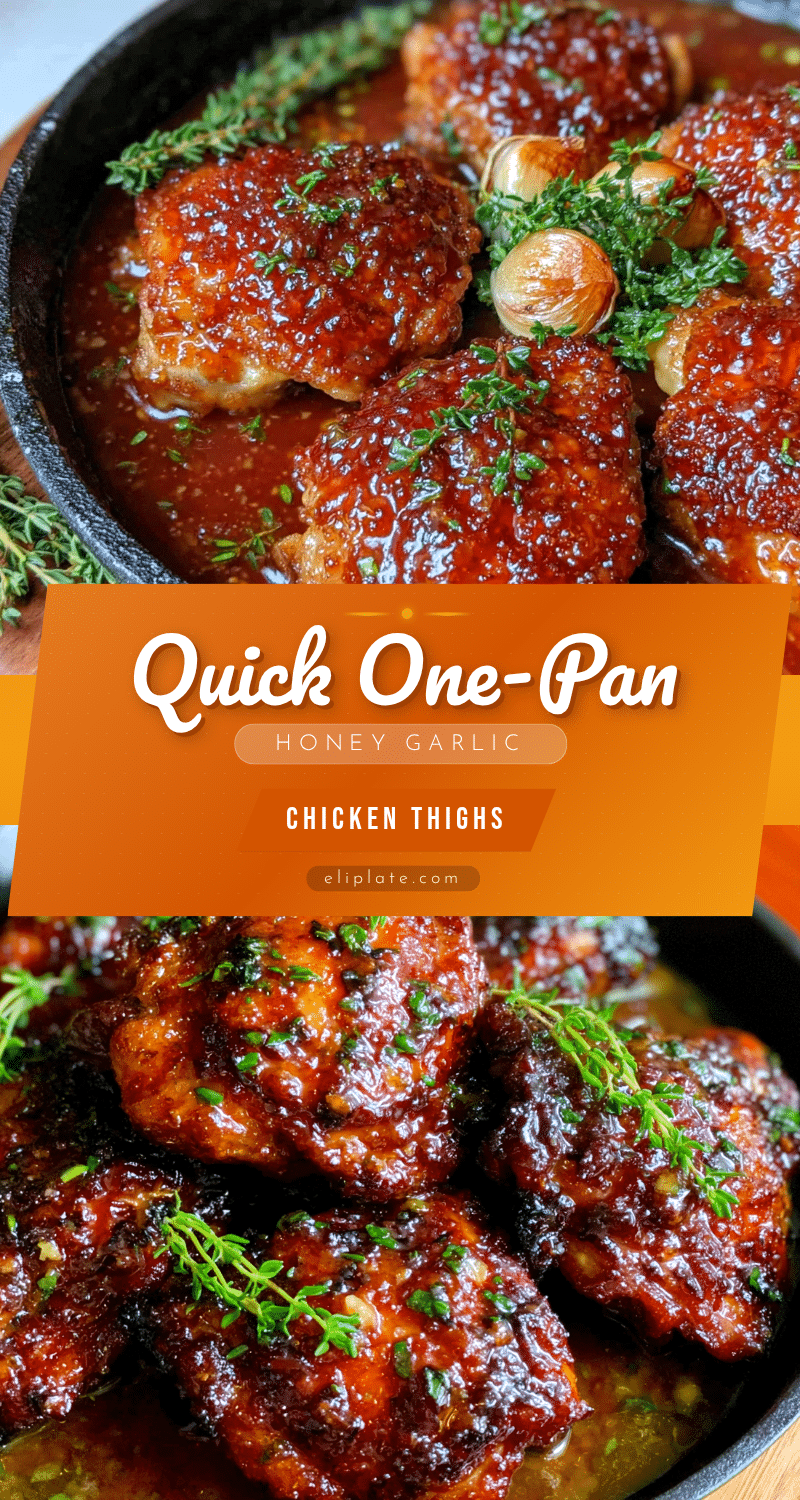
Best One-Pan Honey Garlic Chicken Thighs Recipe

A quick and easy one-pan honey garlic chicken thighs recipe that’s perfect for busy weeknights. With simple ingredients and minimal cleanup, this sweet-savory dish delivers crispy skin and a sticky, caramelized sauce that’s sure to impress.
- Prep Time: 10 minutes
- Cook Time: 25 minutes
- Total Time: 35 minutes
- Yield: 6 servings 1x
- Category: Main Course
- Cuisine: American
Ingredients
- 6 bone-in, skin-on chicken thighs (about 2 pounds / 900g)
- 1/3 cup (110g) honey
- 1/4 cup (60ml) low-sodium soy sauce
- 6 cloves garlic, minced
- 2 tablespoons (30ml) rice vinegar
- 2 tablespoons (30ml) olive oil
- 1/2 teaspoon red pepper flakes (optional)
- Salt and pepper to taste
- Optional garnishes: sliced green onions, sesame seeds, fresh cilantro
Instructions
- Preheat your oven to 400°F (200°C). Position the rack in the middle of the oven.
- Pat the chicken thighs dry with paper towels. Season both sides generously with salt and pepper.
- Heat the olive oil in a large oven-safe skillet over medium-high heat until shimmering.
- Place the chicken thighs skin-side down in the hot skillet. Cook undisturbed for 5-6 minutes until deep golden brown.
- While the chicken sears, whisk together honey, soy sauce, minced garlic, rice vinegar, and red pepper flakes in a small bowl.
- Flip the chicken thighs and cook the second side for 2-3 minutes.
- Pour the sauce over the chicken. Use tongs to turn the chicken a couple of times, coating each piece.
- Transfer the skillet to the preheated oven. Bake for 15-20 minutes, or until the chicken reaches an internal temperature of 165°F (74°C).
- Let the chicken rest for 5 minutes before serving. Spoon pan sauce over the chicken and garnish as desired.
Notes
Pat chicken dry for crispy skin. Don’t crowd the pan. Watch garlic to prevent burning. Let sauce reduce properly in the oven. For extra caramelization, broil for the last 2 minutes.
Nutrition
- Serving Size: 1 chicken thigh with
- Calories: 320
- Sugar: 15
- Sodium: 580
- Fat: 18
- Saturated Fat: 5
- Carbohydrates: 16
- Protein: 25
Keywords: honey garlic chicken, one-pan chicken, chicken thighs, easy weeknight dinner, quick chicken recipe, sticky chicken, skillet chicken