“Mom, I don’t want a granola bar again.”
That’s what my youngest said one Tuesday morning, staring into the pantry like I’d asked her to eat cardboard. And honestly? I couldn’t blame her. Those store-bought bars are fine, but they’re not exactly exciting. I needed something quick, something I could throw together without turning on the oven, and something that wouldn’t come back home uneaten in the lunchbox.
That’s how these easy no-bake peanut butter oat lunchbox balls were born. I was standing in my kitchen, peanut butter in one hand, a bag of oats in the other, thinking about all the times I’d made energy bites for myself before a long run. Why not make them for the kids? Why not make them better?
So I started mixing. A little honey for sweetness, some chocolate chips because—let’s face it—everything is better with chocolate, and a pinch of salt to balance it all out. The first batch disappeared before I could even pack them. My daughter actually asked for them the next day. That’s when I knew I’d stumbled onto something good.
These aren’t just snacks. They’re the kind of thing that makes you feel like you’ve got your act together, even on chaotic mornings. And the best part? You don’t need any fancy equipment or hard-to-find ingredients. Just a bowl, a spoon, and ten minutes of your time.
Why You’ll Love These Lunchbox Balls
I’ve tested these easy no-bake peanut butter oat lunchbox balls more times than I can count. I’ve made them with different nut butters, different mix-ins, and even tried a gluten-free version for my neighbor who has celiac. Every single time, they work. Here’s why they’ll work for you too:
- Quick & Easy: From start to finish, you’re looking at about 10 minutes of active work. No oven, no stove, no complicated steps.
- Simple Ingredients: You probably have everything you need in your pantry right now. Oats, peanut butter, honey, chocolate chips—that’s it.
- Perfect for Lunchboxes: These hold up beautifully at room temperature, so you can pack them in the morning and they’ll still be perfect by lunchtime.
- Crowd-Pleaser: I’ve brought these to playdates, school events, and even work meetings. Adults and kids alike gobble them up.
- Unbelievably Delicious: The texture is soft and chewy, with little pockets of melted chocolate that make every bite feel like a treat.
What makes these different from every other energy ball recipe out there? It’s the ratio. I spent weeks tweaking the amount of peanut butter to oats to honey until I found the perfect balance. Not too dry, not too sticky—just right. And I’ve learned a few tricks along the way that I’m going to share with you.
What Ingredients You Will Need
This recipe uses simple, wholesome ingredients that come together to create something truly satisfying. No weird additives, no obscure superfoods—just real food that tastes good.
For the Base
- 1 cup creamy peanut butter (I prefer natural peanut butter with no added sugar, but any kind works—just make sure it’s well stirred)
- 1/3 cup honey (or maple syrup for a vegan option—the flavor will be slightly different but still delicious)
- 1 teaspoon vanilla extract (pure vanilla extract adds a warmth that makes these taste bakery-fresh)
- 1/4 teaspoon salt (if your peanut butter is already salted, you can skip this—but I find a tiny pinch really brings out the flavor)
For the Dry Mix
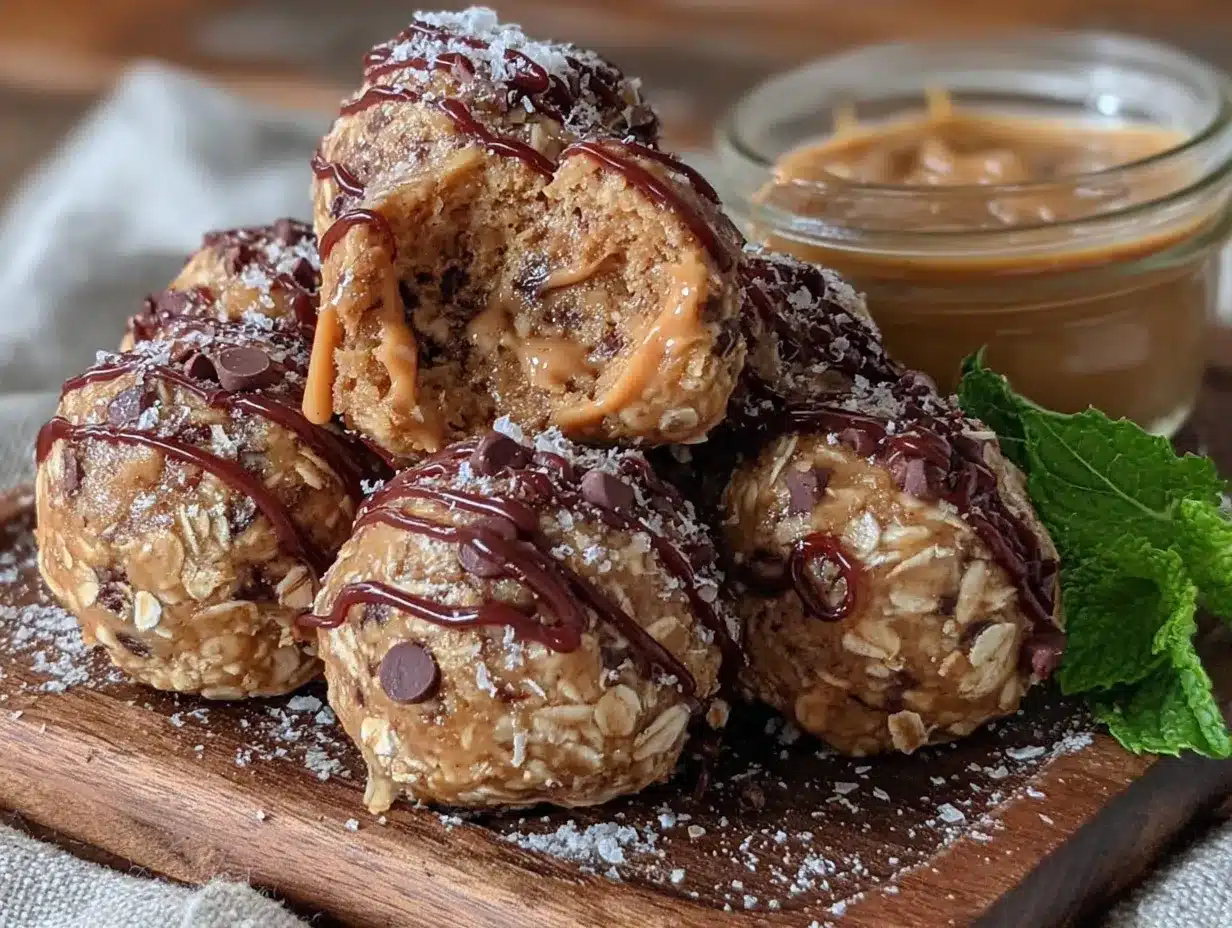
- 2 cups old-fashioned rolled oats (quick oats work too, but the texture will be softer—I like the chewiness of rolled oats)
- 1/2 cup mini chocolate chips (regular chocolate chips work fine, but mini ones distribute more evenly through each bite)
- 2 tablespoons ground flaxseed (optional but recommended—adds fiber and omega-3s without changing the taste)
Ingredient Notes & Swaps
Let me tell you about the time I used crunchy peanut butter because that’s all I had. It worked, but the texture was a little weird—those crunchy bits didn’t soften up like the rest of the mixture. Stick with creamy for the best results.
If you’re avoiding honey, maple syrup is your best bet. I’ve also used agave nectar, which works but makes the balls a bit sweeter than I prefer. For a lower-sugar option, try using just 2 tablespoons of honey and adding an extra tablespoon of peanut butter to compensate for the moisture.
I’ve made these with almond butter and sunflower seed butter too. Almond butter gives a slightly more delicate flavor, while sunflower butter makes them turn a funny green color (it’s harmless—it’s a natural reaction between sunflower seeds and baking soda). Just something to keep in mind if you’re making them for a crowd.
Equipment Needed
One of the things I love most about this recipe is how little equipment it requires. You don’t need a stand mixer, a food processor, or any fancy gadgets.
- Large mixing bowl (any bowl will do, but a wide one makes mixing easier)
- Measuring cups and spoons (I use my trusty set from years ago—nothing fancy)
- Spatula or wooden spoon (for mixing—your hands work too, but it gets messy)
- Parchment paper or wax paper (for rolling and storing the balls)
- Baking sheet or large plate (to hold the balls while they chill)
- Small cookie scoop or tablespoon (for portioning—I use a #60 scoop that gives me perfectly sized balls every time)
If you don’t have a cookie scoop, don’t worry. A regular tablespoon works just fine. You’ll just need to shape the balls by hand, which takes an extra minute or two. I actually prefer doing it by hand—it gives me a chance to make sure each ball is evenly shaped.
Preparation Method
Alright, let’s get to it. I’m going to walk you through every step so you end up with perfect balls every single time.
Step 1: Mix the Wet Ingredients
In your large mixing bowl, combine 1 cup of peanut butter, 1/3 cup of honey, 1 teaspoon of vanilla extract, and 1/4 teaspoon of salt. Stir everything together until it’s smooth and well combined. This should take about 30 seconds. You’re looking for a uniform, glossy mixture with no streaks of honey or peanut butter.
Here’s a tip I learned the hard way: if your peanut butter is cold from the fridge, microwave it for about 10-15 seconds first. It’ll be much easier to mix. Just don’t overheat it—you want it soft, not hot.
Step 2: Add the Dry Ingredients
Add 2 cups of rolled oats, 1/2 cup of mini chocolate chips, and 2 tablespoons of ground flaxseed (if using) to the bowl. Stir everything together until the oats are evenly coated and the chocolate chips are distributed throughout. This takes about a minute of thorough mixing.
The mixture should be thick and slightly sticky. If it seems too dry, add a tablespoon of honey or a splash of milk. If it’s too wet, add another tablespoon of oats. Trust your instincts here—different brands of peanut butter have different moisture levels, so you might need to adjust slightly.
Step 3: Chill the Mixture
Cover the bowl and pop it in the fridge for about 15-20 minutes. This step is crucial. Chilling makes the mixture firmer and much easier to roll into balls. I’ve skipped this step before, and let me tell you, trying to roll warm, sticky mixture into balls is a frustrating mess.
While you’re waiting, line a baking sheet or large plate with parchment paper. This will hold your finished balls.
Step 4: Roll into Balls
Once the mixture is chilled, use a small cookie scoop or a tablespoon to portion out the mixture. Roll each portion between your palms to form a smooth ball. You should get about 20-24 balls, depending on how big you make them.
Here’s a little trick: lightly wet your hands with water before rolling. It prevents the mixture from sticking to your palms and makes the process much smoother. I learned this after my first batch left me with sticky hands for ages.
Step 5: Chill Again
Place the rolled balls on your parchment-lined baking sheet. Pop them back in the fridge for at least 30 minutes to firm up. This second chill is what gives them that perfect, hold-together texture.
If you’re in a hurry, you can skip this step and eat them right away. They’ll be a bit softer, but still delicious. For lunchboxes, though, I recommend the full chill.
Cooking Tips & Techniques
Over the years, I’ve made a lot of mistakes with these easy no-bake peanut butter oat lunchbox balls. Let me save you from repeating them.
Don’t Overmix
I know it’s tempting to keep stirring until everything looks perfect, but overmixing can make the oats break down too much, resulting in a gummy texture. Mix just until everything is combined, then stop.
Use Room Temperature Ingredients
Cold peanut butter straight from the fridge is a nightmare to work with. Let it sit on the counter for 20 minutes before you start. Same goes for honey—if it’s crystallized, warm it up gently in a bowl of hot water.
Roll Evenly
For consistent sizing, use a cookie scoop. I use a #60 scoop, which gives me balls that are about 1 inch in diameter. If you’re making these for little kids, you might want to go even smaller—they’re easier for small hands to hold.
Add Mix-Ins Strategically
The first time I made these, I dumped all the chocolate chips in at once and ended up with some balls that were mostly chocolate and others that had none. Now I stir the chips in gently, folding rather than mixing, to distribute them evenly.
Watch the Temperature
If you live in a warm climate, these balls can get a little soft at room temperature. That’s fine for eating at home, but for lunchboxes, I recommend keeping them chilled until the morning you pack them. They’ll stay firm for several hours.
Variations & Adaptations
One of the things I love about this recipe is how customizable it is. Here are some of my favorite variations:
Chocolate Lover’s Version
Swap 1/4 cup of the oats for 1/4 cup of cocoa powder. You’ll get a rich, chocolatey base that pairs beautifully with the peanut butter. Add an extra tablespoon of honey to balance the bitterness of the cocoa.
Vegan Option
Use maple syrup instead of honey, and make sure your chocolate chips are dairy-free. Everything else is already plant-based. I’ve made this version for my vegan friend, and she couldn’t tell the difference.
Nut-Free School-Friendly Version
Substitute sunflower seed butter for the peanut butter. The flavor is different—more savory, less sweet—but it works beautifully. Just be aware of the color change I mentioned earlier. You can mask it with a tablespoon of cocoa powder if you want.
Tropical Twist
Add 1/4 cup of shredded coconut and 1/4 cup of dried pineapple, chopped small. The sweetness of the pineapple pairs surprisingly well with the peanut butter. This is my personal favorite summer variation.
Protein-Packed Version
Replace 1/4 cup of oats with a scoop of vanilla or chocolate protein powder. You may need to add an extra tablespoon of honey or a splash of milk to keep the mixture from getting too dry. This is great for post-workout snacks.
I once tried a version with chopped dates instead of honey, and honestly, it was a disaster. The dates made the mixture too sticky and the texture was off. Sometimes the simplest version really is the best.
Serving & Storage Suggestions
These easy no-bake peanut butter oat lunchbox balls are incredibly versatile when it comes to serving and storing.
How to Serve
I like to serve these straight from the fridge—they’re firm and cold, which makes them extra satisfying. If you’re packing them in a lunchbox, they’ll soften slightly by lunchtime but still hold their shape beautifully.
For a fun presentation, try rolling them in shredded coconut, crushed nuts, or even a dusting of cocoa powder before serving. It adds a little visual appeal without changing the flavor much.
Storage Instructions
Store these balls in an airtight container in the refrigerator for up to two weeks. I use a glass container with a tight-fitting lid, and they stay fresh the whole time. If you stack them, place a piece of parchment paper between layers to prevent sticking.
For longer storage, you can freeze them. Place the balls on a baking sheet and freeze until solid, then transfer to a freezer-safe bag or container. They’ll keep for up to three months. To thaw, just leave them in the fridge overnight or at room temperature for about 30 minutes.
How to Pack for Lunchboxes
I pack two or three balls in a small container or a reusable snack bag. If it’s hot outside, I add a small ice pack to the lunchbox to keep them cool. They’re sturdy enough to survive being tossed around in a backpack, which is more than I can say for some other snacks.
Nutritional Information & Benefits
These easy no-bake peanut butter oat lunchbox balls are more than just delicious—they’re actually pretty good for you. Here’s a breakdown of what you’re getting in each ball (based on a batch of 22 balls):
- Calories: Approximately 145 per ball
- Protein: 5 grams
- Fiber: 3 grams
- Healthy Fats: 8 grams (mostly from peanut butter)
- Sugar: 8 grams (naturally occurring from honey and chocolate chips)
Health Benefits
The oats provide slow-release energy, making these perfect for keeping kids focused through the afternoon. Peanut butter offers protein and healthy fats that support brain development and keep hunger at bay. And the flaxseed adds a boost of omega-3 fatty acids, which are great for heart health.
Dietary Considerations
These balls are naturally vegetarian. For a vegan version, use maple syrup and dairy-free chocolate chips. They’re also gluten-free if you use certified gluten-free oats. Just check your oat label—some brands process oats in facilities that also handle wheat.
If you’re looking for a lower-sugar option, you can reduce the honey to 2 tablespoons and use sugar-free chocolate chips. The texture will be slightly less sticky, but they’ll still hold together.
Frequently Asked Questions
Can I use quick oats instead of rolled oats?
Yes, you can. Quick oats will give you a softer, more uniform texture. I prefer rolled oats because they add a nice chewiness, but either works. If you use quick oats, you might need to add a little less honey since they absorb moisture differently.
How long do these last at room temperature?
These balls can sit at room temperature for about 4-6 hours without any issues. After that, they might start to get a little soft, especially if it’s warm. For lunchboxes, they’re perfectly fine from morning until lunchtime.
Can I make these without chocolate chips?
Absolutely. You can leave the chocolate chips out entirely, or swap them for raisins, dried cranberries, chopped nuts, or even shredded coconut. The recipe is very forgiving, so feel free to experiment with whatever you have on hand.
My mixture is too dry. What should I do?
If your mixture isn’t coming together, add a tablespoon of honey or a splash of milk (dairy or plant-based) and stir again. Different brands of peanut butter have different moisture levels, so you might need to adjust. The mixture should be thick but pliable, like a soft cookie dough.
Can I double this recipe?
Yes, this recipe doubles beautifully. Just make sure you have a big enough bowl to mix everything together. I often make a double batch on Sunday and we have snacks for the whole week. They freeze well, so you can stash some for later.
Final Thoughts
These easy no-bake peanut butter oat lunchbox balls have saved me more times than I can count. On busy mornings when I’m running late, on afternoons when the kids come home starving, on evenings when I need a quick bite before heading out the door—they’re always there, waiting in the fridge.
What I love most about this recipe is how forgiving it is. You can swap ingredients, adjust the sweetness, add your favorite mix-ins, and it still works. It’s the kind of recipe that grows with you, adapting to whatever you have in your pantry.
I’d love to hear how yours turn out. Did you add something unexpected? Did your kids love them? Drop a comment below and let me know. And if you’re looking for more easy snack ideas, you might enjoy these easy 5-ingredient peanut butter energy bites or these easy DIY snack board lunchbox ideas. Happy snacking!
Pin This Recipe!
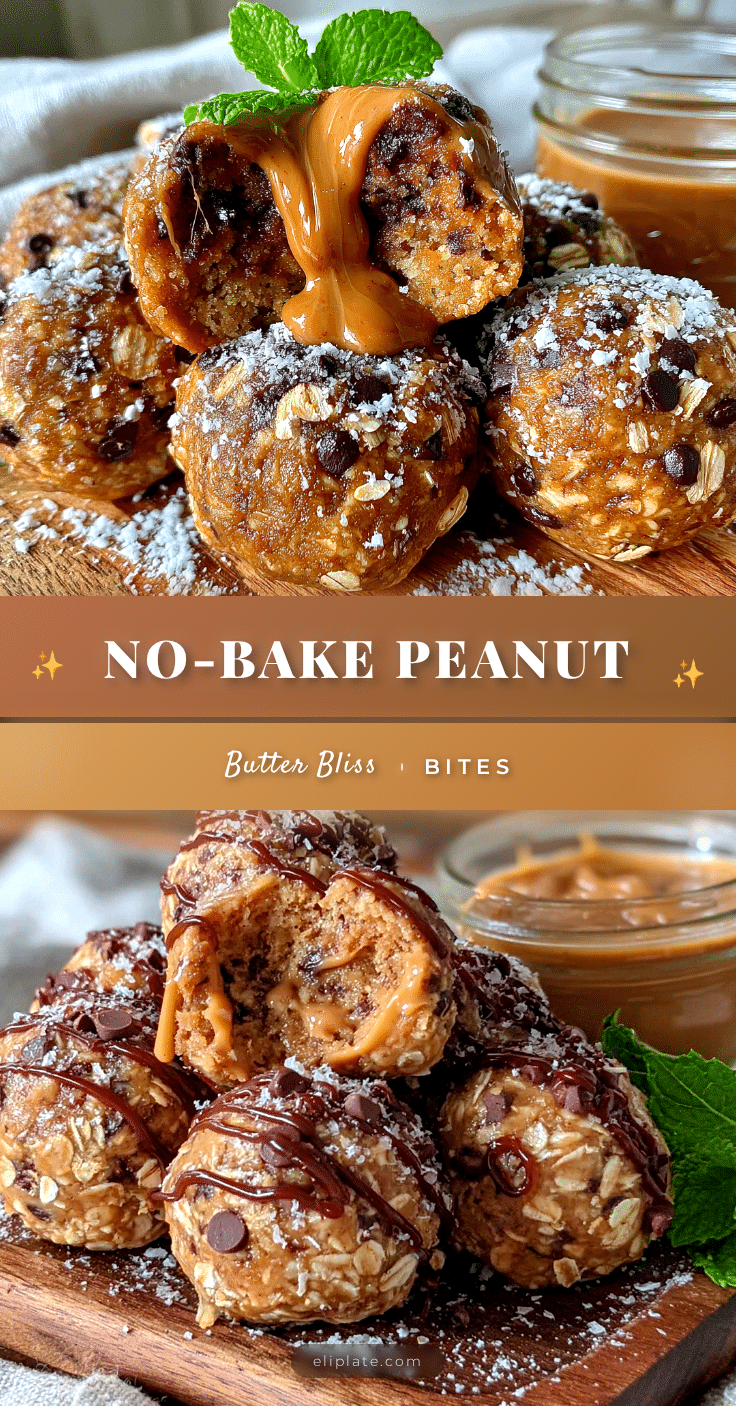
Easy No-Bake Peanut Butter Oat Balls: Best Lunchbox Snack

These easy no-bake peanut butter oat lunchbox balls are a quick, healthy snack made with simple pantry ingredients. Perfect for lunchboxes, they require no oven and come together in just 10 minutes.
- Prep Time: 10 minutes
- Cook Time: 0 minutes
- Total Time: 55 minutes
- Yield: 22 servings 1x
- Category: Snack
- Cuisine: American
Ingredients
- 1 cup creamy peanut butter
- 1/3 cup honey
- 1 teaspoon vanilla extract
- 1/4 teaspoon salt
- 2 cups old-fashioned rolled oats
- 1/2 cup mini chocolate chips
- 2 tablespoons ground flaxseed (optional)
Instructions
- In a large mixing bowl, combine 1 cup peanut butter, 1/3 cup honey, 1 teaspoon vanilla extract, and 1/4 teaspoon salt. Stir until smooth and well combined.
- Add 2 cups rolled oats, 1/2 cup mini chocolate chips, and 2 tablespoons ground flaxseed (if using). Stir until oats are evenly coated and chocolate chips are distributed.
- Cover the bowl and refrigerate for 15-20 minutes to firm up the mixture.
- Line a baking sheet or large plate with parchment paper.
- Using a small cookie scoop or tablespoon, portion out the mixture and roll into smooth balls (about 20-24 balls). Lightly wet hands to prevent sticking.
- Place the rolled balls on the prepared baking sheet and refrigerate for at least 30 minutes to firm up.
- Store in an airtight container in the refrigerator for up to 2 weeks, or freeze for up to 3 months.
Notes
If mixture is too dry, add a tablespoon of honey or a splash of milk. If too wet, add another tablespoon of oats. For vegan option, use maple syrup instead of honey and dairy-free chocolate chips. For nut-free, substitute sunflower seed butter.
Nutrition
- Serving Size: 1 ball
- Calories: 145
- Sugar: 8
- Sodium: 85
- Fat: 8
- Saturated Fat: 2
- Carbohydrates: 16
- Fiber: 3
- Protein: 5
Keywords: no-bake, peanut butter, oat balls, lunchbox snack, energy balls, healthy snack, kid-friendly